
在树莓派4b上安装 ROS MELODIC 源码安装
按照以下步骤照做就可以了,很简单的,就是浪费一点点时间罢了。也可以退而求其次,买个树莓派3B+来玩,哈哈。
Step 1: Install Dependecies and Download the Packages
Let’s start by setting up the repositories and installing the necessary dependencies
sudo sh -c 'echo "deb http://packages.ros.org/ros/ubuntu $(lsb_release -sc) main" > /etc/apt/sources.list.d/ros-latest.list'
sudo apt-key adv --keyserver 'hkp://keyserver.ubuntu.com:80' --recv-key C1CF6E31E6BADE8868B172B4F42ED6FBAB17C654
sudo apt-get update
sudo apt-get install -y python-rosdep python-rosinstall-generator python-wstool python-rosinstall build-essential cmake
Then initialize rosdep and update it
sudo rosdep init
rosdep update
When that’s done let’s create a dedicated catkin workspace for building ROS and move to that directory.
mkdir ~/ros_catkin_ws
cd ~/ros_catkin_ws
Now you have two choices:
ROS-Comm: (Bare Bones) installation – might be preferred choice for Raspberry Pi, since you probably will be running it headless anyway, if you are using it for a robot. Doesn’t include RVIZ, which makes installation process shorter and less hassle.
Desktop Install: includes GUI tools, such as rqt, rviz, and robot-generic libraries.
I’ll go with installing Desktop Install here.
rosinstall_generator desktop --rosdistro melodic --deps --wet-only --tar > melodic-desktop-wet.rosinstall<br>wstool init -j8 src melodic-desktop-wet.rosinstall
The command will take a few minutes to download all of the core ROS packages into the src folder.
If wstool init fails or is interrupted, you can resume the download by running:
wstool update -j 4 -t src
Step 2: Fix the Issues

Let’s install the compatible version of Assimp (Open Asset Import Library) to fix collada_urdf dependency problem.
mkdir -p ~/ros_catkin_ws/external_src
cd ~/ros_catkin_ws/external_src
wget http://sourceforge.net/projects/assimp/files/assimp-3.1/assimp-3.1.1_no_test_models.zip/download -O assimp-3.1.1_no_test_models.zip
unzip assimp-3.1.1_no_test_models.zip
cd assimp-3.1.1
cmake .
make
sudo make install
Let’s also install OGRE for rviz
sudo apt-get install libogre-1.9-dev
Finally we’ll need to fix the issues with libboost. I’m using the solution from this post on stackoverflow:
“The errors during compilation are caused by the ‘boost::posix_time::milliseconds’ function which
in newer boost versions accepts only an integer argument, but the actionlib package in ROS, gives it a float on several places. You can list all files using that function:
find -type f -print0 | xargs -0 grep ‘boost::posix_time::milliseconds’ | cut -d: -f1 | sort -u
Open them in your text editor and search for the
‘boost::posix_time::milliseconds’ function call.
and replace calls like this:
boost::posix_time::milliseconds(loop_duration.toSec() * 1000.0f));
with:
boost::posix_time::milliseconds(int(loop_duration.toSec() * 1000.0f)));
and these:
boost::posix_time::milliseconds(1000.0f)
with:
boost::posix_time::milliseconds(1000)
I recommend you use nano text editor, which is simpler than VIM (这点作者的观点我并不认可), Ctrl+O is saving, Ctrl+X is exiting and Ctrl+W is searching.
Next we use the rosdep tool for installing all the rest of the dependencies:
rosdep install --from-paths src --ignore-src --rosdistro melodic -y
Add TipAsk QuestionCommentDownload
Step 3: Build and Source the Installation
Once it has completed downloading the packages and resolving the dependencies you are ready to build the catkin packages.
sudo ./src/catkin/bin/catkin_make_isolated --install -DCMAKE_BUILD_TYPE=Release --install-space /opt/ros/melodic -j2
If the compilation process freezes(very likely, if you install the desktop version), you need to increase swap space available. By default it’s 100 MB, try increasing it to 2048 MB.
Good luck! The whole compilation process takes about 1 hour, so go make some tea.
Now ROS Melodic should be installed on your Raspberry Pi 4. We’ll source the new installation with following command:
echo "source /opt/ros/melodic/setup.bash" >> ~/.bashrc
Try launching roscore to check if everything was successful.Add TipAsk QuestionCommentDownload
Step 4: Install RPLIDAR ROS Package

Let’s create a separate workspace for other packages, that are not part of core ROS.
From you home folder do:
mkdir -p ~/catkin_ws/src
cd ~/catkin_ws/
catkin_make
and source it to bashrc:
echo "source $HOME/catkin_ws/devel/setup.bash" >> ~/.bashrc
Okay, we’re ready to start installing RPLIDAR ROS package.
cd src
sudo git clone https://github.com/Slamtec/rplidar_ros.git
catkin_make
Wait for the package compilation to finish. Try launching the package to see if the compilation was successful:
roslaunch rplidar_ros rplidar.launch
If it doesn’t output any errors, do a quick celebration dance(*optional).
Now only the last piece is missing – since you are probably running Raspberry Pi 4 in headless mode, we can’t visualize lidar messages. For that we’ll need to set-up ROS to run on multiple machines.Add TipAsk QuestionCommentDownload
Step 5: Set Up ROS to Run on Multiple Machines

For this part you will need a Ubuntu 18.04 computer with ROS Melodic installed. Since it’s Ubuntu ROS can be simply installed using apt-get as described in this tutorial.
After you have working ROS installation both on Raspberry Pi and your desktop machine, check the IP addresses of both machines. They need to be on the same network!
Run roscore on your desktop computer and export ROS_MASTER_URI
roscore
export ROS_MASTER_URI=http://[your-desktop-machine-ip]:11311
Next on Raspberry PI execute
export ROS_MASTER_URI=http://[your-desktop-machine-ip]:11311
export ROS_IP=[your-desktop-machine-ip]
and launch RPILIDAR launch file
roslaunch rplidar_ros rplidar.launch
If it launches successfully, check the topics present on your desktop machine with rostopic list
If you can see / scan mesages, everything works as it supposed to work. Then launch RVIZ on your desktop machine, add Laser Scan messages and choose /scan topic. You will also need to change fixed frame to /laser.
Voila!Add TipAsk QuestionCommentDownload
Step 6: Done!

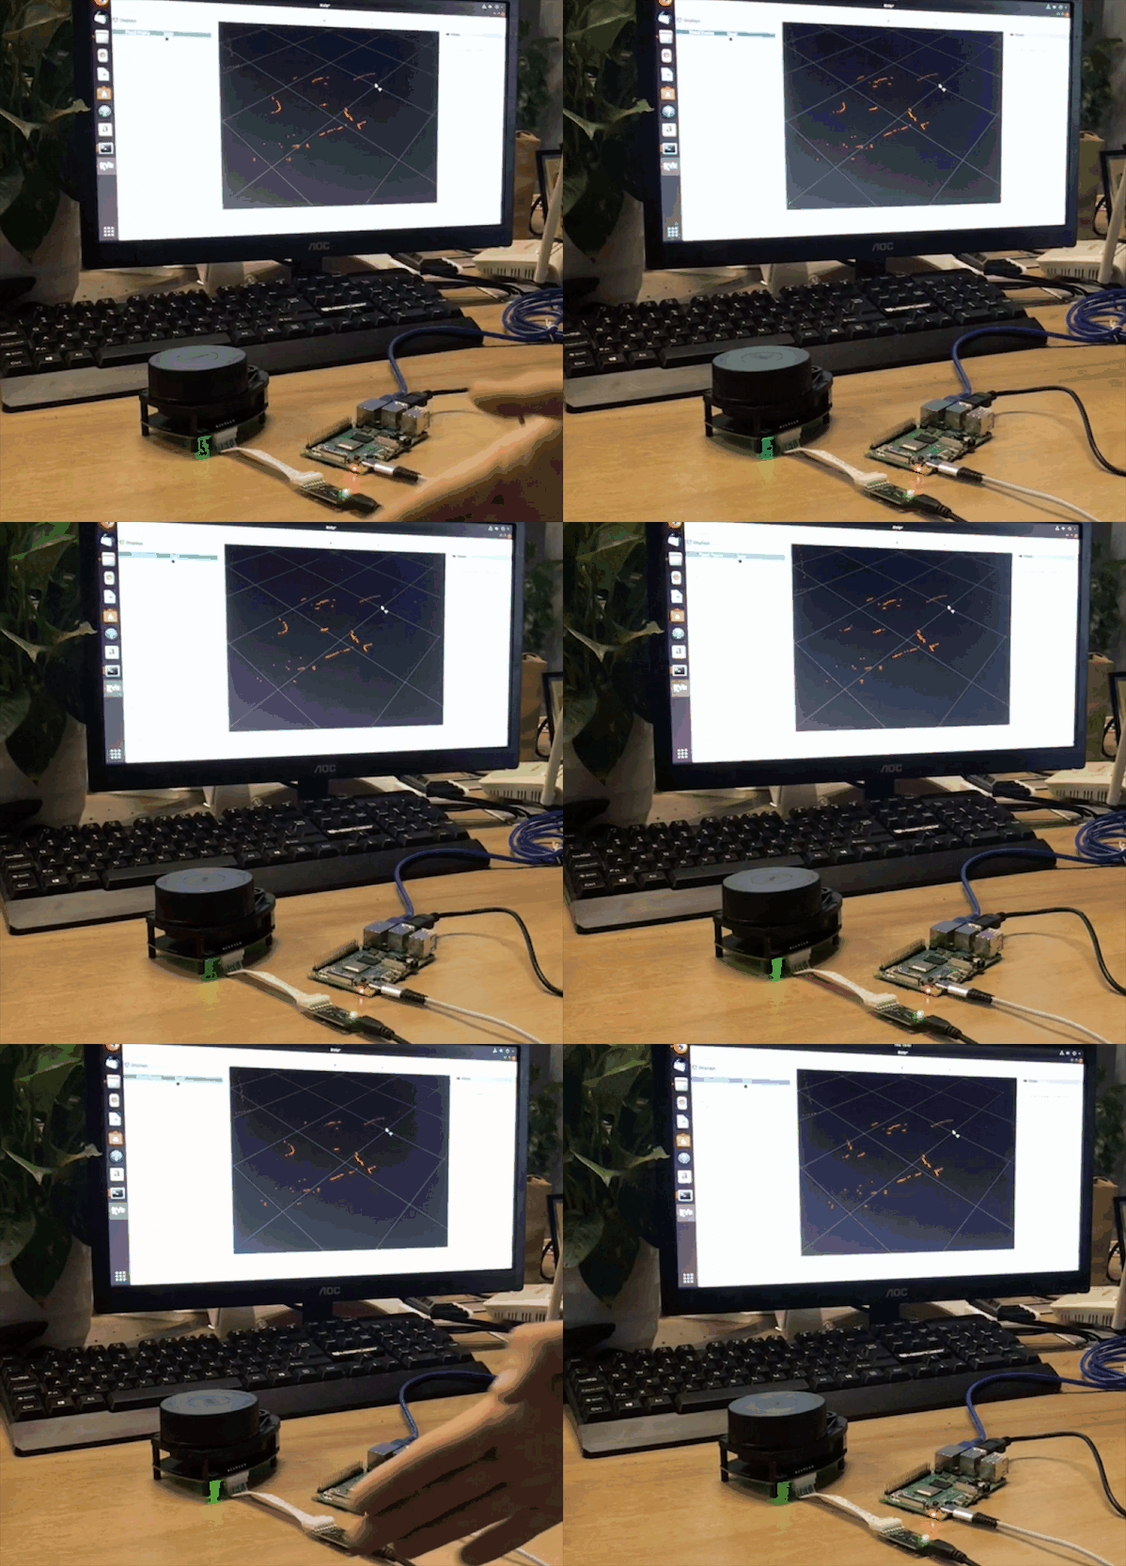
This guide can be a first step towards building your ROS robot on top of new Raspberry Pi 4. We have installed ROS Melodic and prepared the installation for running headless and connecting to our desktop machine over wireless network for remote control.
Next steps are dependent on what type of robot you want to build. You can add motors and encoders for odometry, stereo camera for Visual SLAM and all sorts of other exciting and useful things.
在树莓派4b上安装 ROS MELODIC 源码安装的更多相关文章
- 在ConoHa上Centos7环境下源码安装部署LNMP
本文记录了从源码,在Centos 7上手动部署LNMP环境的过程,为了方便以后对nginx和mariadb进行升级,这里采用yum的方式进行安装. 1.建立运行网站和数据库的用户和组 groupadd ...
- 004-nginx简介、安装配置【源码安装和mac安装】、基本使用
一.概述 1.1.Nginx是什么 Nginx是一款轻量级的Web服务器,也是一款轻量级的反向代理服务器[常用]. 1.2.Nginx能干什么 Nginx能干的事情很多,这里简要罗列一些: 1:直接支 ...
- Redis for linux安装配置之—-源码安装
一‘redis单实例安装配置1.下载redis源码压缩包,并将其上传至服务器/usr/local2.解压redis源码压缩包 # tar -xzvf redis-3.2.12.tar.gz3.进入r ...
- nginx安装,手动源码安装
什么是Nginx? Nginx (engine x) 是一个高性能的HTTP和反向代理web服务器,同时也提供了IMAP/POP3/SMTP服务.Nginx是由伊戈尔·赛索耶夫为俄罗斯访问量第二的Ra ...
- Mysql for Linux安装配置之—— 源码安装
1.安装 --假设已经有mysql-5.5.10.tar.gz以及cmake-2.8.4.tar.gz两个源码压缩文件1)先安装cmake(mysql5.5以后是通过cmake来编译的) # ta ...
- 【SystemTap】 Linux下安装使用SystemTap源码安装SystemTap
转自 http://blog.csdn.net/zklth/article/details/6248558 文章 http://blog.csdn.net/zklth/archive/2010/09/ ...
- Red hat Linux 安装Node.js 源码安装
1. 下载源码包 http://nodejs.org/dist/v0.10.29/node-v0.10.29.tar.gz 2.准备安装环境,>python2.6, gcc, g++ pytho ...
- 【只需3步】Linux php的安装与配置[源码安装]
作者小波/QQ463431476欢迎转载! Linux:redhat 6/centos 6 继续上一篇笔记Apache的配置http://www.cnblogs.com/xiaobo-Linux/p/ ...
- 如何在CentOS 7中安装最新Git(源码安装)
如何在CentOS 7中安装最新Git 2017年05月20日 11:49:53 阅读数:1624 Git是在今天的软件开发行业一个非常有用的版本控制工具.我一直使用Git.于是为Linux公社的读者 ...
随机推荐
- 手机如何修改host文件
常常在想本地开发的时候使用pc端测试移动端,由于有安全域名限制,因此在本地修改了机器的host.将域名映射到本地局域网.这个做法是很正常的也很常见.但是现在新的需求是我需要在手机上也能够正常测试啊!怎 ...
- SOLID Principles
Intention: more understandable, easier to maintain and easier to extend.(通过良好的设计使得代码easy and simple, ...
- .netcore项目中使用log4net
log4net配置文件 引入log4net包,创建一个config目录,专门用来放配置文件,添加log4net.config文件. 编写配置文件. <?xml version="1.0 ...
- .NET Core中使用读取配置文件
引入Nuget的两个类库 Microsoft.Extensions.Configuration Microsoft.Extensions.Configuration.Json 使用 var build ...
- php实现命令行里输出带颜色文字
今天执行composer的时候看到命令窗口出现的提示里面有的关键性部分带有颜色,于是很好奇研究了一下,在这里记录下来 其实在命令行输出带颜色字体主要是使用的 ANSI 转义字符实现的,我们先看个例子: ...
- 基于微软hyper-v虚拟化服务器搭建方法和步骤整理
基于Microsoft基础设施私有云计算搭建 摘要:私有云是指组织机构建设的专供自己使用的云平台,它所提供的服务不是供他人使用,而是供自己的内部人员或分支机构使用,不同于公有云,私有云部署在企业内部网 ...
- CentOS7使用yum安装PostgreSQL和PostGIS
更新yum源 CentOS7默认yum源的PostgreSQL版本过低,不适合在本版本上使用.在https://yum.postgresql.org/repopackages.php上找到适合Cent ...
- ORA-3136 问题处理
Alert 日志报错: Wed May :: *********************************************************************** Fatal ...
- mongodb索引 多健索引
多健索引与单键索引创建形式相同,区别在于字段的值,单键索引,顾名思义,他的值为一个单一的值,例如字符串,数字或者日期,而多健索引,他的值具有多个记录,例如一个数组,两者建立方式类似 增加一条数组记录 ...
- Jupyter的学习
一 .Jupyter中的魔术命令 %load test.py :”可以将test.py 中的文件加载到jupyter框中 %matplotlib inline :可以将Matplotlib 的结果嵌 ...