
【水滴石穿】react-native-app
项目地址:https://github.com/WQone/react-native-app
这个是一个非常优秀的小姐姐写的,希望大家能够以她为榜样,一起加油进步呀~
先看效果
分析package.json可以发现其实没有遇到很多很特别的组件
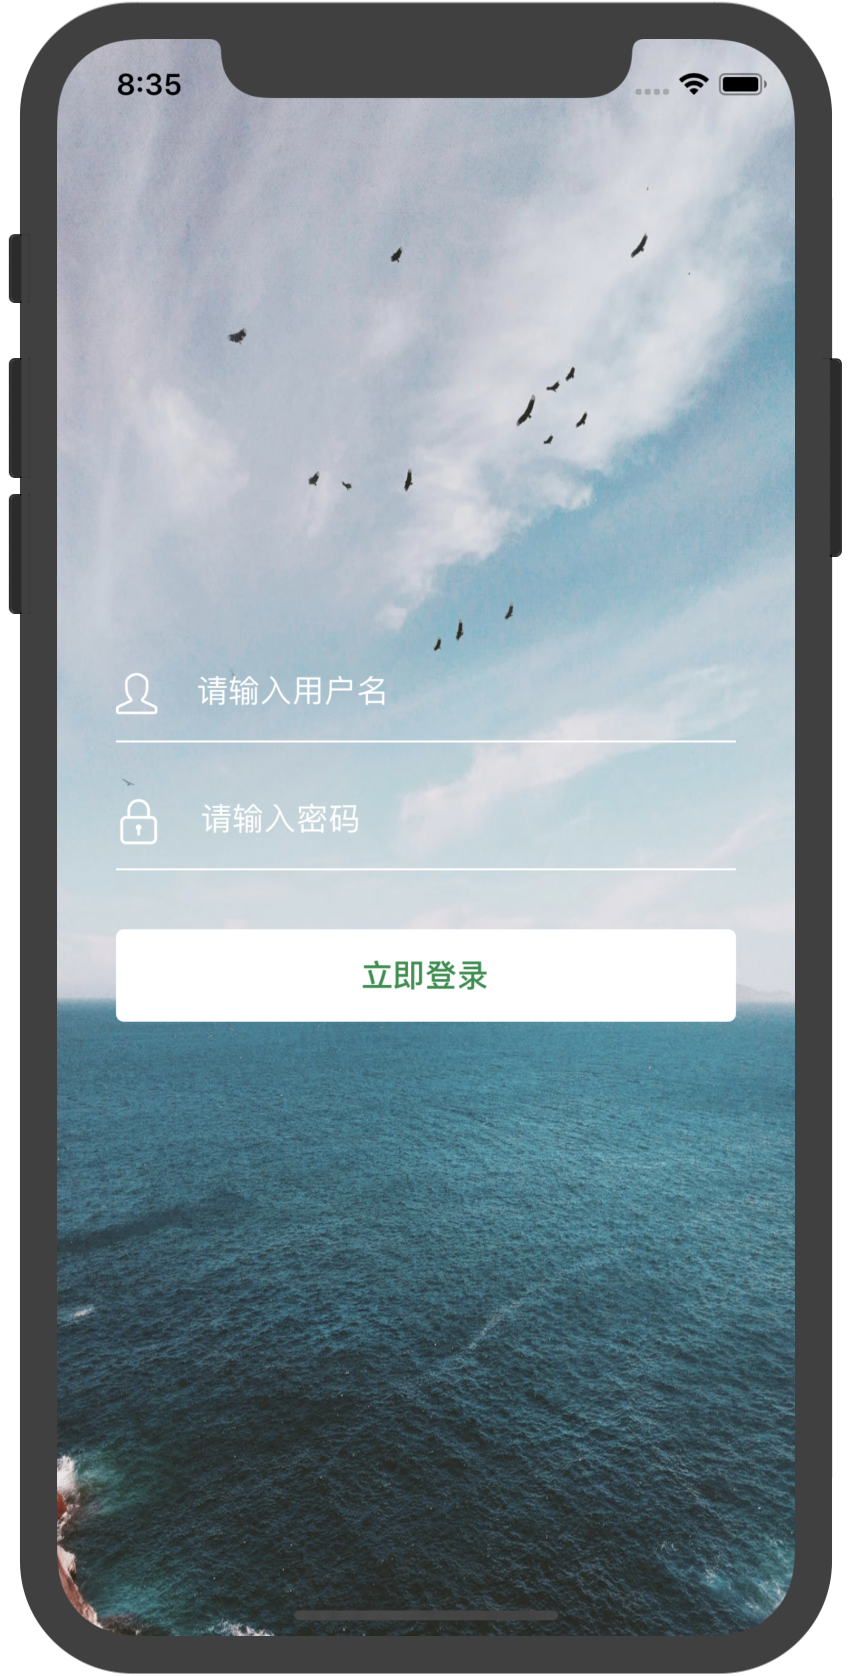
还是先来分析代码
//index.js

/**

 * @format

 */

import {AppRegistry} from 'react-native';

import App from './App';

import {name as appName} from './app.json';

AppRegistry.registerComponent(appName, () => App);
//app.js

//主要定义的是routter

import router from './src/router/index'

//导航注册

export default router;
//index.js

import React from 'react';

import {

  createStackNavigator,

  createAppContainer,

  createBottomTabNavigator,

  createSwitchNavigator,

} from 'react-navigation';

import Ionicons from 'react-native-vector-icons/Ionicons';

import Login from '../views/Login/index';

import Home from '../views/Home/index';

import Mine from '../views/Mine/index';

const BottomNavigator = createBottomTabNavigator(

  {

    Home: {

      screen: Home,

      navigationOptions: {

        title: '首页',

        tabBarIcon: ({ focused, horizontal, tintColor }) => {

          return <Ionicons name={'ios-home'} size={25} style={{ color: tintColor }} />;

        },

      },

    },

    Mine: {

      screen: Mine,

      navigationOptions: {

        title: '我的',

        tabBarIcon: ({ focused, horizontal, tintColor }) => {

          return <Ionicons name={'logo-octocat'} size={25} style={{ color: tintColor }} />;

        },

      },

    },

  },

  {

    tabBarOptions: {

      activeTintColor: '#168f48',

    },

  },

);

const AppNavigator = createStackNavigator(

  {

    Home: {

      screen: BottomNavigator,

      navigationOptions: () => ({

        title: '首页',

        headerBackTitle: null,

      }),

    },

  },

  {

    headerMode: 'none',

  },

);

const LoginNavigator = createStackNavigator(

  {

    Login: {

      screen: Login,

      navigationOptions: () => ({

        title: '登录',

        headerBackTitle: null,

      }),

    },

  },

  {

    headerMode: 'none',

    // navigationOptions: {

    //   headerStyle: {

    //     backgroundColor: '#f4511e',

    //   },

    //   headerTintColor: '#fff',

    //   headerTitleStyle: {

    //     fontWeight: 'bold',

    //   },

    // },

    // headerLayoutPreset: 'center',

  },

);

//路由定义了初始化显示页面

const App = createSwitchNavigator(

  {

    LoginNavigator,

    AppNavigator,

  },

  {

    initialRouteName: 'LoginNavigator',

  },

);

//导航注册

export default createAppContainer(App);
//src/utils/constance.js

//对设备类型进行了判断

/**

 * 常量

 */

import { Dimensions, Platform } from 'react-native';

const { height, width } = Dimensions.get('window');

export const VALUE = {

  width: width,

  height: height,

  ios: Platform.OS === 'ios',

  android: Platform.OS === 'android',

};
//src/views/Login/index.js

import React, { Component } from 'react';

import {

  StatusBar,

  StyleSheet,

  Image,

  TouchableOpacity,

  Button,

  View,

  Text,

  TextInput,

} from 'react-native';

import SimpleLineIcons from 'react-native-vector-icons/SimpleLineIcons';

import { VALUE } from '../../utils/constance';

export default class Login extends Component {

  constructor(props) {

    super(props);

    this.state = { user_text: '', pass_text: '' };

  }

  onPressButton = () => {

    //跳转到home页面

    this.props.navigation.navigate('Home');

  };

  render() {

    return (

      <View style={styles.container}>

        <StatusBar backgroundColor="transparent" translucent barStyle={'dark-content'} />

        <Image

          source={require('../../assets/images/loginbg.jpeg')}

          style={styles.loginBg}

          resizeMode="stretch"

        />

        <View style={styles.login}>

          <View style={styles.InputName}>

            <SimpleLineIcons name={'user'} size={21} style={{ lineHeight: 40, color: 'white' }} />

            <TextInput

              onChangeText={(user_text) => this.setState({ user_text })}

              style={styles.Input}

              autoComplete={'username'}

              underlineColorAndroid={'transparent'}

              maxLength={30}

              placeholder={'请输入用户名'}

              placeholderTextColor={'white'}

            />

          </View>

          <View style={styles.InputPass}>

            <SimpleLineIcons name={'lock'} size={23} style={{ lineHeight: 40, color: 'white' }} />

            <TextInput

              onChangeText={(pass_text) => this.setState({ pass_text })}

              style={styles.Input}

              autoComplete={'password'}

              secureTextEntry={true}

              underlineColorAndroid={'transparent'}

              maxLength={16}

              placeholder={'请输入密码'}

              placeholderTextColor={'white'}

            />

          </View>

          <TouchableOpacity

            activeOpacity={0.9} //点击时的透明度

            style={styles.InputBtn}

            //点击事件,要记得绑定

            onPress={this.onPressButton}

          >

            <Text style={{ fontSize: 16, color: '#168f48', fontWeight: 'bold' }}>立即登录</Text>

          </TouchableOpacity>

        </View>

      </View>

    );

  }

}

const styles = StyleSheet.create({

  container: {

    flex: 1,

    backgroundColor: '#f5f5f5',

    fontSize: 19,

  },

  loginBg: {

    width: VALUE.width,

    height: VALUE.height,

    justifyContent: 'center',

    alignItems: 'center',

    position: 'absolute',

    zIndex: -1,

  },

  login: {

    paddingLeft: 30,

    paddingRight: 30,

    flexDirection: 'column',

    alignItems: 'center',

    justifyContent: 'center',

    width: VALUE.width,

    height: VALUE.height,

  },

  InputName: {

    flexDirection: 'row',

    height: 45,

    borderColor: 'white',

    borderBottomWidth: 1,

    marginBottom: 20,

    width: '100%',

    paddingBottom: 5,

  },

  InputPass: {

    flexDirection: 'row',

    height: 45,

    borderColor: 'white',

    borderBottomWidth: 1,

    width: '100%',

    paddingBottom: 5,

  },

  Input: {

    fontSize: 16,

    padding: 0,

    paddingLeft: 20,

    // color: 'white',

  },

  InputBtn: {

    marginTop: 30,

    width: '100%',

    height: 47,

    backgroundColor: 'white',

    justifyContent: 'center',

    alignItems: 'center', //显示Text组件居中

    borderRadius: 4, //按钮圆角

    alignSelf: 'center',

  },

});
看点击登陆之后进入home页面效果
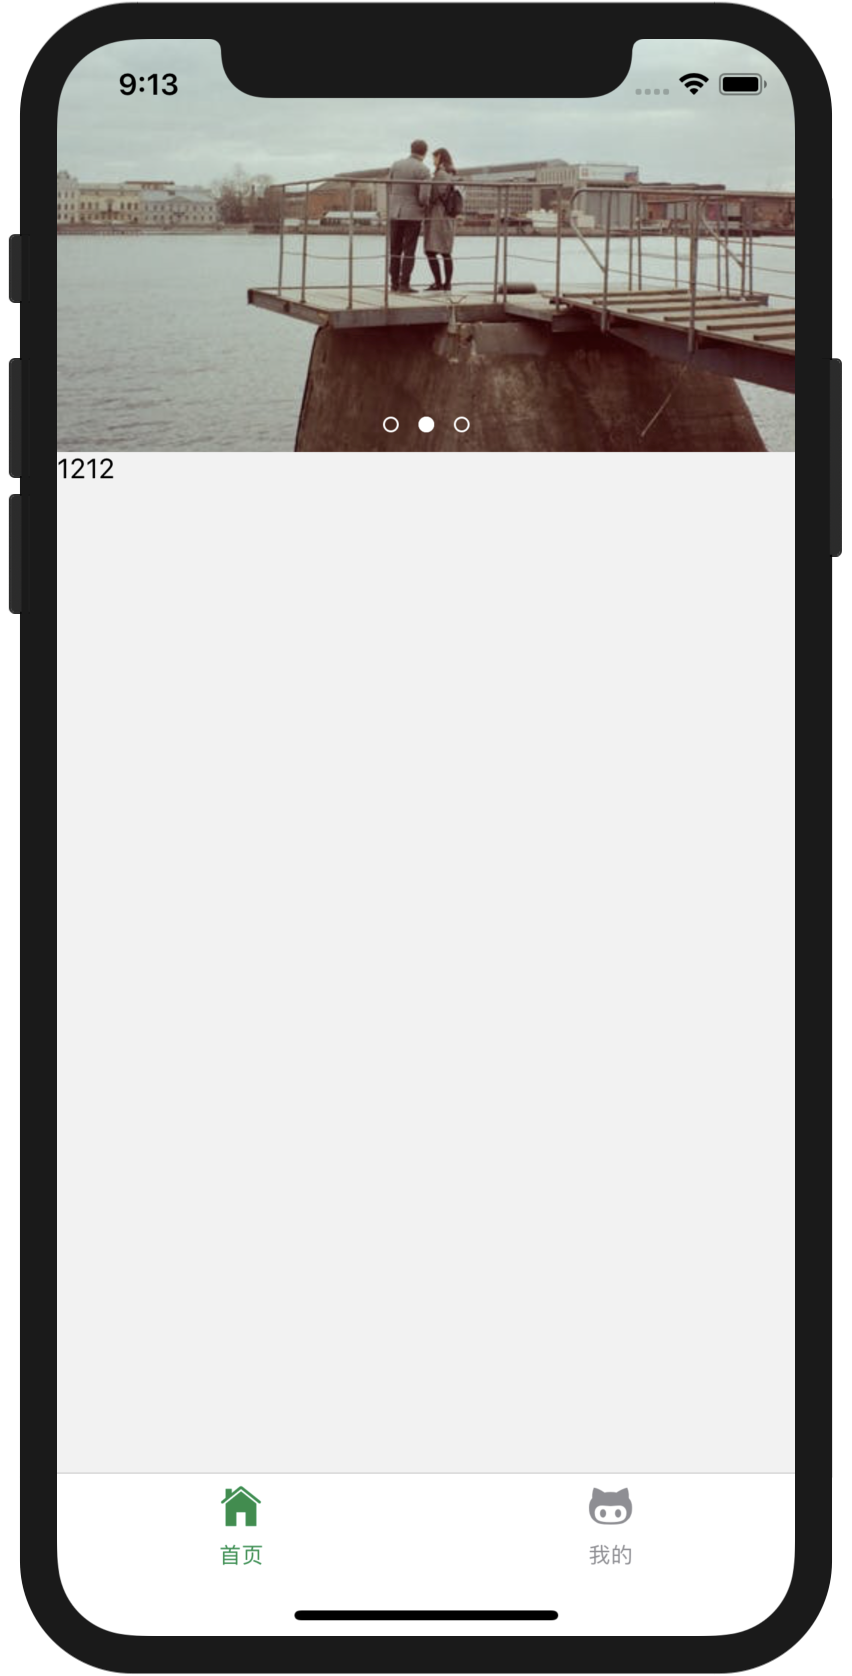
有封装轮播哟
//src/views/Home/index.js

import React, { Component } from 'react';

import { ScrollView, StyleSheet, Button, Text, View, Image } from 'react-native';

import { VALUE } from '../../utils/constance';

import PageScrollView from '../../components/PageScrollView';

import mockjsInit from '../../api/mock'; // 添加mockjs拦截请求,模拟返回服务器数据

import api from '../../api/page';

export default class Home extends Component {

  constructor(props) {

    super(props);

    this.state = {

      value: '1212',

      imageUrl: [

        {

          uri:

            'https://images.pexels.com/photos/2176338/pexels-photo-2176338.jpeg?auto=compress&cs=tinysrgb&dpr=1&w=500',

        },

        {

          uri:

            'https://images.pexels.com/photos/2209511/pexels-photo-2209511.jpeg?auto=compress&cs=tinysrgb&dpr=1&w=500',

        },

        {

          uri:

            'https://images.pexels.com/photos/2236703/pexels-photo-2236703.jpeg?auto=compress&cs=tinysrgb&dpr=1&w=500',

        },

      ],

    };

  }

  componentDidMount() {

    // mockjsInit();

  }

  onPressButton = () => {

    this.setState({

      value: JSON.stringify(5656),

    });

    api

      .list()

      .then((res) => {

        this.setState({

          value: JSON.stringify(777),

        });

      })

      .catch((error) => {

        alert(error.message);

      });

  };

  render() {

    return (

      <View style={styles.container}>

        <PageScrollView

          style={{ width: VALUE.width, height: 210 }}

          imageArr={this.state.imageUrl}

          infiniteInterval={5000}

          pointerColor={['#fff', '#0000', '#fff']}

          pointerViewStyle={{ bottom: 10 }}

        />

        <Text onPress={this.onPressButton}>{this.state.value}</Text>

      </View>

    );

  }

}

const styles = StyleSheet.create({

  container: {

    flex: 1,

    backgroundColor: '#f2f2f2',

    fontSize: 19,

  },

  scrollStyle: {

    height: 210,

    width: VALUE.width,

  },

});
看封装的轮播代码
//src/components/PageScrollView.js

import React, { Component } from 'react';

import {

  View,

  ScrollView,

  Platform,

  Dimensions,

  InteractionManager,

  Image,

  TouchableOpacity,

  ImageBackground,

} from 'react-native';

const { width: w, height: h } = Dimensions.get('window');

class PageScrollView extends Component {

  constructor(props) {

    super(props);

    this.initState();

  }

  //初始化state的值

  initState = () => {

    this.state = {

      //当前滚动到哪一页

      currentPage: 0,

      //整数形式的currentPage

      intCP: -1,

      //总共有几页

      pageNum: this.props.imageArr.length || this.props.datas.length,

      //记录当前是否为手指拖拽

      ifTouch: false,

      // 当onScroll水平滚动时的滚动大小(x值)的数组

      scrollXArr: [],

      // 当onScroll垂直滚动时的滚动大小(x值)的数组

      scrollYArr: [],

      //scrollView是否可以滚动

      scrollEnabled: true,

      //ScrollView自身View的宽高

      viewHeight: 0,

      viewWidth: 0,

      width: 0,

      height: 0,

      //记录是否是首次

      ifFirst: true,

    };

  };

  static defaultProps = {

    //使用官方提供的哪一个内置样式

    builtinStyle: null,

    //使用内置样式时用户自定义的图片宽高

    builtinWH: {},

    //设置整个组件View的style样式

    style: {},

    //轮播图片的数组(该数组存在时使用该数组,datas数组失效)

    imageArr: [],

    //如果是传入图片数组时,自定义的图片样式(该属性在自定义View时无用)

    imageStyle: null,

    // ccStyle:null,

    //自定义view中对应的数据数组

    datas: [],

    //每一个自定义View的具体渲染

    view: () => {},

    //每一个View的宽高(当滚动到当前这个View时的宽高,用于View的宽高会随滚动改变时才用){width:宽度,height:高度}

    // contentWH:null,

    //速度大于多少时为有向左(右,上,下)翻一页的意图(数值越大,要滑动速度越快(越难)才能到下一页,数值越小,滑动越慢(越容易)可以到下一页,)

    goToNextPageSpeed: 3,

    //水平还是竖直方向的ScrollView

    HorV: 'h',

    //是否无限轮播(无限滚动)

    ifInfinite: true,

    //是否自动轮播

    ifAutoScroll: true,

    //自动轮播每张切换的时长(毫秒)

    infiniteInterval: 2000,

    //图片的显示形式

    resizeMode: 'cover',

    //点击图片时执行的操作(不是自定义View的时候)

    dealWithClickImage: null,

    //在当前滚动到的页面改变时调用的方法

    currentPageChangeFunc: null,

    //是否允许用户手动滚动ScrollView

    scrollEnabled: true,

    //组件加载好后,并且布局好得到相应宽高后的执行的操作

    didMount: null,

    //当滚动到当前页的大小为正常大小的多大

    // sizeLarge:1,

    //自定义View时滚动到旁边时的大小为正常大小的多大

    sizeSmall: null,

    //自定义View时滚动到旁边时的透明度

    opacitySmall: null,

    //自定义View时滚动到旁边时旋转的角度

    rotateDeg: null,

    //自定义View时滚动到旁边时的图片的倾斜角度

    skewDeg: null,

    //是否显示当前图片指示器View(下面的点)

    ifShowPointerView: true,

    //指示器的的相关颜色.分别为:当前页的颜色,其他页的颜色,边框的颜色

    pointerColor: ['#fff', '#0000', '#fff'],

    //自定义指示器View的样式(绝对定位的top,bottom...)

    pointerViewStyle: null,

    //自定义指示器圆点的样式(圆点大小)

    pointerStyle: null,

    //自定义指示器View

    renderPointerView: null,

  };

  //官方设置的内置样式的各个参数

  builtinStyleArgs = {

    sizeChangeMode: { sS: 0.7, oS: 0.7, bg: '#999' },

    rotateChangeMode: { rS: 45, skewS: 45, oS: 0.5, sS: 0.5, bg: '#999' },

  };

  //官方设置的内置样式

  builtinStyles = {

    sizeChangeMode: (index, data, { size, opacity }) => {

      let { viewWidth, viewHeight } = this.state;

      let { HorV, builtinWH } = this.props;

      let isH = HorV === 'h';

      let customW = null,

        customH = null;

      if (builtinWH) {

        customW = builtinWH.width;

        customH = builtinWH.height;

      }

      let widimage = customW || w * 0.6,

        wid = isH ? widimage : viewWidth,

        hei = isH ? viewHeight : customH || (widimage / 16) * 9,

        heimage = customH || (widimage / 16) * 9;

      return (

        <View

          style={[

            {

              width: wid,

              height: hei,

              alignItems: 'center',

              justifyContent: 'center',

              backgroundColor: '#999',

              opacity: opacity,

            },

          ]}

          onLayout={this.contentLayout}

        >

          <Image source={data} style={{ width: widimage * size, height: heimage * size }} />

        </View>

      );

    },

    rotateChangeMode: (index, data, { rotate, opacity, size }) => {

      let isios = Platform.OS === 'ios';

      let { rS, sS } = this.builtinStyleArgs['rotateChangeMode'];

      let { viewWidth, viewHeight } = this.state;

      let { HorV, builtinWH } = this.props;

      let Image = ImageBackground || Image;

      let isH = HorV === 'h';

      let customW = null,

        customH = null;

      if (builtinWH) {

        customW = builtinWH.width;

        customH = builtinWH.height;

      }

      let widimage = customW || (isH ? w * 0.5 : w * 0.7),

        wid1 = isH ? widimage : viewWidth,

        hei1 = isH ? viewHeight : customH || (widimage / 16) * 9,

        heimage = customH || (widimage / 16) * 9,

        hei = hei1,

        wid = wid1;

      let LH = hei,

        LW = wid;

      if (isH) {

        rotate ? (wid = Math.cos(Math.PI * (rotate / 180)) * wid1 * size) : (wid = wid1);

      } else {

        rotate ? (hei = Math.cos(Math.PI * (rotate / 180)) * hei1 * size) : (hei = hei1);

      }

      let SH = Math.cos(Math.PI * (rS / 180)) * hei1 * sS,

        SW = Math.cos(Math.PI * (rS / 180)) * wid1 * sS;

      return (

        <View

          style={[

            {

              width: wid,

              height: hei,

              alignItems: 'center',

              justifyContent: 'center',

              backgroundColor: '#999',

              opacity: opacity,

              transform: [

                isH ? { rotateY: rotate + 'deg' } : { rotateX: rotate + 'deg' },

                isH

                  ? { skewY: rotate + 'deg' }

                  : isios

                  ? { skewX: rotate + 'deg' }

                  : { skewY: -rotate + 'deg' },

              ],

            },

          ]}

          onLayout={(e) => {

            !this.distance && this.setDistance1(null, LW, LH, SW, SH);

          }}

        >

          <Image source={data} style={{ width: widimage * size, height: heimage * size }}>

            <View

              style={{

                position: 'absolute',

                top: 0,

                left: 0,

                right: 0,

                bottom: 0,

                backgroundColor: '#000',

                opacity: 1 - opacity,

              }}

            />

          </Image>

        </View>

      );

    },

  };

  render() {

    let { style, builtinStyle } = this.props;

    let { builtinStyles, builtinStyleArgs } = this;

    return (

      <View

        style={[

          style || { flex: 1 },

          builtinStyle && { backgroundColor: builtinStyleArgs[builtinStyle].bg },

        ]}

        onLayout={this.viewOnLayout}

      >

        <ScrollView

          // 设置引用名称,让下面可以引用到

          ref={(ps) => {

            this.scrollView = ps;

          }}

          style={{ flex: 1 }}

          scrollEnabled={this.props.scrollEnabled && this.state.scrollEnabled}

          // 是否是水平的scrollView(默认为水平方向的)

          horizontal={this.props.HorV === 'h'}

          // 是否显示水平方向的滚动条

          showsHorizontalScrollIndicator={false}

          // 是否显示竖方向的滚动条

          showsVerticalScrollIndicator={false}

          // 开始拖拽

          onScrollBeginDrag={this.onScrollBeginDrag}

          // 停止拖拽

          onScrollEndDrag={this.onScrollEndDrag}

          onScroll={(e) => this.onScroll(e)}

          //多少毫秒触发一次上面的onScroll方法

          scrollEventThrottle={20}

          onLayout={this.scrollViewOnLayout}

        >

          {/*渲染scrollView*/}

          {this.renderScrollView()}

        </ScrollView>

        {/*渲染下面的指示器*/}

        {this.props.ifShowPointerView && this.renderPointer()}

      </View>

    );

  }

  //view加载好之后

  viewOnLayout = () => {

    this.state.ifFirst && this.props.didMount && this.props.didMount();

    this.state.ifFirst && (this.state.ifFirst = false);

  };

  //scrollView加载好后,自身的尺寸

  scrollViewOnLayout = (event) => {

    let { width, height } = event.nativeEvent.layout;

    this.setState({ viewHeight: height, viewWidth: width }, () => {});

  };

  //图片加载好后的尺寸

  imageLayout = (event) => {

    this.getContentStyle(event);

  };

  //每个分页view加载好后的尺寸

  contentLayout = (event) => {

    this.getContentStyle(event);

  };

  //获得每一页内容的样式(宽高)

  getContentStyle = (event) => {

    if (this.distance) {

      return;

    }

    let { width, height } = event.nativeEvent.layout;

    this.setDistance(width, height);

  };

  //设置this.state的宽高和distance

  setDistance = (width, height) => {

    if (this.distance) {

      return;

    }

    let isH = this.props.HorV === 'h';

    this.setState({ width: width, height: height }, () => {

      this.distance = isH ? this.state.width : this.state.height;

    });

  };

  //设置this.state的宽高和distance(有旋转,缩放时,即当前滚动到的图片与旁边的图片大小不一样时)

  setDistance1 = (event, LargeWidth, LargeHeight, SmallWidth, SmallHeight) => {

    if (this.distance) {

      return;

    }

    let isH = this.props.HorV === 'h';

    if (event) {

      let { width, height } = event.nativeEvent.layout;

      this.setDistance(width, height);

    } else {

      this.setState({ width: LargeWidth, height: LargeHeight }, () => {

        this.distance = isH ? SmallWidth : SmallHeight;

      });

    }

  };

  //渲染下面的指示器

  renderPointer = () => {

    let { pointerColor: pc, renderPointView } = this.props;

    let viewArr = [];

    let currentPage = this.getintCP();

    let datas = this.props.imageArr.length ? this.props.imageArr : this.props.datas;

    for (let i = 0; i < datas.length; i++) {

      let selected = i === currentPage;

      viewArr.push(

        renderPointView ? (

          <View key={i}>{renderPointView(selected)}</View>

        ) : (

          <View

            key={i}

            style={[

              { width: 8, height: 8, borderRadius: 4, borderColor: pc[2], borderWidth: 1 },

              i && { marginLeft: 10 },

              selected ? { backgroundColor: pc[0] } : { backgroundColor: pc[1] },

              this.props.pointerStyle,

            ]}

          />

        ),

      );

    }

    return (

      <View

        style={[

          {

            position: 'absolute',

            bottom: this.state.viewHeight / 10,

            flexDirection: 'row',

            width: this.state.viewWidth,

            justifyContent: 'center',

          },

          this.props.pointerViewStyle,

        ]}

      >

        {viewArr}

      </View>

    );

  };

  //获得整数型的当前滚动页面

  getintCP() {

    let currentPage = Math.round(this.state.currentPage);

    let ifInfinite = this.props.ifInfinite;

    ifInfinite && (currentPage %= this.state.pageNum);

    return currentPage;

  }

  //获得整数型滚动页面后的操作

  dealWithIntCP() {

    let currentPage = this.getintCP();

    if (currentPage !== this.state.intCP) {

      this.props.currentPageChangeFunc && this.props.currentPageChangeFunc(currentPage);

      this.state.intCP = currentPage;

    }

  }

  // 渲染scrollView

  renderScrollView = () => {

    let {

      imageArr,

      datas,

      ifInfinite,

      dealWithClickImage: dealClick,

      sizeSmall,

      opacitySmall,

      rotateDeg,

      skewDeg,

      imageStyle,

      resizeMode,

      HorV,

      builtinStyle,

    } = this.props;

    let { viewWidth, width, viewHeight, height, pageNum, currentPage } = this.state;

    let { builtinStyles, builtinStyleArgs } = this;

    this.dealWithIntCP();

    //datas数据

    datas = imageArr.length ? imageArr : datas;

    ifInfinite && (datas = [...datas, ...datas, ...datas]);

    //当滚动到当前页的大小为正常大小的多大

    let sL = 1;

    //当滚动到旁边时的大小为正常大小的多大

    let sS = sizeSmall;

    // let sS=0.5;

    let oL = 1;

    //滚到旁边时的透明度

    let oS = opacitySmall;

    //滚动到旁边时的旋转角度

    let rS = rotateDeg;

    //滚动到旁边时的倾斜角度

    let skewS = skewDeg;

    if (builtinStyle) {

      let args = builtinStyleArgs[builtinStyle];

      ({ sS, oS, rS, skewS } = args);

    }

    let arr = [];

    if (HorV === 'h') {

      //当滚动到第一张时的左边空白部分

      arr.push(

        <View

          key={-2}

          style={{ width: (viewWidth - width) / 2, height: viewHeight, backgroundColor: '#0000' }}

        />,

      );

    } else {

      //竖直ScrollView时

      arr.push(

        <View

          key={-2}

          style={{ width: viewWidth, height: (viewHeight - height) / 2, backgroundColor: '#0000' }}

        />,

      );

    }

    for (let i = 0; i < datas.length; i++) {

      let size = 1;

      let opacity = 1;

      let rotate = 0;

      let skew = 0;

      let distance;

      if (sS || oS || rS || skewS) {

        distance = Math.abs(currentPage - i);

        if (distance >= 1) {

          size = sS;

          opacity = oS;

          rotate = rS;

          skew = skewS;

        } else {

          size = sL - distance * (sL - sS);

          opacity = oL - distance * (oL - oS);

          rotate = distance * rS;

          skew = distance * skewS;

        }

      }

      if (this.props.imageArr.length) {

        let style = imageStyle || { width: viewWidth, height: viewHeight };

        if (builtinStyle) {

          arr.push(

            <TouchableOpacity

              activeOpacity={dealClick ? 0.5 : 1}

              onPress={() => {

                dealClick && dealClick(i % this.pNum);

              }}

              key={i}

              style={[]}

            >

              {/*<TouchableOpacity activeOpacity={dealClick?0.5:1} onPress={()=>{dealClick&&dealClick(i%this.pNum)}} key={i} style={[]} onLayout={this.contentLayout}>*/}

              {builtinStyles[builtinStyle](i % pageNum, datas[i % pageNum], {

                size,

                opacity,

                rotate,

                skew,

              })}

            </TouchableOpacity>,

          );

        } else {

          arr.push(

            <TouchableOpacity

              activeOpacity={dealClick ? 0.5 : 1}

              onPress={() => {

                dealClick && dealClick(i % this.pNum);

              }}

              key={i}

              style={style}

              onLayout={this.imageLayout}

            >

              <Image source={datas[i]} style={[style, { resizeMode: resizeMode }]} />

            </TouchableOpacity>,

          );

        }

      } else {

        arr.push(

          <View

            key={i}

            style={[]}

            onLayout={(event) => {

              sS || oS || rS || skewS ? this.setDistance1(event) : this.contentLayout(event);

            }}

          >

            {sS || oS || rS || skewS

              ? this.props.view(i % pageNum, datas[i % pageNum], { size, opacity, rotate, skew })

              : this.props.view(i % pageNum, datas[i % pageNum])}

          </View>,

        );

      }

    }

    if (HorV === 'h') {

      //当滚动到最后一张时的右边的空白部分

      arr.push(

        <View

          key={-3}

          style={{ width: (viewWidth - width) / 2, height: viewHeight, backgroundColor: '#0000' }}

        />,

      );

    } else {

      //竖直方向

      arr.push(

        <View

          key={-3}

          style={{ width: viewWidth, height: (viewHeight - height) / 2, backgroundColor: '#0000' }}

        />,

      );

    }

    return arr;

  };

  //开始拖拽

  onScrollBeginDrag = (e) => {

    this.state.ifTouch = true;

    this.state.scrollXArr = [];

    this.state.scrollYArr = [];

    this.stopInfiniteInterval();

  };

  // 停止拖拽(升级后2)

  onScrollEndDrag = (e) => {

    this.state.ifTouch = false;

    this.props.ifInfinite && this.setState({ scrollEnabled: false });

    let speed = this.props.goToNextPageSpeed;

    let contentOffset = this.isH ? e.nativeEvent.contentOffset.x : e.nativeEvent.contentOffset.y;

    let scrollArr = this.isH ? this.state.scrollXArr : this.state.scrollYArr;

    let speed1 = scrollArr[scrollArr.length - 1] - scrollArr[scrollArr.length - 2];

    let speed2 = scrollArr[scrollArr.length - 2] - scrollArr[scrollArr.length - 3];

    let speed3 = scrollArr[scrollArr.length - 3] - scrollArr[scrollArr.length - 4];

    let speed4 = scrollArr[scrollArr.length - 1] - scrollArr[0];

    let currentPage;

    if (Math.abs(speed1) > speed || Math.abs(speed2) > speed || Math.abs(speed3) > speed) {

      // 速度(speed1,2,3)绝对值大于设定值时为有向左(右,上,下)翻一页的意图

      //speed4>0向右(上)翻(想去(下)(右)一页的意图)

      //speed4<0向左(下)翻(想去(上)(左)一页的意图)

      currentPage =

        speed4 > 0

          ? Math.ceil(contentOffset / this.distance)

          : Math.floor(contentOffset / this.distance);

    } else {

      currentPage = Math.round(contentOffset / this.distance);

    }

    //滚动到相应的界面

    this.scrollToPage(currentPage);

    //如果设置了自动轮播,则重新开启定时器

    this.props.ifAutoScroll && this.setInfiniteInterval();

  };

  // 当滚动scrollView的时候(升级后)

  onScroll = (e) => {

    let scrollPage;

    if (this.isH) {

      // scrollView当前滚动的数值

      this.state.scrollXArr.push(e.nativeEvent.contentOffset.x);

      scrollPage = e.nativeEvent.contentOffset.x / this.distance;

    } else {

      // scrollView当前滚动的数值

      this.state.scrollYArr.push(e.nativeEvent.contentOffset.y);

      scrollPage = e.nativeEvent.contentOffset.y / this.distance;

    }

    if (

      this.props.ifInfinite &&

      Math.abs(scrollPage - Math.ceil(scrollPage)) < 0.1 &&

      !this.state.ifTouch

    ) {

      //处理无限轮播,自动轮播滚动时的情况

      setTimeout(() => {

        this.infiniteScroll(Math.ceil(scrollPage));

      }, 200);

    } else {

      this.setState({ currentPage: scrollPage });

    }

  };

  //无限轮播时对滚动的处理

  infiniteScroll = (currentPage) => {

    if (currentPage < this.pNum || currentPage >= this.pNum * 2) {

      currentPage = (currentPage % this.pNum) + this.pNum;

      this.scrollToPage(currentPage, false);

    }

    //更新状态机

    this.setState({

      //当前页码

      currentPage: currentPage,

      scrollEnabled: true,

    });

  };

  //根据传入的要滚动到的页面数,滚动到相应的页面

  scrollToPage = (currentPage, animated = true) => {

    let pageNum = this.props.ifInfinite ? this.pNum * 3 : this.pNum;

    if (currentPage > pageNum - 1) {

      currentPage = pageNum - 1;

    }

    if (currentPage < 0) {

      currentPage = 0;

    }

    try {

      this.isH

        ? this.scrollView.scrollTo({ x: currentPage * this.distance, animated: animated })

        : this.scrollView.scrollTo({ y: currentPage * this.distance, animated: animated });

    } catch (e) {}

  };

  //父组件中使用ref手动滚动的方法

  manualScrollToPage = (currentPage, animated = true) => {

    if (this.props.ifInfinite && animated) {

      currentPage < this.pNum && (currentPage += this.pNum);

      currentPage >= this.pNum * 2 && (currentPage -= this.pNum);

    } else {

      if (currentPage > this.pNum - 1) {

        currentPage = this.pNum - 1;

      }

      if (currentPage < 0) {

        currentPage = 0;

      }

    }

    this.isH

      ? this.scrollView.scrollTo({ x: currentPage * this.distance, animated: animated })

      : this.scrollView.scrollTo({ y: currentPage * this.distance, animated: animated });

  };

  //设置轮播的定时器

  setInfiniteInterval = () => {

    let interval = this.props.infiniteInterval < 1000 ? 1000 : this.props.infiniteInterval;

    this.timer = setInterval(() => {

      let currentPage = Math.round(this.state.currentPage + 1);

      !this.props.ifInfinite && currentPage >= this.pNum && (currentPage = 0);

      this.scrollToPage(currentPage);

    }, interval);

  };

  //清除轮播定时器

  stopInfiniteInterval = () => {

    this.timer && clearInterval(this.timer);

  };

  componentDidMount() {

    this.isH = this.props.HorV === 'h';

    this.pNum = this.state.pageNum;

    this.props.ifAutoScroll && this.setInfiniteInterval();

  }

  didMount = () => {

    if (this.props.ifInfinite) {

      let isH = this.props.HorV === 'h';

      if (Platform.OS !== 'ios') {

        InteractionManager.runAfterInteractions(() => {

          this.scrollView.scrollTo(

            isH

              ? { x: this.state.pageNum * this.distance, animated: false }

              : { y: this.state.pageNum * this.distance, animated: false },

          );

        });

      } else {

        this.scrollView.scrollTo(

          isH

            ? { x: this.state.pageNum * this.distance, animated: false }

            : { y: this.state.pageNum * this.distance, animated: false },

        );

      }

    }

  };

  componentWillUpdate() {}

  componentWillUnmount() {

    this.stopInfiniteInterval();

  }

}

//输出组件类

export default PageScrollView;
固定了底部

///src/router/index.js

import React from 'react';

import {

  createStackNavigator,

  createAppContainer,

  createBottomTabNavigator,

  createSwitchNavigator,

} from 'react-navigation';

import Ionicons from 'react-native-vector-icons/Ionicons';

import Login from '../views/Login/index';

import Home from '../views/Home/index';

import Mine from '../views/Mine/index';

const BottomNavigator = createBottomTabNavigator(

  {

    Home: {

      screen: Home,

      navigationOptions: {

        title: '首页',

        tabBarIcon: ({ focused, horizontal, tintColor }) => {

          return <Ionicons name={'ios-home'} size={25} style={{ color: tintColor }} />;

        },

      },

    },

    Mine: {

      screen: Mine,

      navigationOptions: {

        title: '我的',

        tabBarIcon: ({ focused, horizontal, tintColor }) => {

          return <Ionicons name={'logo-octocat'} size={25} style={{ color: tintColor }} />;

        },

      },

    },

  },

  {

    tabBarOptions: {

      activeTintColor: '#168f48',

    },

  },

);

const AppNavigator = createStackNavigator(

  {

    Home: {

      screen: BottomNavigator,

      navigationOptions: () => ({

        title: '首页',

        headerBackTitle: null,

      }),

    },

  },

  {

    headerMode: 'none',

  },

);

const LoginNavigator = createStackNavigator(

  {

    Login: {

      screen: Login,

      navigationOptions: () => ({

        title: '登录',

        headerBackTitle: null,

      }),

    },

  },

  {

    headerMode: 'none',

    // navigationOptions: {

    //   headerStyle: {

    //     backgroundColor: '#f4511e',

    //   },

    //   headerTintColor: '#fff',

    //   headerTitleStyle: {

    //     fontWeight: 'bold',

    //   },

    // },

    // headerLayoutPreset: 'center',

  },

);

//路由定义了初始化显示页面

const App = createSwitchNavigator(

  {

    LoginNavigator,

    AppNavigator,

  },

  {

    initialRouteName: 'LoginNavigator',

  },

);

//导航注册

export default createAppContainer(App);
home页面中的数据处理很隐蔽
componentDidMount() {

    // mockjsInit();

  }

  onPressButton = () => {

    this.setState({

      value: JSON.stringify(5656),

    });

    api

      .list()

      .then((res) => {

        this.setState({

          value: JSON.stringify(777),

        });

      })

      .catch((error) => {

        alert(error.message);

      });

  };

//mine页面很神奇啊,它其实没有定义下面的导航切换啊,为啥它有啊

//并没有引入navigation但是却可以用

import React, { Component } from 'react';

import { StyleSheet, ScrollView, Button, Text, View } from 'react-native';

export default class Home extends Component {

  render() {

    return (

      <View style={styles.container}>

        <Text>MineScreen Screen</Text>

        <Button title="Go to Login" onPress={() => this.props.navigation.navigate('Login')} />

        <Button title="Go to Mine" onPress={() => this.props.navigation.navigate('Mine')} />

        <Button title="Go back" onPress={() => this.props.navigation.goBack()} />

      </View>

    );

  }

}

const styles = StyleSheet.create({

  container: {

    flex: 1,

    backgroundColor: '#F5FCFF',

    fontSize: 19,

  },

});
//其实我觉得mine中的代码有问题
【水滴石穿】react-native-app的更多相关文章
- React Native APP结构探索
APP结构探索 我在Github上找到了一个有登陆界面,能从网上获取新闻信息的开源APP,想来研究一下APP的结构. 附上原网址:我的第一个React Native App 具体来讲,就是研究一个复杂 ...
- React Native App设置&Android版发布
React Native系列 <逻辑性最强的React Native环境搭建与调试> <ReactNative开发工具有这一篇足矣> <解决React Native un ...
- React Native & app demos
React Native & app demos https://github.com/ReactNativeNews/React-Native-Apps https://github.com ...
- 利用 Create React Native App 快速创建 React Native 应用
本文介绍的 Create-React-Native-App 是非常 Awesome 的工具,而其背后的 Expo 整个平台也让笔者感觉非常的不错.笔者目前公司是采用 APICloud 进行移动应用开发 ...
- [译] Facebook:我们是如何构建第一个跨平台的 React Native APP
英文原文(需FQ):https://code.facebook.com/posts/1189117404435352/ 早些时候,我们介绍过iOS版的React Native. React Nativ ...
- 我的第一个React Native App
我用了三天时间实现了一个相对比较完整的React Native 新闻发布类型的示例.应用做得很简单,但大多React Native的组件都有用到,今天做一个分享(由于我电脑是Windows系统,所以只 ...
- 用CodePush在React Native App中做热更新
最近在学React Native,学到了CodePush热更新. 老师讲了两种实现的方法,现将其记录一下. 相比较原生开发,使用React Native开发App不仅能节约开发成本,还能做原生开发不能 ...
- 利用 Create React Native App 创建 React Native 应用
$ npm i -g create-react-native-app $ create-react-native-app my-project $ cd my-project $ npm start
- 什么是 Native、Web App、Hybrid、React Native 和 Weex?(转载)
什么是 Native.Web App.Hybrid.React Native 和 Weex? 来源:zwwill_木羽 segmentfault.com/a/1190000011154120 一句 ...
- Native、Web App、Hybrid、React Native(简称RN)、Weex 间的异同点。
App常用开发模式简介 此处App为应用application,并非我们通常讲的手机App. 常用的几种APP开发模式-脑图 Native App 传统的原生App开发模式,有iOS和aOS两大系统, ...
随机推荐
- Drupal创建Omega 4.x 子主题layout笔记
Adding a new region to your Omega 4.0 subtheme (Drupal) Drupal: Creating a custom layout with Omega ...
- 阿里云“网红"运维工程师白金:做一个平凡的圆梦人
他是阿里云的一位 P8 运维专家,却很有野心得给自己取花名“辟拾(P10)”:他没有华丽的履历,仅凭着 26 年的热爱与坚持,一步一个脚印踏出了属于自己的技术逆袭之路:他爱好清奇,练就了能在 20 秒 ...
- Django项目:CMDB(服务器硬件资产自动采集系统)--04--04CMDB本地(Agent)模式客户端唯一标识(ID)
# client.py # ————————01CMDB获取服务器基本信息———————— from src import plugins #__init__.py from lib.serializ ...
- 提示框插件layer的使用讲解
官方网站:http://layer.layui.com/ 在页面中引入: <script src="js/layer-v3.0.3/layer/layer.js">&l ...
- switch的练习
<!doctype html> <html> <head> <meta charset="utf-8"> <title> ...
- Activiti实战04_简单流程
在Activiti实战03_Hello World中我们介绍了一个中间没有任何任务的流程,实现了流程的部署与查阅,而在本章中,将会为流程添加任务节点,是流程能够像个流程,变得更加丰满起来. 在上一节的 ...
- CString转const char
CString转换成const char 需要考虑一个因素: 你使用是否为unicode 不使用unicode: CString Cstr("aaaaaaa"); co ...
- hbase 聚合操作
hbase本身提供了 聚合方法可以服务端聚合操作 hbase中的CoprocessorProtocol机制. CoprocessorProtocol的原理比较简单,近似于一个mapreduce框架.由 ...
- StopWatch 监控Java代码运行时间和分析性能
背景 有时我们在做开发的时候需要记录每个任务执行时间,或者记录一段代码执行时间,最简单的方法就是打印当前时间与执行完时间的差值,然后这样如果执行大量测试的话就很麻烦,并且不直观,如果想对执行的时间做进 ...
- UVA11613 Acme Corproation
UVA11613 Acme Corproation 生产销售计划 题目大意 A公司生产一种元素,给出该元素在未来M个月中每个月的单位售价,最大生产量,生产成本,最大销售量和最大存储时间,和每月存储代价 ...