14: element ui 使用
1.1 element ui 基本使用
参考网址: http://element.eleme.io/#/zh-CN/component/button
1、初始一个vue项目并安装element ui
vue init webpack-simple element-demo
cd element-demo
npm install
cnpm install element-ui -S
npm run dev
2、编辑main.js引入element ui (引入后就可以使用element中的样式了)
import Vue from 'vue'

import ElementUI from 'element-ui';                      // 引入element-ui

import 'element-ui/lib/theme-chalk/index.css';           // element-ui的css样式要单独引入

import App from './App.vue'

Vue.use(ElementUI);   // 这种方式引入了ElementUI中所有的组件

new Vue({

  el: '#app',

  render: h => h(App)

})
main.js
3、在webpack.config.js中添加loader
var path = require('path')

var webpack = require('webpack')

module.exports = {

  entry: './src/main.js',

  output: {

    path: path.resolve(__dirname, './dist'),

    publicPath: '/dist/',

    filename: 'build.js'

  },

  module: {

    rules: [

      {

        test: /\.css$/,

        use: [

          'vue-style-loader',

          'css-loader'

        ],

      },      {

        test: /\.vue$/,

        loader: 'vue-loader',

        options: {

          loaders: {

          }

          // other vue-loader options go here

        }

      },

      {

        test: /\.js$/,

        loader: 'babel-loader',

        exclude: /node_modules/

      },

      {

        test: /\.(png|jpg|gif|svg)$/,

        loader: 'file-loader',

        options: {

          name: '[name].[ext]?[hash]'

        }

      },

      // 添加加载字体字库的loader

      {

        test: /\.(eot|svg|ttf|woff|woff2)(\?\S*)?$/,

        loader: 'file-loader'

      },

    ]

  },

  resolve: {

    alias: {

      'vue$': 'vue/dist/vue.esm.js'

    },

    extensions: ['*', '.js', '.vue', '.json']

  },

  devServer: {

    historyApiFallback: true,

    noInfo: true,

    overlay: true

  },

  performance: {

    hints: false

  },

  devtool: '#eval-source-map'

}

if (process.env.NODE_ENV === 'production') {

  module.exports.devtool = '#source-map'

  // http://vue-loader.vuejs.org/en/workflow/production.html

  module.exports.plugins = (module.exports.plugins || []).concat([

    new webpack.DefinePlugin({

      'process.env': {

        NODE_ENV: '"production"'

      }

    }),

    new webpack.optimize.UglifyJsPlugin({

      sourceMap: true,

      compress: {

        warnings: false

      }

    }),

    new webpack.LoaderOptionsPlugin({

      minimize: true

    })

  ])

}
webpack.config.js
4、在App.vue中使用element-ui
<template>
<div id="app">
{{msg}} <!--图标-->
<div>
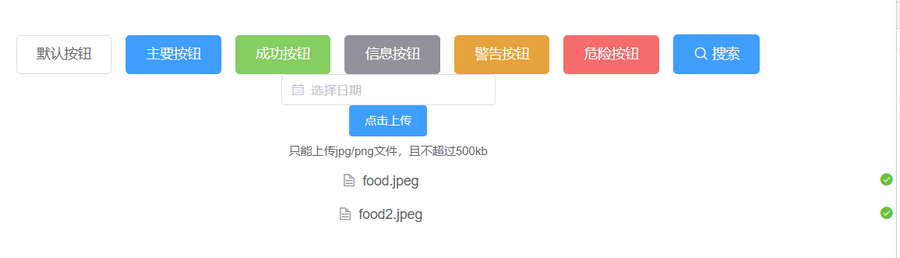
<el-row>
<el-button>默认按钮</el-button>
<el-button type="primary">主要按钮</el-button>
<el-button type="success">成功按钮</el-button>
<el-button type="info">信息按钮</el-button>
<el-button type="warning">警告按钮</el-button>
<el-button type="danger">危险按钮</el-button>
<el-button type="primary" icon="el-icon-search">搜索</el-button>
</el-row>
</div> <!-- 日期选择器 -->
<DatePicker></DatePicker>
<!-- 文件上传 -->
<Upload></Upload>
</div>
</template> <script>
// 导入组件
import DatePicker from './components/DatePicker.vue'
import Upload from './components/Upload.vue' export default {
name: 'app',
data () {
return {
msg: '测试msg'
}
},
components:{
DatePicker,
Upload
}
}
</script> <style>
#app {
font-family: 'Avenir', Helvetica, Arial, sans-serif;
-webkit-font-smoothing: antialiased;
-moz-osx-font-smoothing: grayscale;
text-align: center;
color: #2c3e50;
margin-top: 60px;
} h1, h2 {
font-weight: normal;
} ul {
list-style-type: none;
padding: 0;
} li {
display: inline-block;
margin: 0 10px;
} a {
color: #42b983;
}
</style>
App.vue
5、在src中创建 components/DatePicker.vue 和 components/Upload.vue 两个组件
<template>

    <el-date-picker

      v-model="value"

      type="date"

      placeholder="选择日期"

      size="small"

      :picker-options="options">

    </el-date-picker>

</template>

<script>

    export default {

        data(){

            return {

                value:'',

                options:{

                    disabledDate(time) {

                        return time.getTime() < Date.now() - 8.64e7;

                    },

                    firstDayOfWeek:1

                }

            }

        }

    }

</script>
DatePicker.vue
<template>

    <el-upload

      class="upload-demo"

      action="https://jsonplaceholder.typicode.com/posts/"

      :on-preview="handlePreview"

      :on-remove="handleRemove"

      :file-list="fileList">

      <el-button size="small" type="primary">点击上传</el-button>

      <div slot="tip" class="el-upload__tip">只能上传jpg/png文件,且不超过500kb</div>

    </el-upload>

</template>

<script>

    export default {

        data(){

            return {

                fileList: [

                        {

                            name: 'food.jpeg',

                            url: 'https://fuss10.elemecdn.com/3/63/4e7f3a15429bfda99bce42a18cdd1jpeg.jpeg?imageMogr2/thumbnail/360x360/format/webp/quality/100'

                        },

                        {

                            name: 'food2.jpeg',

                            url: 'https://fuss10.elemecdn.com/3/63/4e7f3a15429bfda99bce42a18cdd1jpeg.jpeg?imageMogr2/thumbnail/360x360/format/webp/quality/100'

                        }

                ]

            }

        },

         methods: {

          handleRemove(file, fileList) {

            console.log(file, fileList);

          },

          handlePreview(file) {

            console.log(file);

          }

        }

    }

</script>
Upload.vue
14: element ui 使用的更多相关文章
- vue+element ui项目总结点(一)select、Cascader级联选择器、encodeURI、decodeURI转码解码、mockjs用法、路由懒加载三种方式
不多说上代码: <template> <div class="hello"> <h1>{{ msg }}</h1> <p> ...
- 【Element UI】使用问题记录
[Element UI]使用问题记录 转载:https://www.cnblogs.com/yangchongxing/p/10750994.html 下载地址: https://unpkg.com/ ...
- vue-cli按需引入Element UI组件
一.环境 使用vue-cli搭建的环境 二.安装 babel-plugin-component npm install babel-plugin-component -D 三.修改.babelrc文件 ...
- 使用element ui 日期选择器获取值后的格式问题
一般情况下,我们需要给后台的时间格式是: "yyyy-MM-dd" 但是使用Element ui日期选择器获取的值是这样的: Fri Sep :: GMT+ (中国标准时间) 在官 ...
- element ui 1.4 升级到 2.0.11
公司的框架 选取的是 花裤衩大神开源的 基于 element ui + Vue 的后台管理项目, 项目源码就不公开了,记录 分享下 步骤 1. 卸载 element ui 1.4的依赖包 2. 卸载完 ...
- [坑况]饿了么你是这样的前端——vue+element ui 【this dependency was not found:'element-ui/lib/theme-chalk/index.css'】
element ui 坑况:今日pull代码,潇洒npm run dev ,被告知:this dependency was not found:'element-ui/lib/theme-chalk/ ...
- Vue + Element UI项目初始化
1.安装相关组件 1.1安装Node 检查本地是否安装node node -v 如果没有安装,从Node官网下载 1.2安装npm npm -v 如果没有安装:使用该指令安装: npm install ...
- Element UI——本地引入iconfont不显示
前言 前面因为本地引入Element UI导致了iconfont不显示,所以只好再去Element UI官网去扒下iconfot 步骤 进入官网 组件 | Element UI F12进入控制台,找到 ...
- Html | Vue | Element UI——引入使用
前言 做个项目,需要一个效果刚好Element UI有,就想配合Vue和Element UI,放在tp5.1下使用,但是引入在线的地址各种报错,本地引入就完美的解决了问题! 代码 __STATIC_J ...
随机推荐
- git 冲突解决办法
1. Pull is not possible because you have unmerged files. 症状:pull的时候 $ git pull Pull is not possible ...
- 利用Tensorflow实现逻辑回归模型
官方mnist代码: #下载Mnist数据集 import tensorflow.examples.tutorials.mnist.input_data mnist = input_data.read ...
- java基础(二) -对象和类
Java 对象和类 Java作为一种面向对象语言.支持以下基本概念: 多态 继承 封装 抽象 类 对象 实例 方法 重载 对象:对象是类的一个实例(对象不是找个女朋友),有状态和行为.例如,一条狗是一 ...
- BCB6.0 清除TPanel面板上的所有控件
方法一: panel->ComponentCount属性获得panel所拥有的控件个数 panel->Components[i]属性获得某一个控件 delete panel->Com ...
- HDU 1757 A Simple Math Problem(矩阵)
A Simple Math Problem [题目链接]A Simple Math Problem [题目类型]矩阵快速幂 &题解: 这是一个模板题,也算是入门了吧. 推荐一个博客:点这里 跟 ...
- 原型链(_proto_) 与原型(prototype) 有啥关系?
prototype对象里面方法及属性是共享的...... 1.JavaScript 中每一个对象都拥有原型链(__proto__)指向其构造函数的原型( prototype),object._prot ...
- LeetCode13.罗马数字转整数
罗马数字包含以下七种字符: I, V, X, L,C,D 和 M. 字符 数值 I 1 V 5 X 10 L 50 C 100 D 500 M 1000 例如, 罗马数字 2 写做 II ,即为两个并 ...
- html常用文本标签(转)
内容一<br />内容二 让文本强制换行 内容一内容二 <p>段落一</p><p>段落二</p> 段落标签 段落一 段落二 <b> ...
- 混合型log,info按大小分,error按日期
1.配置文件 <?xml version="1.0" encoding="utf-8"?> <configuration> <!- ...
- 福布斯最佳雇主榜:谷歌母公司Alphabet再登榜首 微软次之
http://www.sohu.com/a/259018538_114774 站长之家(ChinaZ.com) 10月12日 消息:在福布斯发布的最新全球最佳雇主榜单中,谷歌母公司Alphabet以满 ...