ubuntu下nginx+php5的部署
ubuntu下nginx+php5环境的部署和centos系统下的部署稍有不同,废话不多说,以下为操作记录:
1)nginx安装
root@ubuntutest01-KVM:~# sudo apt-get update && sudo apt-get upgrade
root@ubuntutest01-KVM:~# sudo apt-get install libpcre3 libpcre3-dev zlib1g-dev libssl-dev build-essential openssl libssl0.9.8 libssl-dev
root@ubuntutest01-KVM:~# wget http://nginx.org/download/nginx-1.8.0.tar.gz
root@ubuntutest01-KVM:~# tar -zxvf nginx-1.8.0.tar.gz
root@ubuntutest01-KVM:~# cd nginx-1.8.0
root@ubuntutest01-KVM:~# ./configure --prefix=/usr/local/nginx --user=nginx --group=nginx --with-http_ssl_module --with-http_flv_module --with-http_stub_status_module --with-http_gzip_static_module --with-pcre
root@ubuntutest01-KVM:~# make && make install
2)php5的安装
add-apt-repository 命令是 apt 源的添加,ppa 就是软件对应的源,在官网上可以找到
root@ubuntutest01-KVM:~# sudo add-apt-repository ppa:ondrej/php5-5.6
如果上面命令执行后报错和没有发现命令则执行
root@ubuntutest01-KVM:~# sudo apt-get install Python-software-properties
root@ubuntutest01-KVM:~# sudo apt-get update
root@ubuntutest01-KVM:~# sudo apt-get install php
root@ubuntutest01-KVM:~# php5 -v
安装好php后,在nginx里添加对接php的配置后,访问.php文件会报错502!
这是因为nginx中访问.php文件的请求都交给php-fpm程序处理的,php-fpm监听9000端口
所以还有启动php-fpm程序。
安装php-fpm
root@ubuntutest01-KVM:~# apt-get install php5-fpm php5-gd php5-cli php5-curl php5-mcrypt php5-mysql php5-readline
启动php-fpm
root@ubuntutest01-KVM:~# service php5-fpm start
root@ubuntutest01-KVM:~# ps -ef|grep php5-fpm
root@ubuntutest01-KVM:~# lsof -i:9000
但是发现php5-fpm启动后,9000端口却没有起来!这是为什么?
这是因为php-fpm有两种监听方式:一种是.sock文件方式,另一种是9000端口方式
修改办法:
root@ubuntutest01-KVM:~# vim /etc/php5/fpm/pool.d/www.conf
.....
;listen = /var/run/php5-fpm.sock //注释这行,这是默认的监听方式
listen = 9000 //改为监听9000端口方式
重启php-fpm
root@ubuntutest01-KVM:~# service php5-fpm restart
root@ubuntutest01-KVM:~# lsof -i:9000 //发现9000端口已经起来了
3)nginx+php配置
root@ubuntutest01-KVM:~# vim /usr/local/nginx/conf/nginx.conf //将nginx启动用户改成www-data,确保这个用户存在,不存在就手动创建,保证nginx和php启动用户一致
user  www-data;

worker_processes  8;

#error_log  logs/error.log;

#error_log  logs/error.log  notice;

#error_log  logs/error.log  info;

pid        logs/nginx.pid;

events {

    worker_connections  65535;

}

http {

    include       mime.types;

    default_type  application/octet-stream;

    charset utf-8;

    log_format  main  '$http_x_forwarded_for $remote_addr $remote_user [$time_local] "$request" '

                      '$status $body_bytes_sent "$http_referer" '

                      '"$http_user_agent" "$http_cookie" $host $request_time';

    sendfile       on;

    tcp_nopush     on;

    tcp_nodelay    on;

    keepalive_timeout  65;

    fastcgi_connect_timeout 3000;

    fastcgi_send_timeout 3000;

    fastcgi_read_timeout 3000;

    fastcgi_buffer_size 256k;

    fastcgi_buffers 8 256k;

    fastcgi_busy_buffers_size 256k;

    fastcgi_temp_file_write_size 256k;

    fastcgi_intercept_errors on;

    client_header_timeout 600s;

    client_body_timeout 600s;

    client_max_body_size 100m;

    client_body_buffer_size 256k;

    gzip  on;

    gzip_min_length  1k;

    gzip_buffers     4 16k;

    gzip_http_version 1.1;

    gzip_comp_level 9;

    gzip_types       text/plain application/x-javascript text/css application/xml text/javascript application/x-httpd-php;

    gzip_vary on;

    include vhosts/*.conf;

}
root@ubuntutest01-KVM:~# vim /usr/local/nginx/conf/vhosts/vote.com.conf
server {

    listen 8080;

    server_name www.wangshibo.com;

    access_log  /usr/local/nginx/logs/access.log main;

    error_log  /usr/local/nginx/logs/error.log;

    location / {

        root /home/www/vote;

        try_files $uri $uri/ @router;

        index index.html index.php index.htm;

        }

    location /nginx_status {

        stub_status on;

        access_log off;

        }

    error_page   500 502 503 504  /50x.html;

    location = /50x.html {

        root   html;

        }

    location @router {

       rewrite ^.*$ /index.php last;

    }

    location ~ \.php$ {

        root          /home/www/vote;

        fastcgi_pass   127.0.0.1:9000;

        fastcgi_index  index.php;

        fastcgi_param  SCRIPT_FILENAME  $document_root$fastcgi_script_name;         //这一行和下面一行要加上,不然访问php文件可能出现空白!

        fastcgi_param  PATH_INFO  $fastcgi_script_name;

        include        fastcgi_params;

    }

    location ~ ^/(status|ping)$ {

        include fastcgi_params;

        fastcgi_pass 127.0.0.1:9000;

        fastcgi_param SCRIPT_FILENAME $fastcgi_script_name;

        }

}
测试文件(html文件和php文件)
root@ubuntutest01-KVM:~# vim /home/www/vote/test.html
sdfsadf
12313123
root@ubuntutest01-KVM:~# vim /home/www/vote/test.php
<?php              //这一行不能空格,否则访问会有问题

phpinfo();

?>
修改php-fpm文件(确保/etc/php5/fpm/php-fpm.conf文件中打开了include=/etc/php5/fpm/pool.d/*.conf)
root@ubuntutest01-KVM:~# vim /etc/php5/fpm/pool.d/www.conf
....
user = www-data
group = www-data
....
listen.owner = www-data
listen.group = www-data
listen.mode = 0660
重启nginx和php-rpm
root@ubuntutest01-KVM:~# /usr/local/nginx/sbin/nginx -s reload
root@ubuntutest01-KVM:~# /etc/init.d/php5-fpm restart
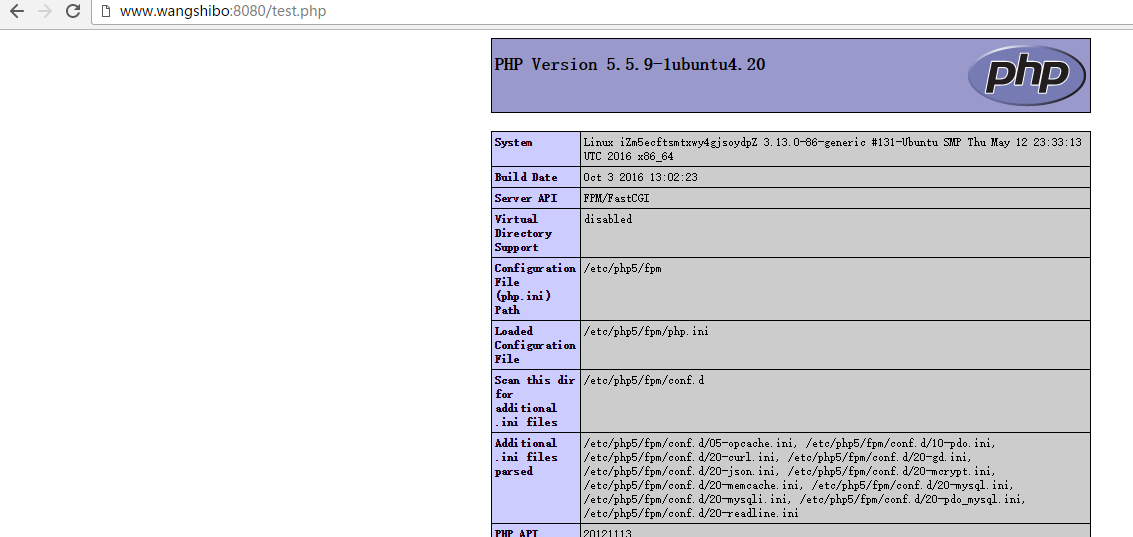
最后,验证访问是否正常:

ubuntu下nginx+php5的部署的更多相关文章
- Ubuntu下Nginx启动、停止等常用命令
本文详细介绍Ubuntu下Nginx启动.停止等常用命令.在开发过程中,我们会经常的修改Nginx的配置文件,每次修改配置文件都可以先测试下本次修改的配置文件是否正确,可以利用以下命令: servic ...
- Ubuntu下Zabbix服务器监控工具部署
Ubuntu下Zabbix服务器监控工具部署 一 安装安装Apache.Mysql.Php.zabbix sudo apt-get update sudo apt-get install apache ...
- Ubuntu下nginx+uwsgi+flask的执行环境搭建
选择web framwork是个非常艰难的事情, 主要分为轻量级和重量级框架. 因为没有搭建站点这样的须要, 所以回避SSH, Django这样的框架, 而选择一个轻量级框架. 自己也比較青睐pyth ...
- linux下nginx负载均衡部署
nginx负载均衡部署 Nginx("engine x") 是一个高性能的 HTTP 和 反向代理 server,也是一个 IMAP/POP3/SMTP 代理server. Ngi ...
- ubuntu 下 Nginx相关设置
ubuntu安装Nginx之后的文件结构大致为: 所有的配置文件都在/etc/nginx下,并且每个虚拟主机已经安排在了/etc/nginx/sites-available下 启动程序文件在/usr/ ...
- 【转】windows下nginx+mono+fastCGI部署asp.net网站
原文链接:http://www.cnblogs.com/amityat/archive/2011/08/23/2150153.html 1,什么是nginx 简介Nginx ("engine ...
- Ubuntu下Nginx安装
1.1 安装Nginx $sudo apt-get install nginx Ubuntu安装之后的文件结构大致为: 所有的配置文件都在/etc/nginx下,并且每个虚拟主机已经安排在了/etc/ ...
- ubuntu下nginx+PHP-FPM安装配置
安装nginx apt-get install nginx 配置nginx 位置: /etc/nginx/nginx.conf ,其中包含了 include /etc/nginx/conf.d/*. ...
- ubuntu下nginx的启停等常用命令
开发过程中,我们会经常的修改nginx的配置文件,每次修改配置文件都可以先测试下本次修改的配置文件是否正确,可以利用以下命令: ? 1 service nginx -t -c /alidata/ser ...
随机推荐
- 解决Dialog 消失,输入法不消失的问题
前言:今天遇到一个奇怪的问题,Activity 里面弹出一个 dialog , 这个dialog里面有EditText . 问题:当 dialog 里面的输入法出现的时候,此时让diolog 消失,输 ...
- iOS定时器、延迟执行
1.通用方式(并不是实时调用并且会卡顿): // 一般用于更新一些非界面上的数据 [NSTimer scheduledTimerWithTimeInterval:时间间隔 target:self se ...
- 【读书笔记】iOS网络-使用Bonjour实现自组织网络
Bonjour就是这样一种技术:设备可以通过它轻松探测并连接到相同网络中的其他设备,整个过程只需要很少的用户参与或是根本就不需要用户参与.该框架提供了众多适合于移动的使用场景,如基于网络的游戏,设备间 ...
- 【Android】不依赖焦点和选中的TextView跑马灯【2】
前言 之前有写一篇TextView跑马灯的效果,后来实际项目中有发现新的问题,比如还是无法自动跑,文本超过了显示区域就截取的问题,今天换了一种思路来实现,更简单更好用. 声明 欢迎转载,但请保留文章原 ...
- 我的android学习经历9
给android的activity添加背景图片 1.你可以在网上下载android的图片,也可以制作自己的图片,图片的后缀为.png,也就是png格式的图片(注意图片的大小要适合你的手机屏幕或者AVD ...
- 基于ruby的watir自动化测试 笔记二
基于ruby的watir自动化测试 笔记一的补充版,新增加了些特殊的控件捕获方法.还在更新中.... attribute_value 获取当前控件的属性 Value = ie.link(:id=> ...
- go的环境变量设置
GOROOT go的安装路劲 如:D:\Program Files\Go GOPATH go的工作路径 GOPATH可以设置多个.存放包文件.比如你引入 "xxx"包.那么go会去 ...
- Git 的 .gitignore 配置
.gitignore 配置文件用于配置不需要加入版本管理的文件,配置好该文件可以为我们的版本管理带来很大的便利,以下是个人对于配置 .gitignore 的一些心得. 1.配置语法: 以斜杠“/”开头 ...
- Google Nexus5在linux下刷原生安卓 android6.0
之前将Nexus5刷成了MIUI系统,现在想体验一下安卓6.0,网上都是windows的教程,但如何在linux下刷机呢? 首先准备环境和工具: 1. 我的linux系统是lubuntu 15.10 ...
- SQL Server(二)——语句
表的创建: 1.创建列(字段):列名+类型 2.设置主键列(primary key):能够唯一标识一条数据 3.设置唯一(unique):内容不能重复 4.外键关系:一张表(从表)其中的某列引用自另外 ...