day 58 bootstrap -part1
我们的bootstrap主要使用都是官网里面的内容,官网里面的都整理得很完备,有需要的时候就直接去里面找即可,
关于这个bootstrap,我所理解的就是,我们前面所学的那些,从html开始一直到后面的css,js,jQuery,都是为了我们可以更加深刻地理解我们的这个bootstrap插件的用法,因为在这个bootstrap里面所有的功能都是封装好的,你可以直接黏贴复制就可以直接拿过来用,很多的细节功能都分得特别的详细,比如我们需要一个表格,然后在bootstrap里面就可以找到对应的代码,直接拿过来粘贴复制即可,特别便利,然后最多就是根据自己的需要把一些参数或者数据之类的自己改一下即可,所以我们以后的使用都是用这样的高效的帮助开发的工具来实现效果的.
所以我们的基本功还是很重要的,如果你不把前面的基本内容学踏实的话,我们在使用bootstrap就可能会出现不明白人家都封装好的代码都是什么意思,根据自己的需要去更改参数之类的就无法操作.当然了,我们不能光图便利,然后把基本功都忘了也不行,虽然后来真的就是都是忘记了.
https://v3.bootcss.com/css/
这里是分地址
这里是css的所有样式地址,里面的东西都要有印象,然后我们以后在工作中需要使用那些的时候就可以知道在那里能能够快速地找到它
http://www.bootcss.com/
这里是总地址,
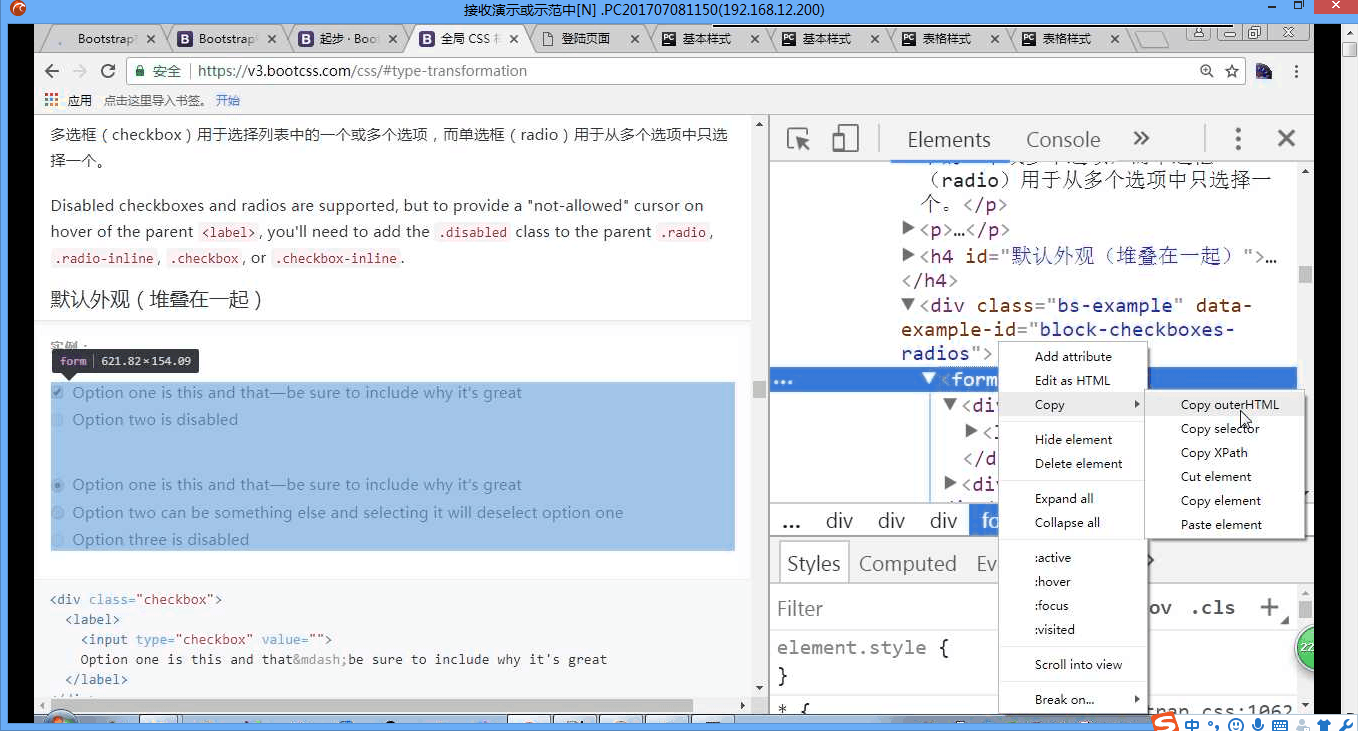
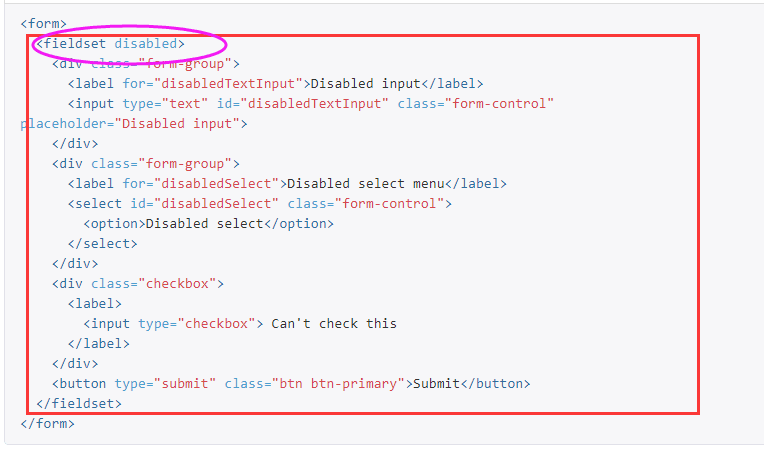
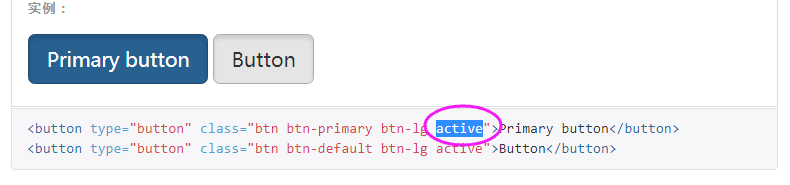
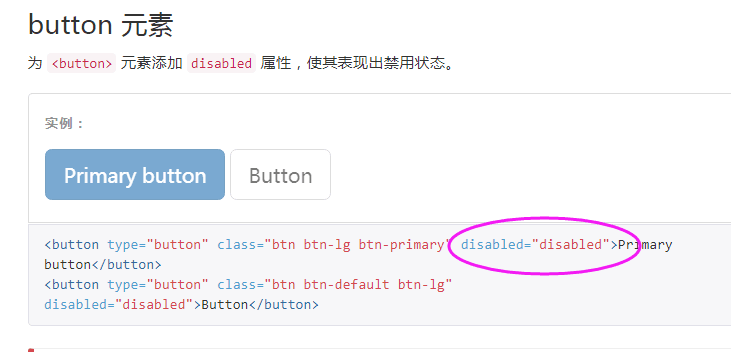
disabled,这里特意说明一下他的用法,因为在bootstrap里面没有明确解释,
它是一个属性,就像我们的id和class属性一样,都是属性的一种,它的属性是一个bool值,它的意思是禁用,我们这个选项设定出来是不可以使用的,不能够选择它,
定义和用法
disabled 属性是一个布尔属性。
disabled 属性规定某个选项应该被禁用。
被禁用的选项既不可用,也不可点击。
可以设置 disabled 属性,直到满足某些条件(比如选择一个复选框),才恢复用户对该选项的使用。然后,可以使用 JavaScript 来清除 disabled 属性,以使选项变为可用状态。
今日作品:
<!DOCTYPE html>
<html lang="en">
<head>
<meta charset="UTF-8">
<meta http-equiv="X-UA-Compatible" content="IE=edge">
<meta name="viewport" content="width=device-width, initial-scale=1">
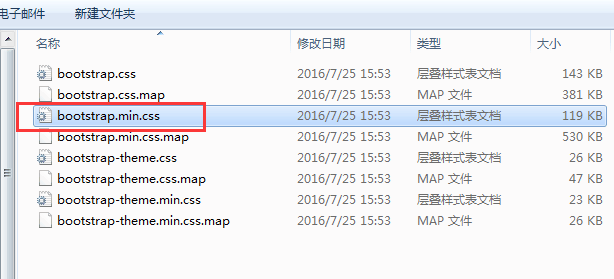
<link rel="stylesheet" href="bootstrap-3.3.7/css/bootstrap.min.css">
<!--<link rel="stylesheet" href="bootstrap-3.3.7/css/bootstrap.min.css">这一句如果不加上的话-->
<!--是没有无法显示出来样式的,你即便把别人的代码粘过来也一样不会显示出来-->
<title>bootstrap-hm</title>
<style>
body {
padding-top: 150px;
background-color: #eeeeee;
} </style>
</head>
<body>
<div>
<h2 class="container col-md-3 col-lg-offset-5">请登录</h2>
</div>
<div class="row">
<!--这里我们直接在class里面设置我本身就占4列,然互我再让出左边的4列,name就得到了居中的效果-->
<div class="container col-md-4 col-lg-offset-4" id="container">
<form class="form-horizontal">
<div class="form-group">
<label for="inputEmail3" class="col-sm-2 control-label">邮箱</label>
<div class="col-sm-9">
<input qimi="true" type="email" class="form-control " id="inputEmail3" placeholder="Email">
<span class="error"></span>
</div>
</div>
<div class="form-group">
<label for="inputPassword3" class="col-sm-2 control-label">密码</label>
<div class="col-sm-9">
<input qimi="true" type="password" class="form-control " id="inputPassword3" placeholder="Password">
<span class="error"></span>
</div>
</div>
<div class="form-group">
<div class="col-sm-offset-2 col-sm-10">
<div class="checkbox">
<label>
<input type="checkbox"> 记住我
</label>
</div>
</div>
</div>
<div class="form-group">
<div class="col-sm-offset-2 col-sm-10">
<!--<button type="submit" class="btn btn-default">Sign in</button>-->
<button type="submit" class="btn btn-primary col-sm-11" >登陆</button>
</div>
</div>
</form>
</div>
</div> <script src="jQuery-3.2.1.min.js"></script>
<script src="hm-js.js"></script>
<!--这里引用js文件失败,无法达到预期效果-->
</body>
</html>
老师作品:
<!DOCTYPE html>

<html lang="en">

<head>

    <meta charset="UTF-8">

    <meta http-equiv="X-UA-Compatible" content="IE=edge">

    <meta name="viewport" content="width=device-width, initial-scale=1">

    <title>登录作业讲解</title>

    <link rel="stylesheet" href="bootstrap-3.3.7/css/bootstrap.min.css">

    <style>

        body {

            background-color: #eeeeee;

        }

        #login-form {

            margin-top: 100px;

        }

    </style>

</head>

<body>

<div class="container">

    <div class="row">

        <form id="login-form" class="form-horizontal col-md-4 col-md-offset-4">

            <h3 class="text-center">请登录</h3>

            <div class="form-group">

                <label for="inputEmail3" class="col-sm-2 control-label">邮箱</label>

                <div class="col-sm-10">

                    <input type="email" class="form-control" id="inputEmail3" placeholder="Email">

                </div>

            </div>

            <div class="form-group">

                <label for="inputPassword3" class="col-sm-2 control-label">密码</label>

                <div class="col-sm-10">

                    <input type="password" class="form-control" id="inputPassword3" placeholder="Password">

                </div>

            </div>

            <div class="form-group">

                <div class="col-sm-offset-2 col-sm-10">

                    <div class="checkbox">

                        <label>

                            <input type="checkbox">记住我

                        </label>

                    </div>

                </div>

            </div>

            <div class="form-group">

                <div class="col-sm-offset-2 col-sm-10">

                    <button type="submit" class="btn btn-primary btn-block">登录</button>

                </div>

            </div>

        </form>

    </div>

</div>

<script src="jquery-3.2.1.min.js"></script>

</body>

</html>
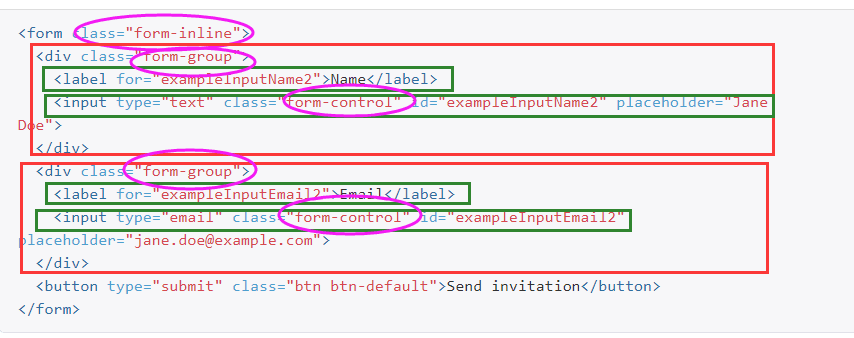
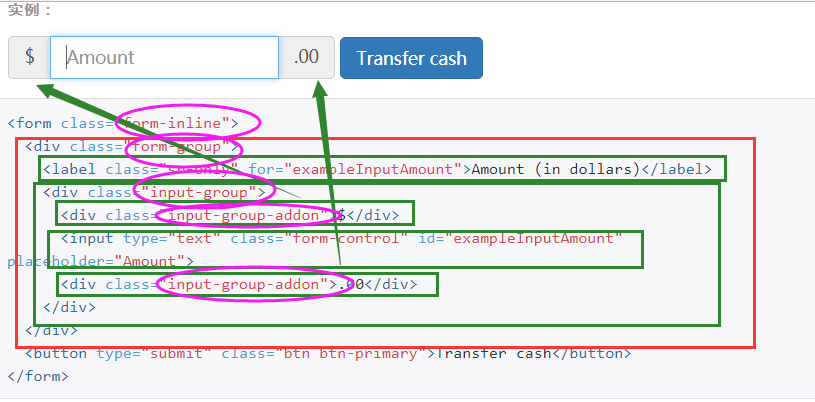
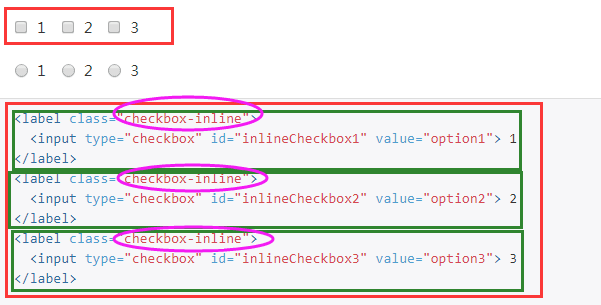
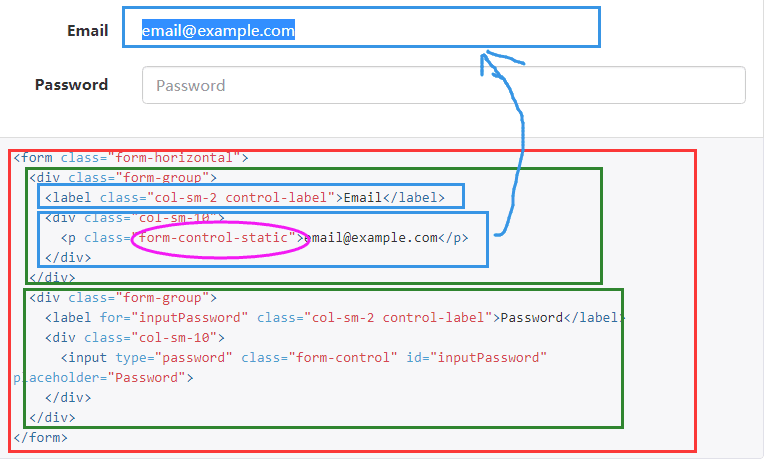
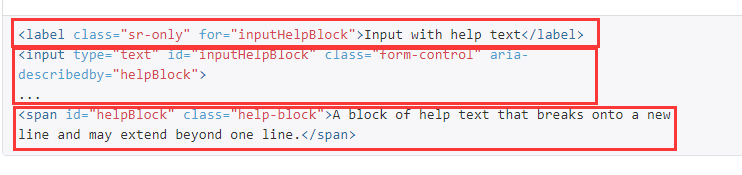
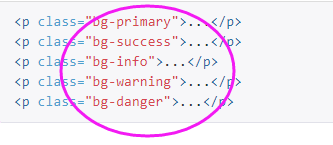
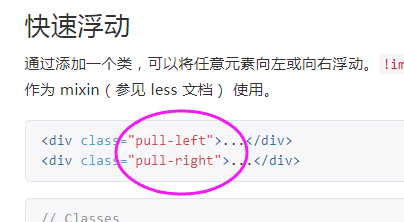
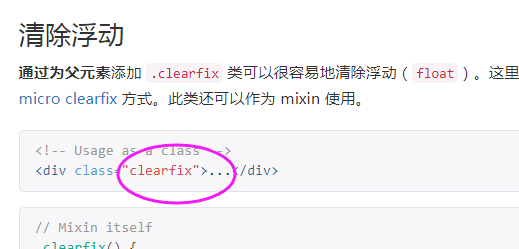
下面就是一些比较常用的方法的截图,有个比较深刻的印象:


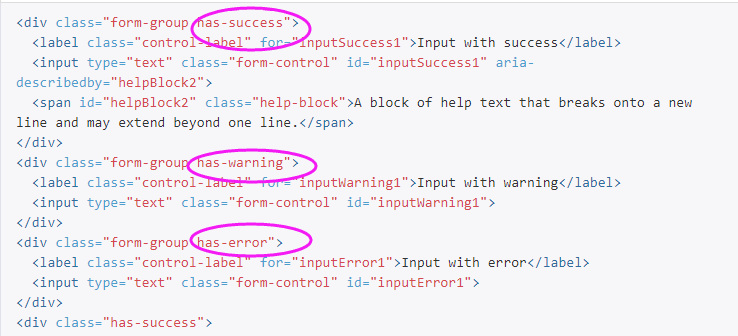
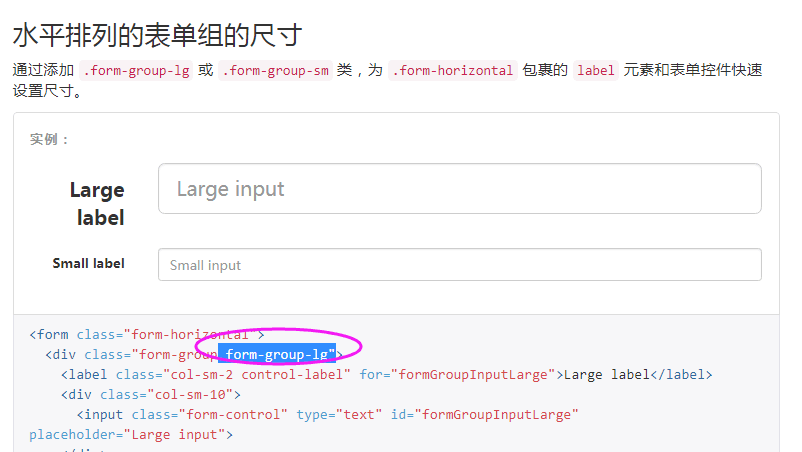


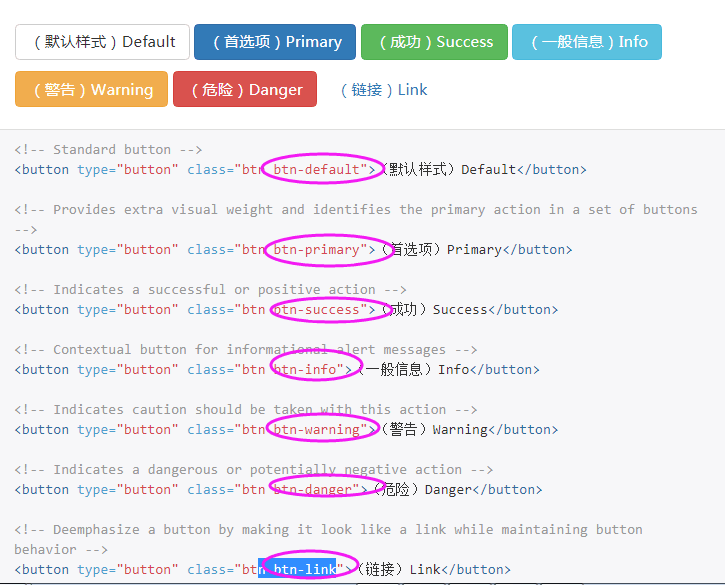
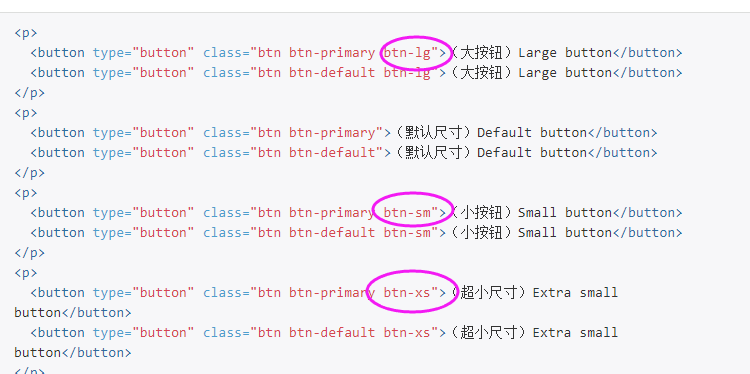


再粘一遍网址 https://v3.bootcss.com/css/
day 58 bootstrap -part1的更多相关文章
- day 58 bootstrap part2
bootstrap组件的官网, https://v3.bootcss.com/components/#page-header 在bootstrap里面出了HTML和css样式之外还有很多的辅助工具,我 ...
- CSS3 模拟笑脸
参考 http://www.html5tricks.com/demo/html5-css3-smile-face/index.html 它还做了舌头... 一开始我都是用JS实现的动画 当然了 眼 ...
- day 58 关于bootstrap
<!DOCTYPE html><html lang="en"><head> <meta charset="UTF-8" ...
- 14、响应式布局和BootStrap 全局CSS样式知识点总结-part1
1.什么是响应式布局 响应式布局是Ethan Marcotte在2010年5月份提出的一个概念,这个概念是为解决移动互联网浏览而诞生的. 简而言之,就是一个网站能够兼容多个终端——而不是为每个终端做一 ...
- Linux平台 Oracle 10gR2(10.2.0.5)RAC安装 Part1:准备工作
Linux平台 Oracle 10gR2(10.2.0.5)RAC安装 Part1:准备工作 环境:OEL 5.7 + Oracle 10.2.0.5 RAC 1.实施前准备工作 1.1 服务器安装操 ...
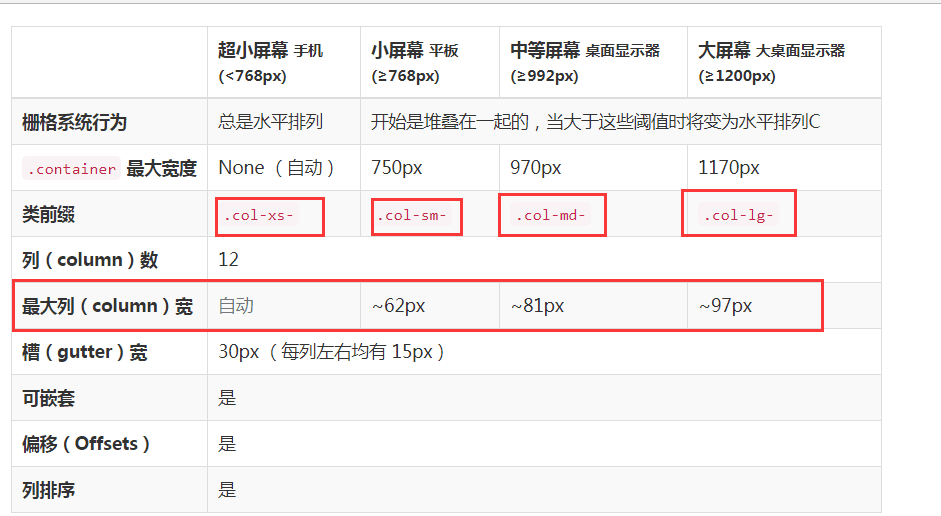
- 模拟Bootstrap响应式网格系统
Bootstrap响应式(适应于不同的终端设备).Bootstrap栅格系统是利用百分比把视口等分为12个,然后利用媒体查询,设置float属性使之并列显示 一.媒体查询 媒体查询包含一个可选的媒体类 ...
- 利用Bootstrap快速搭建个人响应式主页(附演示+源码)
1.前言 我们每个程序员都渴望搭建自己的技术博客平台与他人进行交流分享,但使用别人的博客模板没有创意.做网站后台的开发人员可能了解前端,可是自己写一个不错的前端还是很费事的.幸好我们有Bootstra ...
- Bootstrap Metronic 学习记录(二)菜单栏
1.简介 1) .环境配置 2) .提取页面 2).动态生成菜单(无限级别树) 2.系统环境配置 项目需要程序数据支撑,这里选择MVC5.0+EF6.0[SQLSERVER](不对MVC架构和SQ ...
- Ubuntu 14.04 编译安装 boost 1.58
简介 Boost is a set of libraries for the C++ programming language that provide support for tasks and s ...
随机推荐
- __dict__(字典的另一种用法)
class Foo(): def __init__(self): self.name=None self.age=19 self.addr='上海' @property def dict(self): ...
- Python-爬虫-租房Ziroom
目标站点需求分析 涉及的库 import requestsimport timeimport pymongofrom lxml import etreefrom requests.exceptions ...
- Swift DispatchQueue
延迟2s执行 DispatchQueue.main.asyncAfter(deadline: DispatchTime.now()+2)
- 【JS】中ajax的URL中包含中文,后台接收乱码
[问题]ajax提交get请求,url中参数包含中文,后台接收到显示乱码. [解决方案]前台: function getSiteInfoByName(siteName){ var res; $.aja ...
- Java的动手动脑(五)
日期:2018.11.1 星期四 博客期:021 Part1: 运行代码 class Grandparent { public Grandparent() { System.out.println(& ...
- python面试1-30题
1.一行代码实现1--100之和 利用sum()函数求和 2.如何在一个函数内部修改全局变量 利用global 修改全局变量 3.列出5个python标准库 os:提供了不少与操作系统相关联的函数 s ...
- 高并发编程基础Synchronized与Volatile
关键字Synchronized: 当使用Synchrnized (o) ,锁定 o 的时候,锁定的是 o 指向的堆内存中 new 出来的对象,而非 o 引用,当锁定 o 以后,一旦 o 指向了其他对象 ...
- 【sqli-labs】Less18~Less22
Less18: User-Agent注入,有错误回显 感叹一句,越来越难了.现在只能先看代码再分析怎么注入了..... 通过代码,发现username和password均做了校验.但是会有一个插入us ...
- 用ffmpeg把视频编码格式转为h.264
command: ffmpeg -i infile.mp4 -an -vcodec libx264 -crf 23 outfile.h264
- Python初探list
今天要说一个新概念--list,中文可以翻译成列表,是用来处理一组有序项目的数据结构.想象一下你的购物清单.待办工作.手机通讯录等等,它们都可以看作是一个列表.说它是新概念也不算确切,因为我们之前已经 ...