java实现,使用opencv合成全景图,前端使用krpano展示
这周花三天做了一demo,算上之前的,怎么也有五天,上一篇是opencv介绍,以及定义native方法,通过本地图片路径传参,底层调用Opencv图像库合成,有兴趣的可以看看,这篇重点在于krpano的全景图展示,话说刚才上传了22张片照片合成全景图,感觉有半个小时也没有合成完,我这电脑是有多垃圾
那我们代码走一走(都说不上代码是老流氓)

这是demo的目录结构
@Controller

public class PanoramaController {

     /**

         *    @Description:  文件上传以及全景合成

         *    @Date:  15:58  2018/7/6

         *    @Params:   * @param null

         */

    @RequestMapping("/upload")

    public ModelAndView login07(@RequestParam(value = "file", required = false)MultipartFile[] files,

                          @RequestParam(value = "title",defaultValue = "未命名") String title,HttpServletRequest request) {

        ModelAndView mv=new ModelAndView("success.html");

        MultipartFile tempMultipartFile;

        //基本路径

        StringBuffer sb=new StringBuffer();

        String baseURL="E:/demo";

        String tempStr = "/" + UUID.randomUUID().toString();

        for (int j = 0; j < files.length; j++) {

            tempMultipartFile = files[j];

            // 获得上传的文件名称-带有后缀

            String fileNameAndSuffixName = tempMultipartFile.getOriginalFilename();

            // 获取上传的文件名称

            //String fileName = fileNameAndSuffixName.substring(0, fileNameAndSuffixName.lastIndexOf("."));

            String urlPath;

            urlPath = Imgeupload.fileUpdata(tempMultipartFile, "E:/demo", "" + tempStr);

            System.out.println("=====" + urlPath);

            if (j==files.length-2){

                sb.append(baseURL+tempStr+"/"+urlPath);

                break;

            }else if (j<files.length-2){

                sb.append(baseURL+tempStr+"/"+urlPath+",");

            }else {

                System.out.println();

            }

        }

        //拼接URL

        System.out.println("拼接URL"+sb.toString());

        //调用native

        String result= OpenCVUtil.changeArrValue(sb.toString());

        if(!result.contains(",")){

            mv.setViewName("failure.html");

            return mv;

        }

        //System.out.println(result);

        //复制图片

        String basedirNew=UUID.randomUUID().toString()+","+title;

        String dirNew="D:\\tupian\\img\\"+basedirNew+"\\";

        try {

            copyFile(new File("D:/result.jpg"),new File(dirNew+title+".jpg"),dirNew);

        } catch (IOException e) {

            e.printStackTrace();

        }

        mv.addObject("imgUrl","/img/"+basedirNew+"/"+title+".jpg");

        mv.addObject("title",title);

        mv.addObject("fileName",basedirNew);

        return mv;

    }

    @RequestMapping("/index")

    public String login06() {

        return "upload.html";

    }

     /**

         *    @Description:  复制生成的图片到全景图静态区

         *    @Date:  9:45  2018/7/5

         *    @Params:   * @param null

         */

    public void copyFile(File fromFile, File toFile,String fromUrl) throws IOException {

        File file=new File(fromUrl);

        if (!file.exists()) {

            file.mkdir();

        }

        FileInputStream ins = new FileInputStream(fromFile);

        FileOutputStream out = new FileOutputStream(toFile);

        byte[] b = new byte[1024];

        int n=0;

        while((n=ins.read(b))!=-1){

            out.write(b, 0, n);

        }

        ins.close();

        out.close();

    }

}
这个主要是文件上传以及全景图合成调用native,生成result.jpg全景图,利用生成的全景图通过krpano工具,生成相应的文件放在tomcat对应webapp,启动tomcat即可访问,这是最开始使用krpano看效果的流程,当然java项目不可能手动复制粘贴文件吧,一切都是通过程序控制,所以不可避免java IO操作,这时遇到一个很大的坑,听我细细道来
当时想已经通过krpano生成的相应的文件复制到webapp这部分的操作通过io进行操作,后来才发现,用IO发现权限不够,我使用的是spring boot 项目,tomcat是嵌入式,所以复制到当前项目classes文件下,那换一条路既然生成的都是静态文件,那从当前的项目,引用绝对路径,从本地获取静态资源,呵呵,通过指定端口当用的项目,静态资源权限只限当前项目,从网上收集许多资料,最终使用
spring:

  resources:

    static-locations: //相当于,这块空间和static目录下,resource下,webjar下同级,
//而这块空间可以io进行操作
好了,这个问题解决了,那java代码如何将某个图片拖到本地某个应用XX.bat上看如下代码
public class CmdBat {

	/*public static void main(String[] args) {

		Room r = new Room();

		//项目的位置

		String dpath = "D:\\tupian\\vshow";

		//全景图的位置

		String file = "3";

		String[] fn1 = { "2",

				"3" };

		String[] fn2 = { "客厅", "卧室","大客厅" };

		String title = "哈哈哈哈哈哈哈哈";

		String music = "vshow/backgroundmusic/default.mp3";

		try {

			setKrpano(r,dpath, file, fn1, fn2, title,music);

		} catch (InterruptedException e) {

			e.printStackTrace();

			System.out.println("上传失败");

		}

	}*/

	     /**

	         *    @Description:

	         *    @Date:  10:15  2018/7/6

	         *    @Params:   * @param null

	         */

	public static void setKrpano(final Room r, final String dpath, final String file,

								 final String[] fn1, final String[] fn2, final String title, final String music)

			throws InterruptedException {

		//全景图存的位置

		final String temppath = "D:\\tupian\\img\\";

		String path = temppath+file;

		String ex = "krpanotools32.exe makepano -config=templates\\vtour-multires.config "

				+ path + "\\*.jpg";

		//执行

		Runtime runtime = Runtime.getRuntime();

		boolean b = true;

		Process p = null;

		try {

			//krpano  安装位置

			p = runtime.exec("cmd /c start D:\\Krpano\\krpano.1.19.pr16\\krpano-1.19-pr16\\" + ex);

		} catch (Exception e) {

			b = false;

		}

		if (b) {

			final InputStream is1 = p.getInputStream();

			final InputStream is2 = p.getErrorStream();

			new Thread() {

				public void run() {

					BufferedReader br1 = new BufferedReader(

							new InputStreamReader(is1));

					try {

						String line1 = null;

						while ((line1 = br1.readLine()) != null) {

							if (line1 != null) {

								System.out.println("=AA==========line1======"

										+ line1);

							}

						}

					} catch (IOException e) {

						e.printStackTrace();

					} finally {

						try {

							is1.close();

							// 执行文件复制

							File f = new File(dpath + "\\" + file);

							f.mkdirs();// 创建目录

							// 复制文件

							boolean b1 = copyFile(temppath + file

									+ "\\vtour\\tour.js", dpath + "\\" + file

									+ "\\tour.js");

							if (b1) {

								boolean b2 = copyFile(temppath + file

										+ "\\vtour\\tour.swf", dpath + "\\"

										+ file + "\\tour.swf");

								if (b2) {

									boolean b3 = copyFile(temppath

											+ file + "\\vtour\\tour.xml", dpath

											+ "\\" + file + "\\tour.xml");

									if (b3) {

										// 复制文件夹

										boolean b4 = copyFolder(

												temppath + file

														+ "\\vtour\\panos",

												dpath + "\\" + file + "\\panos");

										if (b4) {

											// 删除临时生成文件

											delFolder(temppath + file);

											// 修改krpano文件内容

											String xmlPath = dpath + "\\"

													+ file + "\\tour.xml";

											File xmlFile = new File(xmlPath);

											DocumentBuilderFactory dbFactory = DocumentBuilderFactory

													.newInstance();

											DocumentBuilder dBuilder;

											try {

												dBuilder = dbFactory

														.newDocumentBuilder();

												Document doc = dBuilder

														.parse(xmlFile);

												doc.getDocumentElement()

														.normalize();

												for (int i = 0; i < fn1.length; i++) {

													updateAttributeValue(doc,

															fn1[i], fn2[i]);

												}

												// update Element value

												updateElementValue(doc, title);

												// delete element

												deleteElement(doc);

												// add new element

												addElement(doc);

												updateAttributeColorValue(doc,

														"0x000000");

												addMusicElement(doc,music);

												// write the updated document to

												// file or console

												doc.getDocumentElement()

														.normalize();

												TransformerFactory transformerFactory = TransformerFactory

														.newInstance();

												Transformer transformer = transformerFactory

														.newTransformer();

												DOMSource source = new DOMSource(

														doc);

												StreamResult result = new StreamResult(

														new File(xmlPath));

												transformer.setOutputProperty(

														OutputKeys.INDENT,

														"yes");

												transformer.transform(source,

														result);

												//生成成功

												r.setMark("1");

											//	AdminService as = ContextUtil.getBean(AdminService.class, "adminService");

											//	as.updateRoom(r);

												/*System.out

														.println("XML file updated successfully");*/

											} catch (

													SAXException

													| ParserConfigurationException

													| IOException

													| TransformerException e1) {

												e1.printStackTrace();

												//生成失败

												r.setMark("2");

											//	AdminService as = ContextUtil.getBean(AdminService.class, "adminService");

											//	as.updateRoom(r);

											}

										}

									}

								}

							}

						} catch (IOException e) {

							e.printStackTrace();

						}

					}

				}

			}.start();

			new Thread() {

				public void run() {

					BufferedReader br2 = new BufferedReader(

							new InputStreamReader(is2));

					try {

						String line2 = null;

						while ((line2 = br2.readLine()) != null) {

							if (line2 != null) {

								System.out.println("=AA==========line2======"

										+ line2);

							}

						}

					} catch (IOException e) {

						e.printStackTrace();

					} finally {

						try {

							is2.close();

						} catch (IOException e) {

							e.printStackTrace();

						}

					}

				}

			}.start();

			p.waitFor();

			p.destroy();

		} else {

			System.out.println("上传失败");

		}

	}

	/**

	 * 复制单个文件

	 *

	 * @param oldPath

	 *            String 原文件路径 如:c:/fqf.txt

	 * @param newPath

	 *            String 复制后路径 如:f:/fqf.txt

	 * @return boolean

	 */

	public static boolean copyFile(String oldPath, String newPath) {

		try {

			int bytesum = 0;

			int byteread = 0;

			File oldfile = new File(oldPath);

			if (oldfile.exists()) { // 文件存在时

				InputStream inStream = new FileInputStream(oldPath); // 读入原文件

				FileOutputStream fs = new FileOutputStream(newPath);

				byte[] buffer = new byte[1444];

				int length;

				while ((byteread = inStream.read(buffer)) != -1) {

					bytesum += byteread; // 字节数 文件大小

					// System.out.println(bytesum);

					fs.write(buffer, 0, byteread);

				}

				inStream.close();

			}

		} catch (Exception e) {

			// System.out.println("复制单个文件操作出错");

			e.printStackTrace();

			return false;

		}

		return true;

	}

	/**

	 * 复制整个文件夹内容

	 *

	 * @param oldPath

	 *            String 原文件路径 如:c:/fqf

	 * @param newPath

	 *            String 复制后路径 如:f:/fqf/ff

	 * @return boolean

	 */

	public static boolean copyFolder(String oldPath, String newPath) {

		try {

			(new File(newPath)).mkdirs(); // 如果文件夹不存在 则建立新文件夹

			File a = new File(oldPath);

			String[] file = a.list();

			File temp = null;

			for (int i = 0; i < file.length; i++) {

				if (oldPath.endsWith(File.separator)) {

					temp = new File(oldPath + file[i]);

				} else {

					temp = new File(oldPath + File.separator + file[i]);

				}

				if (temp.isFile()) {

					FileInputStream input = new FileInputStream(temp);

					FileOutputStream output = new FileOutputStream(newPath

							+ "/" + (temp.getName()).toString());

					byte[] b = new byte[1024 * 5];

					int len;

					while ((len = input.read(b)) != -1) {

						output.write(b, 0, len);

					}

					output.flush();

					output.close();

					input.close();

				}

				if (temp.isDirectory()) {// 如果是子文件夹

					copyFolder(oldPath + "/" + file[i], newPath + "/" + file[i]);

				}

			}

		} catch (Exception e) {

			// System.out.println("复制整个文件夹内容操作出错");

			e.printStackTrace();

			return false;

		}

		return true;

	}

	// 删除文件夹

	public static void delFolder(String folderPath) {

		try {

			delAllFile(folderPath); // 删除完里面所有内容

			String filePath = folderPath;

			filePath = filePath.toString();

			File myFilePath = new File(filePath);

			myFilePath.delete(); // 删除空文件夹

		} catch (Exception e) {

			e.printStackTrace();

		}

	}

	public static boolean delAllFile(String path) {

		boolean flag = false;

		File file = new File(path);

		if (!file.exists()) {

			return flag;

		}

		if (!file.isDirectory()) {

			return flag;

		}

		String[] tempList = file.list();

		File temp = null;

		for (int i = 0; i < tempList.length; i++) {

			if (path.endsWith(File.separator)) {

				temp = new File(path + tempList[i]);

			} else {

				temp = new File(path + File.separator + tempList[i]);

			}

			if (temp.isFile()) {

				temp.delete();

			}

			if (temp.isDirectory()) {

				delAllFile(path + "/" + tempList[i]);// 先删除文件夹里面的文件

				delFolder(path + "/" + tempList[i]);// 再删除空文件夹

				flag = true;

			}

		}

		return flag;

	}

	private static void addElement(Document doc) {

		NodeList employees = doc.getElementsByTagName("krpano");

		Element emp = null;

		// loop for each employee

		for (int i = 0; i < employees.getLength(); i++) {

			emp = (Element) employees.item(i);

			Element vtourskin = doc.createElement("include");

			vtourskin.setAttribute("url", "../skin/vtourskin.xml");

			emp.appendChild(vtourskin);

			Element skinselect = doc.createElement("include");

			skinselect.setAttribute("url", "../skinselect.xml");

			emp.appendChild(skinselect);

		}

	}

	private static void addMusicElement(Document doc,String music) {

		NodeList employees = doc.getElementsByTagName("krpano");

		Element emp = null;

		// loop for each employee

		for (int i = 0; i < employees.getLength(); i++) {

			emp = (Element) employees.item(i);

			Element musicEl = doc.createElement("action");

			musicEl.setAttribute("name", "bgsnd_action");

			musicEl.setAttribute("autorun", "onstart");

			musicEl.appendChild(doc.createTextNode("playsound(bgsnd, '"+music+"', 0);"));

			emp.appendChild(musicEl);

		}

	}

	private static void deleteElement(Document doc) {

		NodeList employees = doc.getElementsByTagName("krpano");

		Element emp = null;

		// loop for each employee

		for (int i = 0; i < employees.getLength(); i++) {

			emp = (Element) employees.item(i);

			Node genderNode = emp.getElementsByTagName("include").item(0);

			emp.removeChild(genderNode);

		}

	}

	private static void updateElementValue(Document doc, String title) {

		NodeList employees = doc.getElementsByTagName("krpano");

		Element emp = null;

		// loop for each employee

		for (int i = 0; i < employees.getLength(); i++) {

			emp = (Element) employees.item(i);

			emp.setAttribute("title", title);

		}

	}

	private static void updateAttributeValue(Document doc, String oldname,

			String newname) {

		NodeList employees = doc.getElementsByTagName("scene");

		Element emp = null;

		// loop for each employee

		for (int i = 0; i < employees.getLength(); i++) {

			emp = (Element) employees.item(i);

			if (emp.getAttribute("title").equals(oldname)) {

				emp.setAttribute("title", newname);

				break;

			}

		}

	}

	private static void updateAttributeColorValue(Document doc, String newname) {

		NodeList employees = doc.getElementsByTagName("skin_settings");

		Element emp = null;

		// loop for each employee

		for (int i = 0; i < employees.getLength(); i++) {

			emp = (Element) employees.item(i);

			emp.setAttribute("design_bgcolor", newname);

			emp.setAttribute("design_bgalpha", "0.8");

		}

	}

}
去掉mian函数的注释,启动一下,看看执行结果,这段代码相当于手动拖动图片到.bat上,其中可以修改krpano下的templates下的vtour-multires.config文件
# basic settings

include basicsettings.config

panotype=sphere

# panotype=autodetect

hfov=360

makescenes=true
自动生成一种固定的全景图(柱型,球型...)
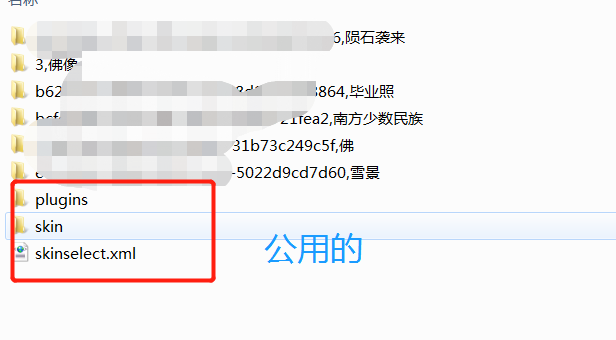
Ok,看一下生成文件中哪些是固定的公用的

@Controller

public class FileLibraryController {

         /**

             *    @Description:  从文件中获取全景图

             *    @Date:  17:13  2018/7/5

             *    @Params:   * @param null

             */

    @RequestMapping("/all")

    public ModelAndView list(Model model){

       // List<File> wjList = new ArrayList<File>();//新建一个文件集合

        List<PanoramaDO> list=new ArrayList<>();

        File file=new File(ConstantBank.PANORAMA_BANK_URL);

        ModelAndView mv=new ModelAndView("list.html");

        File[] fileList = file.listFiles();//将该目录下的所有文件放置在一个File类型的数组中

        for (int i = 0; i < fileList.length; i++) {

            if (fileList[i].isDirectory()) {//判断是否为文件

              //  wjList.add(fileList[i]);

                String directoryName=fileList[i].getName();

                if (!directoryName.equals(ConstantBank.EXCLUSIVE_SECOND_DIR_NAEM)&&!directoryName.equals(ConstantBank.EXCLUSIVE_FIRST_DIR_NAME)){

                    //分割文件名

                    String title =directoryName.substring(directoryName.indexOf(",")+1);

                    PanoramaDO panoramaDO=new PanoramaDO();

                    panoramaDO.setId(directoryName);

                    if (title==null||title.equals("")){

                        panoramaDO.setTitle("未命名");

                    }else {

                        panoramaDO.setTitle(title);

                    }

                    list.add(panoramaDO);

                    //System.out.println(directoryName);

                    //System.out.println(title);

                }

            }

        }

        System.out.println(list);

        mv.addObject("list",list);

        return mv;

    }

    @RequestMapping("/{id}/temp")

    public ModelAndView jump(@PathVariable("id") String vid){

        ModelAndView mv =new ModelAndView("vr.html");

        //mv.getView().

        mv.addObject("vid",vid);

        String title =vid.substring(vid.indexOf(",")+1);

        if (title==null||title.equals("")){

            mv.addObject("title","未命名");

        }else {

            mv.addObject("title",title);

        }

        System.out.println("===>"+vid);

       return mv;

    }

    @RequestMapping("/compound/{fileName}/{title}")

    public ModelAndView compound(@PathVariable("fileName") String fileName,

                            @PathVariable("title") String title){

        ModelAndView mv =new ModelAndView("redirect:/all");

        //mv.getView().

        Room r = new Room();

        //项目的位置

        String dpath = "D:\\tupian\\vshow";

        //全景图的文件名

        String file = fileName;

        String[] fn1 = { "2",

                "3" };

        String[] fn2 = { "客厅", "卧室","大客厅" };

        //String title = "哈哈哈哈哈哈哈哈";

        String music = "vshow/backgroundmusic/default.mp3";

        try {

            CmdBat.setKrpano(r,dpath, file, fn1, fn2, title,music);

        } catch (InterruptedException e) {

            e.printStackTrace();

            System.out.println("上传失败");

        }

        return mv;

    }

}
vr.html 公用的vr.html
<!--<%@ page language="java" import="java.util.*" pageEncoding="UTF-8" isELIgnored="false"%>

<%

String path = request.getContextPath();

String basePath = request.getScheme()+"://"+request.getServerName()+":"+request.getServerPort()+path+"/";

%>-->

<html lang="en" xmlns:th="http://www.thymeleaf.org">

<!DOCTYPE html>

<html>

<head>

<base href="/">

	<title th:text="${title}"> </title>

	<meta name="viewport" content="width=device-width, initial-scale=1.0, minimum-scale=1.0, maximum-scale=1.0" />

	<meta name="apple-mobile-web-app-capable" content="yes" />

	<meta name="apple-mobile-web-app-status-bar-style" content="black" />

	<meta http-equiv="Content-Type" content="text/html;charset=utf-8" />

	<meta http-equiv="x-ua-compatible" content="IE=edge" />

	<link rel="shortcut icon" href="images/favicon.png">

	<style>

		@-ms-viewport { width:device-width; }

		@media only screen and (min-device-width:800px) { html { overflow:hidden; } }

		html { height:100%; }

		body { height:100%; overflow:hidden; margin:0; padding:0; font-family:Arial, Helvetica, sans-serif; font-size:16px; color:#FFFFFF; background-color:#000000; }

	</style>

</head>

<body>

<div style="position: absolute;z-index: 1;margin-top: 10px;margin-left: 10px">

<a href="/all"><img src="img/logo.jpg" style="height: 50px"></a>

</div>

<script th:src="'/vshow/'+${vid }+'/tour.js'"></script>

<div id="pano" style="width:100%;height:100%;">

	<noscript><table style="width:100%;height:100%;"><tr style="vertical-align:middle;"><td><div style="text-align:center;">ERROR:<br/><br/>Javascript not activated<br/><br/></div></td></tr></table></noscript>

	<script>

        /*<![CDATA[*/

        var vid = "[[${vid}]]";

        embedpano({swf:"/vshow/"+vid+"/tour.swf", xml:"/vshow/"+vid+"/tour.xml", target:"pano", html5:"prefer", mobilescale:1.0, passQueryParameters:true});

     /*   ]]>*/

	</script>

</div>

</body>

</html>
upload.html 这是文件上传以及回显,下面的js等待加载过度
<!DOCTYPE html>

<html lang="en">

<head>

    <meta charset="UTF-8">

    <meta http-equiv="X-UA-Compatible" content="IE=edge,chrome=1">

    <meta name="viewport" content="width=device-width, initial-scale=1.0">

    <title></title>

    <link rel="stylesheet" type="text/css" href="css/normalize.css" />

    <link rel="stylesheet" type="text/css" href="css/default.css">

    <!--<link rel="stylesheet" href="css/bootstrap.min.css">-->

    <link rel="stylesheet" href="css/demo.css">

    <link rel="stylesheet" href="css/fakeLoader.css">

    <style>

        .uploadImgBtn {

            width: 100px;

            height: 100px;

            cursor: pointer;

            position: relative;

            background: url("img/plus.png") no-repeat;

            -webkit-background-size: cover;

            background-size: cover;

        }

        .uploadImgBtn .uploadImg {

            position: absolute;

            right: 0;

            top:0;

            width: 100%;

            height: 100%;

            opacity: 0;

            cursor: pointer;

        }

        //这是一个用做回显的盒子的样式

          .pic{

              width: 100px;

              height: 100px;

          }

        .pic img {

            width: 200px;

            height: 100px;

        }

    </style>

</head>

<body>

    <div class="fakeloader"></div>

<form action="/upload" method="post" enctype="multipart/form-data">

    <div class="uploadImgBtn" id="uploadImgBtn">

        <input class="uploadImg" type="file" name="file" multiple id="file">

    </div>

    <div>合成全景图片的名字<input type="text" name="title" id="title"></div>

    <input type="submit" onclick="haha()" value="上传">

</form>

    <script src="js/jquery-1.11.0.min.js"></script>

    <script src="js/fakeLoader.min.js"></script>

<script>

    function haha() {

        var html01='<h4>全景图正在合成请稍等...</h4>';

        $(".fakeloader").append($(html01));

        $(".fakeloader").fakeLoader({

            timeToHide:1200000,

            bgColor:"#d9d2e9",

            spinner:"spinner2"

        });

    }

    $(document).ready(function(){

        //为外面的盒子绑定一个点击事件

        $("#uploadImgBtn").click(function(){

            /*

            1、先获取input标签

            2、给input标签绑定change事件

            3、把图片回显

             */

//            1、先回去input标签

            var $input = $("#file");

            console.log($input)

//            2、给input标签绑定change事件

            $input.on("change" , function(){

                console.log(this)

                //补充说明:因为我们给input标签设置multiple属性,因此一次可以上传多个文件

                //获取选择图片的个数

                var files = this.files;

                var length = files.length;

                console.log("选择了"+length+"张图片");

                //3、回显

                $.each(files,function(key,value){

                    //每次都只会遍历一个图片数据

                    var div = document.createElement("div"),

                        img = document.createElement("img");

                    div.className = "pic";

                    var fr = new FileReader();

                    fr.onload = function(){

                        img.src=this.result;

                        div.appendChild(img);

                        document.body.appendChild(div);

                    }

                    fr.readAsDataURL(value);

                })

            })

            //4、我们把当前input标签的id属性remove

            $input.removeAttr("id");

            //我们做个标记,再class中再添加一个类名就叫test

            var newInput = '<input class="uploadImg test" type="file" name="file" multiple id="file">';

            $(this).append($(newInput));

        })

    })

</script>

</body>

</html>
这写到这把,后续会弄全景漫游....这些都要整合项目里面
java实现,使用opencv合成全景图,前端使用krpano展示的更多相关文章
- java 实现基于opencv全景图合成
因项目需要,自己做了demo,从中学习很多,所以分享出来,希望有这方面需求的少走一些弯路,opencv怎么安装网上教程多多,这里不加详细说明,我安装的opencv-3.3.0 如上图所示,找到相应的j ...
- OpenCV4Android开发之旅(一)----OpenCV2.4简介及 app通过Java接口调用OpenCV的示例
转自: http://blog.csdn.net/yanzi1225627/article/details/16917961 开发环境:windows+ADT Bundle+CDT+OpenCV-2 ...
- 基于OpenCv和swing的图片/视频展示Java实现
基于OpenCv和swing实现图片/视频的展示 图片的展示 swing展示图片,多为操作BufferedImage,这里要关注的核心是将Mat转为BufferedImage. 代码如下: publi ...
- [Android Studio] Using Java to call OpenCV
Environment: Android studio 2.2.3, OpenCV 2.4.9 For Android, Android 6 with api 23 for X86 一.File: b ...
- java中使用opencv
Java + opencv学习:在Eclipse下配置基于Java的OpenCV开发环境 2016-04-08 17:43 6491人阅读 评论(0) 收藏 举报 分类: OpenCV学习(10) ...
- Java后端传Long类型给前端导致的精度丢失
问题:实体属性是Long类型,在后端值本来是1119102511023023410,但是返回给前端的却是1119102511023023400 解决方案:添加序列化注解 import com.fast ...
- python+java全栈工程师 转 向前端的路
python的优点 简单 简单 简单 我目前在公司用python 1. 增加odoo的各种业务,成本核算.自动跑单.自动备份数据库之类的 ----odoo是国外大佬做的一个开源erp 用的python ...
- python利用opencv合成模糊图像
之前需要评估图像质量来筛选成像质量不错的图片,去除由于对焦,运动等造成的模糊图像,所以在构建数据集的时候考虑用opencv对清晰的图片进行处理获得模糊的图片从而进行训练. 1) 运动模糊图像 一般来说 ...
- ImageCombiner - Java服务端图片合成的工具包,好用!
自己的第一个也是唯一一个开源项目,因为平时比较懒,很少做宣传,今天刚好突破160个star,发到园子里推荐给大家,算是庆祝一下,哈. 项目地址:https://gitee.com/opensource ...
随机推荐
- SpringCloud之Turbine
[前面的话]书接上文,本文的某些知识依赖我的上一篇SpringCLoud的文章:SpringCloud之Feign,如果没有看过可以先移步去看一下.前文提到了hystrix的应用,以及hystrix的 ...
- 品Spring:详细解说bean后处理器
一个小小的里程碑 首先感谢能看到本文的朋友,感谢你的一路陪伴. 如果每篇都认真看的话,会发现本系列以bean定义作为切入点,先是详细解说了什么是bean定义,接着又强调了bean定义为什么如此重要. ...
- 死磕 java同步系列之mysql分布式锁
问题 (1)什么是分布式锁? (2)为什么需要分布式锁? (3)mysql如何实现分布式锁? (4)mysql分布式锁的优点和缺点? 简介 随着并发量的不断增加,单机的服务迟早要向多节点或者微服务进化 ...
- invalid comparison: java.util.ArrayList and java.lang.String解决
报错: Caused by: org.apache.ibatis.exceptions.PersistenceException: ### Error querying database. Cause ...
- js三级联动效果city-picker
链接:https://pan.baidu.com/s/1NE_EO5_xGvR-y-lboYap7g 提取码:h00e 效果展示: 解决: 动态赋值: 注意:在执行赋值之前,必须执行reset和des ...
- [Week 2][Guarantee of PLA] the Correctness Verification of PLA
Conditions: For the data set D, there exists a $\displaystyle W_{f}$ which satisfies that for every ...
- java调用python的几种用法(看这篇就够了)
java调用python的几种用法如下: 在java类中直接执行python语句 在java类中直接调用本地python脚本 使用Runtime.getRuntime()执行python脚本文件(推荐 ...
- Flask框架踩坑之ajax跨域请求
业务场景: 前后端分离需要对接数据接口. 接口测试是在postman做的,今天才开始和前端对接,由于这是我第一次做后端接口开发(第一次嘛,问题比较多)所以在此记录分享我的踩坑之旅,以便能更好的理解,应 ...
- ECMAScript6 VS TypeScript
如果你真正使用过Typescript你会发现他其实是javascript的超集, 这是一个非常简洁的描述 ,之所以称之为Typescript,正是Type一词的表述(强类型),可不仅仅是有一个Clas ...
- BF算法(蛮力匹配)
输入主串a,模式b b在a中的位置 1.在串a和串b中设置比较的下标i=0,j=0: 2.重复下述操作,直到a或b的所有字符均比较完毕: 2.1如果a[i]等于b[i],继续比较a和b的下一对字符: ...