dubbo集成zookeeper rpc远程调用
注:下面使用dubbo依赖的是zookeeper注册中心,这里没有详细的介绍。在配置之前,请自行准备好zookeeper环境。
后续如果写zookeeper的配置会补放链接
添加Gradle依赖
    compile group: 'com.alibaba', name: 'dubbo', version: '2.5.10'//dubbo

    compile group: 'org.apache.zookeeper', name: 'zookeeper', version: '3.3.3'//zookeeper

    compile group: 'com.github.sgroschupf', name: 'zkclient', version: '0.1'//zkclient
服务端provider
目录结构
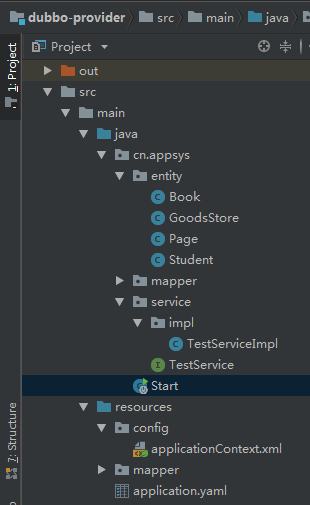
实体类
//这里实体对象实现了Serializable接口,dubbo规定,在远程调用实体对象时必须要实现Serializable接口以保证实体对象能够被序列化,如不实现会报错

public class Student implements Serializable {

    private String name;

    private int age;

    public Student(String name, int age) {

        this.name = name;

        this.age = age;

    }

    public Student() {

    }

    public String getName() {

        return name;

    }

    public void setName(String name) {

        this.name = name;

    }

    public int getAge() {

        return age;

    }

    public void setAge(int age) {

        this.age = age;

    }

}
service方法
public interface TestService {

    //返回字符串测试

    String hello(String word);

    //返回实体对象测试,注意实体类要实现 Serializable 接口

    List<Student> selectAllStudent();

}
实现service方法
//给service起个名字 别人调用提供接口方法时就是来实现本实现类的方法,和xml配置文件中所对应,让spring IOC 注入所管理

@Service("testService")

public class TestServiceImpl implements TestService {

    @Autowired

    private GoodsStoreMapper goodsStoreMapper;

    @Override

    public String hello(String word) {

        return "提供者:"+word;

    }

    @Override

    public List<Student> selectAllStudent() {

        System.out.println("------被调用了------");

        List<Student> list = new ArrayList<Student>();

        list.add(new Student("张三" , 1));

        list.add(new Student("李四" , 2));

        list.add(new Student("王五" , 3));

        return list;

    }

}
applicationContext.xml
<?xml version="1.0" encoding="UTF-8"?>

<beans xmlns="http://www.springframework.org/schema/beans"

       xmlns:xsi="http://www.w3.org/2001/XMLSchema-instance"

       xmlns:dubbo="http://code.alibabatech.com/schema/dubbo"

       xsi:schemaLocation="http://www.springframework.org/schema/beans

    http://www.springframework.org/schema/beans/spring-beans.xsd

    http://code.alibabatech.com/schema/dubbo

    http://code.alibabatech.com/schema/dubbo/dubbo.xsd">

    <!-- 提供方应用信息,用于计算依赖关系-->

    <!--name给当前服务起一个名字-->

    <dubbo:application name="springBootProvider"></dubbo:application>

    <!--protocol指定注册中心类型 这里用的是zookeeper-->

    <!--address注册中心地址 ip地址端口号-->

    <dubbo:registry protocol="zookeeper" address="127.0.0.1:2181" />

    <!-- 用dubbo协议在20880端口暴露服务-->

    <dubbo:protocol name="dubbo" port="20880" />

    <!-- 声明需要暴露的服务接口-->

    <dubbo:service interface="cn.appsys.service.TestService" ref="testService" />

</beans>
启动类
@SpringBootApplication

//读取配置文件

@ImportResource(locations = {"classpath:config/applicationContext.xml"})

public class Start

{

    public static void main(String[] args) {

        SpringApplication.run(Start.class , args);

    }

}
运行服务端,首先先启动zookeeper注册中心
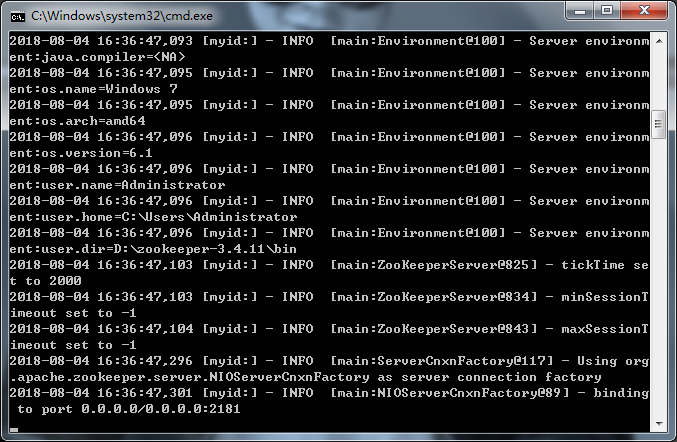
启动启动类,注意zookeeper的变化
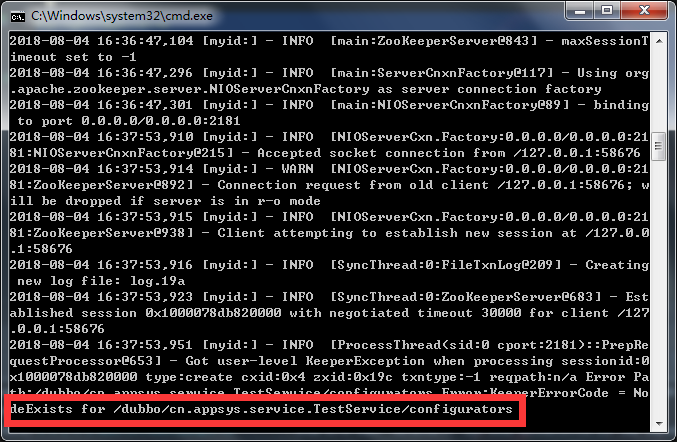
这里看到 在配置文件中外放的接口已经被注册进来了,调用方想调用就要通过此节点来调用服务。
客户端customer
目录结构
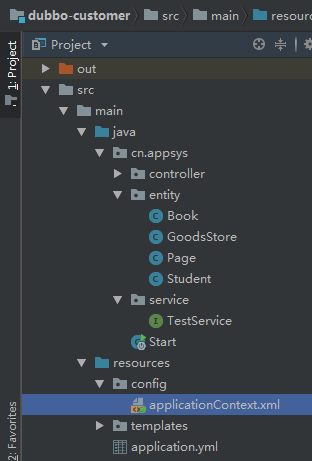
客户端 实体 方法都和服务端的保持一致
注意:方法所在的包也要和服务端保持一致,接口名都需要和服务端保持一致
applicationContext.xml配置文件
<?xml version="1.0" encoding="UTF-8"?>

<beans xmlns="http://www.springframework.org/schema/beans"

       xmlns:xsi="http://www.w3.org/2001/XMLSchema-instance"

       xmlns:dubbo="http://code.alibabatech.com/schema/dubbo"

       xsi:schemaLocation="http://www.springframework.org/schema/beans

    http://www.springframework.org/schema/beans/spring-beans.xsd

    http://code.alibabatech.com/schema/dubbo

    http://code.alibabatech.com/schema/dubbo/dubbo.xsd">

    <dubbo:application name="springBootConsumer"></dubbo:application>

    <dubbo:registry protocol="zookeeper" address="127.0.0.1:2181" />

    <!--包名 接口名 必须要和服务提供方保持一致-->

    <dubbo:reference id="testService" interface="cn.appsys.service.TestService" ></dubbo:reference>

</beans>
启动测试类
@SpringBootApplication

//读取配置文件

@ImportResource(locations = {"classpath:config/applicationContext.xml"})

public class Start

{

    public static void main(String[] args)

    {

        //SpringApplication.run返回一个ApplicationContext对象

        ApplicationContext ac = SpringApplication.run(Start.class , args);

        //通过ApplicationContext对象的getBean获取实现方法

        TestService testService = ac.getBean(TestService.class);

        //调用方法

        String s = testService.hello("aaaaaaaa");

        System.out.println(s);

        List<Student> stus = testService.selectAllStudent();

        for (Student stu : stus)

        {

            System.out.println(stu.getName());

        }

    }

}
启动运行
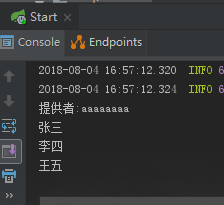
调用成功,再看一下服务端的变化
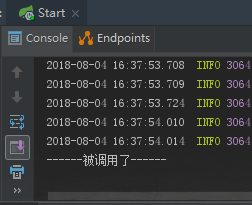
成功!
这里在放上如果不在服务端实体类不实现Serializable接口的报错信息
Exception in thread "main" com.alibaba.dubbo.rpc.RpcException: Failed to invoke the method selectAllStudent in the service cn.appsys.service.TestService. Tried 3 times of the providers [192.168.1.104:20880] (1/1) from the registry 127.0.0.1:2181 on the consumer 192.168.1.104 using the dubbo version 2.0.1. Last error is: Failed to invoke remote method: selectAllStudent, provider: dubbo://192.168.1.104:20880/cn.appsys.service.TestService?anyhost=true&application=springBootConsumer&check=false&dubbo=2.0.1&generic=false&interface=cn.appsys.service.TestService&methods=hello,login,selectAllStudent&pid=8928®ister.ip=192.168.1.104&remote.timestamp=1533373429375&side=consumer×tamp=1533373564236, cause: Failed to send response: Response [id=3, version=2.0.0, status=20, event=false, error=null, result=RpcResult [result=[cn.appsys.entity.Student@45a35c25, cn.appsys.entity.Student@419cd049, cn.appsys.entity.Student@49e561e], exception=null]], cause: java.lang.IllegalStateException: Serialized class cn.appsys.entity.Student must implement java.io.Serializable
java.lang.IllegalStateException: Serialized class cn.appsys.entity.Student must implement java.io.Serializable
dubbo在远程调用时注意事项
1)序列化
我们所有需要用来传输数据的实体一定要实现序列化,不然一定会报错
2)业务注入不进来
例如我们在Controller中注入了一个业务,@Controller使用的是Spring注解,@Reference使用的是Dubbo,如果Spring先进行扫描,那么业务一定是注入不进去的。如所有我们dubbo也要扫描controller。
3)超时设置
根据业务来设定不同的超时配置,如果一个服务很庞大处理的时间相对来说时间会比较长,可以会一直引起超时错误。
dubbo集成zookeeper rpc远程调用的更多相关文章
- ZooKeeper伪分布集群安装及使用 RMI+ZooKeeper实现远程调用框架
使用 RMI + ZooKeeper 实现远程调用框架,包括ZooKeeper伪集群安装和代码实现两部分. 一.ZooKeeper伪集群安装: 1>获取ZooKeeper安装包 下载地址:ht ...
- 測试JSON RPC远程调用(JSONclient)
#include <string> #include <iostream> #include <curl/curl.h> /* 标题:JSonclient Auth ...
- 使用Socket&反射&Java流操作进行方法的远程调用(模拟RPC远程调用)
写在前面 阅读本文首先得具备基本的Socket.反射.Java流操作的基本API使用知识:否则本文你可能看不懂... 服务端的端口监听 进行远程调用,那就必须得有客户端和服务端.服务端负责提供服务,客 ...
- 从0到1:全面理解RPC远程调用
上一篇关于 WSGI 的硬核长文,不知道有多少同学,能够从头看到尾的,不管你们有没有看得很过瘾,反正我是写得很爽,总有一种将一样知识吃透了的错觉. 今天我又给自己挖坑了,打算将 rpc 远程调用的知识 ...
- Openstack Nova 源码分析 — RPC 远程调用过程
目录 目录 Nova Project Services Project 的程序入口 setuppy Nova中RPC远程过程调用 nova-compute RPC API的实现 novacompute ...
- rpc远程调用开发
RPC即远程过程调用,适用于集群管理,集群节点就是RPCServer,而我们发起远程调用的web服务器就是RPCClient.所以是少数rpcClient(可能一个)对多个RPCServer(集群节点 ...
- 使用 RMI + ZooKeeper 实现远程调用框架
目录[-] 1 发布 RMI 服务1.1 定义一个 RMI 接口1.2 编写 RMI 接口的实现类1.3 通过 JNDI 发布 RMI 服务2 调用 RMI 服务3 RMI 服务的局限性4 使用 Zo ...
- Spring集成RMI实现远程调用
前提: 1.开发工具: jdk tomcat ecplise,开发工具的使用本篇不做介绍. 2.需具备以下知识:javase servelt web rmi spring maven 一.关于RMI ...
- Docker+Dubbo+Zookeeper实现RPC远程调用
Docker+Dubbo+Zookeeper 1.安装Docker 1.1卸载旧版本的Docker //如果Docker处于与运行状态 未运行可跳过 [root@MrADiao ~]# systemc ...
随机推荐
- Mybatis源码解析,一步一步从浅入深(二):按步骤解析源码
在文章:Mybatis源码解析,一步一步从浅入深(一):创建准备工程,中我们为了解析mybatis源码创建了一个mybatis的简单工程(源码已上传github,链接在文章末尾),并实现了一个查询功能 ...
- 基于Linux系统--web环境搭建
上线部署文档 数据库部分1.下载Mysql服务 #yum install mysql-server 2.更改 /etc/my.cnf 3.启动Mysql ...
- 在Docker中启动Cloudera
写在前面 记录一下,一个简单的cloudera处理平台的构建过程和一些基本组件的使用 前置说明 需要一台安装有Docker的机器 docker常用命令: docker ps docker ps -a ...
- Spring Boot(三) 使用Lombok
C#写的多了用习惯了众多的语法糖,再写起来Java总会有一些非常不舒服的地方.比如用惯了C#的属性在用起来Java的属性,写起来就会感觉不够优雅.如:定义一个Person类 public cl ...
- 【ADO.NET基础-GridView】GridView的编辑、更新、取消、删除以及相关基础操作代码
代码都是基础操作,后续功能还会更新,如有问题欢迎提出和提问....... 前台代码: <asp:GridView ID=" OnRowDataBound="GridView1 ...
- 并发编程之多线程(Java)
一.线程与进程区别 每个正在系统上运行的程序都是一个进程.每个进程包含一到多个线程.线程是一组指令的集合,或者是程序的特殊段,它可以在程序里独立执行.也可以把它理解为代码运行的上下文.所以线程基本上是 ...
- 中缀表达式转后缀表达式(Java代码实现)
后缀表达式求值 后缀表达式又叫逆波兰表达式,其求值过程可以用到栈来辅助存储.例如要求值的后缀表达式为:1 2 3 + 4 * + 5 -,则求值过程如下: 遍历表达式,遇到数字时直接入栈,栈结构如下 ...
- 使用 Jenkins 与 Sonar 集成对代码进行持续检测
SonarQube 与 Jenkins 简介 SonarQube是 一个开源的代码质量分析平台,便于管理代码的质量,可检查出项目代码的漏洞和潜在的逻辑问题.同时,它提供了丰富的插件,支持多种语言的检测 ...
- Windows10+YOLOv3实现检测自己的数据集(1)——制作自己的数据集
本文将从以下三个方面介绍如何制作自己的数据集 数据标注 数据扩增 将数据转化为COCO的json格式 参考资料 一.数据标注 在深度学习的目标检测任务中,首先要使用训练集进行模型训练.训练的数据集好坏 ...
- 你的火狐很慢吗? - Firefox启动和运行速度优化
最近刚开始体验firefox,发现了一些优势和缺点,无敌的扩展确实带来的是功能上的享受,可随之而来的问题便是太多的插件和主题导致ff启动如龟速,比起IE和TW都有不小的差距,因此特意搜集来一些关于启动 ...