Flask 学习(三)路由介绍
Flask路由规则都是基于Werkzeug的路由模块的,它还提供了很多强大的功能。
两种添加路由的方式
方式一:

  @app.route('/xxxx')  # @decorator

  def index():

     return "Index"

方式二:

  def index():

     return "Index"

  app.add_url_rule('/xxx', "n1", index)  #n1是别名
@app.route和app.add_url_rule参数
@app.route和app.add_url_rule参数:

            rule,                       URL规则

            view_func,                  视图函数名称

            defaults=None,              默认值,当URL中无参数,函数需要参数时,使用defaults={'k':'v'}为函数提供参数

            endpoint=None,              名称,用于反向生成URL,即: url_for('名称')

            methods=None,               允许的请求方式,如:["GET","POST"]

            strict_slashes=None,        对URL最后的 / 符号是否严格要求,

                                        如:

                                            @app.route('/index',strict_slashes=False),

                                                访问 http://www.xx.com/index/ 或 http://www.xx.com/index均可

                                            @app.route('/index',strict_slashes=True)

                                                仅访问 http://www.xx.com/index

            redirect_to=None,           重定向到指定地址

                                        如:

                                            @app.route('/index/<int:nid>', redirect_to='/home/<nid>')

                                            或

                                            def func(adapter, nid):

                                                return "/home/888"

                                            @app.route('/index/<int:nid>', redirect_to=func)
举例使用
# ============对url最后的/符号是否严格要求=========

@app.route('/test',strict_slashes=True)  #当为True时,url后面必须不加斜杠

def test():

    return "aaa"

@app.route('/test',strict_slashes=False)  #当为False时,url上加不加斜杠都行

def test():

    return "aaa"

@app.route("/json_test/<int:age>" ,defaults={'age':66})

def json_test(age):

    ret_dic = {'name': 'xiaowang', 'age': age}

    return jsonify(ret_dic) # 转换json形式
带参数的路由
@app.route('/hello/<name>')
def hello(name):
return 'Hello %s' % name
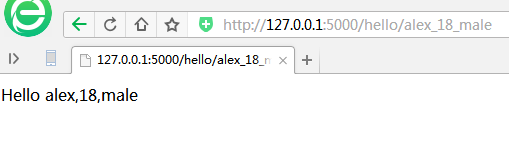
@app.route('/hello/<name>_<age>_<sex>') # 多个参数
def hello(name,age,sex):
return 'Hello %s,%s,%s' %(name,age,sex)
在浏览器的地址栏中输入http://localhost:5000/hello/Joh,你将在页面上看到”Hello Joh”的字样。
URL路径中/hello/后面的参数被作为hello()函数的name参数传了进来。
多个参数
# 动态路由参数

@app.route("/json_param/<int:age>" ,strict_slashes=False)

def json_param(age):

    ret_dic = {'name': 'xiaowang', 'age': age}

    return jsonify(ret_dic)

endpoint
当请求传来一个url的时候,会先通过rule找到endpoint(url_map),然后再根据endpoint再找到对应的view_func(view_functions)。通常,endpoint的名字都和视图函数名一样。

实际上这个endpoint就是一个Identifier,每个视图函数都有一个endpoint,

当有请求来到的时候,用它来知道到底使用哪一个视图函数
endpoint可以解决视图函数重名的情况

Flask中装饰器多次使用
# 验证用户装饰器

def wrapper(func):

    @wraps(func)

    def inner(*args, **kwargs):

        if not session.get("user_info"):

            return redirect("/login")

        ret = func(*args, **kwargs)

        return ret

    return inner

@app.route("/login", methods=("GET", "POST"))

def login():

    # 模板渲染

    # print(request.path)

    # print(request.url)

    # print(request.headers)

    if request.method == "GET":

        print(request.args.get("id"))

        text_tag = "<p>你看见了吗test:<input type='text' name='test'></p>"

        text_tag = Markup(text_tag)

        return render_template("login.html", msg=text_tag)  # sum = add_sum)

    else:

        # print(request.form)

        # print(request.values.to_dict())   # 这个里面什么都有,相当于body

        # print(request.json)  # application/json

        # print(request.data)

        username = request.form.get("username")

        password = request.form.get("password")

        if username == "alex" and password == "123":

            session["user_info"] = username

            # session.pop("user_info")  #删除session

            return "登录成功"

        else:

            return render_template("login.html", msg="用户名或者密码错误")

# endpoint可以解决视图函数重名的情况

@app.route("/detail", endpoint="detail")

@wrapper  # f = route(wrapper(detail))

def detail():

    print(url_for("detail"))

    return render_template("detail.html", **STUDENT)

@app.route("/detail_list", endpoint="detail_list")

@wrapper  # f = route(wrapper(detail_list))

def detail_list():

    return render_template("detail_list.html", stu_list=STUDENT_LIST)

@app.route("/detail_dict")

def detail_dict():

    if not session.get("user_info"):

        return redirect("/login")

    return render_template("detail_dict.html", stu_dict=STUDENT_DICT)
反向生成URL: url_for
endpoint("name") #别名
@app.route('/index',endpoint="xxx")  #endpoint是别名

def index():

    v = url_for("xxx")

    print(v)

    return "index"
静态文件位置
一个Web应用的静态文件包括了JS, CSS, 图片等,Flask的风格是将所有静态文件放在”static”子目录下。并且在代码或模板中,使用url_for('static')来获取静态文件目录

app = Flask(__name__,template_folder='templates',static_url_path='/xxxxxx')

<link rel="stylesheet" type="text/css" href="{{ url_for('static', filename='style.css') }}">

<div class="page">

    {% block body %}

    {% endblock %}

</div>
两个常用函数
@app.route("/bo")

def bo():

    # return render_template("bo.html")

    return send_file("s1.py") # 发送文件(可以是图像或声音文件)

@app.route("/json_test/<int:age>" ,defaults={'age':66})

def json_test(age):

    ret_dic = {'name': 'xiaowang', 'age': age}

    return jsonify(ret_dic) # 转换json形式,帮助转换为json字符串, 并且设置响应头Content-Type: application/json
Flask 学习(三)路由介绍的更多相关文章
- Flask 学习之 路由
一.路由的基本定义 # 指定访问路径为 demo1 @app.route('/demo1') def demo1(): return 'demo1' 二.常用路由设置方式 @app.route('/u ...
- flask 学习(三)
继续flask的学习.尝试了使用程序context这一部分: 而在hello.py文档的旁边发现新出现了hello.pyc,看来运行过程中也被编译成字节码文件了,也不清楚是在哪个步骤的,留着后面研究. ...
- Jenkins学习三:介绍一些Jenkins的常用功能
Jenkins其实就是一个工具,这个工具的作用就是调用各种其他的工具来达成你的目的. 1.备份.迁移.恢复jenkins 首先找到JENKINS_HOME,因为Jenkins的所有的数据都是以文件的形 ...
- Flask学习 三 web表单
web表单 pip install flask-wtf 实现csrf保护 app.config['SECRET_KEY']='hard to guess string' # 可以用来存储框架,扩展,程 ...
- flask学习(三):flask入门(URL)
一. flask简介 flask是一款非常流行的python web框架,出生于2010年,作者是Armin Ronacher,本来这个项目只是作者在愚人节的一个玩笑,后来由于非常受欢迎,进而成为一个 ...
- Spring整合Jms学习(三)_MessageConverter介绍
1.4 消息转换器MessageConverter MessageConverter的作用主要有双方面,一方面它能够把我们的非标准化Message对象转换成我们的目标Message对象,这主要 ...
- Flask 学习(三)模板
Flask 学习(三)模板 Flask 为你配置 Jinja2 模板引擎.使用 render_template() 方法可以渲染模板,只需提供模板名称和需要作为参数传递给模板的变量就可简单执行. 至于 ...
- Flask 学习(二)路由
Flask 路由 在说明什么是 Flask 路由之前,详细阐述下 Flask “Hello World” 这一 最小应用的代码. Flask “Hello World” from flask imp ...
- Django基础学习三_路由系统
今天主要来学习一下Django的路由系统,视频中只学了一些皮毛,但是也做下总结,主要分为静态路由.动态路由.二级路由 一.先来看下静态路由 1.需要在project中的urls文件中做配置,然后将匹配 ...
- Flask 学习(一)简单介绍
Flask介绍(轻量级的框架) Flask是一个基于Python开发并且依赖jinja2模板和Werkzeug WSGI服务的一个微型框架,对于Werkzeug本质是Socket服务端,其用于接收ht ...
随机推荐
- PAT 甲级 1025.PAT Ranking C++/Java
Programming Ability Test (PAT) is organized by the College of Computer Science and Technology of Z ...
- jenkins构建邮件自动发送,测试邮件发送成功,构建项目邮件发送不成功的问题
提示问题: Connection error sending email,retrying once more in 10 seconds…… Connection error sending ema ...
- 利用 subst.exe 可以将任意文件夹映射成盘符:
subst命令:将路径与驱动器号关联,即将一个目录当做一个磁盘驱动器来看: 假设:将E:\下的baidu文件夹设置成虚拟盘,虚拟盘的盘符为M. 1.点开始按钮,在运行框里输入 subst m: E:\ ...
- 常用 shell 命令 chmod | root
chmod 命令 chmod 命令 [格式1:] chmod [ugoa][+-=][rwx] 文件或目录 /*u.g.o.a : u属主,g属组,o其他用户,a所有用户*/ /*+.-.= : 增加 ...
- Performance --- 前端性能监控
阅读目录 一:什么是Performance? 二:使用 performance.timing 来计算值 三:前端性能如何优化? 四:Performance中方法 五:使用performane编写小工具 ...
- HDU-1848-Fibonacci again and again(SG函数,博弈)
链接: http://acm.hdu.edu.cn/showproblem.php?pid=1848 题意: 任何一个大学生对菲波那契数列(Fibonacci numbers)应该都不会陌生,它是这样 ...
- learning shell check host dependent pkg
[Purpose] Shell script check host dependent pkg [Eevironment] Ubuntu 16.04 bash env ...
- ent 基本使用八 索引
我们可以在ent 的schema 中定义index 可以方便的控制数据约束,使用索引可以加速我们的访问以及数据的唯一性处理 配置字段索引 多字段索引 package schema import ( ...
- proxysql 学习二 admin-web 启用
proxysql 从1.4.4 开始内置了一个简单的http server,可以方便进行状态信息的查看,今天在 尝试通过配置参数以及update global_variables 没有生效,set 也 ...
- Vuejs组件基础
一.概念 ①组件就是对局部视图的封装,组件思想就是把一个很大的复杂的 Web 页面视图给拆分成一块一块的组件视图,然后利用某种特定的方式把它们组织到一起完成完整的 Web 应用构建. ②目前主流的前端 ...