巧用Drawable 实现Android UI 元素间距效果
源文地址: 巧用Drawable 实现Android UI 元素间距效果
在大部分的移动UI或者Web UI都是基于网格概念而设计的。这种网格一般都是有一些对其的方块组成,然后它们组合成为一个块。使用网格这种设计原则能够有助于对齐UI元素,提升UI的一致性。同一时候还能让用户更加easy的获取UI上面包括的内容。简而言之。网格是一个相当的强大的设计工具。
开发人员在使用网格设计原则的时候须要在UI 元素之间加入一些额外的间距。比方padding、margin或者spacing(依据你的设计方案来选择使用哪种间距) 。这些间距有利于在不同的块之间设置清晰的分隔带同一时候不会总体UI的可读性。这些间距对我们Android 开发人员来说也不陌生,我们在设计Android 界面时,也会使用View 的padding 和 margin 来达到类似的效果。在Android 开发中。为了将UI 和业务逻辑分隔,我们会使用 XML来定义UI。
这样的做法对于比較固定的UI非常有效果。但当这些UI元素须要依据业务逻辑来确定隐藏或者显示的状态时,这样的做法就有点困难了。这篇文章就依据这样的情况提出了一些Android开发技巧来应对动态的网格UI。
没有间距的UI
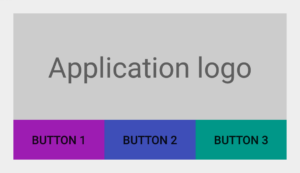
首先让我们来看一个简单的样例。我们创建一个简单的 LinearLayout 。
然后我们在TextView (显示“Application logo”)下方再内置一个 LinearLayout ,我们在当中水平依次放置3个Button。最后得到的效果图例如以下图所看到的:
<LinearLayout xmlns:android="http://schemas.android.com/apk/res/android"

    android:layout_width="match_parent"

    android:layout_height="wrap_content"

    android:orientation="vertical"

    android:padding="@dimen/spacing_medium">

    <TextView

        android:layout_width="match_parent"

        android:layout_height="128dp"

        android:background="@color/light_gray"

        android:gravity="center"

        android:text="@string/application_logo"

        android:textAppearance="@android:style/TextAppearance.Material.Display1" />

    <LinearLayout

        android:id="@+id/buttons_container"

        android:layout_width="match_parent"

        android:layout_height="wrap_content"

        android:orientation="horizontal">

        <Button

            android:id="@+id/btn_first"

            android:layout_width="0dp"

            android:layout_height="wrap_content"

            android:layout_weight="1"

            android:background="@drawable/purple"

            android:text="@string/button_1" />

        <Button

            android:id="@+id/btn_second"

            android:layout_width="0dp"

            android:layout_height="wrap_content"

            android:layout_weight="1"

            android:background="@drawable/indigo"

            android:text="@string/button_2" />

        <Button

            android:id="@+id/btn_third"

            android:layout_width="0dp"

            android:layout_height="wrap_content"

            android:layout_weight="1"

            android:background="@drawable/teal"

            android:text="@string/button_3" />

    </LinearLayout>

</LinearLayout>
加入间距后的UI
上图的所展示的UI就是基于网格设计的。当时UI里面的元素之间都没有间距。为了让用户更好地区分这些UI元素。我们给id 为 @id/buttons_container 的 LinearLayout 加入属性 android:layout_marginTop="@dimen/spacing_medium" ;给id 为 @id/btn_first 和@id/btn_second 的两个 Button 分别加入属性 android:layout_marginRight="@dimen/spacing_medium" 。这时的UI效果例如以下图所看到的:

加入了间距之后,总体的UI效果好多了,可读性更强了。可当我们动态的隐藏某些 View 的时候就会出现一些问题了。我们如果第三个Button 会依据用户的设备是否安装了 Google Play Services 来决定它的展示。
如果这个设备没有 Google Play Services,那我们就把这个 Button to View.GONE 的 visibility 属性设为 View.GONE。 所得效果例如以下图:

出来的效果与我们预料中的一样,第三个 Button 没有再显示了。可是第二个 Button 的右边没有与上面的TextView 右边对齐。出现这样的问题的解决办法是:拥有 margin 属性的view 会觉得margin相应方向存在邻接 view。比如,每一个拥有right/top margin view会觉得它的 right/top 方向有一个邻接 view,因此,这个相应 margin 也就会生效,就算这个邻接view已经隐藏了。
设置间距的折衷方案——Java 和 GridLayout
一个比較直接的解决方式就是在Java 代码里面手动改变对应的margin 值,但说实话这不是一个好的方案。还有一个方案就是使用可以自己主动处理元素之间的间距的布局。GridLayout 就符合这种要求。可是这个布局让人蛋疼的是元素之间的间距不能自己定义。仅仅能使用默认的间距。
设置间距的最佳方案——LinearLayout 的divider
实际上 LinearLayout 已经有一个处理这样的元素之间的间距的属性了。
这个属性却没怎么被大家发现,一直非常低调,但它的效果相当奇妙。所以我们说的第三个方案就是使用一个固定高宽的 Drawable 作为 LinearLayout 的 元素分隔线(divider):
<?xml version="1.0" encoding="utf-8"?

>

<shape xmlns:android="http://schemas.android.com/apk/res/android"

    android:shape="rectangle">

    <size

        android:width="@dimen/spacing_medium"

        android:height="@dimen/spacing_medium" />

    <solid android:color="@android:color/transparent" />

</shape>
如今你就能够把这个新创建的 Drawable 设为LinearLayout 的 divider,这样这个Drawable 就能让元素之间产生间距了:
<LinearLayout xmlns:android="http://schemas.android.com/apk/res/android"

    android:layout_width="match_parent"

    android:layout_height="wrap_content"

    android:divider="@drawable/spacer_medium"

    android:orientation="vertical"

    android:padding="@dimen/spacing_medium"

    android:showDividers="middle">

    <!-- TextView -->

    <LinearLayout

        android:id="@+id/buttons_container"

        android:layout_width="match_parent"

        android:layout_height="wrap_content"

        android:divider="@drawable/spacer_medium"

        android:orientation="horizontal"

        android:showDividers="middle">

        <!-- Buttons -->

    </LinearLayout>

</LinearLayout>

总结
Android 框架里面有很多的特性能够用来实现一些不常见的方案。并且最后效果出其不意。
定义 Drawable 就是当中一种途径。
假设你能吃透Android 里面的 Drawable 。那么你的代码也可能大大地精简。
注意:文章LinearLayout的divider 属性设置是Android
API 11之后加进去的,这意味着Android API 11之前的设备要使用这个divider须要LinearLayoutCompat。
本文翻译自:Grid
Spacing on Android 原文作者:Cyril
Mottier
巧用Drawable 实现Android UI 元素间距效果的更多相关文章
- 怎样进行Android UI元素设计
Android UI元素里面包含了许多的内容,比如:该平台由操作系统.中间件.用户界面和应用软件组成,一个应用程序要想受用户喜爱,那么UI可不能差. Android为相似的编程名词引入了一些新的术语, ...
- Android UI设计--半透明效果对话框及activity(可做遮罩层)
下面是style的一些属性及其解释 <style name="dialog_translucent" parent="@android:style/Theme.Di ...
- Android UI设计
Android UI设计--PopupWindow显示位置设置 摘要: 当点击某个按钮并弹出PopupWindow时,PopupWindow左下角默认与按钮对齐,但是如果PopupWindow是下图的 ...
- appium— Android定位webView里面的UI元素
Android SDK中的UIAutomator中本身是不支持网页中的UI元素定位,下面介绍几种常用的定位app内部的网页的UI元素的方法. 一.使用chrome浏览器调试移动端网页 这是使用最多的一 ...
- 详解 “Android UI”设计官方教程
我们曾经给大家一个<MeeGo移动终端设备开发UI设计基础教程>,同时很多朋友都在寻找Android UI开发的教程,我们从Android的官方开发者博客找了一份幻灯片,介绍了一些Andr ...
- Android UI设计规则
Android UI技巧 1.1 不该做什么 l 不要照搬你在其他平台的UI设计,应该让用户使用感觉是在真正使用一个Android软件,在你的LOGO显示和平台总体观感之间做好平衡 l 不要过度使 ...
- 各种Android UI开源框架 开源库
各种Android UI开源框架 开源库 转 https://blog.csdn.net/zhangdi_gdk2016/article/details/84643668 自己总结的Android开源 ...
- 【Android UI】Android开发之View的几种布局方式及实践
引言 通过前面两篇: Android 开发之旅:又见Hello World! Android 开发之旅:深入分析布局文件&又是“Hello World!” 我们对Android应用程序运行原理 ...
- Android UI性能优化实战, 识别View中的性能问题
出自:[张鸿洋的博客]来源:http://blog.csdn.net/lmj623565791/article/details/45556391 1.概述 2015年初google发布了Android ...
随机推荐
- webpack打包 css文件里面图片路径 替换位置
{ test: /\.css$/, use: ExtractTextPlugin.extract({ use: ['css-loader?minimize', 'autoprefixer-loader ...
- docker 深入理解之namespace
namespace 名称空间 docker容器主要通过资源隔离来实现的,应该具有的6种资源隔 namespace 的六项隔离 namespace 系统调用参数 隔离的内容 UTS CLONE_NEWU ...
- Vickers Vane Pump Tips - Vane Pump Maintenance Note
The Vickers Vane Pump describes the matters needing attention in the maintenance of the vane p ...
- 使用Maven构建JavaEE项目
学习要点 Maven简介 Maven构建项目 MyEclipse中Maven的使用 Maven简介 Maven作用 对第三方依赖库进行统一的版本管理 统一的目录结构,统一各平台各IDE目录 统一的软件 ...
- Win10任务栏搜索框无法搜索,显示白色页面
如果确定: Windows search服务启动打开 %LocalAppData%\Packages\windows.immersivecontrolpanel_cw5n1h2txyewy\Local ...
- 关闭 macOS Google Chrome 黑暗模式风格
终端执行命令 defaults write com.google.Chrome NSRequiresAquaSystemAppearance -bool YES 恢复 defaults write c ...
- python基础知识02-序列类型的方法
列表的方法: 增:append() insert() extend()只能添加序列类型. .改li[0]= '123' li.insert(2,'123') 2个参数,位置,值 li.remove(' ...
- zzuli 1905 小火山的跳子游戏
Description 小火山和火山火山在一块玩跳子游戏.规则如下: 1:跳子的起始位置为0,棋盘大小从1到N 2:每次跳子跳k步. 例如当前位置为i, 那么下一步为i + k 3:跳 ...
- Java基础学习总结(92)——Java编码规范之排版、注释及命名
为使开发人员养成良好的开发习惯,编写可读性强.易维护的程序,结合以往资料,现整理Java编码规范,将之作为开发人员的参照依据. 一.排版 1.相对独立的程序块之间必须加空行 下列情况应该使用一个空行: ...
- MQ报错java.lang.IllegalStateException: Failed to load ApplicationContext
这个问题是jdk版本造成的,把jdk1.8换成jdk1.7问题就解决了