zabbix详细介绍及其自动动态发现
zabbix3.2.1
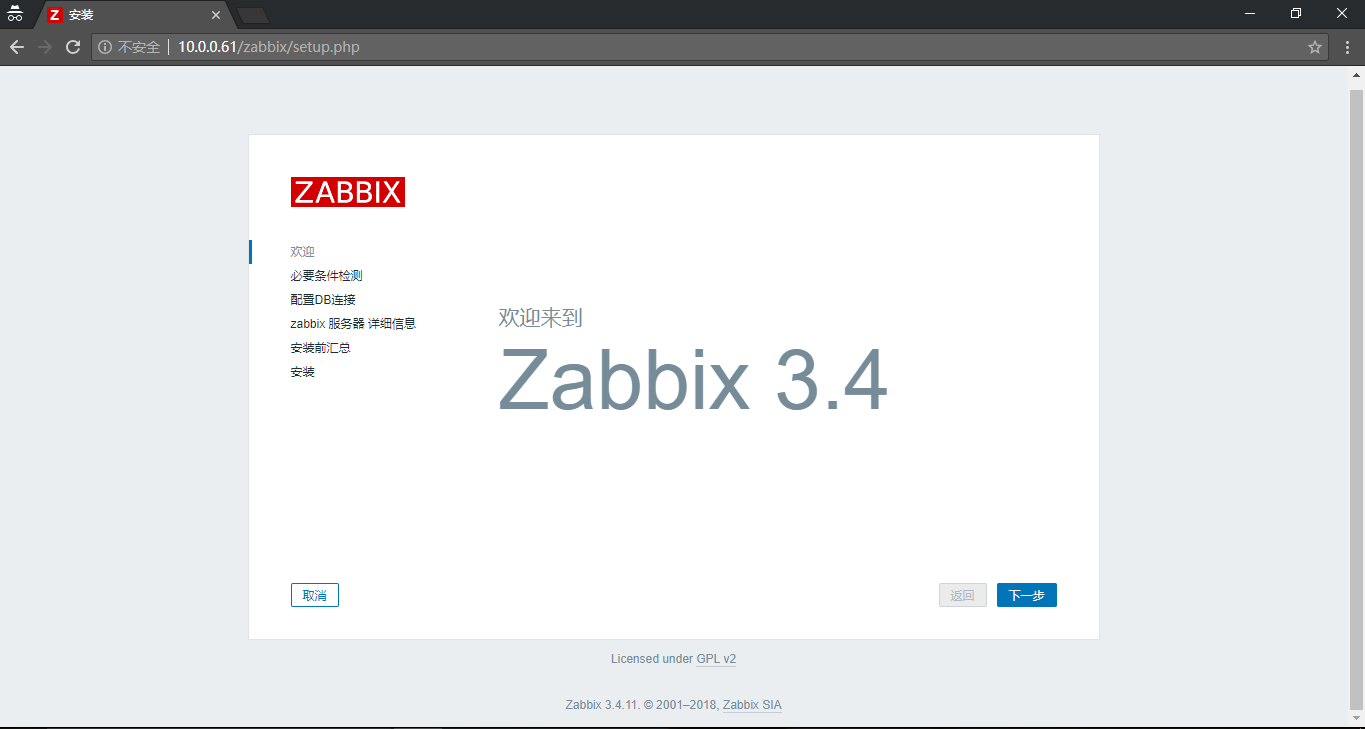
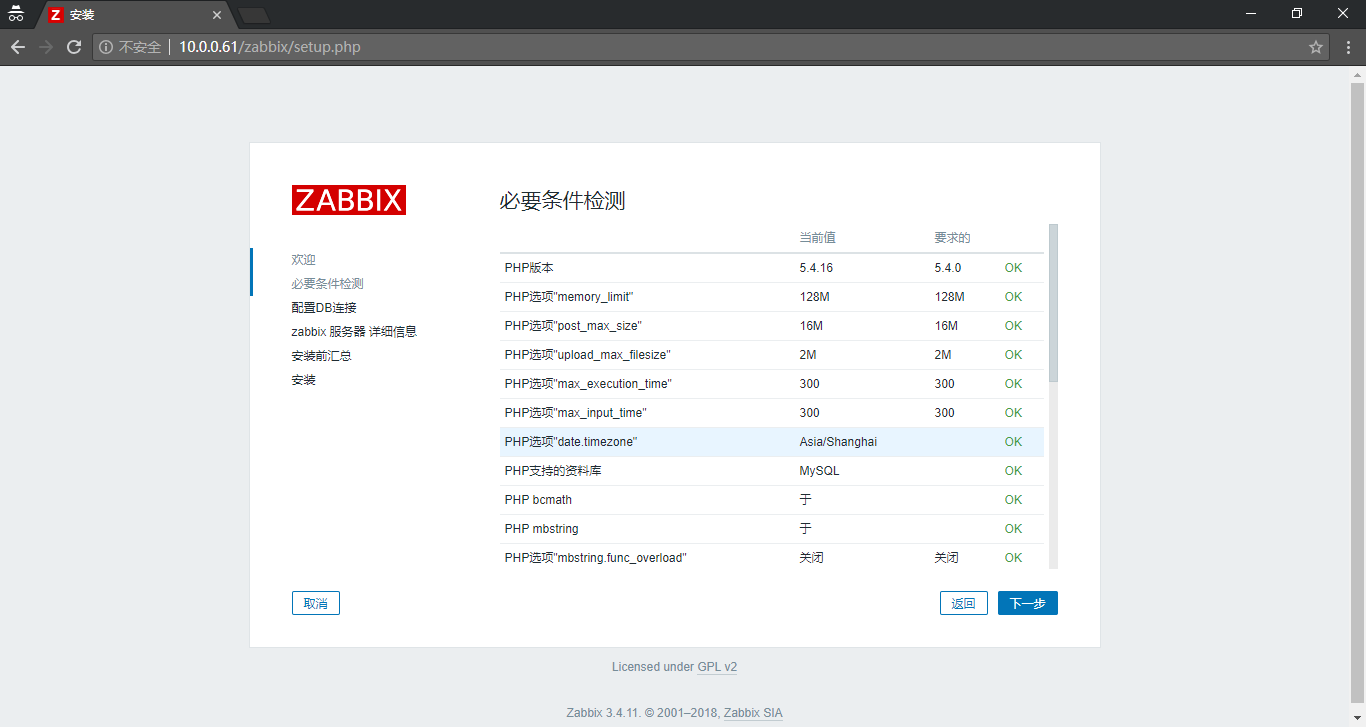
第1章 安装
1.1 查看系统环境
[root@centos7-2 ~]#
[root@centos7-2 ~]# hostname -I
10.0.0.10 172.16.1.10
[root@centos7-2 ~]# cat /etc/redhat-release
CentOS Linux release 7.2.1511 (Core)
[root@centos7-2 ~]# uname -r
3.10.0-327.el7.x86_64
[root@centos7-2 ~]# uname -m
x86_64
[root@centos7-2 ~]#
1.2 部署
rpm -ivh http://repo.zabbix.com/zabbix/3.2/rhel/7/x86_64/zabbix-release-3.2-1.el7.noarch.rpm
# 安装zabbix,httpd,php
yum install -y zabbix-server-mysql zabbix-web-mysql
# 安装mariadb
yum -y install mariadb-server
systemctl start mariadb.service
# 创建数据库,权限
mysql
create database zabbix character set utf8 collate utf8_bin;
grant all privileges on zabbix.* to zabbix@localhost identified by 'zabbix';
exit
# 导入数据库sql文件
zcat /usr/share/doc/zabbix-server-mysql-3.2.11/create.sql.gz|mysql -uzabbix -pzabbix zabbix
# 配置zabbix Server连接mysql
sed -i.ori '115a DBPassword=zabbix' /etc/zabbix/zabbix_server.conf
# 修改apache-php配置时区
sed -i.ori '18a php_value date.timezone Asia/Shanghai' /etc/httpd/conf.d/zabbix.conf
#启动并加入开机自启动
systemctl start zabbix-server
systemctl start httpd
systemctl enable zabbix-server.service httpd.service mariadb.service
# 只能在服务端操作,-s执行相应客户端IP 用来获取agent的相关信息
yum install zabbix-get -y
zabbix_get -s 172.16.1.11 -p 10050 -k "system.cpu.load[all,avg1]"
==================================================================
第2章 客户端
#配置 rpm
rpm -ivh http://repo.zabbix.com/zabbix/3.2/rhel/7/x86_64/zabbix-release-3.2-1.el7.noarch.rpm
#暗转zabbix-agent
yum install zabbix-agent -y
#修改zabbix-server的ip
sed -i.ori 's#Server=127.0.0.1#Server=172.16.1.10#' /etc/zabbix/zabbix_agentd.conf
#开机启动&自启动
systemctl start zabbix-agent.service
systemctl enable zabbix-agent
#编写自定义监控脚本
echo "UserParameter=nginx_status,who |wc -l" > /etc/zabbix/zabbix_agentd.d/userparameter_nginx.statu.conf
systemctl restart zabbix-agent.service
服务端测试命令
zabbix_get -s 172.16.1.11 -p 10050 -k "nginx_status"
2
第3章 配置zabbix_web
这里暂时选用一下zabbix3.4的配置界面。
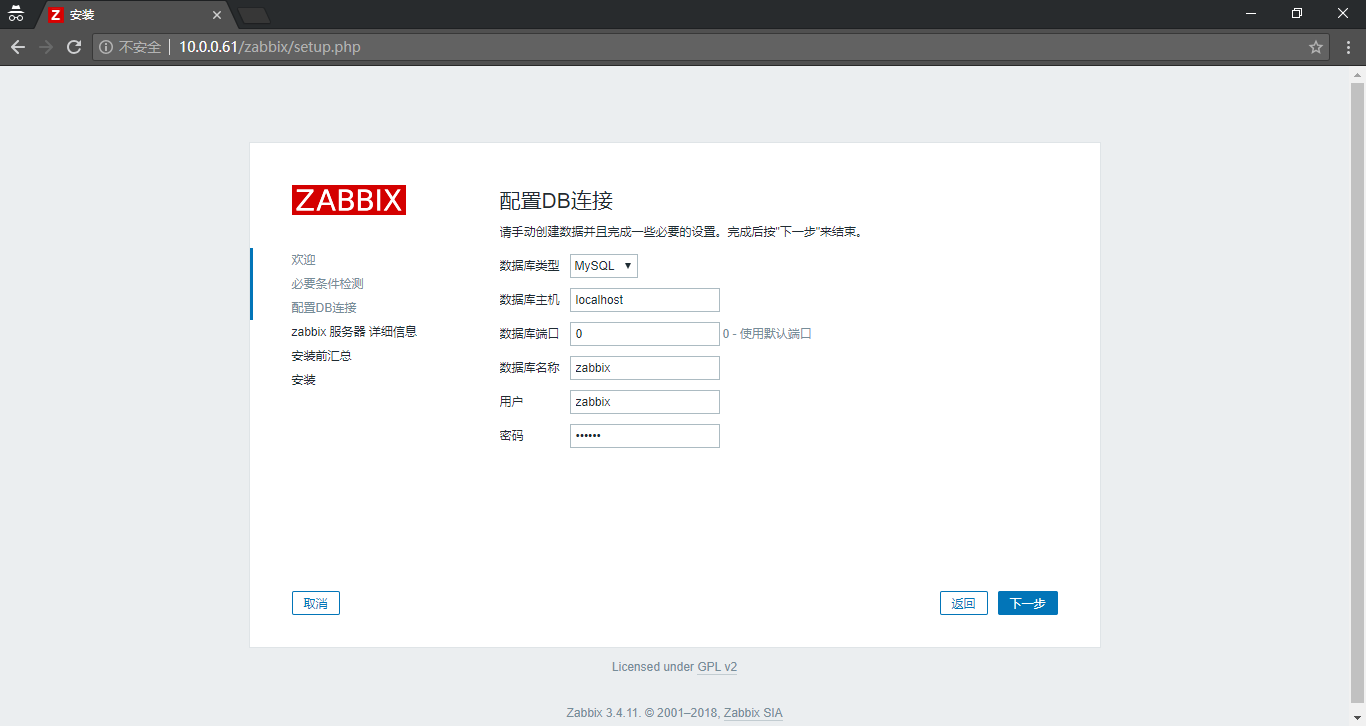
此处没用使用ip地址,是因为数据库中只是授权localhost。
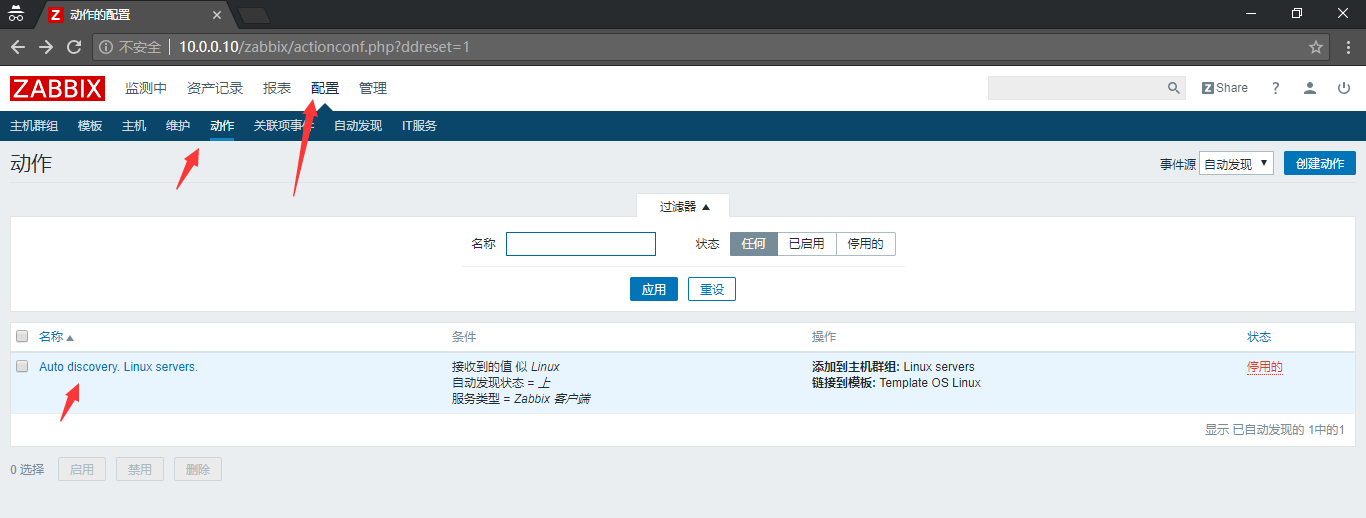
第4章 配置自动发现
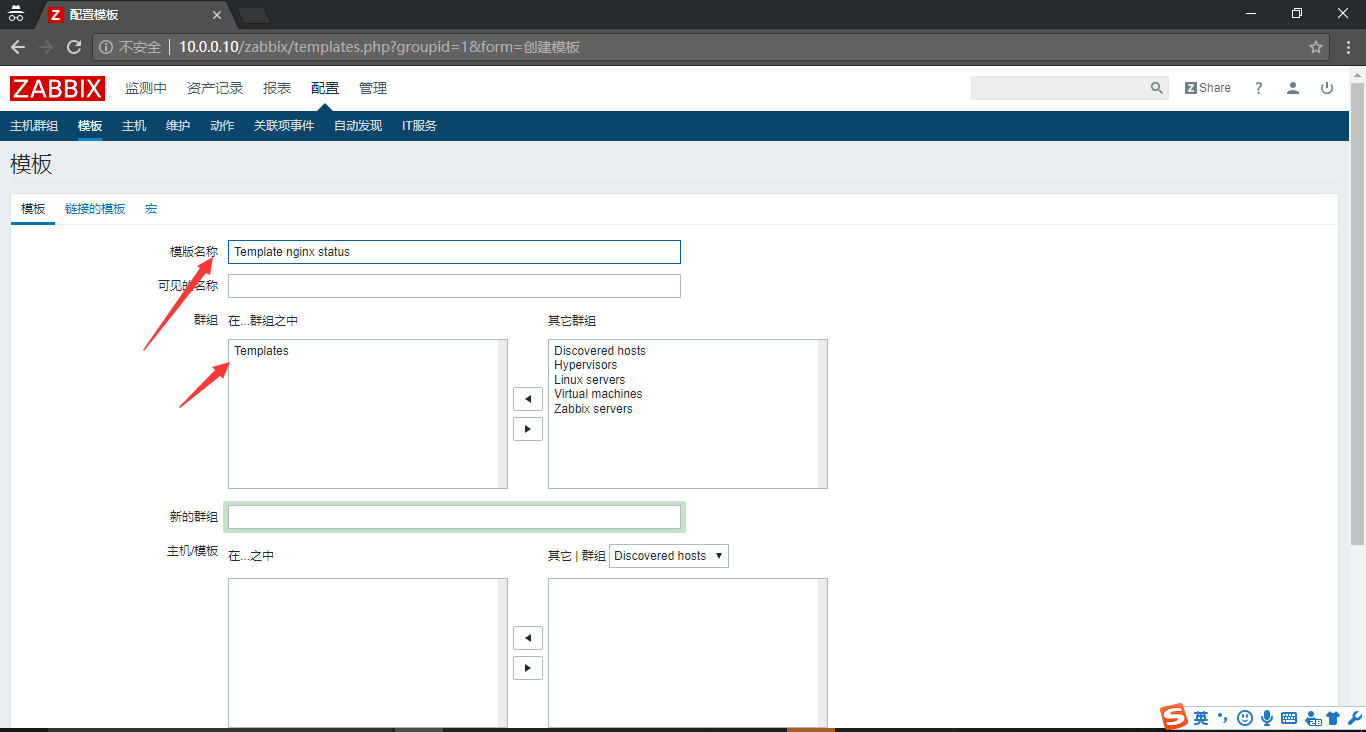
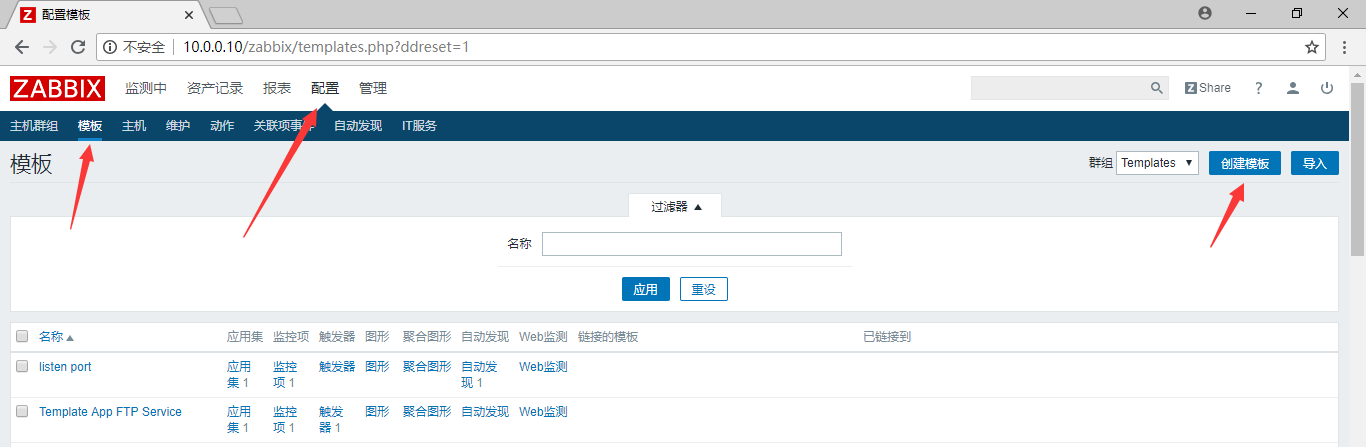
4.1 配置模板
4.1.1 创建模板

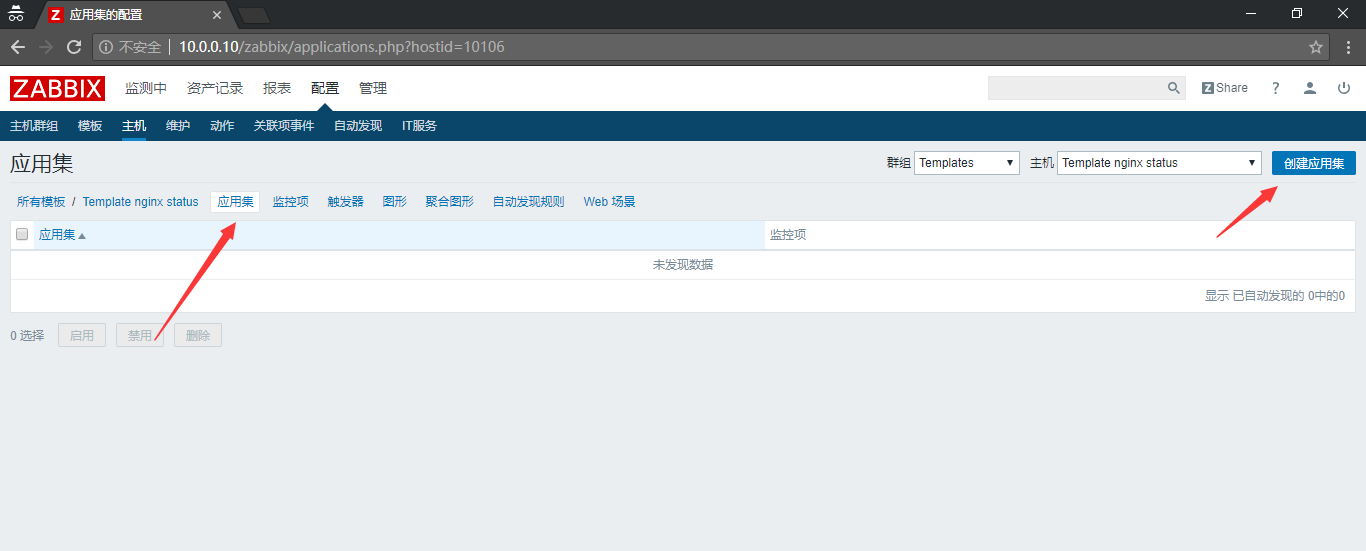
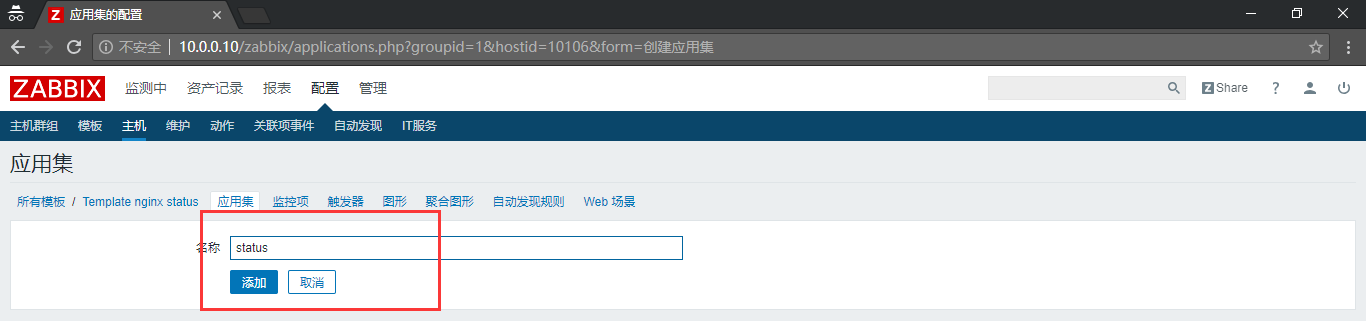
4.1.2 创建应用集
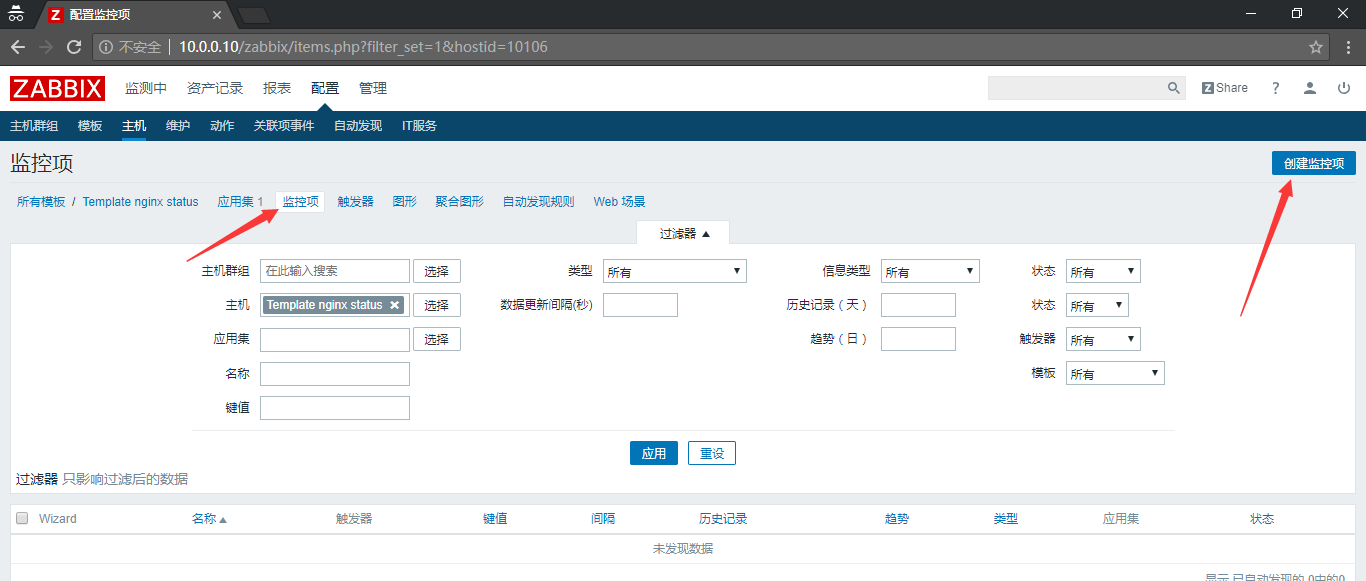
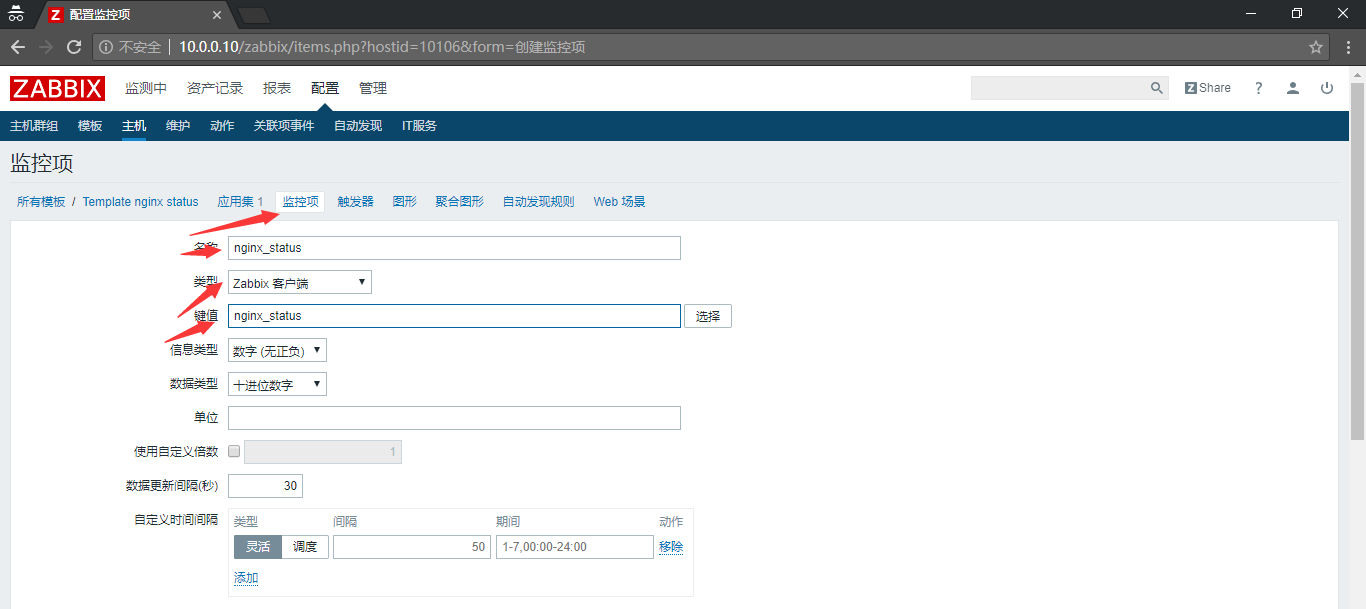
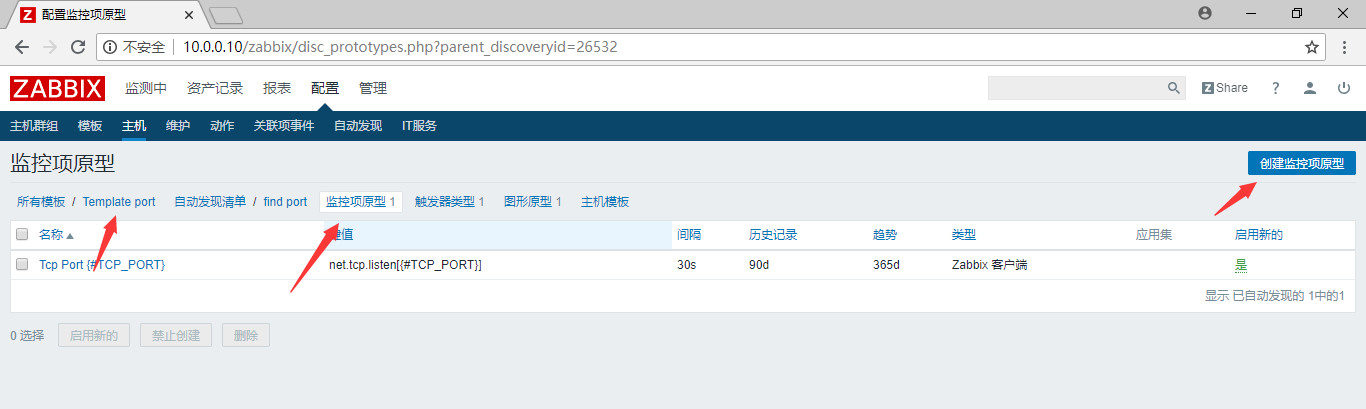
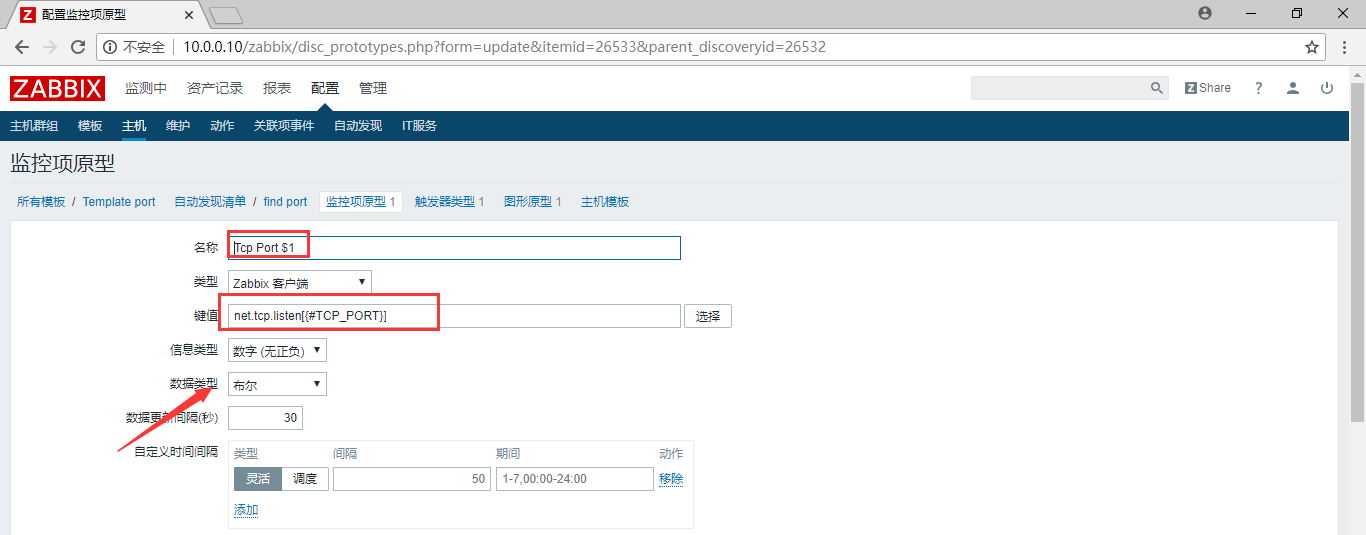
4.1.3 创建监控项
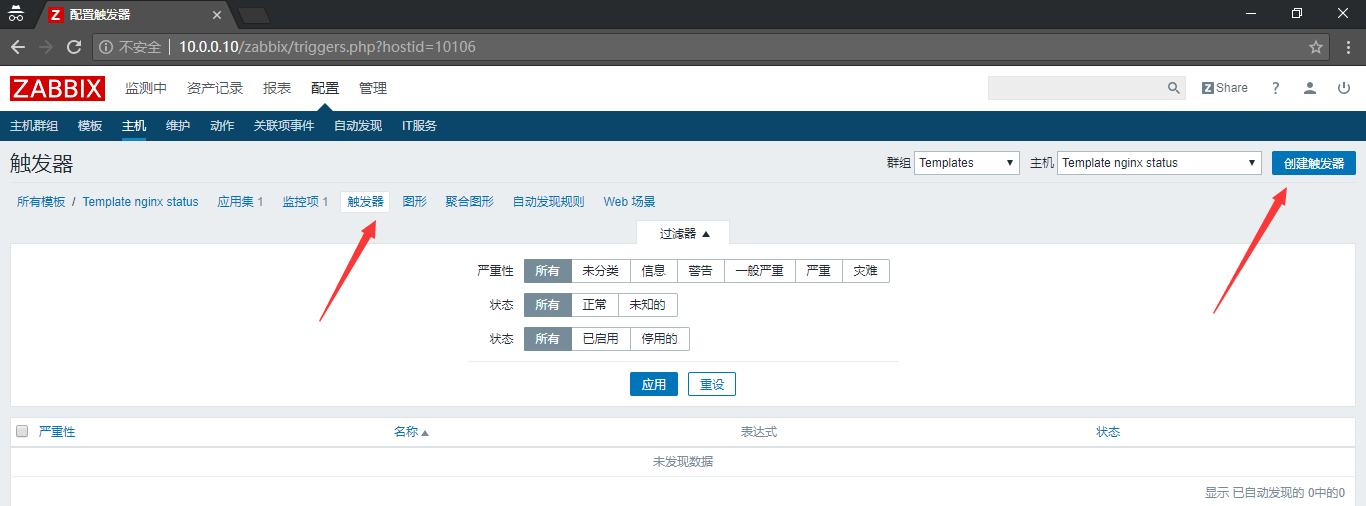
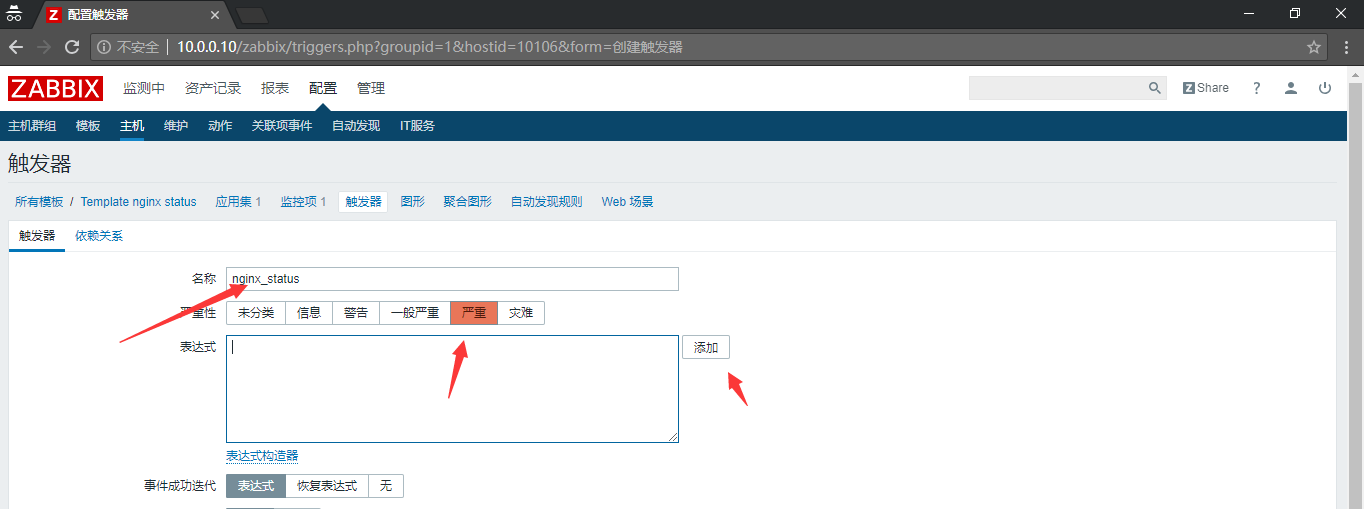
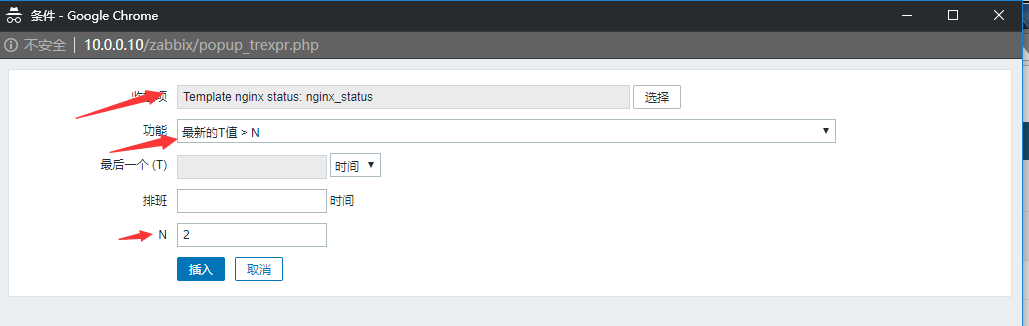
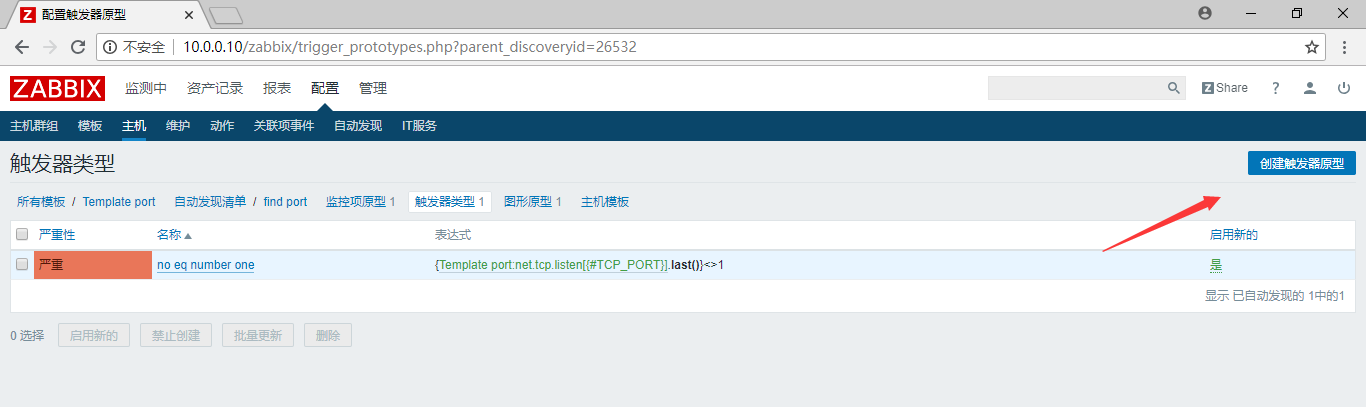
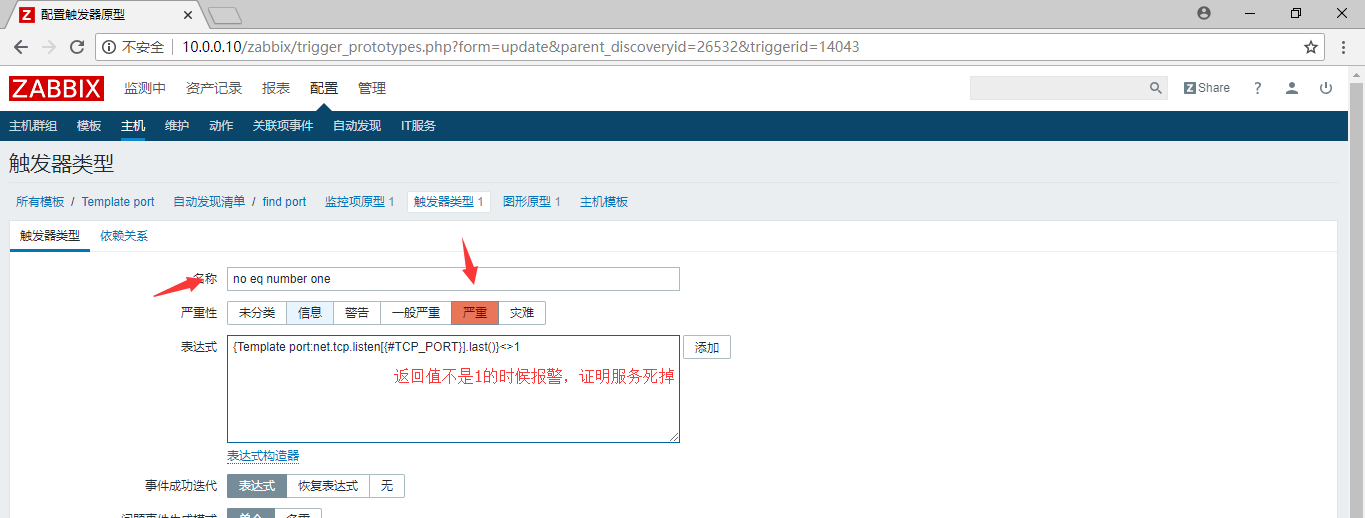
4.1.4 创建触发器
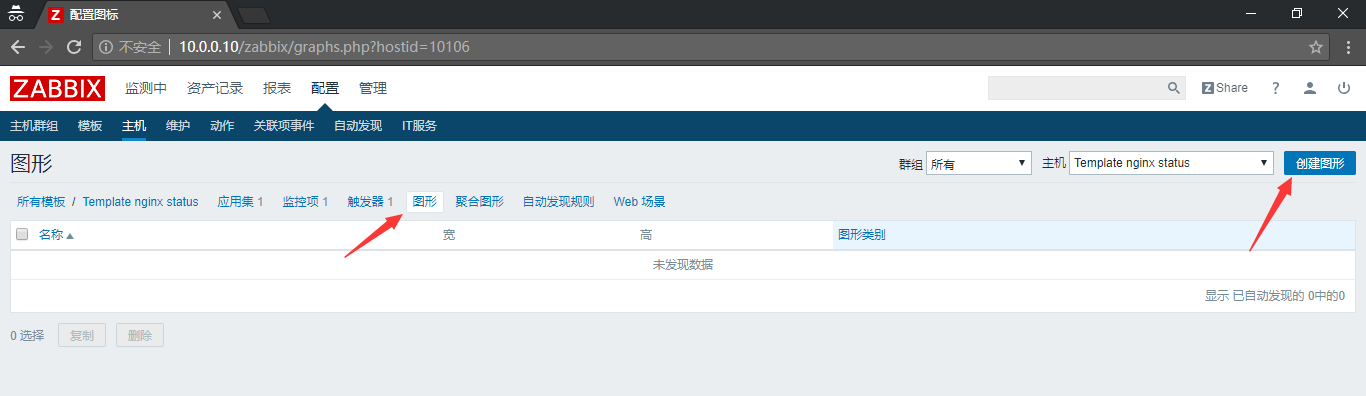
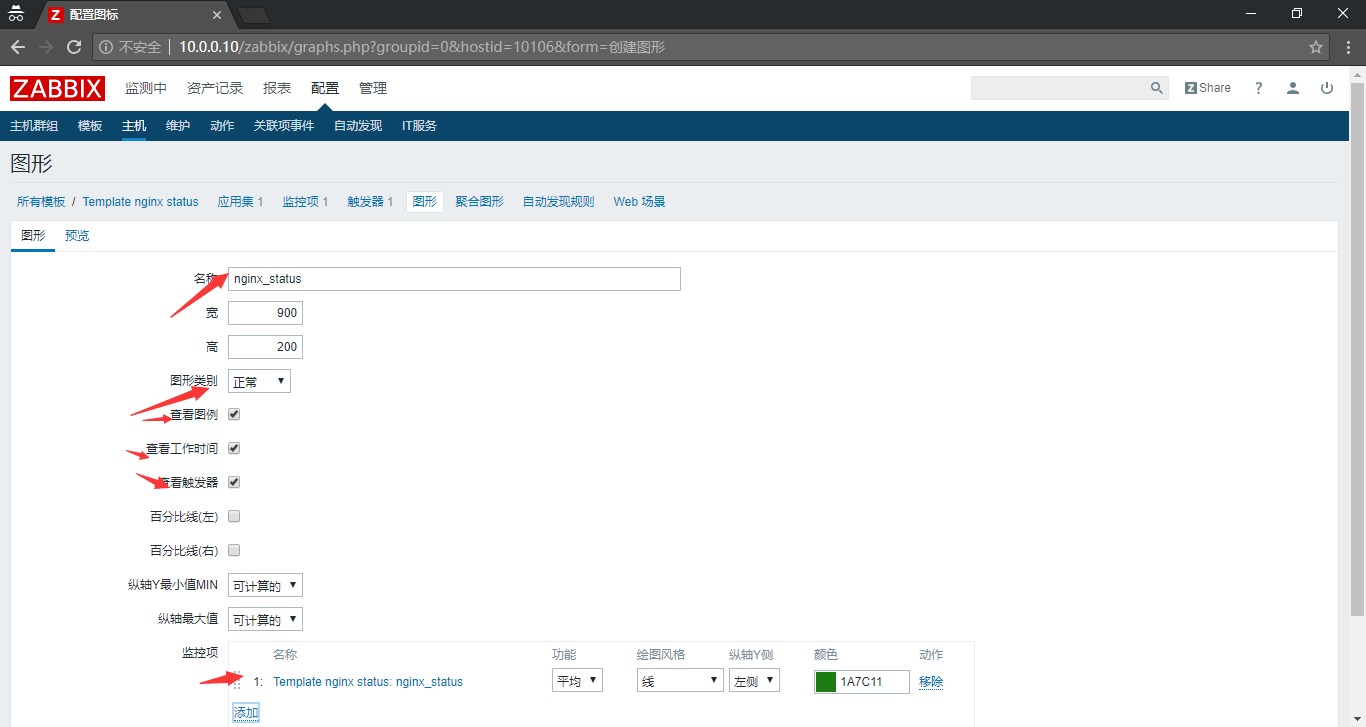
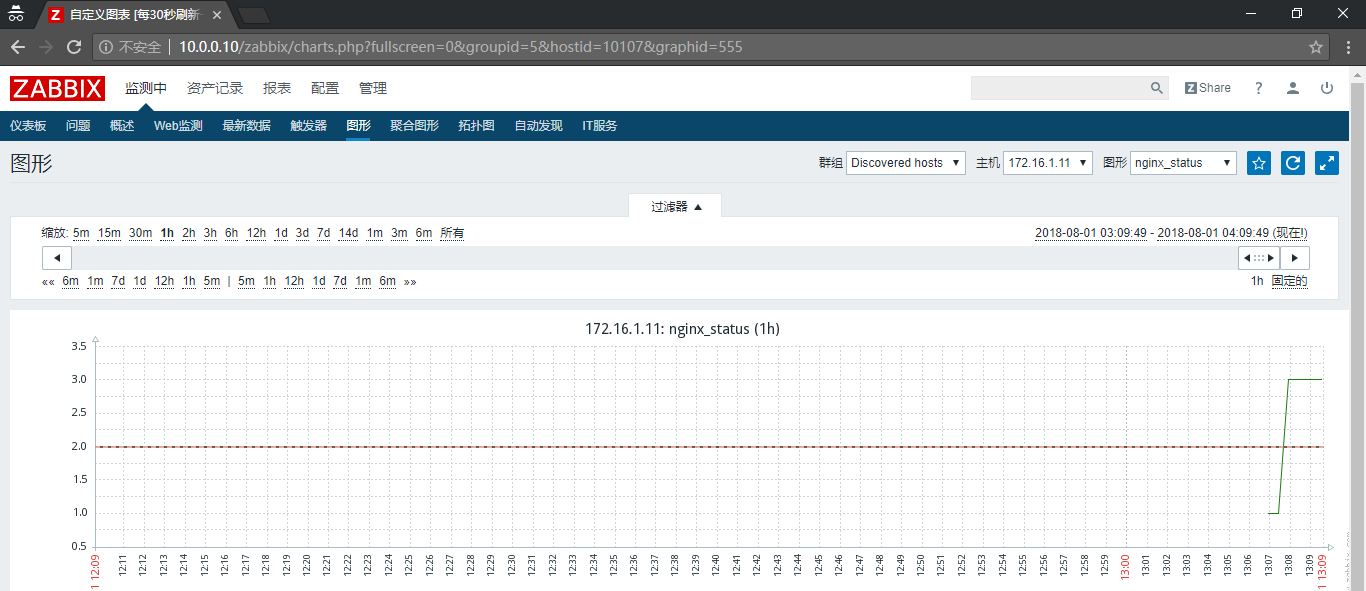
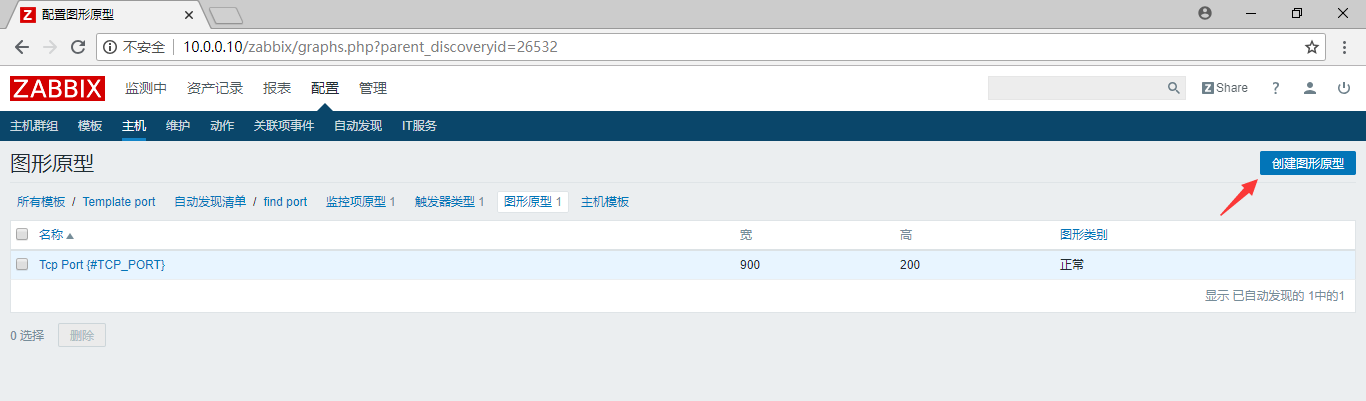
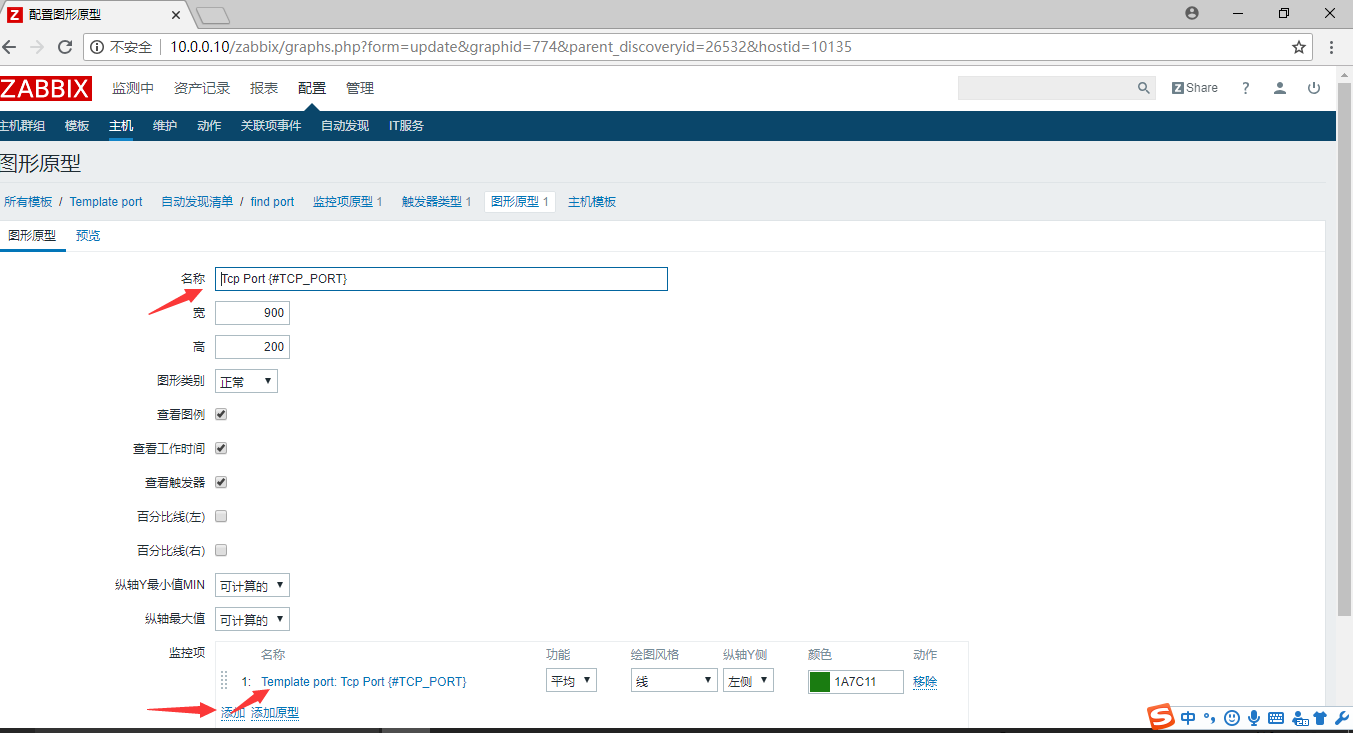
4.1.5 图形界面显示
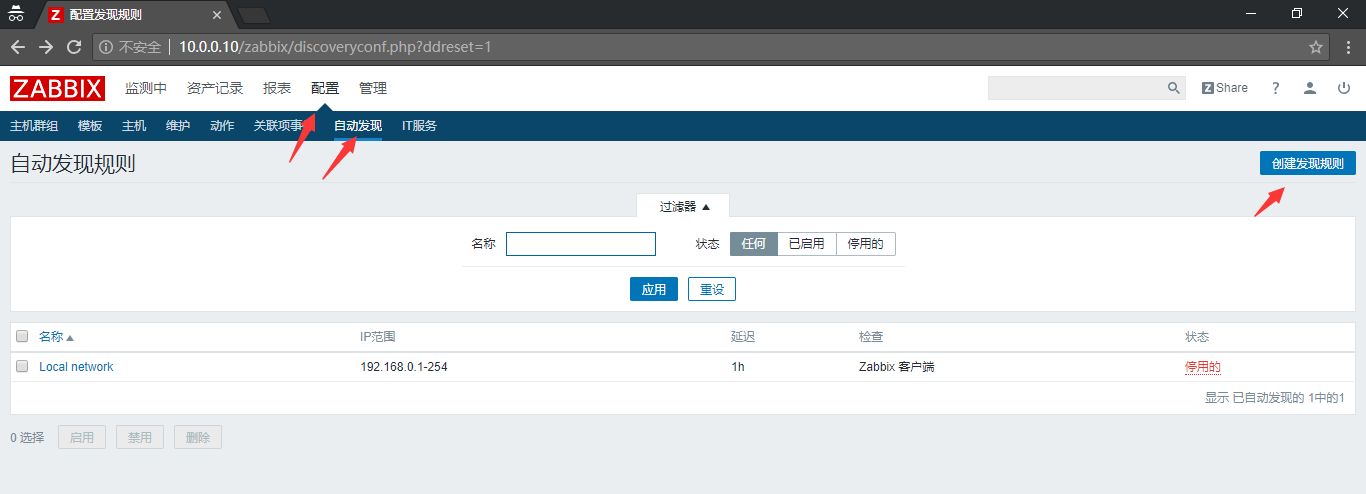
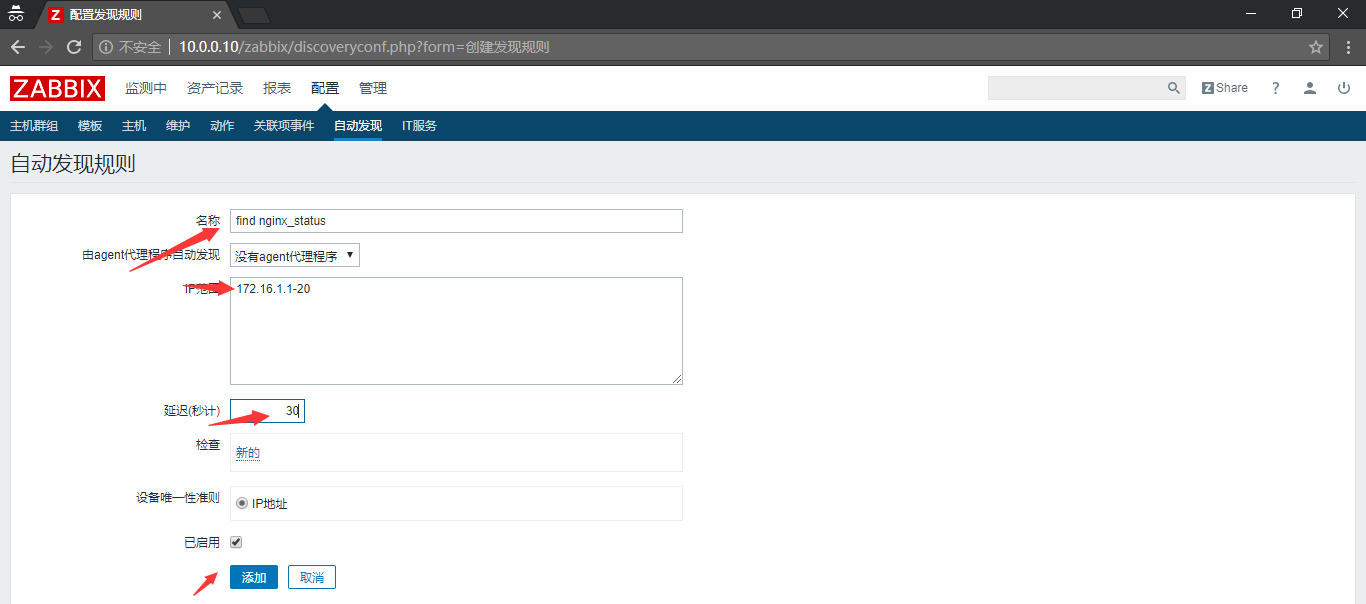
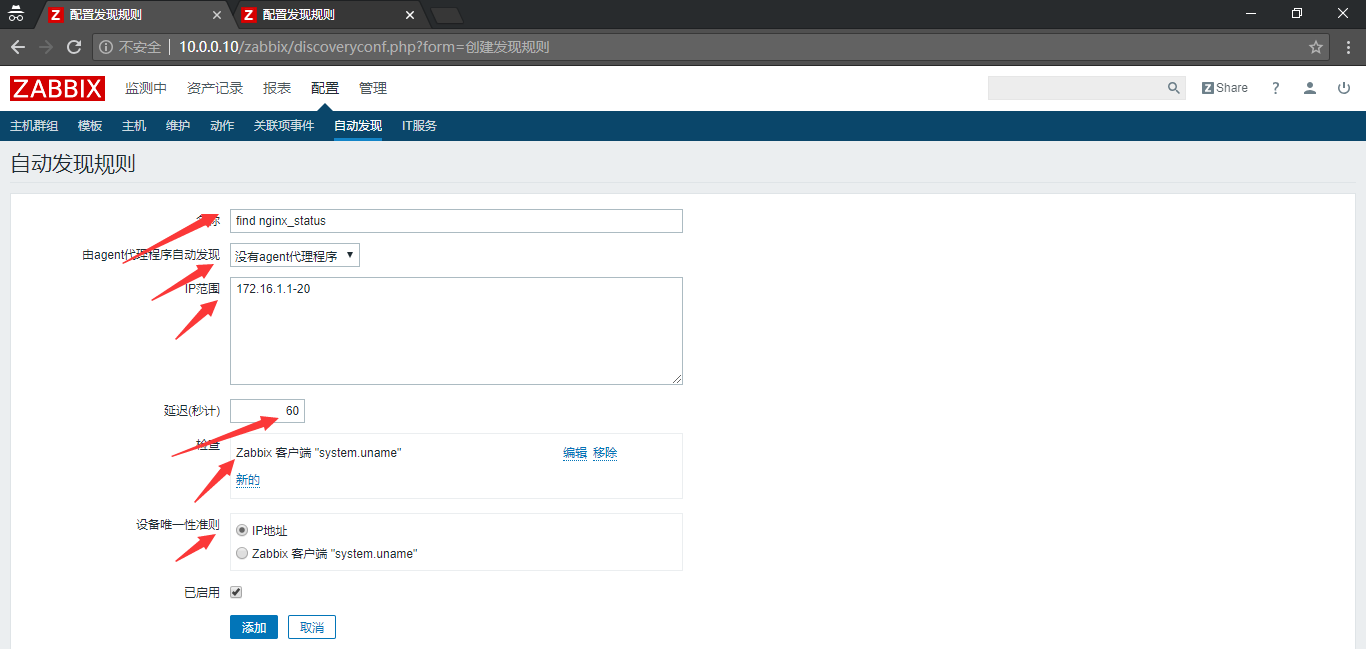
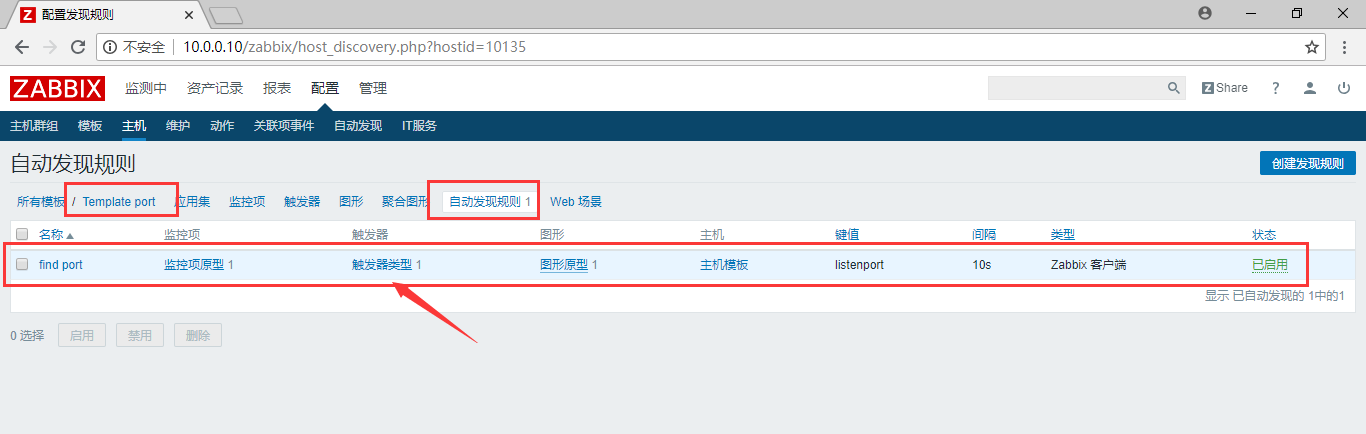
4.1.6 创建自动发现规则
4.1.7 自动发现关联模板


第5章 自动发现规则实现动态监控端口
5.1 脚本内容
#JSON格式的脚本
[root@zabbix-agent2 ~]# cat /etc/zabbix/script/discovery.sh
#!/bin/bash
portarray=(`netstat -tnlp|egrep -i "$1"|awk {'print $4'}|awk -F':' '{if ($NF~/^[0-9]*$/) print $NF}'|sort|uniq`)
#namearray=(`netstat -tnlp|egrep -i "$1"|awk {'print $7'}|awk -F'/' '{if ($NF != "Address") print $NF}'|uniq`)
length=${#portarray[@]}
printf "{\n"
printf '\t'"\"data\":["
for ((i=0;i<$length;i++))
do
printf '\n\t\t{'
printf "\"{#TCP_PORT}\":\"${portarray[$i]}\"}"
# printf "\"{#TCP_NAME}\":\"${namearray[$i]}\"}"
if [ $i -lt $[$length-1] ];then
printf ','
fi
done
printf "\n\t]\n"
printf "}\n"
#脚本给与 执行权限
[root@zabbix-agent2 ~]# chmod +x /etc/zabbix/script/discovery.sh
使用netstat命令输出端口号;-tnlp=Tcp协议+不显示别名+listen状态+显示程序名称;$1~$9表示输出的第几个参数;awk {'print $4'}表示输出第4个参数(如0.0.0.0:80);awk -F':' '{if ($NF~/^[0-9]*$/) print $NF}表示截取冒号后面的值,且只能是0~9的数字;|sort|uniq表示排序和去重。
脚本中注释掉的两行是用来监控服务的,只需替换掉其上的一行就是个扫描服务的脚本了。
5.2 测试脚本
[root@zabbix-agent2 ~]# sh /etc/zabbix/script/discovery.sh
{
"data":[
{"{#TCP_PORT}":"10050"},
{"{#TCP_PORT}":"111"},
{"{#TCP_PORT}":"20048"},
{"{#TCP_PORT}":"2049"},
{"{#TCP_PORT}":"22"},
{"{#TCP_PORT}":"41406"},
{"{#TCP_PORT}":"44522"},
{"{#TCP_PORT}":"58850"},
{"{#TCP_PORT}":"60859"}
]
}
5.3 脚本的key
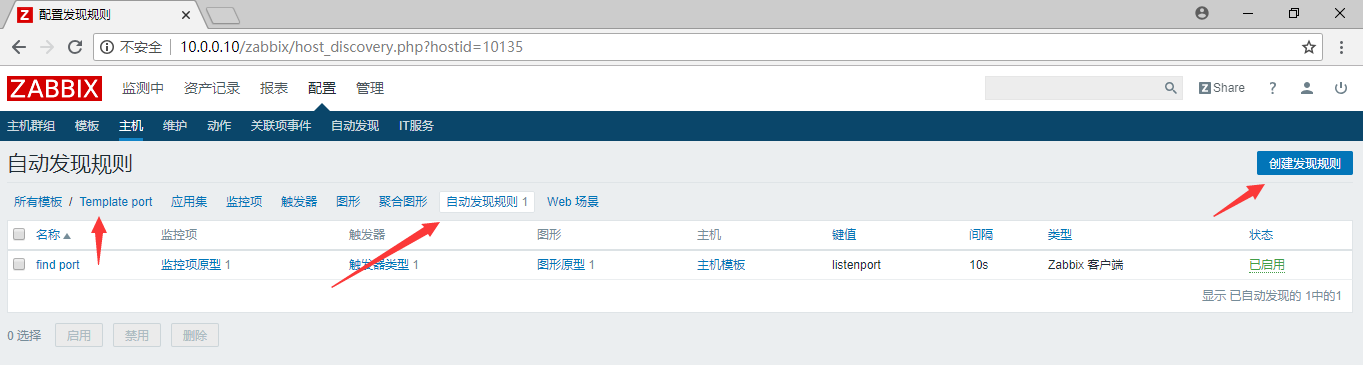
[root@zabbix-agent2 ~]# cat /etc/zabbix/zabbix_agentd.d/userparameter_port.conf
UserParameter=listenport,/etc/zabbix/script/discovery.sh "$1"
5.4 重启agent
[root@zabbix-agent2 ~]# systemctl restart zabbix-agent.service
5.5 服务端测试
[root@zabbx-server ~]# zabbix_get -s 172.16.1.12 -p 10050 -k "listenport"
{
"data":[
{"{#TCP_PORT}":"10050"},
{"{#TCP_PORT}":"111"},
{"{#TCP_PORT}":"20048"},
{"{#TCP_PORT}":"2049"},
{"{#TCP_PORT}":"22"},
{"{#TCP_PORT}":"41406"},
{"{#TCP_PORT}":"44522"},
{"{#TCP_PORT}":"58850"},
{"{#TCP_PORT}":"60859"}
]
}
5.6 web界面配置
5.6.1 加模板

5.6.2 自动发现规则

5.6.3 创建监控项原型
5.6.4 创建触发器
5.6.5 添加图形
zabbix详细介绍及其自动动态发现的更多相关文章
- 日志模块详细介绍 hashlib模块 动态加盐
目录 一:hashlib模块 二:logging 一:hashlib模块 加密: 将明文数据通过一系列算法变成密文数据(目的就是为了数据的安全) 能够做文件一系列校验 python的hashlib提供 ...
- Android manifest之manifest标签详细介绍
AndroidManifest详细介绍 本文主要对AndroidManifest.xml文件中各个标签进行说明.索引如下: 概要PART--01 manifest标签PART--02 安全机制和per ...
- ubuntu文件目录详细介绍
/bin 二进制可执行命令 /dev 设备文件(硬盘/光驱等) /etc 系统管理和配置文件 /etc/rc.d 启动的配置文件和脚本 /home 用户主目录,下面会有以登录用户名作为文件夹名的各文件 ...
- Linux各目录及每个目录的详细介绍(转载)
[常见目录说明] 目录 /bin 存放二进制可执行文件(ls,cat,mkdir等),常用命令一般都在这里. /etc 存放系统管理和配置文件 /home 存放所有用户文件的根目录,是用户主目录的基点 ...
- 03-Linux各目录及每个目录的详细介绍
Linux各目录及每个目录的详细介绍 [常见目录说明] 目录 /bin 存放二进制可执行文件(ls,cat,mkdir等),常用命令一般都在这里. /etc 存放系统管理和配置文件 /home 存放所 ...
- 详细介绍Redis的几种数据结构以及使用注意事项(转)
原文:详细介绍Redis的几种数据结构以及使用注意事项 1. Overview 1.1 资料 <The Little Redis Book>,最好的入门小册子,可以先于一切文档之前看,免费 ...
- SpringMVC之六:Controller详细介绍
一.简介 在SpringMVC 中,控制器Controller 负责处理由DispatcherServlet 分发的请求,它把用户请求的数据经过业务处理层处理之后封装成一个Model ,然后再把该Mo ...
- kvm详细介绍
KVM详解,太详细太深入了,经典 2016-07-18 19:56:38 分类: 虚拟化 原文地址:KVM详解,太详细太深入了,经典 作者:zzjlzx KVM 介绍(1):简介及安装 http:// ...
- Linux 目录详细介绍
[常见目录说明] 目录 /bin 存放二进制可执行文件(ls,cat,mkdir等),常用命令一般都在这里. /etc 存放系统管理和配置文件 /home 存放所有用户文件的根目录,是用户主目录的基点 ...
随机推荐
- 使用谷歌Z生成条形码以及二维码
下载地址:http://zxingnet.codeplex.com/ zxing.net是.net平台下编解条形码和二维码的工具,使用非常方便. 首先下载二进制dll文件,引入工程: using Sy ...
- spring boot 学习-创建方式
spring boot是什么 spring boot 是一个快速开发框架,适合小白快速上手开发,它集成了很多优秀的和常用的第三方框架,它简化了xml配置,完全采用注解方式,内部集成了Tomcat.Je ...
- pycharm支持react
安装nodejs插件 使能node 出现下面的变化,在scope里可以定义使用的范围 创建react项目 使能eslint规则检查功能 配置前端启动脚本: https://www.jetbrains. ...
- python异步回调函数的实现
#coding:utf-8 from socket import * import time #简单的服务器程序 监听用户连接,接收用户发来的信息,并返回反馈 def main(): HOST = & ...
- nodejs连接sqlserver
nodejs连接sqlserver http://blog.csdn.net/kkkkkxiaofei/article/details/31353091
- 可利用空间表(Free List)
写这篇文章的动因是因为 2015 年 04 月 02 日的阿里在线笔试题考到了这个知识点.我当时模模糊糊的写了一些,估计写的也不对,所以在这里总结一下. 原题 常常会有频繁申请.释放内存的需求,比如在 ...
- easyUI 对话框的关闭事件
有一个easyUI的dialog: <div id="dlg_Add" class="easyui-dialog" style=" width: ...
- SpringMVC上传文件后返回文件服务器地址路径
先写一个表单: <%@ page language="java" contentType="text/html; charset=UTF-8" pageE ...
- JBOSS和EJB学习一
1.使用软件 IDE:Eclipse4.3(开普勒) EE版本 服务器:jboss EAP 6.2 eclipse-jboss plugin:jbosstools-Update-4.1.2.Final ...
- 一个shell脚本清空所有vim的配置!!
这个是从dyl的脚本那里偷过来的哈哈--(其实我现在还不是很懂shell [ -d .vim ] && mv -v .vim .vim.$(stat -c%Y .vim) [ -f . ...