
Spring Boot 整合MyBatis(1)
这篇文章介绍如何在Spring boot中整合Mybatis,其中sql语句采用注解的方式插入。后续文章将会介绍,如何使用xml方式。
SSM SSH框架已经满足轻量级这个需求了,但是对于开发人员而言,它们有个缺点,那就是需要的配置文件文件太多。
用这些框架写的项目在resource下面你总是能看到一大堆的xml文件,即使后来注解帮助我们减轻了一部分工作量,但对一个需要迅速动手开发的团队而言,这些远远不够。
针对这些需求,Spring Boot出现了。采用“习惯大于约定”的思想解决了这一难题。不需要任何xml配置文件,我们就可以写出一个web项目。
当然,并不是说Sping Boot是一种新的出现,在我看来,它只是根据人们日常开发的习惯将Spring SpringMVC进行整合,让它能够快速满足大多数人的需求。
同时,Spring Boot的缺点也很明显,封装过于良好,细节不为人知。当我们需要“习惯”之外的东西或者出现异常的错误,我们往往束手无策。
好了,废话不多说了。下面介绍,如何将Spring Boot与MyBatis进行整合。
步骤一:从这个网站中下载初始工程,当然你也可以在eclipse中新建maven web项目。
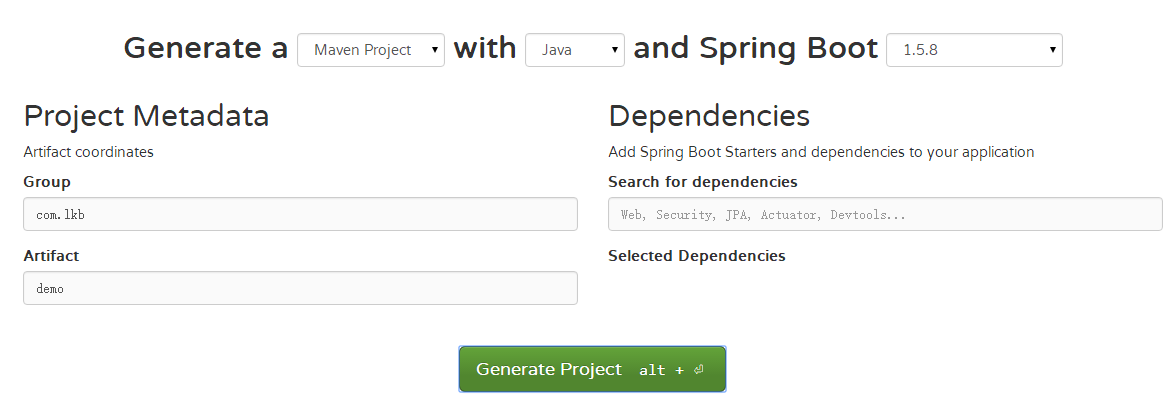
步骤二:通过eclipse将该工程导入。
步骤三:打开pom.xml,里面添加MySQL和MyBatis的依赖。
<dependencies>

        <dependency>

            <groupId>org.springframework.boot</groupId>

            <artifactId>spring-boot-starter-web</artifactId>

        </dependency>

        <dependency>

            <groupId>org.springframework.boot</groupId>

            <artifactId>spring-boot-starter-test</artifactId>

            <scope>test</scope>

        </dependency>

        <!-- mybatis -->

        <dependency>

            <groupId>org.mybatis.spring.boot</groupId>

            <artifactId>mybatis-spring-boot-starter</artifactId>

            <version>1.3.0</version>

        </dependency>

        <!-- mysql -->

        <dependency>

            <groupId>mysql</groupId>

            <artifactId>mysql-connector-java</artifactId>

        </dependency>

    </dependencies>
步骤四:准备测试数据
CREATE TABLE IF NOT EXISTS `student`(

    `id` INT UNSIGNED AUTO_INCREMENT,

    `name` VARCHAR(50) NOT NULL,

    `gender` ENUM('female','male') NOT NULL,

    `stu_id` VARCHAR(50) NOT NULL,

    PRIMARY KEY ( `id` )

)ENGINE=InnoDB DEFAULT CHARSET=utf8;

insert into student(name,gender,stu_id) values('Andy','female','01'),('Bruce','male','02'),('Celina','female','03'),('David','male','04');
步骤五:在Application.properties中添加MySQL的配置信息,并配置数据源信息。
spring.datasource.url = jdbc:mysql://localhost:3306/user?useUnicode=true&characterEncoding=utf-8

spring.datasource.username = root

spring.datasource.password = root

spring.datasource.driver-class-name = com.mysql.jdbc.Driver
     @Autowired

        private Environment env;

        //destroy-method="close"的作用是当数据库连接不使用的时候,就把该连接重新放到数据池中,方便下次使用调用.

        @Bean(destroyMethod =  "close")

        public DataSource dataSource() {

            DataSource dataSource = new DataSource();

            dataSource.setUrl(env.getProperty("spring.datasource.url"));

            dataSource.setUsername(env.getProperty("spring.datasource.username"));//用户名

            dataSource.setPassword(env.getProperty("spring.datasource.password"));//密码

            dataSource.setDriverClassName(env.getProperty("spring.datasource.driver-class-name"));

            dataSource.setInitialSize(2);//初始化时建立物理连接的个数

            dataSource.setMaxActive(20);//最大连接池数量

            dataSource.setMinIdle(0);//最小连接池数量

            dataSource.setMaxWait(60000);//获取连接时最大等待时间,单位毫秒。

            dataSource.setValidationQuery("SELECT 1");//用来检测连接是否有效的sql

            dataSource.setTestOnBorrow(false);//申请连接时执行validationQuery检测连接是否有效

            dataSource.setTestWhileIdle(true);//建议配置为true,不影响性能,并且保证安全性。

            return dataSource;

        }
步骤六:编写student表对应的POJO类。
package com.lkb.demo.domain;

/**

 * student表对应的POJO类

 * @author LKB

 *

 */

public class Student {

    /**

     * id

     */

    private int id;

    /**

     * 姓名

     */

    private String name;

    /**

     * 性别

     */

    private String gender;

    /**

     * 学号

     */

    private String stuId;

    //get set

    ...

   }
步骤七:编写Mapper接口。在方法上面添加对应的mybatis注解,这里我是选择,所以添加的是@Select 。
package com.lkb.demo.mapper;

import java.util.List;

import org.apache.ibatis.annotations.Select;

import com.lkb.demo.domain.Student;

public interface StudentMapper {

    /**

     * 查找所有的学生

     * @return

     */

    @Select("select * from student where 1=1")

    public List<Student> selectAll();

}
步骤八:编写service接口。
package com.lkb.demo.service;

import java.util.List;

import com.lkb.demo.domain.Student;

public interface StudentService {

    /**

     * 获取所有学生信息

     * @return

     */

    public List<Student> getAllStu();

}
步骤九:编写service接口实现类。
package com.lkb.demo.service.impl;

import java.util.List;

import org.springframework.beans.factory.annotation.Autowired;

import org.springframework.stereotype.Service;

import com.lkb.demo.domain.Student;

import com.lkb.demo.mapper.StudentMapper;

import com.lkb.demo.service.StudentService;

@Service("studentService")

public class StudentServiceImpl implements StudentService{

    @Autowired

    StudentMapper studentMapper;

    @Override

    public List<Student> getAllStu() {

        // TODO Auto-generated method stub

        return studentMapper.selectAll();

    }

}
步骤十:编写controller类。与之前不同的是,这里有一个@RestController 的注解,其实这个注解就是@Controller与@ResponseBody的结合。
你可以写一个@RestController,也可以按照之前的习惯书写。
package com.lkb.demo.controller;

import java.util.List;

import org.springframework.beans.factory.annotation.Autowired;

import org.springframework.web.bind.annotation.RequestMapping;

import org.springframework.web.bind.annotation.RestController;

import com.lkb.demo.domain.Student;

import com.lkb.demo.service.StudentService;

@RestController

@RequestMapping("/stu")

public class StudentController {

    @Autowired

    StudentService stuService;

    /**

     * 获取所有学生

     * @return

     */

    @RequestMapping("/getAll")

    public String getAllStu(){

        List<Student> students = stuService.getAllStu();

        return students.toString();

    }

}
步骤十一:编写启动类。下载的项目中已经带有启动类。但是我们仍然要添加mapper的路径,告诉Spring Boot上哪寻找我们的Mapper文件。
@SpringBootApplication

@MapperScan("com.lkb.demo.mapper")

public class DemoApplication{

    public static void main(String[] args) {

        SpringApplication.run(DemoApplication.class, args);

    }
}
步骤十二:在启动类处点击run->run as java application。下面是启动界面。
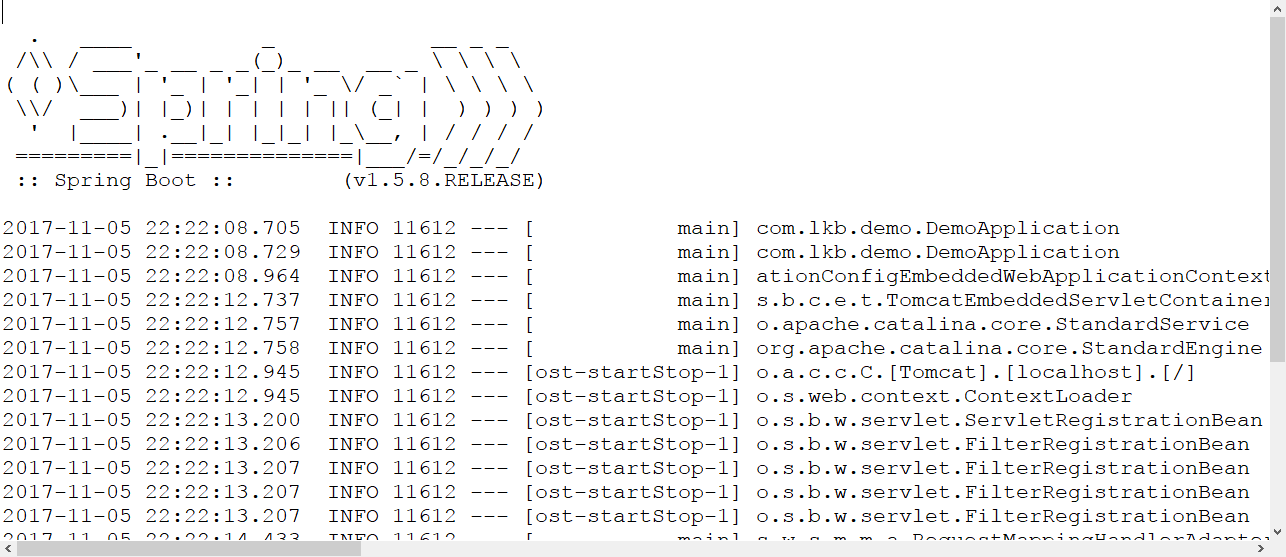
步骤十三:在浏览器输入localhost:8080/stu/getAll

可以看到是有返回数据的。
Spring Boot 整合MyBatis(1)的更多相关文章
- Spring Boot整合Mybatis并完成CRUD操作
MyBatis 是一款优秀的持久层框架,被各大互联网公司使用,本文使用Spring Boot整合Mybatis,并完成CRUD操作. 为什么要使用Mybatis?我们需要掌握Mybatis吗? 说的官 ...
- spring boot 整合 mybatis 以及原理
同上一篇文章一样,spring boot 整合 mybatis过程中没有看见SqlSessionFactory,sqlsession(sqlsessionTemplate),就连在spring框架整合 ...
- Spring Boot 整合mybatis时遇到的mapper接口不能注入的问题
现实情况是这样的,因为在练习spring boot整合mybatis,所以自己新建了个项目做测试,可是在idea里面mapper接口注入报错,后来百度查询了下,把idea的注入等级设置为了warnin ...
- Spring Boot整合Mybatis报错InstantiationException: tk.mybatis.mapper.provider.base.BaseSelectProvider
Spring Boot整合Mybatis时一直报错 后来发现原来主配置类上的MapperScan导错了包 由于我使用了通用Mapper,所以应该导入通用mapper这个包
- Spring Boot整合MyBatis(非注解版)
Spring Boot整合MyBatis(非注解版),开发时采用的时IDEA,JDK1.8 直接上图: 文件夹不存在,创建一个新的路径文件夹 创建完成目录结构如下: 本人第一步习惯先把需要的包结构创建 ...
- Spring Boot整合Mybatis完成级联一对多CRUD操作
在关系型数据库中,随处可见表之间的连接,对级联的表进行增删改查也是程序员必备的基础技能.关于Spring Boot整合Mybatis在之前已经详细写过,不熟悉的可以回顾Spring Boot整合Myb ...
- Spring Boot系列(三):Spring Boot整合Mybatis源码解析
一.Mybatis回顾 1.MyBatis介绍 Mybatis是一个半ORM框架,它使用简单的 XML 或注解用于配置和原始映射,将接口和Java的POJOs(普通的Java 对象)映射成数据库中的记 ...
- 太妙了!Spring boot 整合 Mybatis Druid,还能配置监控?
Spring boot 整合 Mybatis Druid并配置监控 添加依赖 <!--druid--> <dependency> <groupId>com.alib ...
- Spring Boot 整合 Mybatis 实现 Druid 多数据源详解
摘要: 原创出处:www.bysocket.com 泥瓦匠BYSocket 希望转载,保留摘要,谢谢! “清醒时做事,糊涂时跑步,大怒时睡觉,独处时思考” 本文提纲一.多数据源的应用场景二.运行 sp ...
- Spring boot整合Mybatis
时隔两个月的再来写博客的感觉怎么样呢,只能用“棒”来形容了.闲话少说,直接入正题,之前的博客中有说过,将spring与mybatis整个后开发会更爽,基于现在springboot已经成为整个业界开发主 ...
随机推荐
- PowderDesign的使用
(一)PowderDesign的安装 powderDesign下面简称pd,安装的话在网上找到安装包,安装后破解就行了.打开如图: (二)sql导入 操作步骤:File----------->R ...
- 小程序 mcrypt加密拓展在php7.1 废弃 使用openssl替代方案
原加密方法 使用mcrypt //获得16位随机字符串,填充到明文之前 $random = $this->getRandomStr(); $text = $random . pack(" ...
- 【洛谷 P1501】 [国家集训队]Tree II(LCT)
题目链接 Tree Ⅱ\(=\)[模板]LCT+[模板]线段树2.. 分别维护3个标记,乘的时候要把加法标记也乘上. 还有就是模数的平方刚好爆\(int\),所以开昂赛德\(int\)就可以了. 我把 ...
- 实现字符串检索strstr函数、字符串长度strlen函数、字符串拷贝strcpy函数
#include <stdio.h> #include <stdlib.h> #include <string.h> /* _Check_return_ _Ret_ ...
- 25、Python垃圾回收机制?
Python的GC模块主要运用了“引用计数”(reference counting)来跟踪和回收垃圾.在引用计数的基础上,还可以通过“标记-清除”(mark and sweep)解决容器对象可能产生的 ...
- Mysql储存过程5: while
循环结构 while create procedure name() begin while 条件 do SQL语句 end while; end$ create procedure aa6() be ...
- Redis—初探Redis
一.什么是Redis? 学习Redis最好的是看官网了,下面是Redis的官网对Redis的介绍 可见,Redis是一个内存存储的数据结构服务器,可以用作数据库.缓存等.支持的数据结构也很丰富,有字符 ...
- MGR_ERROR 3092 (HY000): DROP DATABASE failed;
start group_replication;时报以下错: ERROR 3092 (HY000): DROP DATABASE failed; some tables may have been d ...
- Machine Learning系列--L0、L1、L2范数
今天我们聊聊机器学习中出现的非常频繁的问题:过拟合与规则化.我们先简单的来理解下常用的L0.L1.L2和核范数规则化.最后聊下规则化项参数的选择问题.这里因为篇幅比较庞大,为了不吓到大家,我将这个五个 ...
- Python 类的名称空间和组合
一.Python类的名称空间 class Student(object): School = '北京大学' def __init__(self): pass stu1 = Student() stu1 ...