How to Install Xcode, Homebrew, Git, RVM, Ruby & Rails on Snow Leopard, Lion, Mountain Lion, and Mavericks
After following many outdated and incomplete instructions for setting up a web development environment on a Mac (back in March 2012), and spending a lot of time finding solutions to the problems I encountered along the way, I decided to put together this detailed tutorial.
Over time, as tools have improved, and with new releases of OS X, I’ve updated this tutorial. With Mavericks, setting up a development environment on a Mac with Apple’s standalone Command Line Tools, Homebrew, Git, RVM, Ruby, and Rails is a fairly stress-free process that’s no longer fraught with the issues from two years ago.
I started with a clean system, and the following are the steps that worked for me. If you run into an issue, or find an error in this tutorial, please let me know and I’ll update it.
Click on your OS X version below to get started:
Historical Background
Up until February 2012, the only way you could get the Command Line Tools required for web development was via the full Xcode package, which is almost 2 GB in size. Since then, Apple started offering the Command Line Tools (CLT) as a separate, much smaller download (~118MB), which benefits those who don’t plan on writing Mac or iOS apps.
There is also a third-party option, the osx-gcc-installer by Kenneth Reitz, that supports both Snow Leopard and Lion. However, it is not updated as often as the official Apple tools, and I personally ran into issues with it on Lion.
When I tried Apple’s CLT for Lion back in March 2012, they weren’t compatible with Homebrew:
1 |
|
As of August 6, 2012, the issue above is no longer present with the latest CLT for Mountain Lion, and I believe that’s the case on Lion as well, but I haven’t confirmed that yet. Until I do, I recommend getting the CLT from Xcode if you’re on Lion, as explained in this tutorial.
Step 1: Download and Install the Command Line Tools (via Xcode or the standalone installer)
Step 1 starts with the standalone CLT instructions, as that’s the easiest and fastest way to get started. Here’s a quick link to the Xcode instructions.
Installing the standalone Command Line Tools on Mavericks
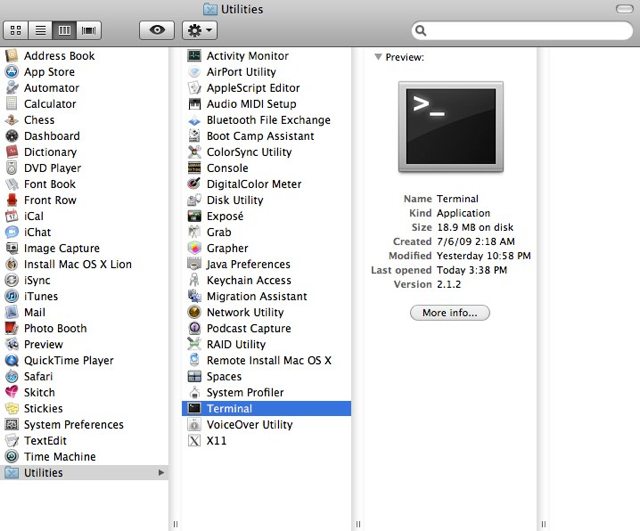
Launch the “Terminal” application, which you can find in the “Utilities” folder in “Applications”.
Inside the Terminal window, copy and paste (or type) the following command, and press the return key on your keyboard:
1 |
|
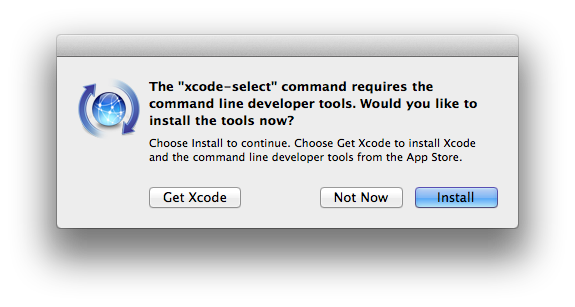
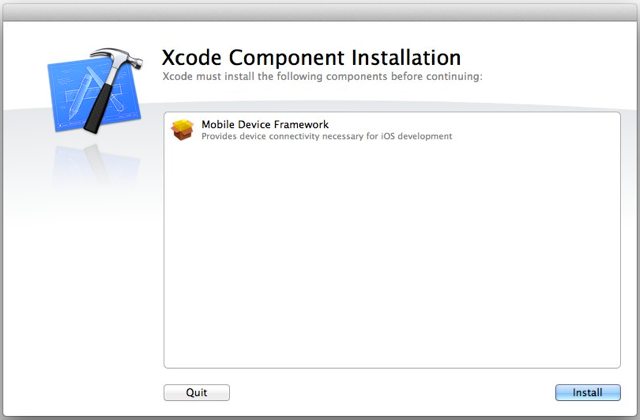
You should see the pop up below on your screen. Click Install when it appears.
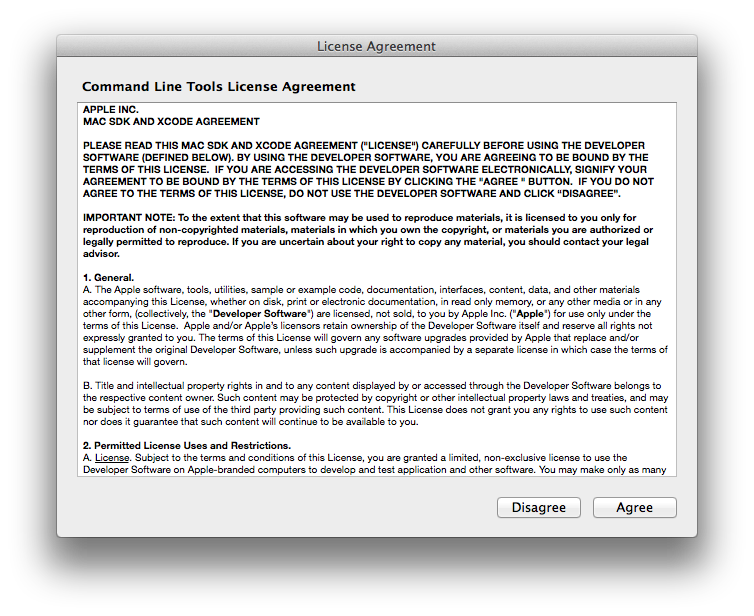
Click Agree when the License Agreement appears:
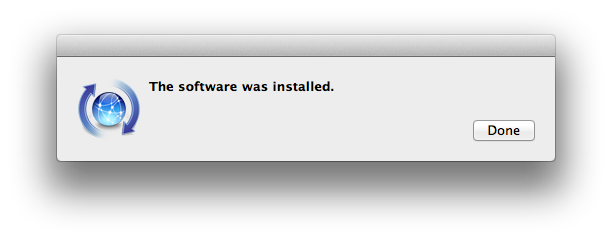
Your computer will then attempt to find the software, and then will start downloading it. The following popup will appear:
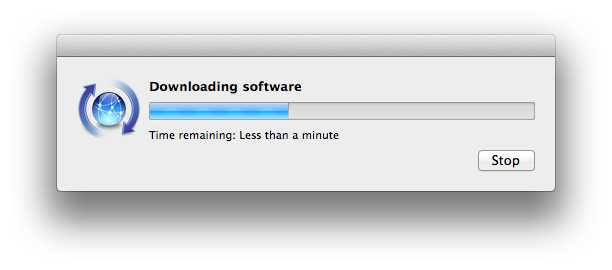
Once the software is installed, click Done. That’s it! You’re now ready to go to Step 2.
Installing the standalone Command Line Tools on Mountain Lion
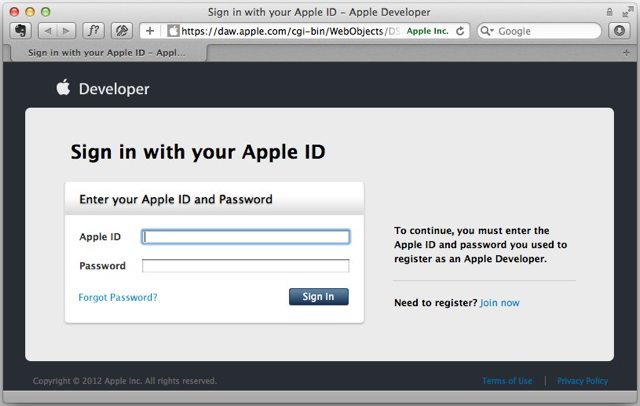
Go to http://developer.apple.com/downloads and sign in with your Apple ID (the same one you use for iTunes and app purchases).
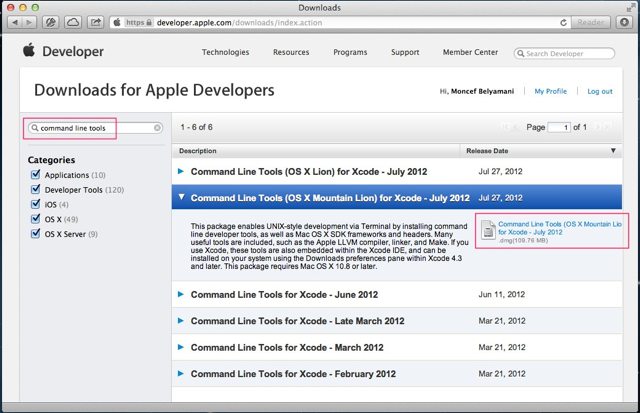
Search for “command line tools” (in the search field on the left), then click on the latest version of “Command Line Tools (OS X Mountain Lion) for Xcode,” and click on the the .dmg link to download it.
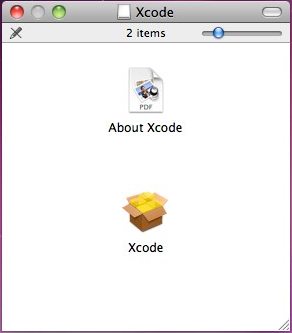
Once the .dmg has finished downloading, double-click on it (if it didn’t already open automatically). This will mount the disk image and open a window in your Finder that looks like this:

Double-click on the “Command Line Tools (Mountain Lion).mpkg” installer and go through the installation. Once the CLT are installed, go to Step 2.
Installing Xcode on Lion or Mountain Lion
Click on this link to Xcode on the Mac App Store, then click on “View in Mac App Store.”
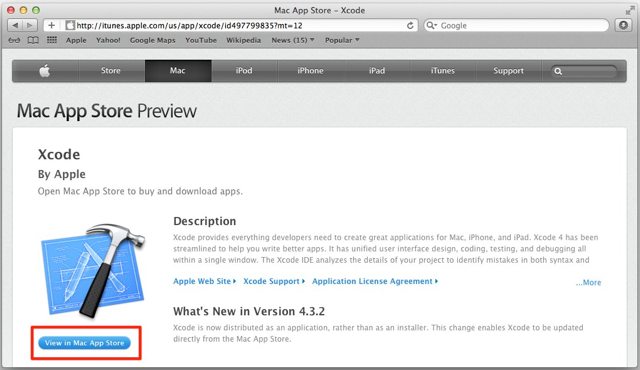
It should automatically launch the “App Store” app on your Mac and take you the Xcode page. Click on the “Free” button, then click on “Install App.”
Once the installation is complete, go to your Applications folder and double-click on Xcode, then install any required components if asked to.
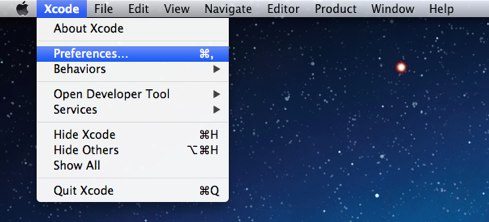
Go to Xcode’s Preferences via the menu bar, or by pressing the command and comma keys.
Click on the “Downloads” icon, then click on the “Install” button next to “Command Line Tools.”
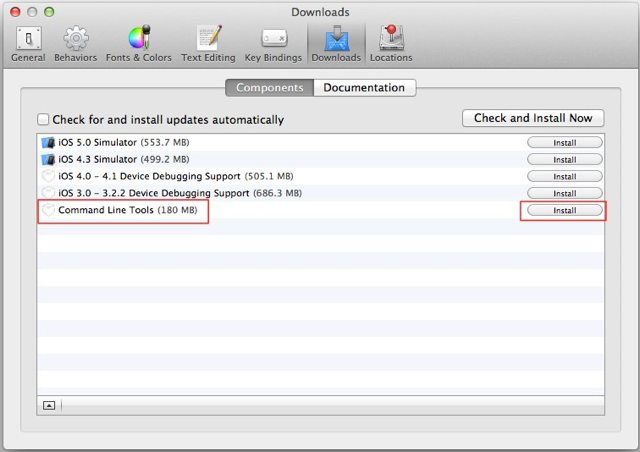
When prompted to log in, you should be able to use the same email and password you use for iTunes and app purchases. Once the Command Line Tools are installed, you can quit Xcode and move on to Step 2.
IMPORTANT NOTE: If you upgraded to Mountain Lion from Lion, and you already had Xcode installed on Lion, and you updated to Xcode 4.4 and updated the Command Line Tools while still on Lion, you will have to go back to Xcode and download the Command Line Tools again after upgrading to Mountain Lion.
Snow Leopard Instructions
UPDATE: A kind reader (P. Martin) pointed out that the Xcode 4.2 download for Snow Leopard is only available to those registered in the $99/year developer program. I confirmed that the latest version of Xcode for Snow Leopard available to me while signed in with a free account is 3.2.6. I have not tested this setup with Xcode 3.2.6, but I would love to hear from you if you have. Otherwise, I recommend that you upgrade to Lion, Mountain Lion or Mavericks.
Go to http://developer.apple.com/downloads and sign in with your Apple ID (the same one you use for iTunes and app purchases).
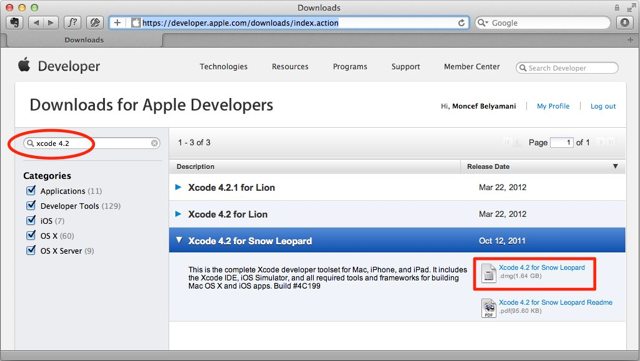
If you are part of the $99/year Apple developer program, search for “xcode 4.2” (in the search field on the left), then click on “Xcode 4.2 for Snow Leopard,” and click on the .dmg link to download it.
Otherwise, search for “xcode 3.2”, then click on “Xcode 3.2.6 and iOS SDK 4.3 for Snow Leopard,” and click on the .dmg link to download it. As mentioned at the beginning of this section, I have not tested this tutorial with Xcode 3.2.6, so I would recommend that you upgrade to Lion, Mountain Lion or Mavericks.
Once the .dmg has finished downloading, it should automatically mount the disk image and open a window in your Finder that looks like this:
Double-click on the “Xcode” package installer. Once the installer launches, make sure all the checkboxes are checked, as shown in the screenshot below:
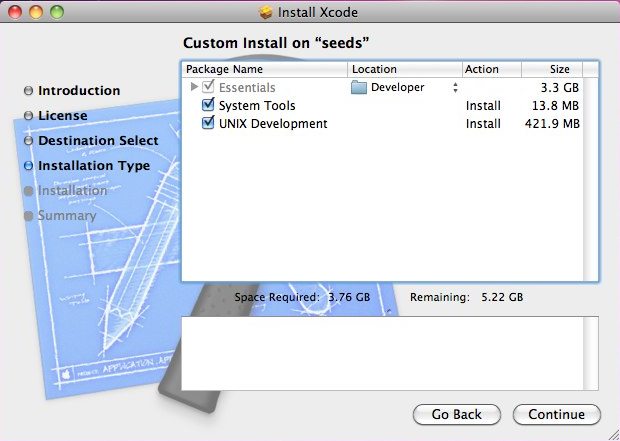
Click “Continue,” and go through the rest of the installation. If the installation fails, quit the installer, then run Software Update and install any updates that it finds.
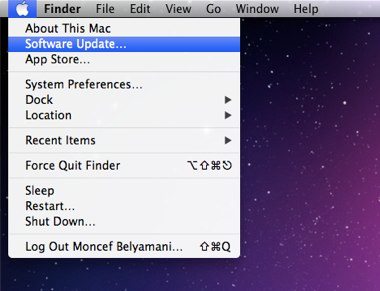
If no new updates are available, restart your computer and try installing Xcode again. Once Xcode is successfully installed, you can move on to Step 2.
Step 2: Verify that GCC was installed
Launch the “Terminal” application, which you can find in the “Utilities” folder in “Applications”.
From now on, you will be copying and pasting (or typing) a lot of commands in Terminal. They will be formatted like so:
1 |
|
The “$” appears automatically at the end of the command prompt in Terminal after every command that you run. You will not be copying and pasting or typing the $, only what comes after it. After entering the command, you will press “return” to execute the command.
The first command we will run will serve to verify that GCC was successfully installed by either Xcode or the standalone CLT:
1 |
|
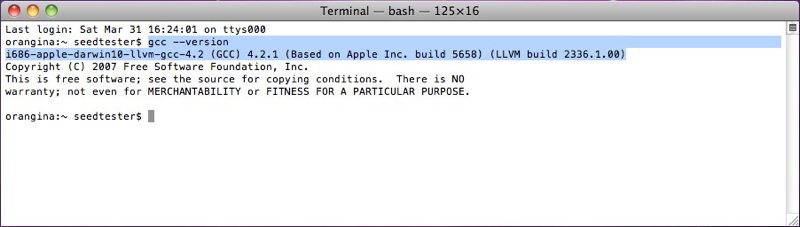
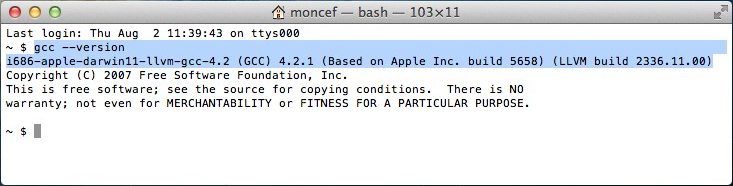
If all went well, you should see the GCC version in the output. It will show something like this:
1 |
|
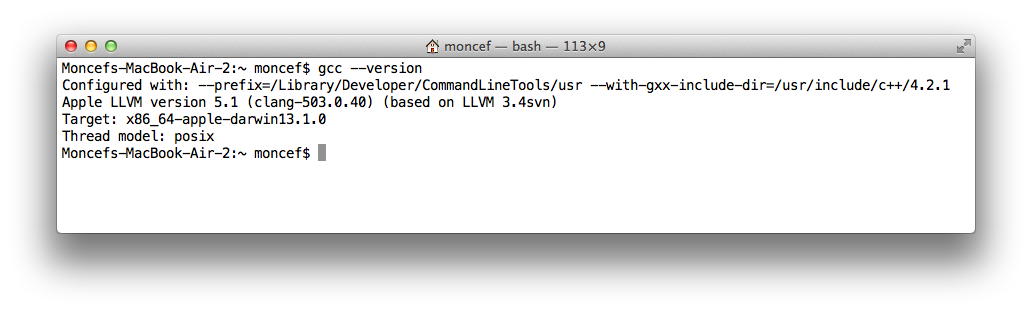
The exact output will differ depending on which version of OS X you’re on. Here are some screenshots from Lion, Mountain Lion, and Mavericks.
Lion:
Mountain Lion:
Mavericks:
Step 3: Install Homebrew
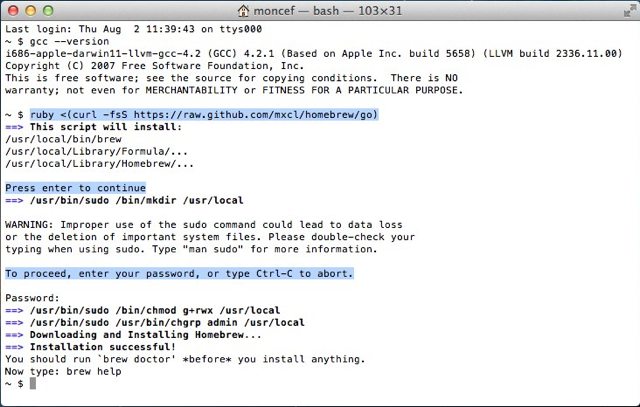
Homebrew, “the missing package manager for OS X,” allows you to easily install hundreds of open-source tools. The full instructions are available on the Homebrew Wiki, but you should only need to run the command that’s listed at the bottom of the Homebrew site:
1 |
|
Note that the command listed on the Homebrew site could change, so please make sure that what I have listed above is the same. If it isn’t, please let me know and I’ll update it.
Run the command, and follow the instructions when prompted, as highlighted in the screenshot below. Note that Terminal does not provide visual feedback when you type your password. Just type it slowly and press return.
Once the installation is successful, run the following command:
1 |
|
If you get Your system is ready to brew, you can move on to Step 4. Otherwise, continue reading to learn how to fix errors and warnings you might run into.
In many cases, Homebrew will provide helpful instructions for dealing with warnings and errors, and I usually follow those instructions. I’ve tried to cover the most common sources of warning and errors. If you run into an issue I haven’t mentioned, try looking it up in the Homebrew GitHub Issues, or Google the error message. If that doesn’t help, contact me and I’ll do my best to help you.
After you fix each issue, run brew doctor until you get Your system is ready to brew. Then go to Step 4.
Common Homebrew warnings and errors, and how to get rid of them
If you get Warning: /usr/bin occurs before /usr/local/bin, run the command below, as recommended by Homebrew:
1 |
|
This command takes everything between the single quotes and adds it (>>) to a file called .bash_profile in your user’s root directory (~/). Every time you open a new Terminal window or tab, .bash_profile is called. The export PATH line tells your system to look in /usr/local/binfirst. In Step 4, I explain why this is important.
Quit and relaunch Terminal, then run brew doctor once more. Your system should be ready to brew now.
If you get Warning: Experimental support for using Xcode without the "Command Line Tools", you probably upgraded from Lion to Mountain Lion but didn’t reinstall the Command Line Tools. See the important note in Step 1.
If you get Error: No such file or directory - /usr/local/Cellar, run the following command, which creates the /usr/local/Cellar directory:
1 |
|
sudo allows you to run commands as a user with higher access rights, which is why it prompts you for your password, and mkdir stands for “make directory.”
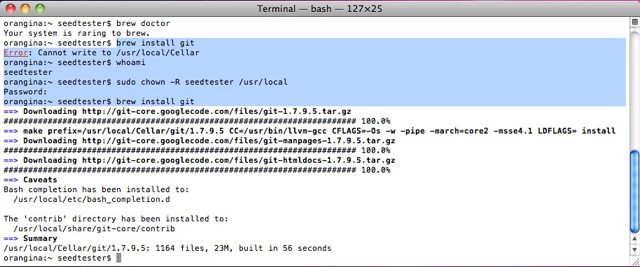
If you get /usr/local/etc isn't writable or Cannot write to /usr/local/Cellar or if it complains that any directories inside /usr/local aren’t writable, fix it with this command:
1 |
|
This makes you the owner of the /usr/local directory, in addition to all nested directories.
chown stands for “change owner,” the -R flag applies this to all nested files and directories, and whoami is a variable that represents your OS X username. You should copy and paste the command above as is.
To learn more about any Unix command, type man (for “manual”), followed by the command. For example:
1 |
|
If a manual is longer than a page long, it will display a : at the end to signify there is more to read. To display one additional line at a time, press return. To display an additional page at a time, press the space bar. To quit at any time, press q.
If you get Warning: Unbrewed dylibs were found in /usr/local/lib, or a warning about any type of unbrewed files or static libraries, you may need to delete them as suggested by Homebrew (unless you put them there on purpose, which is unlikely). You’ll have to delete each file it complains about one by one with the rm command. For example, to remove a file called libgd.2.0.0.dylib from /usr/local/lib, you would run this command:
1 |
|
If you get Warning: Python is installed at /Library/Frameworks/Python.framework, or Warning: "config" scripts exist outside your system or Homebrew directories related to Python, it most likely means you installed Python with a tool other than Homebrew. If you think you might need this version of Python, then just ignore those warnings. Otherwise, run the command below to remove that version of Python, but read this thread first.
1 |
|
If you’re on Lion, you might get this:
1 |
|
This should fix it:
1 |
|
Run brew doctor to verify. Your system should be ready to brew now.
Step 4: Install Git
Git is the version control system of choice among many web developers. With Homebrew, installing Git is as easy as this:
1 |
|
Since we just installed Homebrew, we could have skipped brew update, but it’s a good habit to run it before installing anything with Homebrew because Homebrew is updated regularly.
Run brew doctor to make sure everything is still working. If you get Warning: /usr/bin occurs before /usr/local/bin, run the command below, as recommended by Homebrew:
1 |
|
This command takes everything between the single quotes and adds it (>>) to a file called .bash_profile in your user’s root directory (~/). Every time you open a new Terminal window or tab, .bash_profile is called. The export PATH line tells your system to look in /usr/local/binfirst. This is important because Xcode installs an older version of Git in /usr/bin, but we want to use the latest version that Homebrew installed in /usr/local/bin.
Quit and relaunch Terminal, then run brew doctor once more. Your system should be ready to brew now.
To verify:
1 |
|
You should get /usr/local/bin/git.
Step 5: Configure Git with your Name and Email
1 |
|
Note that the email address you set above will be attached to every Git commit you make, so you might want to use a bogus email if you want to keep your email private. If you use GitHub, I think you’ll need to add that email address to your GitHub email settings. To learn more about Git, check out the various resources I’ve tagged with “git” on Pinboard.
Step 6: Install RVM with the latest Ruby (2.1.1) and Rails (4.1.0)
RVM stands for Ruby Version Manager, and is one of the most popular tools that allow you to install and manage multiple versions of Ruby and Rails on the same computer.
RVM has come a long way since I originally published this tutorial. As of March 30, 2013, you can now install the latest RVM, Ruby, and Rails in one step. However, because RVM installs documentation for every gem that Rails depends on, which takes forever, I recommend disabling documentation first:
1 |
|
Now you can install everything with one command. If you’re not interested in Rails, just remove --rails from the command below:
1 |
|
Read the RVM installation documentation to see all the different options you can use.
I verified this on a clean installation of Mountain Lion 10.8.3 and Mavericks 10.9.2, but I have not tested it on Snow Leopard or Lion.
This will take a few minutes, and once it’s done, quit and relaunch Terminal, then run this command:
1 |
|
If you get rvm is a function, that means RVM was successfully installed. If not, go to the Troubleshooting section.
To make sure the latest versions of RVM, Ruby and Rails were installed, run the commands below:
For RVM
1 |
|
You should get rvm 1.25.25 or higher.
For Ruby
1 |
|
You should get ruby 2.1.1p76 or higher.
For Rails
1 |
|
You should get Rails 4.1.0 or higher.
To make sure your system is still ready to brew:
1 |
|
If everything went well, you’re done! Your machine is now set up with the basic tools for web development.
If you run into any other issues, please let me know and I will do my best to help you. If you got any value out of my tutorial, I have more time-saving tips and tricks for you in my free newsletter. If you’re feeling really appreciative, you can also donate, which will automatically give you a discount for any paid courses I will release in 2014.
Troubleshooting
In some cases, brew doctor might show you this warning:
1 |
|
Homebrew messages are generally very helpful and they let you know exactly what to do. In this case, it is telling you to fix the linking issue by running brew unlink, followed by the tools (or “brews”) that need to be unlinked. Here, there is only one tool that needs to be unlinked. Therefore, you should run this command:
1 |
|
If it listed more than one tool, you would add them to the command separated by a space, like so:
1 |
|
Run brew doctor once more, and you should be ready to brew now.
How to load RVM into your shell session as a function
Run this command:
1 |
|
Just like the command we saw in Step 4, this adds everything between the single quotes to your .bash_profile, which ensures that every time you start a new Terminal session, you will be able to use all of RVM’s commands.
Now that .bash_profile has been modified, it needs to be reloaded. For initial RVM installations, the preferred way to do this is to quit and relaunch Terminal. Otherwise, you can use the following command:
1 |
|
If all went well, you should see rvm is a function after you run this command:
1 |
|
Next Steps
Once you start hacking away on your computer, you will most likely need to install more tools with Homebrew. Before you do, remember to always run brew update and brew doctor to make sure your system is still ready to brew. To upgrade your existing packages, run brew upgrade.
If you installed the full Xcode package, remember that when you update it via the Mac App Store, you might also need to update the Command Line Tools via Xcode’s Preferences. If you installed the standalone CLT, I recommend checking for a new version once a month or so.
If you followed this tutorial because you’re interested in Rails development, I recommend visiting Daniel Kehoe’s excellent RailsApps Project.
If you want to install another version of Ruby besides 2.1.1, follow the instructions below.
Installing other versions of Ruby, such as 1.9.3
Before you install a version of Ruby with RVM, you should make sure you have the latest version of RVM:
1 |
|
Then run:
1 |
|
To see all the versions of Ruby installed via RVM:
1 |
|
This output also lets you know which version is the default and which one is the current one in use.
To use a specific version (2.0.0 in the example below) and also set it as the default version for new shell sessions:
1 |
|
To verify:
1 |
|
The version should match that of the current Ruby in use.
Previous Notes
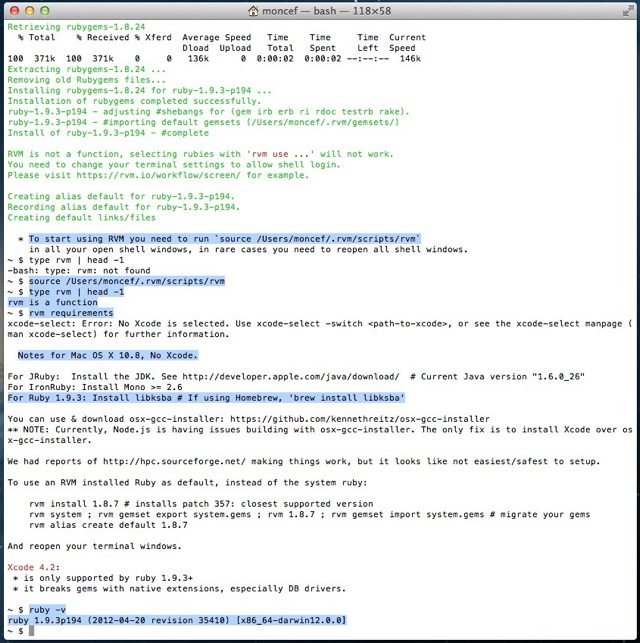
Installing Ruby on Snow Leopard and Lion is presumably as easy as on Mountain Lion, but I haven’t been able to verify that. The instructions below are based on my experience in 2012. I’ve left them here for reference but I’m not sure if they still apply. For example, running rvm requirements used to provide instructions specific to your environment, but now it tries to install all the requirements for you.
The screenshots below are examples of the kind of output rvm requirements would show. One is for Snow Leopard 10.6.8 with Xcode 4.2, and the other for Mountain Lion 10.8 with no Xcode:
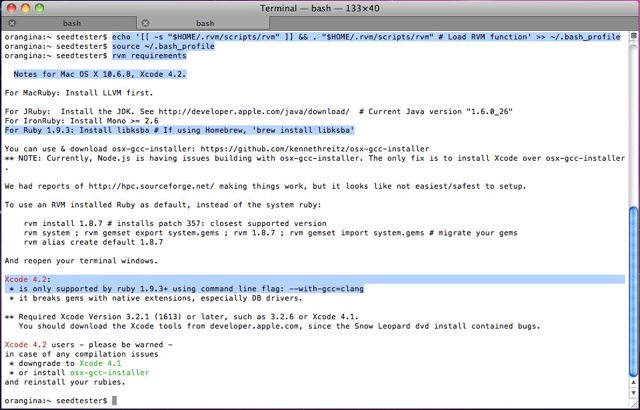
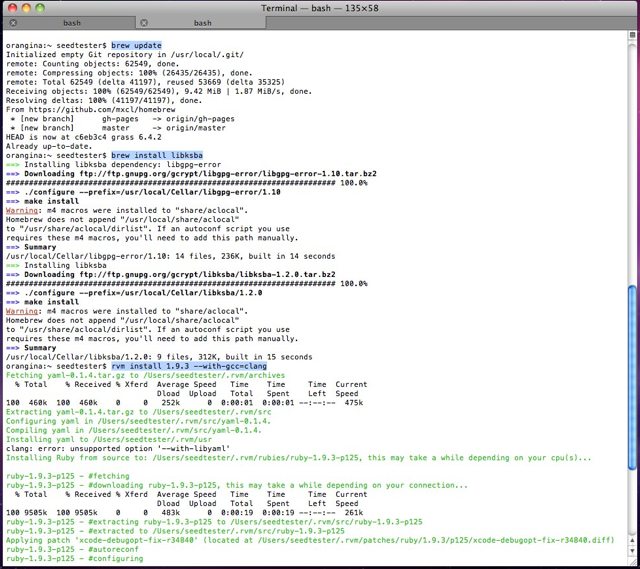
According to the requirements, we must first install libksba. This applies to Snow Leopard, Lion and Mountain Lion.
We can do that easily with Homebrew, but first we should make sure it is up to date:
1 |
|
Since Homebrew is updated regularly, it’s advisable to run brew update before installing anything with Homebrew.
Now we’re finally ready to install Ruby 1.9.3! If you’re on Snow Leopard, you need to add a flag to the command (as specified in the RVM requirements):
1 |
|
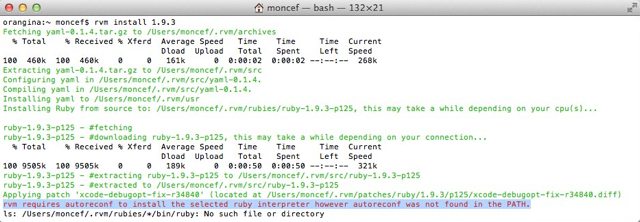
If you’re on Lion, you need to install automake first:
1 |
|
Otherwise, you will get this error when installing Ruby 1.9.3:
1 |
|
If you’re on Mountain Lion 10.8.2 with Xcode 4.5, you will need to run these commands first:
1 |
|
The steps above are necessary for you to be able to install Ruby gems, such as Rails. Otherwise, you will run into errors such as these:
1 |
|
If you got any value out of this tutorial, I have more tips and tricks for you in my free newsletter. If you're feeling really appreciative, you can also donate, which will automatically give you a discount for any paid courses I will release in 2014.
How to Install Xcode, Homebrew, Git, RVM, Ruby & Rails on Snow Leopard, Lion, Mountain Lion, and Mavericks的更多相关文章
- 转 CentOS下面安装RVM+ruby+Rails
CentOS6.2下面安装RVM+ruby+Rails (1)RVM官方网站应该是改版过一次, 使用 curl -L https://get.rvm.io | bash -s stable 下载并安装 ...
- Mac 下搭建环境 homebrew/git/node.js/npm/vsCode...
主要记录一下 homebrew/git/node.js/npm/mysql 的命令行安装 1. 首先安装 homebrew 也是一个包管理工具: mac 里打开终端命令行工具,粘下面一行回车安装br ...
- 更新Mac OSX XCode后Git 不能使用提示Can't start Git: /usr/bin/git
更新Mac OSX XCode后Git 不能使用提示Can't start Git: /usr/bin/git 解决办法: 终端运行 sudo xcodebuild -license 同意协议就好了.
- Xcode连接git@osc
Xcode 已经集成了git,建立新项目时钩选使用git,然后按照下面步骤让Xcode和git@osc 建立连接. 第一步:成生SSH密钥 打开终端命令工具,输入命令:ssh-keygen -t rs ...
- Xcode 中 Git 的配置与使用
Xcode 中 Git 的配置与使用主要围绕下面几个问题展开阐述: 问题1,如何在Xcode中创建本地代码库,并添加和提交代码到本地代码库? 问题2,如何在Xcode中提交推送给远程服务器代码库? 问 ...
- Xcode中git的用法介绍与"Please tell me who you are"问题的解决方式
我在之前多篇博客中解说了怎样使用命令行操作git,能够大大提高我们的工作效率.详细能够參考<Git学习札记><Git学习札记--进阶>等文章.事实上对于同一个工具,我们有不同的 ...
- could not launch process: debugserver or lldb-server not found: install XCode's command line tools or lldb-server
0x00 事件 VS 调试 go 的时候,发生了这个错误,导致无法调试: could not launch process: debugserver or lldb-server not found: ...
- 为Xcode配置Git和Github
Xcode.Git和Github是三个伟大的编程工具.本文记录一下如何在Xcode中使用Git作为源代码控制工具,以及如何将本地的Git仓库和远程Github上的仓库集成起来. 1. 如何为新建的Xc ...
- xcode upgrade & git bug
xcode upgrade & git bug ➜ op-static git checkout feature/select-seat-system Agreeing to the Xcod ...
随机推荐
- IDE的文件和代码模板
设置IDE的的模板,可以在创建文件的时候,自动产生模板内容,模板里可以 模板头设置: # -*- coding: utf- -*- """ --------------- ...
- 4 cocos2dx 3.0 源码分析- scheduler
scheduler 这个类, 负责了引擎的自定义更新, 及定时更新相关的操作, 看看下面的代码,很熟悉吧. schedule(schedule_selector(HelloWorld::updat ...
- Sqlmap Tamper大全
sqlmap是一个自动化的SQL注入工具,其主要功能是扫描,发现并利用给定的URL的SQL注入漏洞,目前支持的数据库是MS-SQL,,MYSQL,ORACLE和POSTGRESQL.SQLMAP采用四 ...
- Node.js:get/post请求、全局对象、工具模块
一.GET/POST请求 在很多场景中,我们的服务器都需要跟用户的浏览器打交道,如表单提交.表单提交到服务器一般都使用 GET/POST 请求. 1.获取GET请求内容 由于GET请求直接被嵌入在路径 ...
- unexpected token: * 和 java.lang.ClassCastException: [Ljava.lang.Object; cannot be cast to 解决办法
一.unexpected token: * 的解决办法 首先要搞清楚sql与hql的区别! sql操作的是数据库表,而hql操作的是对象! sql中“select * from table”,而hq ...
- Android -- 消息处理机制源码分析(Looper,Handler,Message)
android的消息处理有三个核心类:Looper,Handler和Message.其实还有一个Message Queue(消息队列),但是MQ被封装到Looper里面了,我们不会直接与MQ打交道,因 ...
- pjsip视频通信开发(底层实现)之用户注册(1)
一.PJSIP简介 对于pjsip的介绍可以看http://www.cnblogs.com/my_life/articles/2175462.html 文章,里面详细介绍了它的组成框架以及各部份的组成 ...
- java梳理-一个汉字占多大空间
面试题:一个汉字占多大空间. 事实上这个问题我了解不深的,知道结论不知道为什么.借此梳理下认识. 先回想下java基本类型 一基本类型 :简称四类八种,声明变量的同一时候分配了空间.举比例如以下: ...
- 用php编写我的第一段代码:hello world
一.php环境的搭建 在编写php前,先搭建php环境,我选择了一站式安装软件WampServer,WampServer的下载地址:http://www.wampserver.com/ WampSer ...
- SQL语法 之 表连接
一.连接条件 连接查询中用来连接连个表的条件称为连接条件或连接谓词.其形式为: [<表1>].<列名1> <连接运算符> [<表2>].<列2&g ...