
Android之如何使用JUnit进行单元测试
转的:http://www.blogjava.net/qileilove/archive/2014/05/19/413824.html
Android中如何使用JUnit进行单元测试
|
<instrumentation android:name="android.test.InstrumentationTestRunner"
android:targetPackage="com.example.junittest" android:label="@string/app_name"
></instrumentation>
|
|
<?xml version="1.0" encoding="utf-8"?>
<manifest xmlns:android="http://schemas.android.com/apk/res/android"
package="com.example.junittest"
android:versionCode="1"
android:versionName="1.0" >
<uses-sdk
android:minSdkVersion="8"
android:targetSdkVersion="18" />
<instrumentation android:name="android.test.InstrumentationTestRunner"
android:targetPackage="com.example.junittest" android:label="@string/app_name"
></instrumentation>
<application
android:allowBackup="true"
android:icon="@drawable/ic_launcher"
android:label="@string/app_name"
android:theme="@style/AppTheme" >
<uses-library android:name="android.test.runner"/>
<activity
android:name="com.example.junittest.MainActivity"
android:label="@string/app_name" >
<intent-filter>
<action android:name="android.intent.action.MAIN" />
<category android:name="android.intent.category.LAUNCHER" />
</intent-filter>
</activity>
</application>
</manifest>
|
|
package com.example.junittest;
public class Calculator {
public int add(int x,int y){
return x+y;
}
public int sub(int x,int y){
return x-y;
}
public int divide(int x,int y){
return x/y;
}
public int multiply(int x,int y){
return x*y;
}
}
|
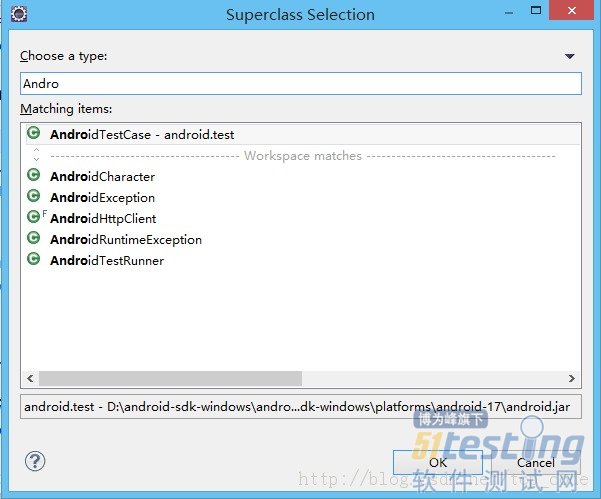
|
package com.example.test;
import junit.framework.Assert;
import com.example.junittest.Calculator;
import android.test.AndroidTestCase;
import android.util.Log;
public class CalculatorTester extends AndroidTestCase {
private static final String TAG = CalculatorTester.class.getSimpleName();
private Calculator calculator;
/**
* This method is invoked before any of the test methods in the class.
* Use it to set up the environment for the test (the test fixture. You can use setUp() to instantiate a new Intent with the action ACTION_MAIN. You can then use this intent to start the Activity under test.
*/
@Override
protected void setUp() throws Exception {
Log.e(TAG, "setUp");
calculator = new Calculator();
super.setUp();
}
/**
* 测试Calculator的add(int x, int y)方法
* 把异常抛给测试框架
* @throws Exception
*/
public void testAdd() throws Exception{
int result = calculator.add(3, 5);
Assert.assertEquals(8, result);
}
/**
* 测试Calculator的divide(int x, int y)方法
* 把异常抛给测试框架
* @throws Exception
*/
public void testDivide() throws Exception{
int result = calculator.divide(10, 0);
Assert.assertEquals(10, result);
}
/**
* This method is invoked after all the test methods in the class.
* Use it to do garbage collection and to reset the test fixture.
*/
@Override
protected void tearDown() throws Exception {
Log.e(TAG, "tearDown");
calculator = null;
super.tearDown();
}
}
|
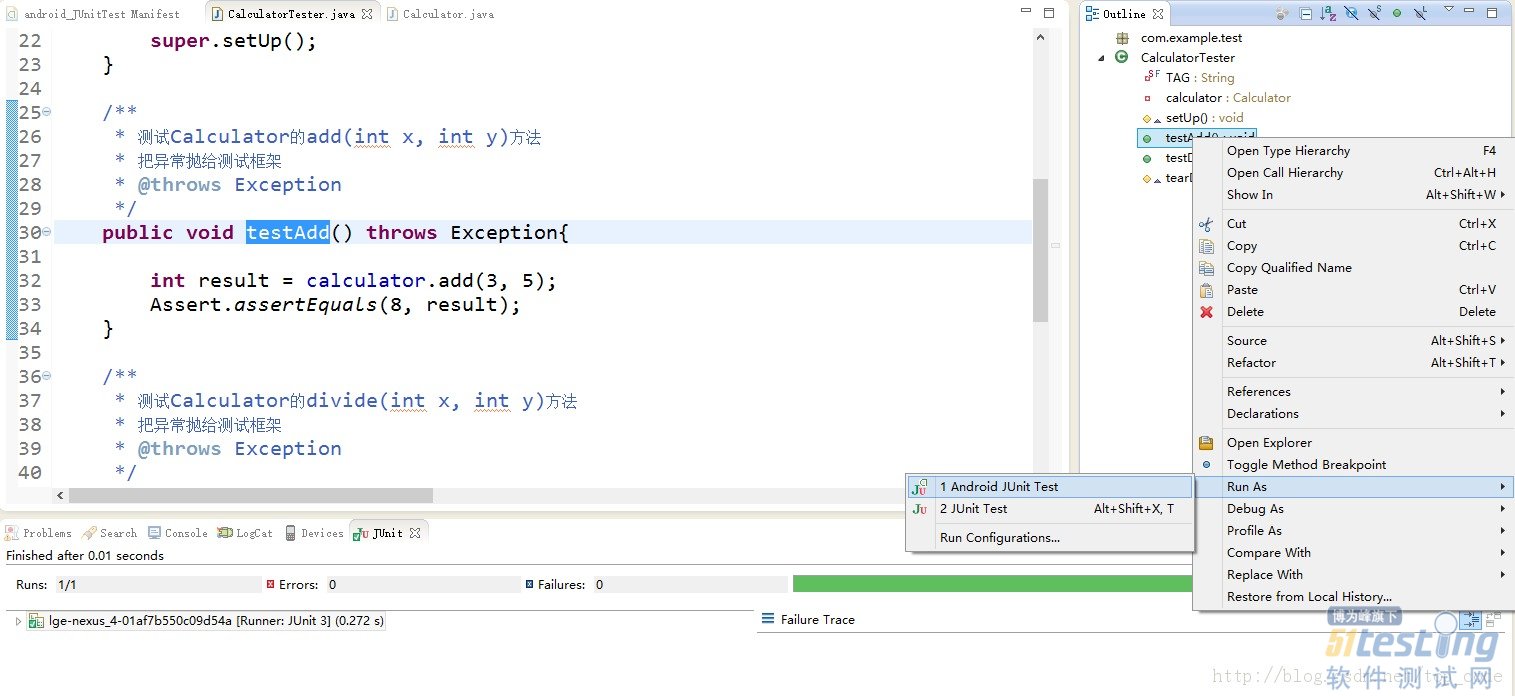

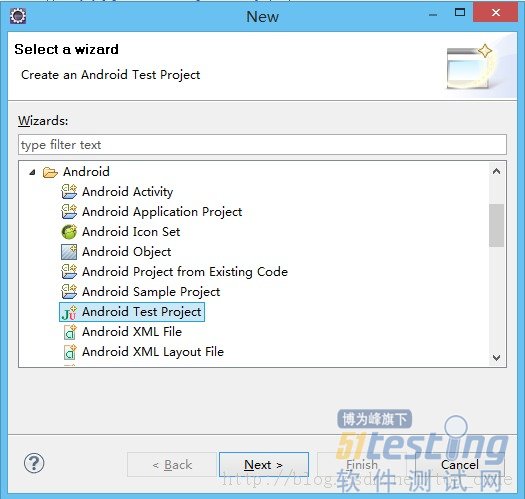
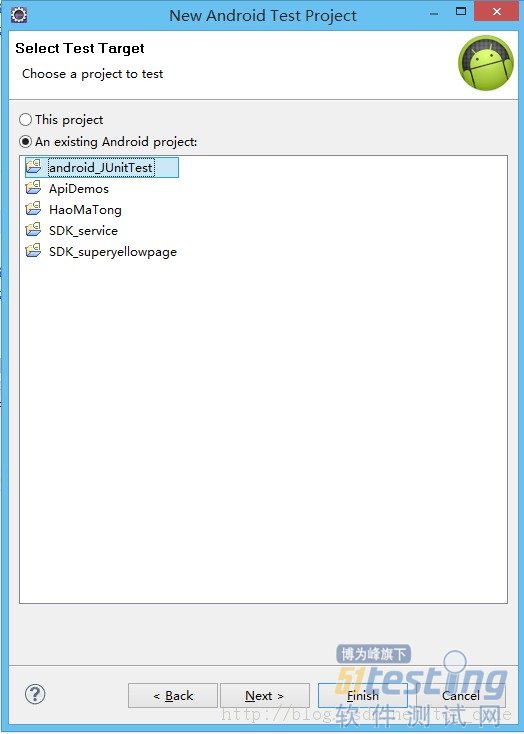
Android之如何使用JUnit进行单元测试的更多相关文章
- Android中如何使用JUnit进行单元测试 eclipse
Android中如何使用JUnit进行单元测试 在我们日常开发android app的时候,需要不断地进行测试,所以使用JUnit测试框架显得格外重要,学会JUnit可以加快应用的开发周期. Andr ...
- Android开发学习——SQLite数据库与单元测试
SQLite数据库 轻量级关系型数据库 创建数据库需要使用的api:SQLiteOpenHelper public class Myopenhelper extends SQLiteOpenHelp ...
- android 学习随笔三(测试与单元测试框架)
测试 1.按岗位: 黑盒测试:测试业务逻辑 白盒测试:测试逻辑方法 2.按测试粒度 方法测试 function 单元测试 unit 集成测试 integration 系统测试 system 3.按暴力 ...
- java如何使用JUnit进行单元测试
注:所有内容都是在eclipse上实现,关于eclipse的安装和jdk的安装配置,请看:http://www.cnblogs.com/fench/p/5914827.html 单元测试是什么? 百度 ...
- JUnit 4 单元测试
Individual Project ——JUnit 4 单元测试 学习到JUnit单元测试,我拿来测试之前写过的一个计算器(两个依存类:Calc.java CalcFunction.java).代码 ...
- 使用Spring配合Junit进行单元测试的总结
最近公司的项目和自己的项目中都用到了spring集成junit进行单元测试,总结一下几种基本的用法: 1.直接对spring中注入的bean进行测试(以DAO为例): 在测试类上添加@RunWith注 ...
- Spring(3)—— Junit框架单元测试
Junit主要用于单元测试,即白盒测试.它是一个开源的由JAVA开发的一个用于测试的框架. Junit的几个基本概念:TestCase,TestSuite,TestFixtrue TestCase:代 ...
- JUnit + Mockito 单元测试(二)
摘自: http://blog.csdn.net/zhangxin09/article/details/42422643 版权声明:本文为博主原创文章,未经博主允许不得转载. 目录(?)[-] 入门 ...
- spring junit 做单元测试,报 Failed to load ApplicationContext 错误
spring junit 做单元测试,报 Failed to load ApplicationContext 错误. 查找了好一会,最后发现.@ContextConfiguration(locatio ...
随机推荐
- zookeeper 故障重连机制
一.连接多个服务器,用逗号隔开 如果在连接时候zk服务器宕机 To create a client session the application code must provide a connec ...
- 使用 StringBuilder
嘿嘿,请不要说我是偷取,我只是借鉴一下.. String 对象是不可改变的.每次使用 System.String 类中的方法之一时,都要在内存中创建一个新的字符串 对象,这就需要为该新对象分配新的空间 ...
- commons-io ProxyInputStream,ProxyOutputStream,ProxyReader,ProxyWriter
1.ProxyInputStream: A Proxy stream which acts as expected, that is it passes the method calls on to ...
- PHP data
- RedHat下apache\ftp\mysql 4.0 的安装方法
RedHat下安装这三个服务的方法大同小异 Apache服务: 找到Apache安装包: rpm -ivh httpd-2.0.40-21.i386.rpm 等待安装完成即可 检查安装结果: rpm ...
- form表单转Json提交方法
先将表单数值转换成数组存储,存储成的格式为[{"name":"","value":""},.....}] var for ...
- VMware中linux配置2-安装jdk
1.通过共享文件夹,将文件jdk-7u79-linux-x64.tar.gz 复制到/tmp目录下 cp jdk-7u79-linux-x64.tar.gz /tmp 2.解压该文件 tar -zxv ...
- 浏览器地址栏背后的logic
曾经有面试题是这样的:"描述在浏览器的地址栏中输入:http://www.baidu.com 后发生了什么?". 1.服务端返回baidu页面资源,浏览器载入html 2.浏览器开 ...
- Webstorm 下的Angular2.0开发之路
人一旦上了年纪,记忆力就变得越来越不好. 最近写了许多的博文,倒不是为了给谁看,而是方便自己来搜索,不然一下子又忘记了. 如果恰巧帮助到了你,也是我的荣幸~~~~~~~~~~~~ 废话不多说,看正题~ ...
- SAP LOGON DATA CHECK
之前有朋友做过RFC登录验证,后来群里又有很多人问SAP的登录验证函数. 后来自己找找了,看看了,然后改写了一个LOGON DATA CHECK... FUNCTION ZUSER_CHECK_LOG ...