IdentityServer4 简单使用,包括api访问控制,openid的授权登录,js访问
写在前面
先分享一首数摇:http://music.163.com/m/song?id=36089751&userid=52749763
其次是:对于identityServer理解并不是特别深刻,目前只是能简单的应用,里面一些具体设置以后可能慢慢更新到本文中。
最后:一张大图

IdentityServer4基于.net core的OAuth2.0和OpenId框架,主要应用于身份验证,单点登录,API访问控制等。。。
IdentityServer4 文档: https://identityserver4.readthedocs.io/en/release/
IdentityServer4 GitHub:https://github.com/IdentityServer/IdentityServer4/tree/dev/docs/topics
本文demo:https://github.com/aspros-luo/IdentityServer4Demo
api访问控制
一.首先需要创建授权中心,
新建.net core Web Application 项目,模板可以选择空或者web应用程序,偷懒的话直接选择web就好了
1.在project.json里添加 "IdentityServer4": "1.0.0",nuget添加一样可以。
2.我们需要新建一个配置文件configs.cs定义client和api作用域及账号信息具体代码如下:
public static IEnumerable<ApiResource> GeyApiResources()

        {

            return new List<ApiResource>

            {

                new ApiResource("UserApi","用户API")

            };

        }

        public static IEnumerable<Client> GetClients()

        {

            return new List<Client>

            {

                new Client

                {

                    ClientId = "Client",

                    AllowedGrantTypes = GrantTypes.ClientCredentials,

                    ClientSecrets =

                    {

                        new Secret("secret".Sha256())

                    },

                    AllowedScopes = {"UserApi"}

                },

                new Client

                {

                    ClientId = "ro.Client",

                    AllowedGrantTypes = GrantTypes.ResourceOwnerPassword,

                    ClientSecrets =

                    {

                        new Secret("secret".Sha256())

                    },

                    AllowedScopes = {"UserApi"}

                },

                   // OpenID Connect implicit flow client (MVC)

                new Client

                {

                    ClientId = "MVC",

                    ClientName = "MVC Client",

                    AllowedGrantTypes = GrantTypes.HybridAndClientCredentials,

                     ClientSecrets =

                    {

                        new Secret("secret".Sha256())

                    },

                    RedirectUris = { "http://localhost:5002/signin-oidc" },

                    PostLogoutRedirectUris = { "http://localhost:5002" },

                    AllowedScopes =

                    {

                        IdentityServerConstants.StandardScopes.OpenId,

                        IdentityServerConstants.StandardScopes.Profile,

                        "UserApi"

                    },

                    AllowOfflineAccess = true

                },

                   // JavaScript Client

                new Client

                {

                    ClientId = "js",

                    ClientName = "JavaScript Client",

                    AllowedGrantTypes = GrantTypes.Implicit,

                    AllowAccessTokensViaBrowser = true,

                    RedirectUris = { "http://localhost:5003/callback.html" },

                    PostLogoutRedirectUris = { "http://localhost:5003/index.html" },

                    AllowedCorsOrigins = { "http://localhost:5003" },

                    AllowedScopes =

                    {

                        IdentityServerConstants.StandardScopes.OpenId,

                        IdentityServerConstants.StandardScopes.Profile,

                        "UserApi"

                    },

                }

            };

        }

        public static List<TestUser> GeTestUsers()

        {

            return new List<TestUser>

            {

                new TestUser

                {

                    SubjectId = "",

                    Username = "qwerty",

                    Password = "a123"

                },

                new TestUser

                {

                    SubjectId = "",

                    Username = "aspros",

                    Password = "b123"

                }

            };

        }
3.在startup文件ConfigureServices里配置服务,Configure使用identityserver
 public void ConfigureServices(IServiceCollection services)

        {

            // Add framework services.

            services.AddApplicationInsightsTelemetry(Configuration);

            services.AddIdentityServer()

                .AddTemporarySigningCredential()

                .AddInMemoryApiResources(Configs.GeyApiResources())

                .AddInMemoryClients(Configs.GetClients())

                .AddTestUsers(Configs.GeTestUsers());

            services.AddMvc();

        }
  public void Configure(IApplicationBuilder app, IHostingEnvironment env, ILoggerFactory loggerFactory)

        {

            loggerFactory.AddConsole(Configuration.GetSection("Logging"));

            loggerFactory.AddDebug();

            app.UseApplicationInsightsRequestTelemetry();

            if (env.IsDevelopment())

            {

                app.UseDeveloperExceptionPage();

                app.UseBrowserLink();

            }

            else

            {

                app.UseExceptionHandler("/Home/Error");

            }

            app.UseApplicationInsightsExceptionTelemetry();

            app.UseStaticFiles();

//使用userIdentityServer

            app.UseIdentityServer();

            app.UseMvc(routes =>

            {

                routes.MapRoute(

                    name: "default",

                    template: "{controller=Home}/{action=Index}/{id?}");

            });

        }
4.更改当前应用程序的端口为:8000 (可略过)
以上,基本授权中心配置完毕
二.添加测试使用的api
新建.net core Web Application,模板使用Api
1.在project.json里添加 "IdentityServer4.AccessTokenValidation": "1.0.1", "Microsoft.AspNetCore.Cors": "1.1.0"(为跨域访问api做准备)
2.在Startup文件里添加跨域服务,配置授权中心地址及scope api作用域
 public void ConfigureServices(IServiceCollection services)

        {

            // Add framework services.

            services.AddApplicationInsightsTelemetry(Configuration);

            #region 跨域

            services.AddCors(options =>

            {

                // this defines a CORS policy called "default"

                options.AddPolicy("default", policy =>

                {

                    policy.WithOrigins("http://localhost:5003")

                        .AllowAnyHeader()

                        .AllowAnyMethod();

                });

            });

            #endregion

            services.AddMvcCore()

              .AddAuthorization()

              .AddJsonFormatters();

        }
 public void Configure(IApplicationBuilder app, IHostingEnvironment env, ILoggerFactory loggerFactory)

        {

            loggerFactory.AddConsole(Configuration.GetSection("Logging"));

            loggerFactory.AddDebug();

            //配置identityServer授权

            app.UseIdentityServerAuthentication(new IdentityServerAuthenticationOptions

            {

                Authority = "http://localhost:8000",

                AllowedScopes = { "UserApi" },

                RequireHttpsMetadata = false

            });

            //跨域访问

            app.UseCors("default");

            app.UseMvc();

        }
注释:cors可以暂时不配置,不影响后面调试
3.在controller上添加 [Authorize]
  [Authorize]

    [Route("api/[controller]")]

    public class ValuesController : Controller

    {

        [HttpGet]

        public IActionResult Get()

        {

            //return Content("a");

            return new JsonResult(from c in User.Claims select new { c.Type, c.Value });

        }

    }
4.更改api端口号,5001
以上测试使用Api暂时配置完毕
三.单元测试
新建.net core 类库
1.在project.json里添加
"dotnet-test-xunit": "2.2.0-preview2-build1029",
"IdentityModel": "2.1.1",
"xunit": "2.2.0-beta4-build3444",
"xunit.runner.console": "2.2.0-beta2-build3300"
具体如下:
{

  "version": "1.0.0-*",

  "testRunner": "xunit",

  "dependencies": {

    "dotnet-test-xunit": "2.2.0-preview2-build1029",

    "IdentityModel": "2.1.1",

    "xunit": "2.2.0-beta4-build3444",

    "xunit.runner.console": "2.2.0-beta2-build3300"

  },

  "frameworks": {

    "netcoreapp1.0.1": {

      "dependencies": {

        "Microsoft.NETCore.App": {

          "type": "platform",

          "version": "1.0.1"

        }

      }

    }

  }

}
2.新建测试类,UserClientTest,代码如下
public class UserClientTest

    {

        [Fact]

        public async Task ClientApiTest()

        {

            //get access_token

            var disco = await DiscoveryClient.GetAsync("http://localhost:8000");

            var tokenClient = new TokenClient(disco.TokenEndpoint, "Client", "secret");

            var tokenResponse = await tokenClient.RequestClientCredentialsAsync("UserApi");

            var client = new HttpClient();

            client.SetBearerToken(tokenResponse.AccessToken);//add bearer with access_token

            var response = await client.GetAsync("http://localhost:5001/api/Values");//call API with access_token

            var apiResult = response.Content.ReadAsStringAsync().Result;

            Assert.NotEmpty(apiResult);

        }

        [Fact]

        public async Task PasswordApiTests()

        {

            var disco = await DiscoveryClient.GetAsync("http://localhost:8000");

            var tokenClient = new TokenClient(disco.TokenEndpoint, "ro.Client", "secret");

            var tokenResponse = await tokenClient.RequestResourceOwnerPasswordAsync("qwerty", "a123", "UserApi");

            var client = new HttpClient();

            client.SetBearerToken(tokenResponse.AccessToken);//add bearer with access_token

            var response = await client.GetAsync("http://localhost:5001/api/Values");//call API with access_token

            var apiResult = response.Content.ReadAsStringAsync().Result;

            Assert.NotEmpty(apiResult);

        }

    }
调试,
1请求授权中心,带入clientId,secret,scope作用域(api) 得到access_token
2得到access_token后,在header里添加Authorization:Bearer+access_token 请求api
3返回结果
OpenId 连接的mvc用户认证
一.授权中心更改的地方:
1.在授权中心里config里添加IdentityResource
   public static IEnumerable<IdentityResource> GetyIdentityResources()

        {

            return new List<IdentityResource>

            {

                new IdentityResources.OpenId(),

                new IdentityResources.Profile()

            };

        }
2.config=》client里添加mvc
 new Client

                {

                    ClientId = "MVC",

                    ClientName = "MVC Client",

                    AllowedGrantTypes = GrantTypes.HybridAndClientCredentials,

                     ClientSecrets =

                    {

                        new Secret("secret".Sha256())

                    },

                    RedirectUris = { "http://localhost:5002/signin-oidc" },

                    PostLogoutRedirectUris = { "http://localhost:5002" },

                    AllowedScopes =

                    {

                        IdentityServerConstants.StandardScopes.OpenId,

                        IdentityServerConstants.StandardScopes.Profile,

                        "UserApi"

                    },

                    AllowOfflineAccess = true

                },
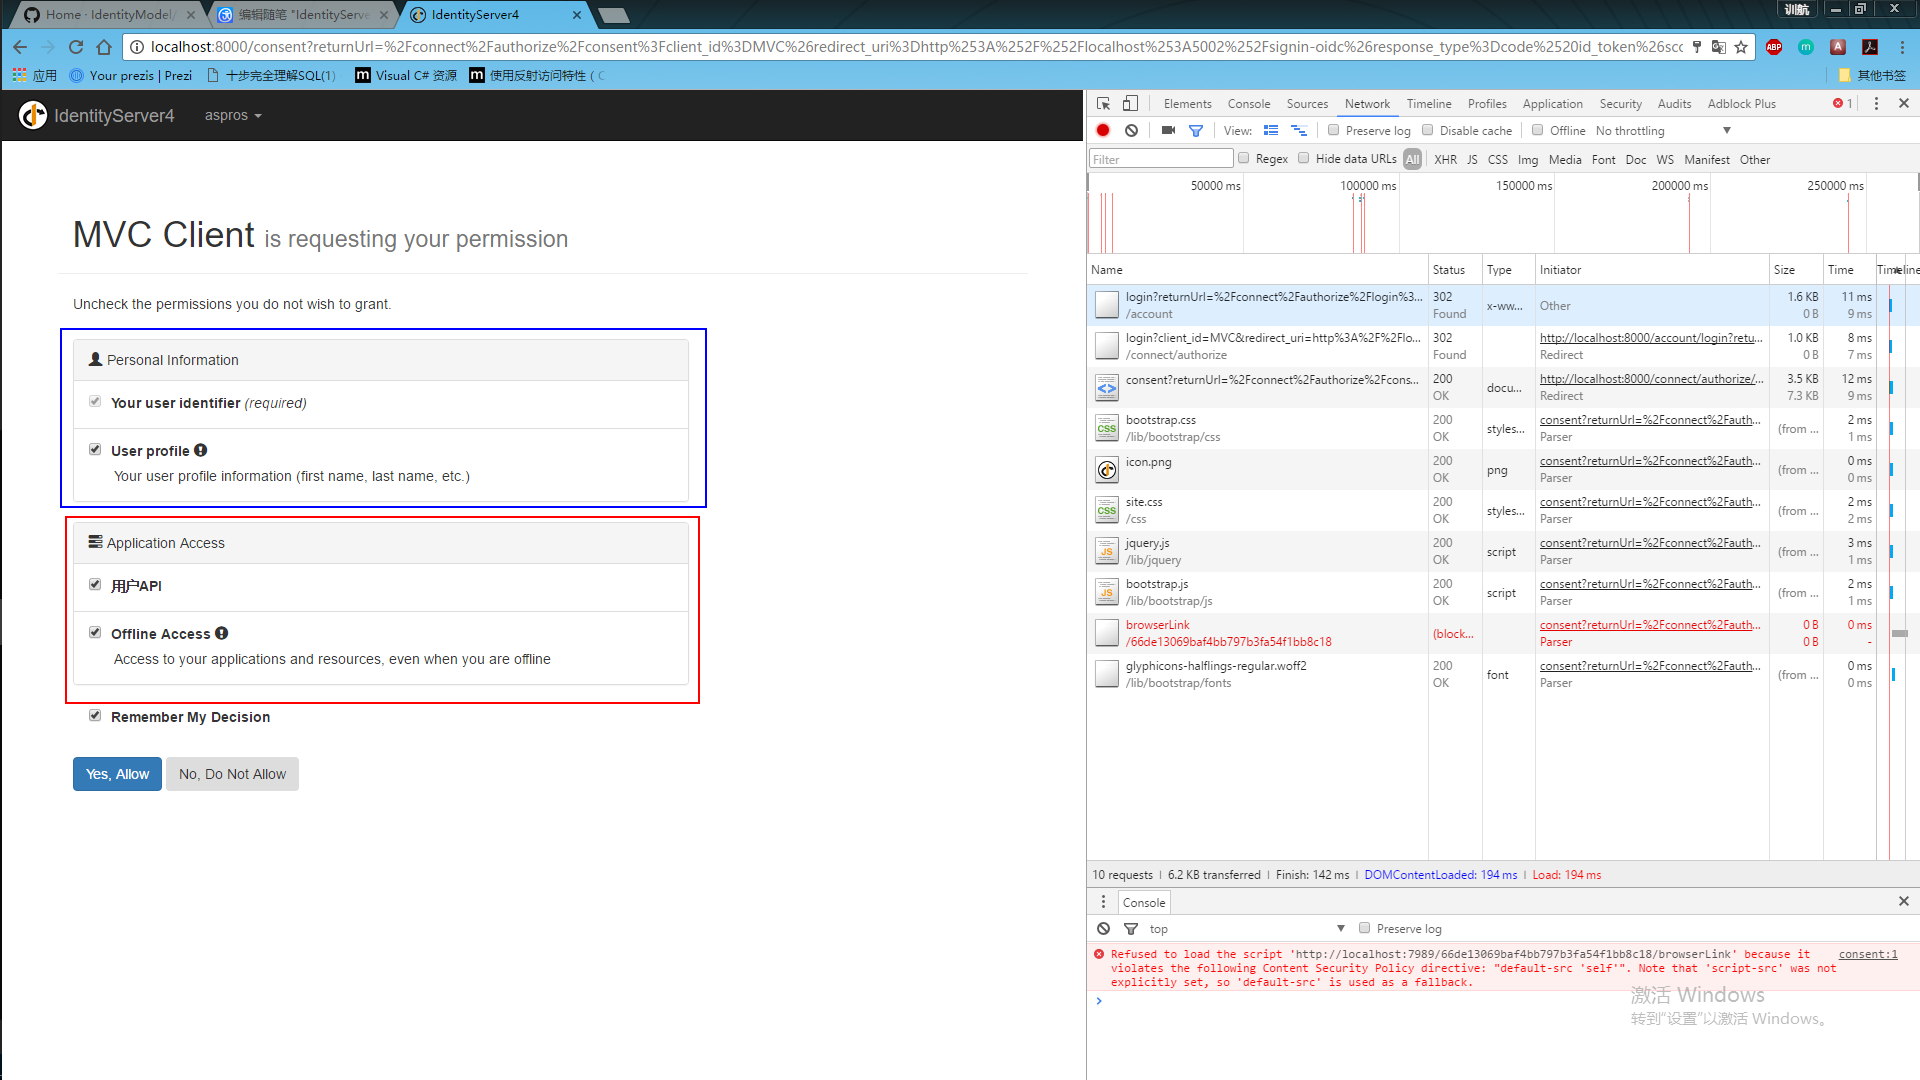
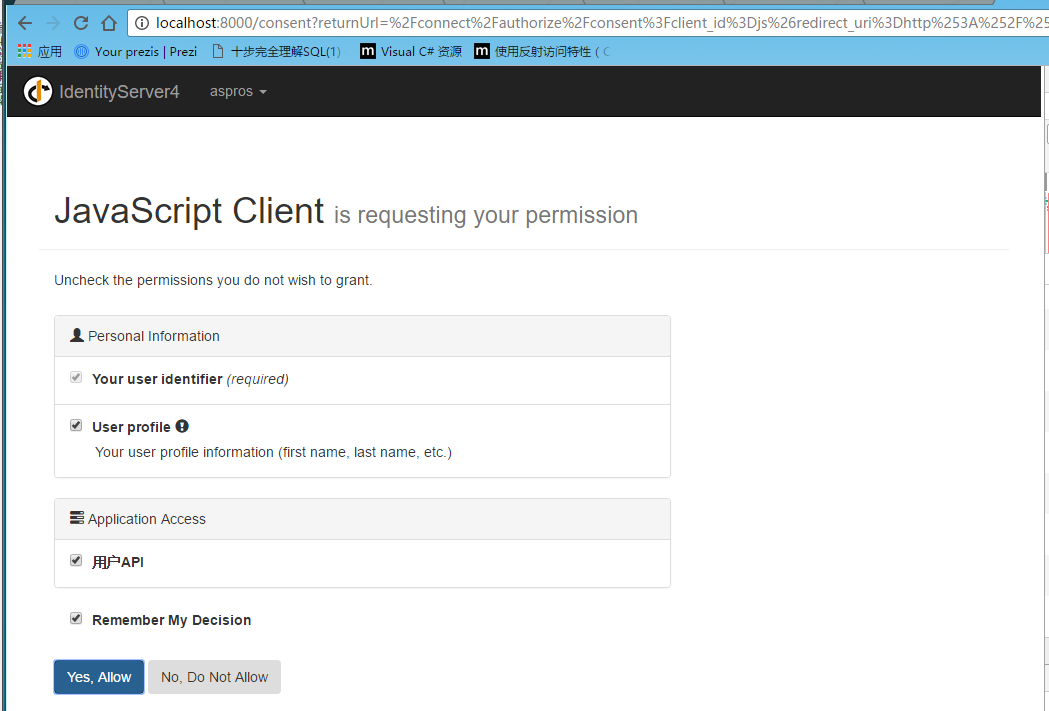
(AllowedScopes 设置授权范围,加上“UserApi” 及AllowOfflineAccess = true 后,在授权中心登录验证通过后,显示对应访问权限)
3.在startup里添加 AddInMemoryIdentityResources方法
 public void ConfigureServices(IServiceCollection services)

        {

            // Add framework services.

            services.AddApplicationInsightsTelemetry(Configuration);

            services.AddIdentityServer()

                .AddTemporarySigningCredential()

                .AddInMemoryApiResources(Configs.GeyApiResources())

                .AddInMemoryClients(Configs.GetClients())

                .AddInMemoryIdentityResources(Configs.GetyIdentityResources())

                .AddTestUsers(Configs.GeTestUsers());

            services.AddMvc();

        }
(这里我出现过一个问题,在添加顺序的时候,将IdentityResources方法写在前面,单元测试请求api的时候会出现httpstatue 500错误)
4.添加UI
可以在github下载 https://github.com/IdentityServer/IdentityServer4.Quickstart.UI/tree/release
(涉及到的页面及viewmodel较多。demo里我也重新整理过了)
以上,授权中心部分修改完毕
二.mvc客户端
添加.net core web application 选择web应用程序
1.在project.json 里添加
"Microsoft.AspNetCore.Authentication.Cookies": "1.0.*",
"Microsoft.AspNetCore.Authentication.OpenIdConnect": "1.0.*",
"IdentityModel": "2.1.1"
2.在startup里添加UseCookieAuthentication,UseOpenIdConnectAuthentication,代码如下
   public void Configure(IApplicationBuilder app, IHostingEnvironment env, ILoggerFactory loggerFactory)

        {

            JwtSecurityTokenHandler.DefaultInboundClaimTypeMap.Clear();

            loggerFactory.AddConsole(Configuration.GetSection("Logging"));

            loggerFactory.AddDebug();

            if (env.IsDevelopment())

            {

                app.UseDeveloperExceptionPage();

            }

            else

            {

                app.UseExceptionHandler("/Home/Error");

            }

            app.UseCookieAuthentication(new CookieAuthenticationOptions

            {

                AuthenticationScheme = "Cookies"

            });

            app.UseOpenIdConnectAuthentication(new OpenIdConnectOptions

            {

                AuthenticationScheme = "oidc",

                SignInScheme = "Cookies",

                Authority = "http://localhost:8000",

                RequireHttpsMetadata = false,

                ClientId = "MVC",

                ClientSecret = "secret",

                ResponseType = "code id_token",

                Scope = { "UserApi", "offline_access" },//添加权限请求项

                GetClaimsFromUserInfoEndpoint = true,

                SaveTokens = true

            });

            app.UseStaticFiles();

            app.UseMvcWithDefaultRoute();

        }
注意的地方,Authority为授权中心地址,ClientId与授权中心config里client里保持一致。Scope为请求权限项
3.在action上加上[Authorize],启用授权
4.更改端口为5002,可自行调节,需要与config保持一致
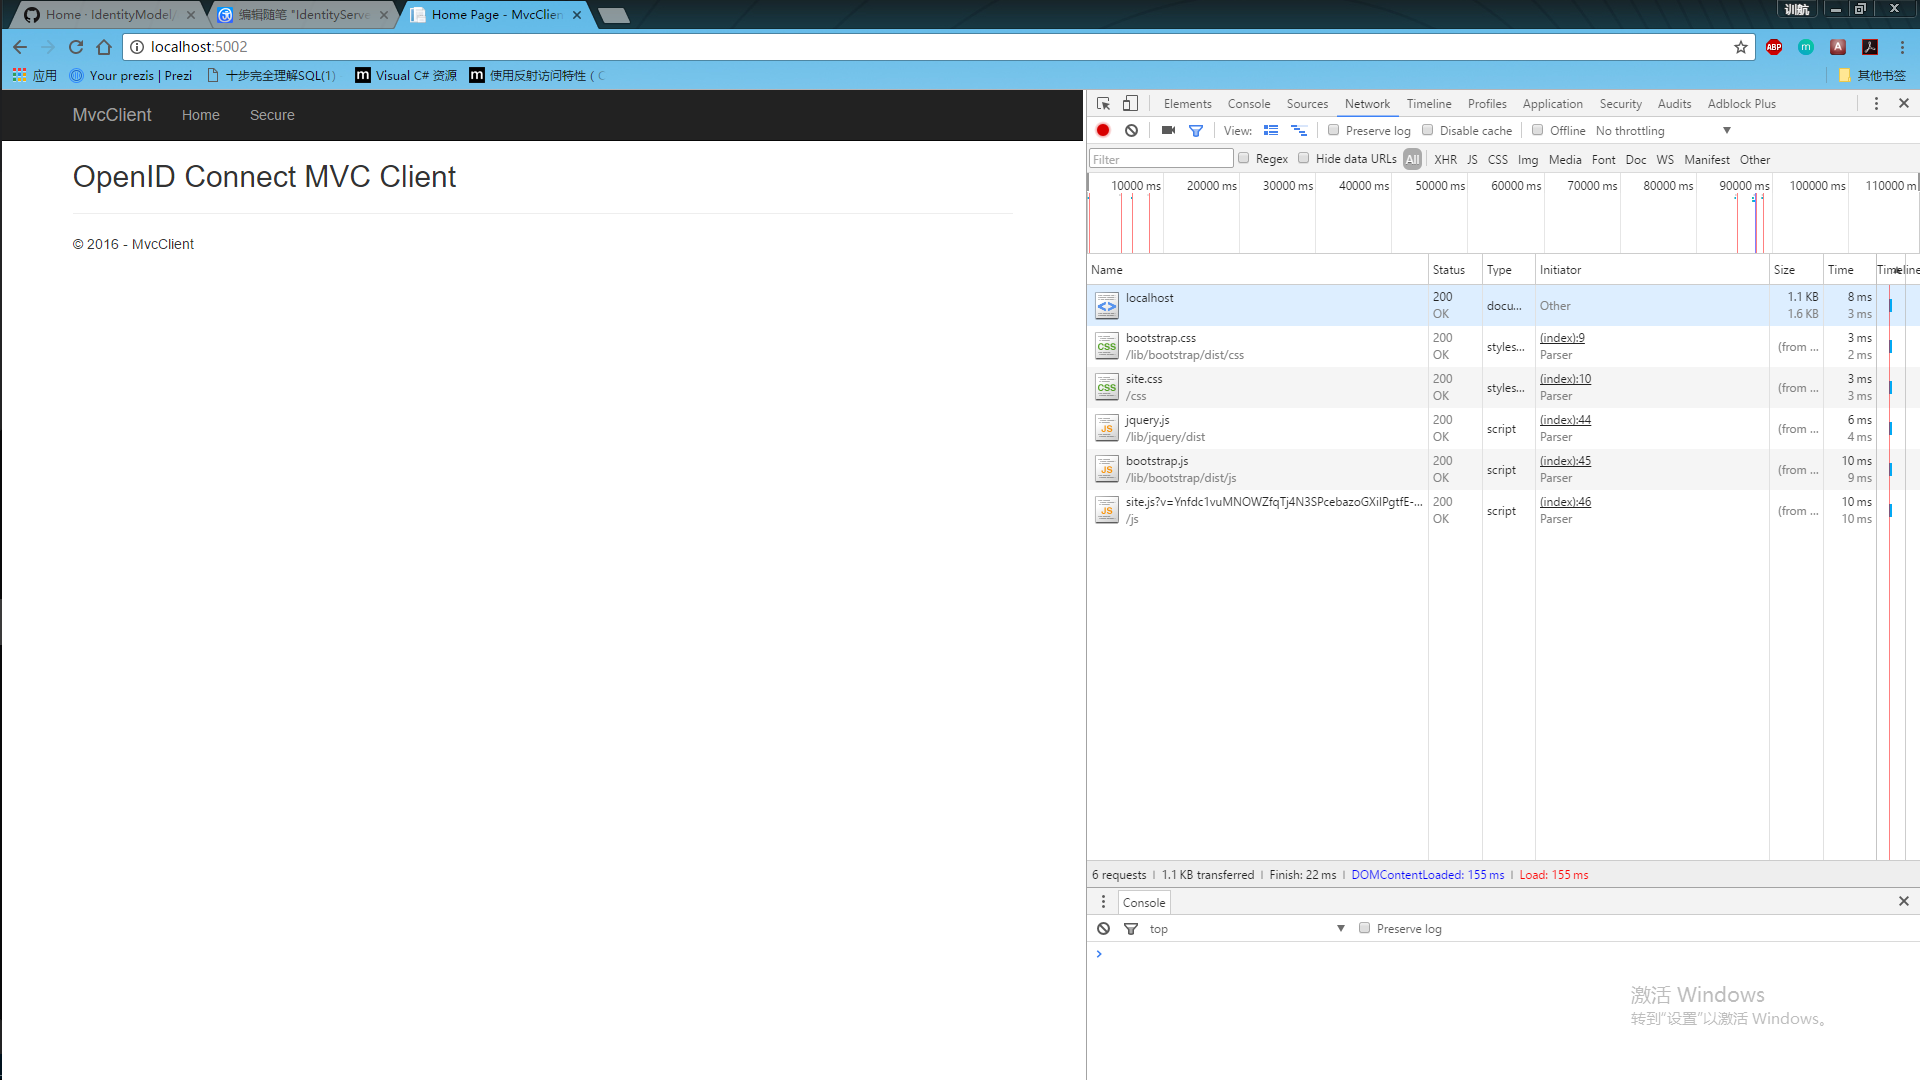
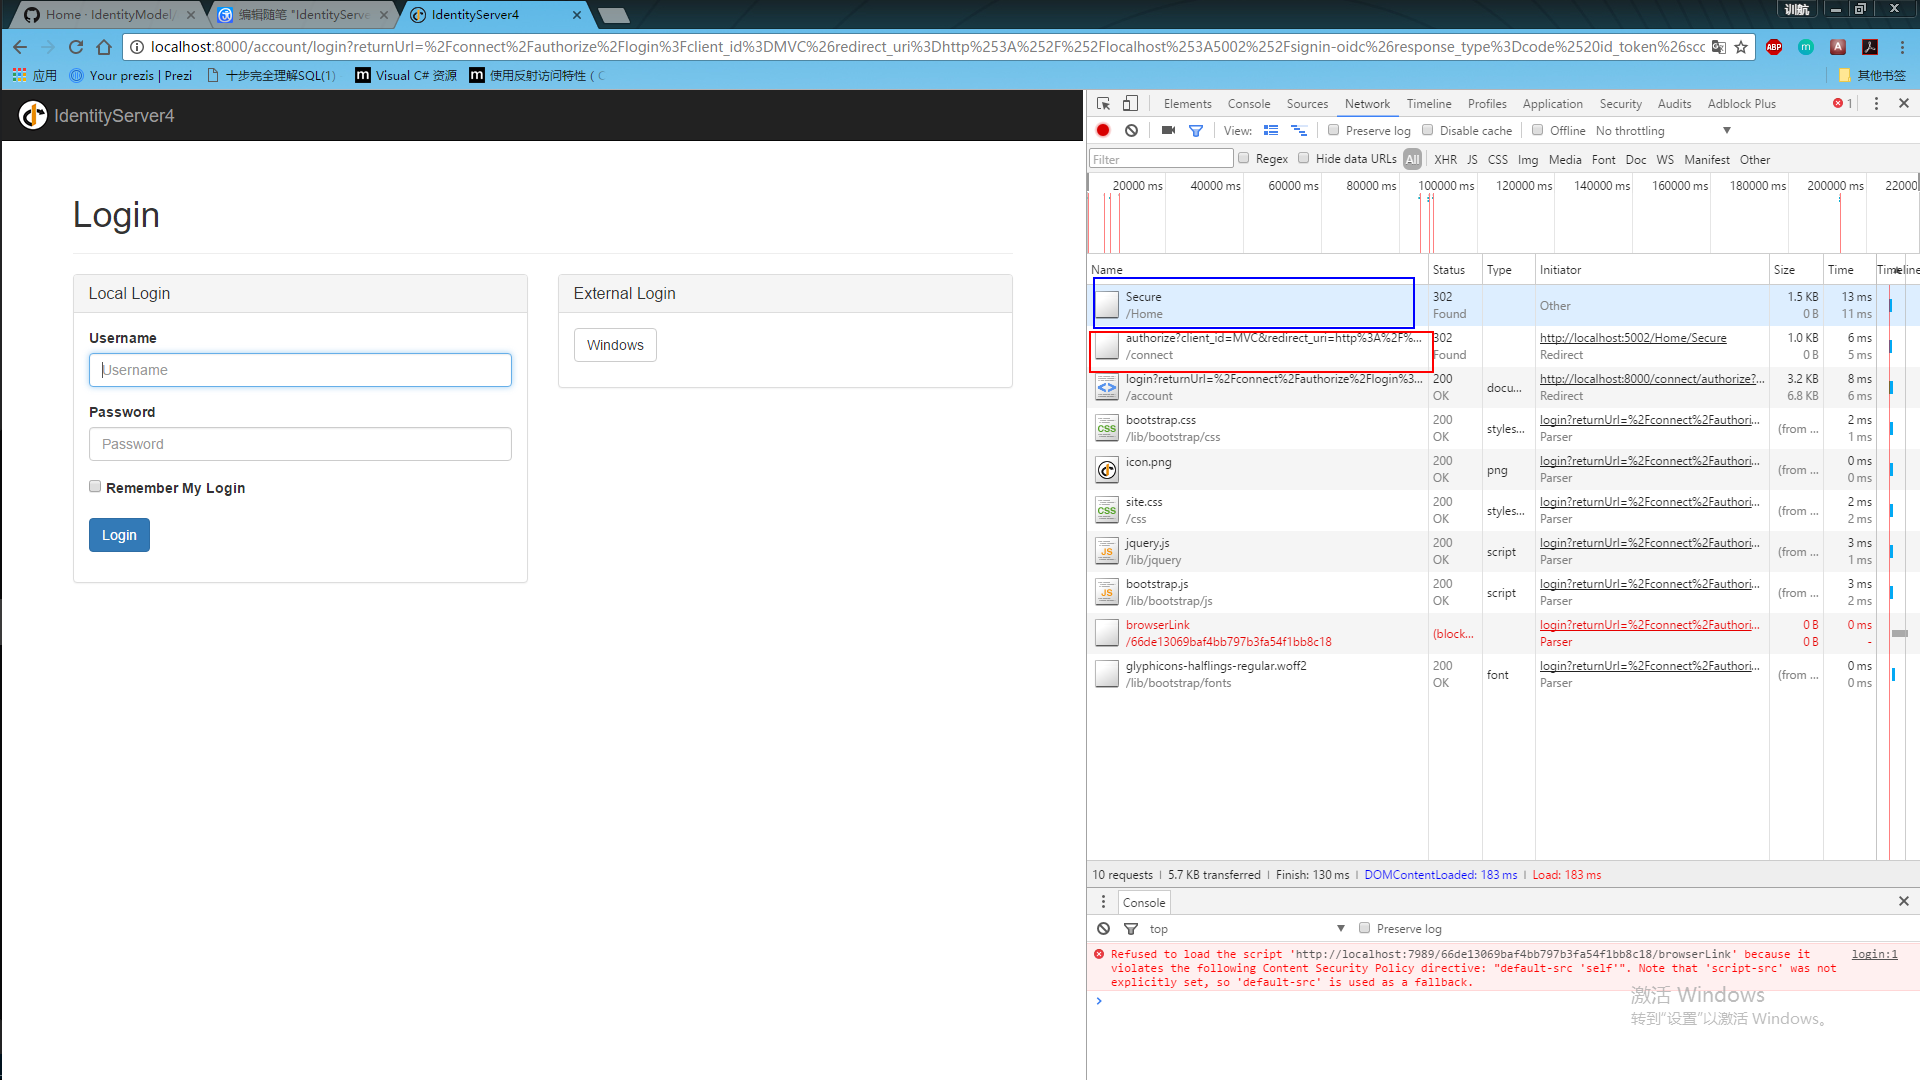
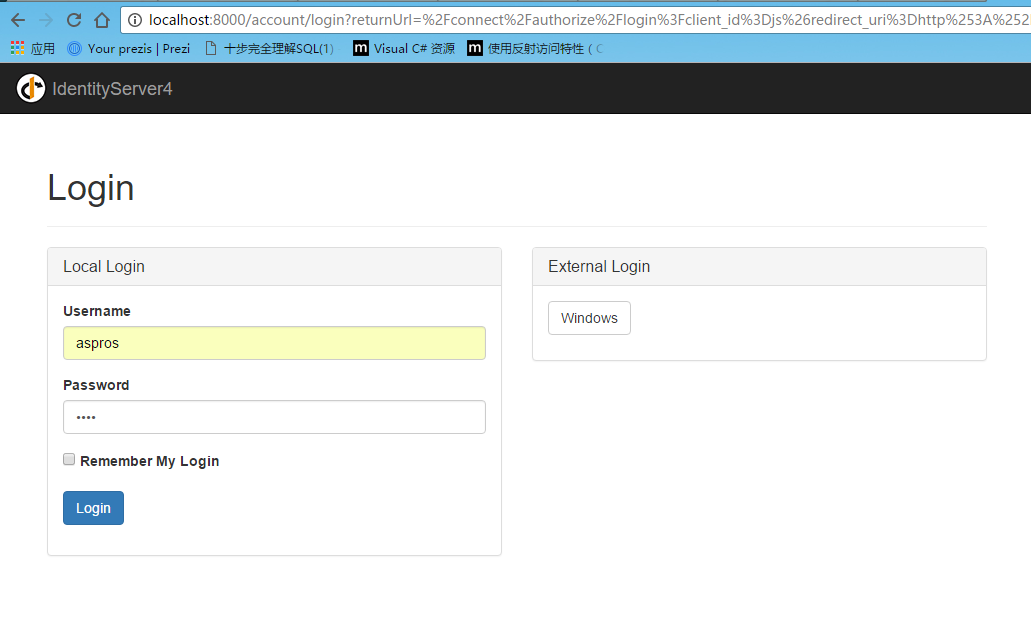
使用:
运行授权中心=》运行mvc客户端=》点击对应的授权的action链接=》跳转到授权中心登录页面=》输入账号密码后=》显示授权对应的权限列表=》跳回当前页面

以上。
js客户端访问
js端访问配置稍微麻烦点,因为中间出了一些问题,主要是前端js功力不够,看的的时候比较吃力
添加一个新项目。。先
在mvc端中,我们引用了一个库处理openid连接,在javascript中也需要引用一个类似的库
1.点击添加=》新建项=》左侧选择client-side选择NPM配置文件,默认为package.json
在package.json 里添加"oidc-client": "1.2.2",如下
{

  "version": "1.0.0",

  "name": "asp.net",

  "private": true,

  "devDependencies": {

    "oidc-client": "1.2.2"

  }

}
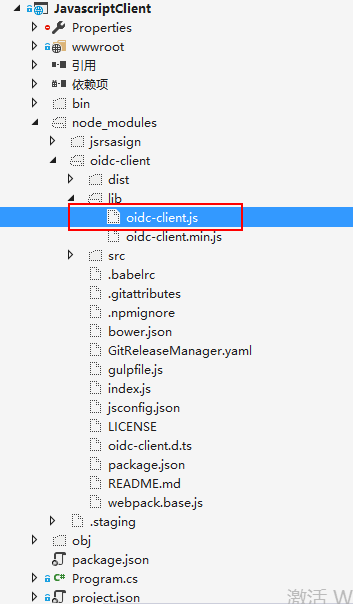
找到oidc-client.js文件,将文件复制到wwwroot下(注意html页面引用就行)
2.添加两个html
index.html
<!DOCTYPE html>

<html>

<head>

    <meta charset="utf-8"/>

    <title></title>

</head>

<body>

    <button id="login">Login</button>

    <button id="api">Call API</button>

    <button id="logout">Logout</button>

    <pre id="results"></pre>

    <script src="http://code.jquery.com/jquery-latest.js"></script>

    <script src="oidc-client.js"></script>

    <script src="app.js"></script>

</body>

</html>
callBack.html
<!DOCTYPE html>

<html>

<head>

    <meta charset="utf-8" />

    <title></title>

</head>

<body>

    <script src="oidc-client.js"></script>

    <script>

        new Oidc.UserManager().signinRedirectCallback().then(function () {

            window.location = "index.html";

        }).catch(function (e) {

            console.error(e);

        });

    </script>

</body>

</html>
3.添加app.js
/// <reference path="oidc-client.js" />
function log() {
document.getElementById('results').innerText = '';
Array.prototype.forEach.call(arguments, function (msg) {
if (msg instanceof Error) {
msg = "Error: " + msg.message;
}
else if (typeof msg !== 'string') {
msg = JSON.stringify(msg, null, 2);
}
document.getElementById('results').innerHTML += msg + '\r\n';
});
}
document.getElementById("login").addEventListener("click", login, false);
document.getElementById("api").addEventListener("click", api, false);
document.getElementById("logout").addEventListener("click", logout, false);
var config = {
authority: "http://localhost:8000",
client_id: "js",
redirect_uri: "http://localhost:5003/callback.html",
response_type: "id_token token",
scope: "openid profile UserApi",
post_logout_redirect_uri: "http://localhost:5003/index.html",
};
var mgr = new Oidc.UserManager(config);
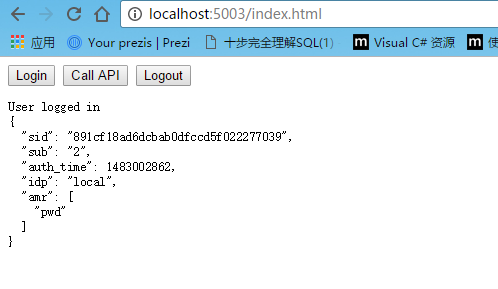
mgr.getUser().then(function (user) {
if (user) {
log("User logged in", user.profile);
}
else {
log("User not logged in");
}
});
function login() {
mgr.signinRedirect();
}
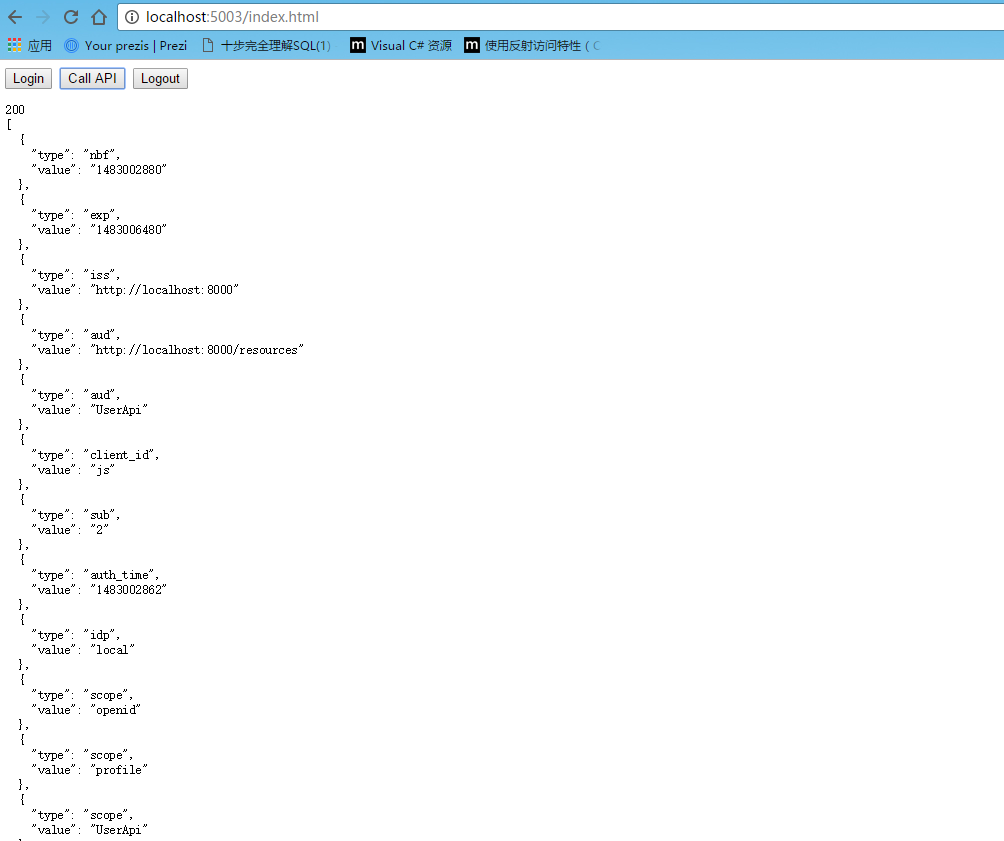
function api() {
mgr.getUser().then(function (user) {
var url = "http://localhost:5001/api/Values";
var xhr = new XMLHttpRequest();
xhr.open("GET", url);
xhr.onload = function () {
log(xhr.status, JSON.parse(xhr.responseText));
}
xhr.setRequestHeader("Authorization", "Bearer " + user.access_token);
xhr.send();
});
}
function logout() {
mgr.signoutRedirect();
}
4.将端口设为5003
运行授权中心=》运行javascriptclient=》点击login=》跳转到授权中心登录页面=》登录后,显示权限列表=》返回5003

以上
更新
看了昨天的评论,又去官方文档瞄了下,找到一些处理方法,如下
https://identityserver4.readthedocs.io/en/release/quickstarts/8_entity_framework.html
IdentityServer is designed for extensibility, and one of the extensibility points is the storage mechanism used for data that IdentityServer needs. This quickstart shows to how configure IdentityServer to use EntityFramework (EF) as the storage mechanism for this data (rather than using the in-memory implementations we had been using up until now).
大概意思是说,可以用数据库存储apiresour,client和identityserverresource 资源
新建或在原有的授权中心项目更改都是可以的,我这里是直接新建了一个
1.在project.json里 dependencies添加
"IdentityServer4.EntityFramework": "1.0.0",
"Microsoft.EntityFrameworkCore.SqlServer": "1.1.0",
"Microsoft.EntityFrameworkCore.Tools": "1.0.0-preview2-final",
"Microsoft.EntityFrameworkCore.SqlServer.Design": "1.1.*"
tools里添加(用于执行cmd的donet ef命令)
"Microsoft.EntityFrameworkCore.Tools": "1.0.0-preview2-final"
2.新建config文件
using System.Collections.Generic;

using IdentityServer4;

using IdentityServer4.Models;

using IdentityServer4.Test;

namespace EntityFrameworkDemo

{

    public class Config

    {

        public static IEnumerable<IdentityResource> GetyIdentityResources()

        {

            return new List<IdentityResource>

            {

                new IdentityResources.OpenId(),

                new IdentityResources.Profile()

            };

        }

        public static IEnumerable<ApiResource> GeyApiResources()

        {

            return new List<ApiResource>

            {

                new ApiResource("UserApi","用户API"),

                new ApiResource("api1","测试api")

            };

        }

        public static IEnumerable<Client> GetClients()

        {

            return new List<Client>

            {

                new Client

                {

                    ClientId = "Client",

                    AllowedGrantTypes = GrantTypes.ClientCredentials,

                    ClientSecrets =

                    {

                        new Secret("secret".Sha256())

                    },

                    AllowedScopes = {"UserApi"}

                },

                new Client

                {

                    ClientId = "ro.Client",

                    AllowedGrantTypes = GrantTypes.ResourceOwnerPassword,

                    ClientSecrets =

                    {

                        new Secret("secret".Sha256())

                    },

                    AllowedScopes = {"UserApi"}

                },

                   // OpenID Connect implicit flow client (MVC)

                new Client

                {

                    ClientId = "MVC",

                    ClientName = "MVC Client",

                    AllowedGrantTypes = GrantTypes.HybridAndClientCredentials,

                     ClientSecrets =

                    {

                        new Secret("secret".Sha256())

                    },

                    RedirectUris = { "http://localhost:5002/signin-oidc" },

                    PostLogoutRedirectUris = { "http://localhost:5002" },

                    AllowedScopes =

                    {

                        IdentityServerConstants.StandardScopes.OpenId,

                        IdentityServerConstants.StandardScopes.Profile,

                        "UserApi"

                    },

                    AllowOfflineAccess = true

                },

                   // JavaScript Client

                new Client

                {

                    ClientId = "js",

                    ClientName = "JavaScript Client",

                    AllowedGrantTypes = GrantTypes.Implicit,

                    AllowAccessTokensViaBrowser = true,

                    RedirectUris = { "http://localhost:5003/callback.html" },

                    PostLogoutRedirectUris = { "http://localhost:5003/index.html" },

                    AllowedCorsOrigins = { "http://localhost:5003" },

                    AllowedScopes =

                    {

                        IdentityServerConstants.StandardScopes.OpenId,

                        IdentityServerConstants.StandardScopes.Profile,

                        "UserApi"

                    },

                }

            };

        }

        public static List<TestUser> GetTestUsers()

        {

            return new List<TestUser>

            {

                new TestUser

                {

                    SubjectId = "",

                    Username = "qwerty",

                    Password = "a123"

                },

                new TestUser

                {

                    SubjectId = "",

                    Username = "aspros",

                    Password = "b123"

                }

            };

        }

    }

}
3.在startup里添加对应的服务
(1).修改ConfigureServices
旧:ConfigureServices里如下
     services.AddIdentityServer()

                .AddTemporarySigningCredential()

                .AddInMemoryApiResources(Configs.GeyApiResources())

                .AddInMemoryClients(Configs.GetClients())

                .AddInMemoryIdentityResources(Configs.GetyIdentityResources())

                .AddTestUsers(Configs.GeTestUsers());
新:ConfigureServices里如下
 var connectionString = @"server=.;database=IdentityServer4;trusted_connection=yes";

            var migrationsAssembly = typeof(Startup).GetTypeInfo().Assembly.GetName().Name;

            // configure identity server with in-memory users, but EF stores for clients and resources

            services.AddIdentityServer()

                .AddTemporarySigningCredential()

                .AddTestUsers(Config.GetTestUsers())

                .AddConfigurationStore(builder =>

                    builder.UseSqlServer(connectionString, options =>

                        options.MigrationsAssembly(migrationsAssembly)))

                .AddOperationalStore(builder =>

                    builder.UseSqlServer(connectionString, options =>

                        options.MigrationsAssembly(migrationsAssembly)));
(2).修改Configure
  app.UseIdentityServer();

            app.UseCookieAuthentication(new CookieAuthenticationOptions

            {

                AuthenticationScheme = IdentityServerConstants.ExternalCookieAuthenticationScheme,

                AutomaticAuthenticate = false,

                AutomaticChallenge = false

            });
(3).初始化数据库
   private void InitializeDatabase(IApplicationBuilder app)

        {

            using (var scope = app.ApplicationServices.GetService<IServiceScopeFactory>().CreateScope())

            {

                scope.ServiceProvider.GetRequiredService<PersistedGrantDbContext>().Database.Migrate();

                var context = scope.ServiceProvider.GetRequiredService<ConfigurationDbContext>();

                context.Database.Migrate();

                if (!context.Clients.Any())

                {

                    foreach (var client in Config.GetClients().Where(client => !context.Clients.Any(c => c.ClientId == client.ClientId)))

                    {

                        context.Clients.Add(client.ToEntity());

                    }

                }

                //context.SaveChanges();

                if (!context.IdentityResources.Any())

                {

                    foreach (

                        var identity in

                            Config.GetyIdentityResources()

                                .Where(identity => !context.IdentityResources.Any(i => i.Name == identity.Name)))

                    {

                        context.IdentityResources.Add(identity.ToEntity());

                    }

                }

                //context.SaveChanges();

                if (!context.ApiResources.Any())

                {

                    foreach (var api in Config.GeyApiResources().Where(api => !context.ApiResources.Any(a => a.Name == api.Name)))

                    {

                        context.ApiResources.Add(api.ToEntity());

                    }

                }

                context.SaveChanges();

            }

        }
在Configure添加初始化数据库方法
  public void Configure(IApplicationBuilder app, IHostingEnvironment env, ILoggerFactory loggerFactory)

        {

            // this will do the initial DB population

            InitializeDatabase(app);

            ...

         }
4.在当前项目目录,如 G:\MyProject\IdentityServerDemo\src\EntityFrameworkDemo下shift+右键,在此处打开命令窗口,运行下面两行命令
dotnet ef migrations add InitialIdentityServerPersistedGrantDbMigration -c PersistedGrantDbContext -o Data/Migrations/IdentityServer/PersistedGrantDb
dotnet ef migrations add InitialIdentityServerConfigurationDbMigration -c ConfigurationDbContext -o Data/Migrations/IdentityServer/ConfigurationDb
5.重新运行授权中心前更改端口号为8001(如果是新建的项目),在sqlserver数据库会生成对应的数据库
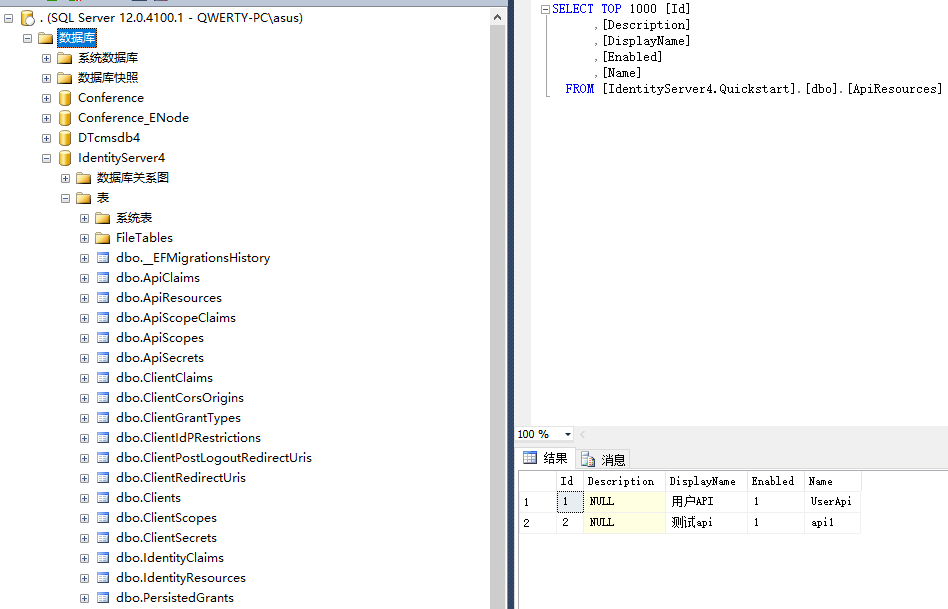
6.将api的授权地址改成8001
7.运行单元测试
以上
如有问题,欢迎指正。
IdentityServer4 简单使用,包括api访问控制,openid的授权登录,js访问的更多相关文章
- 033.Kubernetes集群安全-API Server认证及授权
一 Kubernetes集群安全 1.1 安全机制 Kubernetes通过一系列机制来实现集群的安全控制,其中包括API Server的认证授权.准入控制机制及保护敏感信息的Secret机制等.集群 ...
- 使用 IdentityServer4 实现 OAuth 2.0 与 OpenID Connect 服务
IdentityServer4 是 ASP.NET Core 的一个包含 OIDC 和 OAuth 2.0 协议的框架.最近的关注点在 ABP 上,默认 ABP 也集成 IdentityServer4 ...
- IdentityServer4实现.Net Core API接口权限认证(快速入门)
什么是IdentityServer4 官方解释:IdentityServer4是基于ASP.NET Core实现的认证和授权框架,是对OpenID Connect和OAuth 2.0协议的实现. 通俗 ...
- Java得到一个整数的绝对值,不使用任何判断和比较语句,包括API.
/** * Java得到一个整数的绝对值,不使用任何判断和比较语句,包括API. <br> * 1.不得使用任何API,如Math.abs()等.<br> * 2.不得使用判断 ...
- 解决微信公众号授权登录和开放平台微信第三方应用授权登录获取到的用户Openid关联问题
开发背景: 最近一段时间一直在做关于微信方面的网站应用开发,这段时间也收获的不少关于微信开发方面的开发技能,接触的比较多的主要有微信公众号和微信网站app第三方登录授权,以及微信会员卡,优惠券和扫描二 ...
- Yii2 restful api创建,认证授权以及速率控制
Yii2 restful api创建,认证授权以及速率控制 下面是对restful从创建到速率控制的一个详细流程介绍,里面的步骤以及截图尽可能详细,熟悉restful的盆友可能觉得过于繁琐,新手不妨耐 ...
- IdentityServer4实现OAuth2.0四种模式之授权码模式
接上一篇:IdentityServer4实现OAuth2.0四种模式之隐藏模式 授权码模式隐藏码模式最大不同是授权码模式不直接返回token,而是先返回一个授权码,然后再根据这个授权码去请求token ...
- HTML5 file API加canvas实现图片前端JS压缩并上传
一.图片上传前端压缩的现实意义 对于大尺寸图片的上传,在前端进行压缩除了省流量外,最大的意义是极大的提高了用户体验. 这种体验包括两方面: 由于上传图片尺寸比较小,因此上传速度会比较快,交互会更加流畅 ...
- 在dotnet core web api中支持CORS(跨域访问)
最近在写的Office add-in开发系列中,其中有一个比较共性的问题就是在add-in的客户端脚本中访问远程服务时,要特别注意跨域访问的问题. 关于CORS的一些基本知识,请参考维基百科的说明:h ...
随机推荐
- CSS3自定义滚动条样式 -webkit-scrollbar
今天写项目碰上需要改滚动条效果,我的第一反应是,需要用js写滚动条,顿时头大,上网搜了一下,原来css3就可以修改滚动条样式了,非常好啊,下面分享原文地址:http://www.xuanfengge. ...
- java Http编程小结
1:什么是HTTP? 超文本传输协议(HyperText Transfer Protocol -- HTTP)是一个设计来使客户端和服务器顺利进行通讯的协议. HTTP在客户端和服务器之间以reque ...
- 复旦大学2015--2016学年第二学期高等代数II期末考试情况分析
一.期末考试成绩班级前几名 胡晓波(90).杨彦婷(88).宋卓卿(85).唐指朝(84).陈建兵(83).宋沛颖(82).王昊越(81).白睿(80).韩沅伯(80).王艺楷(80).张漠林(80) ...
- MySQL新建用户,授权,删除用户,修改密码
首先要声明一下:一般情况下,修改MySQL密码,授权,是需要有mysql里的root权限的.注:本操作是在WIN命令提示符下,phpMyAdmin同样适用. 用户:phplamp 用户数据库: ...
- AIDMA VS AISAS vs ISMAS 营销法则
AIDMA法则与传统媒体时代 引起注意——产生兴趣——培养欲望——形成记忆——购买行动 注:AIDMA,传统消费者行为学理论模型,即:Attention(引起注意),Interest (引起兴趣),D ...
- Oracle(控制用户权限)
权限允许用户访问属于其它用户的对象或执行程序, ORACLE系统提供权限:Object 对象级.System 系统级 查看权限的数据字典: 字典名 含义 ROLE_SYS_PRIVS System p ...
- Winform MDI窗体容器 权限 简单通讯
MDI窗体容器 权限 using System; using System.Collections.Generic; using System.ComponentModel; using Syste ...
- python http代理代码
googlecode :https://code.google.com/archive/p/python-proxy/source/default/source # -*- coding: cp125 ...
- 漂亮的Linux命令提示符
漂亮的Linux命令提示符 每天面对着白底黑字(黑底白字)的命令行是否枯燥泛味呢?生活应给是五彩缤纷的,何不为单调无味的生活增添一抹色彩? 下面一起体验一下Linux命令行提示符惊险的整容之旅 惊鸿一 ...
- 易货beta版本测试报告
测试 对于服务器端我们是进行了单元测试 对于客户端我们使用的是在线的云测工具对app进行了包括安装,启动,具体功能以及ui方面的测试. 另外,对于客户端,我们还进行了对细节功能的人工测试 功能需求编号 ...