cxf-webservice完整示例
最近一段时间研究webservice,一般来说,开发java的Webservice经常使用axis2和cxf这两个比较流行的框架
先使用cxf,开发一个完整示例,方便对webservice有一个整体的概念
使用的工具主要有eclipse、maven
一、开发服务端
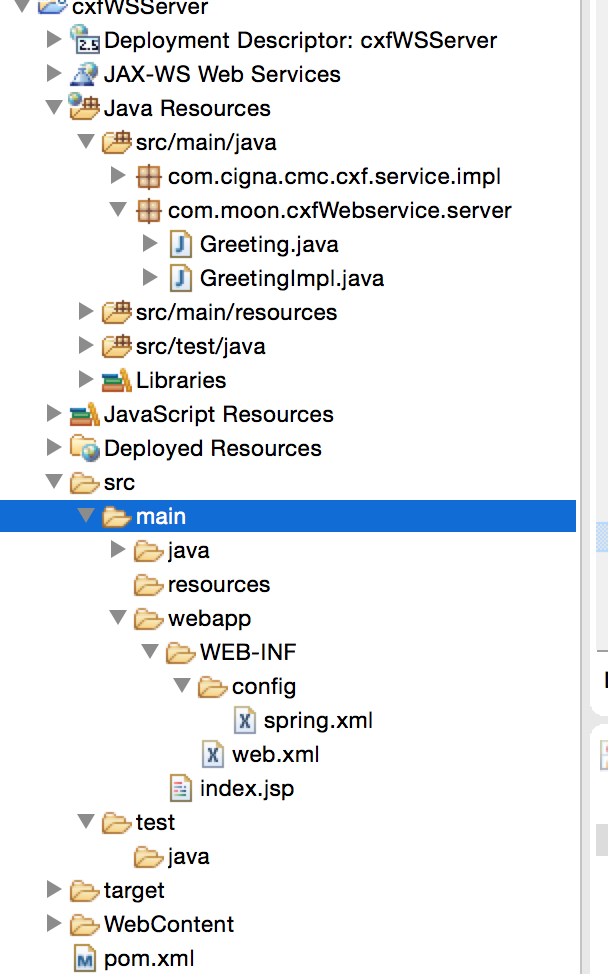
整体结构如下:
1、创建maven的web工程,这个就不多赘述了,如果以前没搭建过可以去网上搜索下,网上资源很多
2、配置POM.xml文件,引入相应的jar包
<project xmlns="http://maven.apache.org/POM/4.0.0" xmlns:xsi="http://www.w3.org/2001/XMLSchema-instance"

    xsi:schemaLocation="http://maven.apache.org/POM/4.0.0 http://maven.apache.org/maven-v4_0_0.xsd">

    <modelVersion>4.0.0</modelVersion>

    <groupId>com.moon.ws</groupId>

    <artifactId>cfxWSServer</artifactId>

    <packaging>war</packaging>

    <version>0.0.1-SNAPSHOT</version>

    <name>cfxWSServer Maven Webapp</name>

    <url>http://maven.apache.org</url>

    <dependencies>

        <dependency>

            <groupId>junit</groupId>

            <artifactId>junit</artifactId>

            <version>3.8.1</version>

            <scope>test</scope>

        </dependency>

        <dependency>

            <groupId>org.apache.cxf</groupId>

            <artifactId>cxf-api</artifactId>

            <version>2.5.0</version>

        </dependency>

        <dependency>

            <groupId>org.apache.cxf</groupId>

            <artifactId>cxf-rt-frontend-jaxws</artifactId>

            <version>2.5.0</version>

        </dependency>

        <dependency>

            <groupId>org.apache.cxf</groupId>

            <artifactId>cxf-rt-bindings-soap</artifactId>

            <version>2.5.0</version>

        </dependency>

        <dependency>

            <groupId>org.apache.cxf</groupId>

            <artifactId>cxf-rt-transports-http</artifactId>

            <version>2.5.0</version>

        </dependency>

        <dependency>

            <groupId>org.apache.cxf</groupId>

            <artifactId>cxf-rt-ws-security</artifactId>

            <version>2.5.0</version>

        </dependency>

    </dependencies>

    <build>

        <finalName>cfxWSServer</finalName>

    </build>

</project>
3、开发相关的接口和实现类
首先开发接口类
package com.moon.cxfWebservice.server;

import javax.jws.WebParam;

import javax.jws.WebService;

@WebService

public interface Greeting {

    public String greeting(@WebParam(name="username")String userName);

}
然后开发实现类
package com.moon.cxfWebservice.server;

import java.util.Calendar;

import javax.jws.WebService;

@WebService(endpointInterface="com.moon.cxfWebservice.server.Greeting")

public class GreetingImpl implements Greeting{

    public String greeting(String userName) {

        return "Hello " + userName + ", currentTime is "

                + Calendar.getInstance().getTime();

    }

}
至此,服务端的代码就开发完成了。
4、配置web.xml和spring配置文件
web.xml配置如下
<?xml version="1.0" encoding="UTF-8"?>

<web-app version="2.5"

    xmlns="http://java.sun.com/xml/ns/javaee"

    xmlns:xsi="http://www.w3.org/2001/XMLSchema-instance"

    xsi:schemaLocation="http://java.sun.com/xml/ns/javaee

    http://java.sun.com/xml/ns/javaee/web-app_2_5.xsd">

    <!-- 配置 Spring 配置文件的名称和位置 -->

    <context-param>

        <param-name>contextConfigLocation</param-name>

        <param-value>/WEB-INF/config/spring.xml</param-value>

    </context-param>

    <!-- 启动 IOC 容器的 ServletContextListener -->

    <listener>

        <listener-class>org.springframework.web.context.ContextLoaderListener</listener-class>

    </listener>

    <!-- 配置字符集 -->

    <filter>

        <filter-name>encodingFilter</filter-name>

        <filter-class>org.springframework.web.filter.CharacterEncodingFilter</filter-class>

        <init-param>

            <param-name>encoding</param-name>

            <param-value>UTF-8</param-value>

        </init-param>

        <init-param>

            <param-name>forceEncoding</param-name>

            <param-value>true</param-value>

        </init-param>

    </filter>

    <filter-mapping>

        <filter-name>encodingFilter</filter-name>

        <url-pattern>/*</url-pattern>

    </filter-mapping>

    <servlet>

        <servlet-name>CXFServlet</servlet-name>

        <servlet-class>org.apache.cxf.transport.servlet.CXFServlet</servlet-class>

        <load-on-startup>1</load-on-startup>

    </servlet>

    <servlet-mapping>

        <servlet-name>CXFServlet</servlet-name>

        <!--==这个设置很重要,那么我们的webservice的地址就是http://localhost:8080/yourProgramName/webservice/Greeting=== -->

        <url-pattern>/webservice/*</url-pattern>

    </servlet-mapping>

    <display-name>hello world!</display-name>

    <welcome-file-list>

        <welcome-file>index.html</welcome-file>

        <welcome-file>index.htm</welcome-file>

        <welcome-file>index.jsp</welcome-file>

        <welcome-file>default.html</welcome-file>

        <welcome-file>default.htm</welcome-file>

        <welcome-file>default.jsp</welcome-file>

    </welcome-file-list>

</web-app>
spring的配置文件
<?xml version="1.0" encoding="UTF-8"?>

<beans xmlns="http://www.springframework.org/schema/beans"

xmlns:context="http://www.springframework.org/schema/context"

xmlns:jaxws="http://cxf.apache.org/jaxws" xmlns:xsi="http://www.w3.org/2001/XMLSchema-instance"

xsi:schemaLocation="http://www.springframework.org/schema/beans

http://www.springframework.org/schema/beans/spring-beans-3.0.xsd

http://www.springframework.org/schema/context

http://www.springframework.org/schema/context/spring-context-3.0.xsd

http://cxf.apache.org/jaxws

http://cxf.apache.org/schemas/jaxws.xsd">

<!--=============== 实现类的bean,需要spring注入 ============================-->

<bean id="greetingImpl" class="com.moon.cxfWebservice.server.GreetingImpl"/>

 <jaxws:endpoint id="greeting"  implementor="#greetingImpl"   address="/Greeting" />

</beans>
配置完这两个文件后,服务器端就完成了,我们就可以将这个服务跑起来了,跑起来后 访问 http://localhost:8080/yourProgramName/webservice/Greeting?wsdl
例如我本地的项目访问的就是
http://localhost:8080/cxfWSServer/webservice/Greeting?wsdl
二、开发客户端
客户端调用我使用的两种方式
第一种使用apche cxf生成代码进行访问
1、下载apache cxf的包,地址为:http://cxf.apache.org/download.html 如:apache-cxf-3.1.6
2、解压apache-cxf-3.1.6到任意目录
3、配置环境变量
os系统设置
1)、export CXF_HOME=/Users/moon/Desktop/tools/apache-cxf-3.1.6
2)、path后面加 :$CXF_HOME/bin
windows系统设置
1)、CXF_HOME=D:\apache-cxf-3.1.6
2)、在path后面加上 %CXF_HOME%/bin;
在命令中输入wsdl2java,如果有提示usage,就表明配置成功
4、运行wsdl2java工具
在命令中输入:wsdl2java -d \xx\xxx\xx -client http://localhost:8080/cxfWSServer/webservice/Greeting?wsdl
(\xx\xxx\xx 是客户端程序代码所在的目录,http://localhost:8080/cxfWSServer/webservice/Greeting?wsdl 是发布的webservice服务)
附wsdl2java用法:
wsdl2java -p com -d D:\\src -all xx.wsdl
-p 指定其wsdl的命名空间,也就是要生成代码的包名:
-d 指定要产生代码所在目录
-client 生成客户端测试web service的代码
-server 生成服务器启动web service的代码
-impl 生成web service的实现代码
-ant 生成build.xml文件
-all 生成所有开始端点代码:types,service proxy,,service interface, server mainline, client mainline, implementation object, and an Ant build.xml file.
生成后的代码直接放到client工程上面

另外新建一个client类 直接使用生成的类调用
package com.moon.cxf;

import com.moon.cxf.client.Greeting;

import com.moon.cxf.client.GreetingImplService;

public class CxfClient {

    public static void main(String[] args) {

        GreetingImplService serviceFactory = new GreetingImplService();

        Greeting service =

            serviceFactory.getGreetingImplPort();

        String result = service.greeting("Jaune");

        System.out.println(result);

    }

}
二、使用axis调用webservice接口
引入axis 相关jar包

代码如下
package com.moon.cxf;

import java.rmi.RemoteException;

import javax.xml.namespace.QName;

import javax.xml.rpc.ParameterMode;

import javax.xml.rpc.ServiceException;

import org.apache.axis.client.Call;

import org.apache.axis.client.Service;

import org.apache.axis.encoding.XMLType;

/**

 * 使用axis调用cxf发布的webservice接口

 * @author moon

 *

 */

public class AxisClient {

    public static void main(String[] args) throws ServiceException, RemoteException {

         try {

             String endpoint = " http://localhost:8080/cfxWSServer/webservice/Greeting";

             // 调用过程

             Service service = new Service();

             Call call = (Call) service.createCall();

             call.setTargetEndpointAddress(new java.net.URL(endpoint));

             call.setOperationName(new QName("http://server.cxfWebservice.moon.com/","greeting"));// WSDL里面描述的操作名称

             call.addParameter("username",

                             org.apache.axis.encoding.XMLType.XSD_STRING,

                             javax.xml.rpc.ParameterMode.IN);// 操作的参数

             call.setReturnType(org.apache.axis.encoding.XMLType.XSD_STRING);// 设置返回类型

             call.setUseSOAPAction(true);

             // 给方法传递参数,并且调用方法

             String temp = "good";

             Object[] obj = new Object[] { temp };

             String result = (String) call.invoke(obj);

             System.out.println("Result is : " + result);

     } catch (Exception e) {

             e.printStackTrace();

     }

    }

}
相关代码:https://github.com/15210448683/WebServiceDemoImpl
cxf-webservice完整示例的更多相关文章
- eclipse+maven搭建cxf webservice 完整例子
开发环境是eclipse , maven. 在开发java webservice时,有两个比较流行的框架:axis2和cxf.cxf可以无缝的和spring集成,而axis2需要打包成aar文件,在t ...
- 利用JavaScriptSOAPClient直接调用webService --完整的前后台配置与调用示例
JavaScriptSoapClient下载地址:https://archive.codeplex.com/?p=javascriptsoapclient JavaScriptSoapClient的D ...
- php中创建和调用webservice接口示例
php中创建和调用webservice接口示例 这篇文章主要介绍了php中创建和调用webservice接口示例,包括webservice基本知识.webservice服务端例子.webservi ...
- Spring整合CXF webservice restful 实例
webservice restful接口跟soap协议的接口实现大同小异,只是在提供服务的类/接口的注解上存在差异,具体看下面的代码,然后自己对比下就可以了. 用到的基础类 User.java @Xm ...
- 《转》CXF WebService 开发文档-目录索引
CXF WebService 开发文档-目录索引 上次介绍了Axis的WebService,现在我们来看看CXF是怎么完成WebService的. Axis1 WebService 在线博文: htt ...
- java调用CXF WebService接口的两种方式
通过http://localhost:7002/card/services/HelloWorld?wsdl访问到xml如下,说明接口写对了. 2.静态调用 // 创建WebService客户端代理工厂 ...
- 【第四篇】ASP.NET MVC快速入门之完整示例(MVC5+EF6)
目录 [第一篇]ASP.NET MVC快速入门之数据库操作(MVC5+EF6) [第二篇]ASP.NET MVC快速入门之数据注解(MVC5+EF6) [第三篇]ASP.NET MVC快速入门之安全策 ...
- CXF WebService整合SpringMVC的maven项目
首先推荐博客:http://www.cnblogs.com/xdp-gacl/p/4259481.html http://blog.csdn.net/hu_shengyang/article/de ...
- WCF服务开发与调用的完整示例
WCF服务开发与调用的完整示例 开发工具:VS2008 开发语言:C# 开发内容:简单的权限管理系统 第一步.建立WCF服务库 点击确定,将建立一个WCF 服务库示例程序,自动生成一个包括IServi ...
随机推荐
- mongodb的远程访问
1,centos6上安装mongodb:2,新建可以远程访问的用户,以便可以远程访问: [root@localhost ~]# cd /usr/local/mongodb/bin/ [root@loc ...
- 在python pydev中使用todo标注任务
在做自动化测试时,有部分代码因需求未定或界面需要更改,代码不做修改或更新,这里就需要用到TODO功能. 在PyCharm中TODO功能很详细,但在pydev中怎么用呢.看了文档后,截图如下: 1.设置 ...
- 玩node-images模块---Node.js轻量级跨平台图像编解码库
Node.js轻量级跨平台图像编解码库 github:https://github.com/zhangyuanwei/node-images Features 功能特性 轻量级:无需安装任何图像处理库 ...
- 神奇的thrust::device_vector与nvcc编译选项
在C++的GPU库thrust中,有两种vector thrust::device_vector<int> D; //GPU使用的内存中的向量 thrust::host_vector< ...
- wpgcms---首页数据怎么掉
在首页调用单页模型下的,单页列表使用的方法: {% for page in wpg.page.getList('business') %} <li> <div class=" ...
- Hive show
CREATE TABLE page_view(viewTime INT, userid BIGINT,p_date timestamp, page_url STRING, referrer_url v ...
- Elasticsearch-mapper 基于注解方式生成mapping(2.0以上)
Elasticsearch生成mapping的方式上有多种方式,我们可以把mapping做成配置文件,也可以用spring-data-elasticsearch基于注解生成. 在基于注解生成这种方式上 ...
- linux下git命令
1.初始化: 方式一.git clone,将远程的Git版本库,克隆到本地一份. 方式二.git init和git remote 2.git pull:将其他版本库代码更新到本地.例如:git pul ...
- Linux下 磁盘扩容的两种方式
Hadoop扩容 概述 Hadoop存储容量或计算能力不能满足日益增长的需求时,就需要扩容. 扩容有两个方案: 1) 增加磁盘 2) 增加节点 方案一:扩大虚拟磁盘 扩大容量 将虚拟的Linux关闭, ...
- C语言清屏函数
Devc++ 与VC中的清屏函数 #include<stdio.h> #include<stdlib.h>//清屏函数的头文 int main() { int i; for(i ...