docker上部署nginx容器80端口自动转443端口
拉去nginx镜像
# docker pull nginx
运行nginx容器config用于拷贝nginx配置文件
# docker run --name nginxconfig -d docker.io/nginx
# docker cp nginxconfig:/etc/nginx/ /root/
删除
# docker stop nginxconfig
# docker rm nginxconfig
创建服务nginx容器
# docker run --name nginx -p 80:80 -p 443:443 -v /root/nginx/:/etc/nginx/ -d docker.io/nginx
- 映射端口443,用于https请求
- 映射端口80,用于http请求
nginx配置文件如下(不做任何修改)
[root@iZm5eclei4hhnwn6mo9va6Z ~]# ls

mysql  nginx   redis

[root@iZm5eclei4hhnwn6mo9va6Z ~]#

[root@iZm5eclei4hhnwn6mo9va6Z ~]# cd nginx

[root@iZm5eclei4hhnwn6mo9va6Z nginx]#

[root@iZm5eclei4hhnwn6mo9va6Z nginx]# ls

certs  conf.d  fastcgi_params  koi-utf  koi-win  mime.types  modules  nginx.conf  scgi_params  uwsgi_params  win-utf

[root@iZm5eclei4hhnwn6mo9va6Z nginx]#

[root@iZm5eclei4hhnwn6mo9va6Z nginx]# cat nginx.conf

user  nginx;                                #运行nginx的用户

worker_processes  ;                        #启动进程设置成和CPU数量相等

error_log  /var/log/nginx/error.log warn;   #全局错误日志

pid        /var/run/nginx.pid;              #PID文件的位置

#工作模式及连接数上限

events {

    worker_connections  ;               #单个后台work进程最大并发数设置为1024

}

http {

    include       /etc/nginx/mime.types;    #设定mime类型

    default_type  application/octet-stream;

    log_format  main  '$remote_addr - $remote_user [$time_local] "$request" '       #设定日志格式

                      '$status $body_bytes_sent "$http_referer" '

                      '"$http_user_agent" "$http_x_forwarded_for"';

    access_log  /var/log/nginx/access.log  main;

    sendfile        on;

    #tcp_nopush     on;

    keepalive_timeout  ;                 #设置连接超时的事件

    #gzip  on;                             #开启GZIP压缩

    include /etc/nginx/conf.d/*.conf;

}

[root@iZm5eclei4hhnwn6mo9va6Z nginx]#
拷贝申请的阿里云ssl证书
[root@iZm5eclei4hhnwn6mo9va6Z nginx]# cd certs/

[root@iZm5eclei4hhnwn6mo9va6Z certs]#

[root@iZm5eclei4hhnwn6mo9va6Z certs]# ls

2032088_cnbi.jiaxin365.cn.key  2032088_cnbi.jiaxin365.cn.pem

[root@iZm5eclei4hhnwn6mo9va6Z certs]#

[root@iZm5eclei4hhnwn6mo9va6Z certs]# pwd

/root/nginx/certs
配置http自动跳往https
[root@iZm5eclei4hhnwn6mo9va6Z nginx]# cd conf.d/

[root@iZm5eclei4hhnwn6mo9va6Z conf.d]#

[root@iZm5eclei4hhnwn6mo9va6Z conf.d]# pwd

/root/nginx/conf.d

[root@iZm5eclei4hhnwn6mo9va6Z conf.d]#

[root@iZm5eclei4hhnwn6mo9va6Z conf.d]# ls

default.conf

[root@iZm5eclei4hhnwn6mo9va6Z conf.d]#

[root@iZm5eclei4hhnwn6mo9va6Z conf.d]# cat default.conf

server {

        server_name  cnbi.jiaxin365.cn;    #域名

        listen ;                         #侦听80端口

        rewrite ^(.*) https://$server_name$1 permanent;       #${server_name}可以换成$host

    }                                                         #设置http自动跳转https

server {

    listen     ssl;                     #侦听443端口

    server_name  cnbi.jiaxin365.cn;        #域名

    #charset koi8-r;

    #access_log  /var/log/nginx/host.access.log  main;
    # 增加ssl

    ssl on;                                #如果强制HTTPs访问,这行要打开

    ssl_certificate /etc/nginx/certs/2032088_cnbi.jiaxin365.cn.pem;

    ssl_certificate_key /etc/nginx/certs/2032088_cnbi.jiaxin365.cn.key;

    ssl_session_cache    shared:SSL:1m;

    ssl_session_timeout 5m;

    ssl_protocols  SSLv2 SSLv3 TLSv1.;    # 指定密码为openssl支持的格式

    ssl_ciphers  HIGH:!aNULL:!MD5;         # 密码加密方式

    ssl_prefer_server_ciphers  on;         # 依赖SSLv3和TLSv1协议的服务器密码将优先于客户端密码

    location / {                           # 定义首页索引目录和名称

        root   /usr/share/nginx/html;

        index  index.html index.htm;

    }

    #error_page                /.html;

    # redirect server error pages to the static page /50x.html

    #

    error_page        /50x.html;

    location = /50x.html {                #重定向错误页面到 /50x.html

        root   /usr/share/nginx/html;

    }

    # proxy the PHP scripts to Apache listening on 127.0.0.1:

    #

    #location ~ \.php$ {

    #    proxy_pass   http://127.0.0.1;

    #}

    # pass the PHP scripts to FastCGI server listening on 127.0.0.1:

    #

    #location ~ \.php$ {

    #    root           html;

    #    fastcgi_pass   127.0.0.1:;

    #    fastcgi_index  index.php;

    #    fastcgi_param  SCRIPT_FILENAME  /scripts$fastcgi_script_name;

    #    include        fastcgi_params;

    #}

    # deny access to .htaccess files, if Apache's document root

    # concurs with nginx's one

    #

    #location ~ /\.ht {

    #    deny  all;

    #}

}
重启容器
# docker restart nginx
查看容器是否启动成功
# docker ps -a
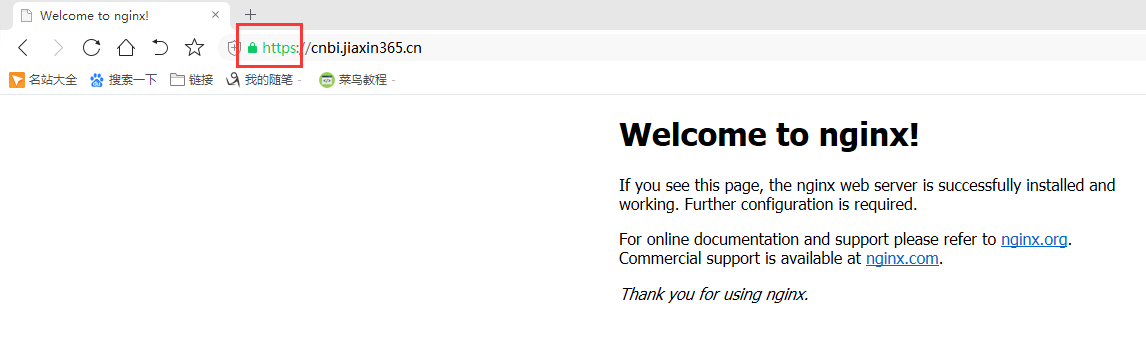
打开浏览器测试
参考博客:
nginx访问http80端口跳转https443端口
https://yq.aliyun.com/articles/556481
docker安装nginx并配置通过https访问
https://www.jianshu.com/p/5f9bd492f186
nginx配置ssl证书实现https访问
https://www.cnblogs.com/tianhei/p/7726505.html
nginx 80端口重定向到443端口
https://www.cnblogs.com/lxwphp/p/9820005.html
https://yq.aliyun.com/articles/601562
https://blog.csdn.net/weixin_31655741/article/details/82226688
docker上部署nginx容器80端口自动转443端口的更多相关文章
- docker - compose 部署 Nginx
主要介绍 docker 中 Nginx 的部署及项目目录挂载券的方法.docker 中部署一个服务,有三种方法,分别是 docker run.Dockerfile.docker-compose . 下 ...
- 在Docker下部署Nginx
在Docker下部署Nginx 在Docker下部署Nginx,包括: 部署一个最简单的Nginx,可以通过80端口访问默认的网站 设置记录访问和错误日志的路径 设置静态网站的路径 通过proxy_p ...
- docker上启动nginx,并配置修改nginx的配置文件
1.使用docker 下载nginx 镜像 docker pull nginx 2.启动nginx docker run --name nginx -p 80:80 -d nginx 这样就简单的把 ...
- 阿里云服务器安装Docker并部署nginx、jdk、redis、mysql
阿里云服务器安装Docker并部署nginx.jdk.redis.mysql 一.安装Docker 1.安装Docker的依赖库 yum install -y yum-utils device-map ...
- 定期从Docker上部署的MySQL备份数据
前段时间公司停电,正巧赶上周一领导要开会要过一遍项目,然而项目所依赖的MySQL数据库是直接部署在宿主机,且因为各人部署方式不同的原因,花了很久才在开会前启动起来.于是开完会后,我第一件事就是把原先依 ...
- Docker Compose部署 nginx代理Tomcat集群
一.简介 使用Docker镜像部署Nginx代理的多个Tomcat集群: 使用Dockerfile构建nginx镜像 使用Dockerfile构建tomcat镜像 mysql镜像使用docker hu ...
- docker上构建redis容器
1.查看docker上的镜像 [root@holly ~]# docker images 2.搜索docker上的redis镜像,选择下载的版本 [root@holly ~]# docker sear ...
- 在Docker上部署自动更新ssl证书的nginx + .NET CORE
突发奇想要搞一个ssl的服务器,然后我就打起了docker的主意,想着能不能搞一个基于Docker的服务器,这样维护起来也方便一点. 设想 想法是满足这么几点: .NET CORE on Docker ...
- docker一键搭建Nginx+PHP环境(含自动部署命令)
文章的主要部分是一步一步的教程,文章的最后是我整理好的一键安装命令,自动下载并安装docker,构建镜像,启动容器集群(压缩包内注释覆盖范围达到80%) 大家可以看完教程亲自尝试下,也可以直接执行一键 ...
随机推荐
- 第6天【egrep、bash环境配置及脚本、vim编辑器】
bash环境配置及脚本(02)_recv bash环境配置及脚本(02)_recv bash环境配置文件: 按生效范围划分,存在两类: 全局配置: /etc/profile /etc/bashrc 个 ...
- gcc 的参数 -Wall -O2 -ansi
-Wall 生成所有警告信息 -o test (小写字母o)是说输出为test -ansi 是使用c++98标准去编译代码. 关闭gnu c中与ansi c不兼容的特性,激活ansi c的专有特性 ...
- Win10系列:C#应用控件基础21
ListView控件 ListView控件的常用方式是与后台数据进行绑定,并将所绑定的数据内容与前端界面布局相结合,按照特定的顺序将数据集合以列表形式展示在界面当中,如电子邮件列表或搜索结果列表等. ...
- python笔记12-字典
1.定义字典#定义字典--字典里面的key是不能重复的info = { 'name':'xiaoming', 'sex':'nan', 'age':20, 'id':1,}2.字典取值 #取值:方法1 ...
- 显示“快捷键清单” acessksy
<!DOCTYPE html> <html lang="en"> <head> <meta charset="UTF-8&quo ...
- WWSSN instrument response
由于科研需要,一项任务是完成观测地震图和the short-period World-Wide Standardized Seismograph Network instrument response ...
- pycharm的中文汉化
下载pycharm软件 然后通过下面的网站进行激活: http://idea.lanyus.com/ 激活好后下载汉化包:链接:http://pan.baidu.com/s/1i5zaGgX 密码:g ...
- [Spring Boot]什么是Spring Boot
<Spring Boot是什么> Spring Boot不是一个框架 是一种用来轻松创建具有最小或零配置的独立应用程序的方式 用来开发基于Spring的应用,但只需非常少的配置. 它提供了 ...
- python自学第12天 模块
json , pickle模块 json,用于字符串和python数据类型间进行转换 pickle,用于python特有的类型和python数据类型间的进行转换 shelve 模块 是一个简单的k,v ...
- Js/Bind()的认识
1.bind( eventType [, eventData], handler(eventObject))2.向绑定的对象上面提供一些事件方法的行为.其中三个参数的意义分别代表: 一.eventTy ...