<linux报错解决>在Fedora21下安装vmware报错的解决办法
关于VMWARE WORKSTATION在Fedora21下的安装问题
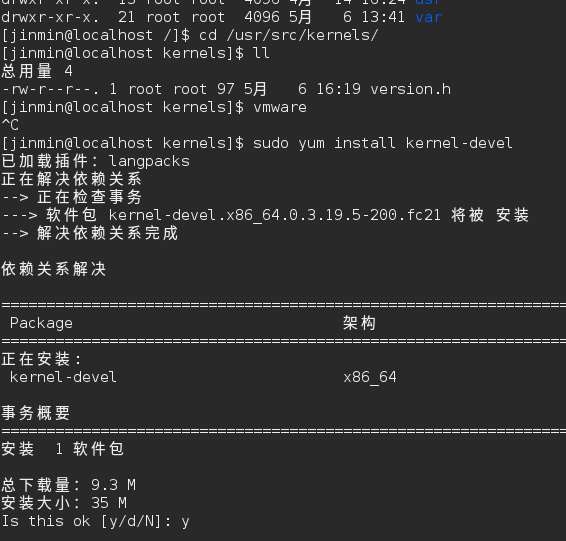
(1)在Fedora21下安装vmware如果在终端下启动,提示你找不到内核头文件Kernel Headers的话使用命令:
sudo yum install kernel-devel
你的内核头文件默认是在/usr/src/kernels下
使用命令后再检查内核头文件就应该已经存在了
(2)在内核头文件存在的情况下,如果提示报错如下:
Stopping vmware (via systemctl): [ 确定 ]
make: Entering directory '/tmp/modconfig-czFWqw/vmnet-only'
Using kernel build system.
/bin/make -C /lib/modules/3.19.5-200.fc21.x86_64/build/include/.. SUBDIRS=$PWD SRCROOT=$PWD/. \
MODULEBUILDDIR= modules
make[1]: Entering directory '/usr/src/kernels/3.19.5-200.fc21.x86_64'
CC [M] /tmp/modconfig-czFWqw/vmnet-only/driver.o
CC [M] /tmp/modconfig-czFWqw/vmnet-only/hub.o
CC [M] /tmp/modconfig-czFWqw/vmnet-only/userif.o
CC [M] /tmp/modconfig-czFWqw/vmnet-only/netif.o
/tmp/modconfig-czFWqw/vmnet-only/driver.c: 在函数‘VNetFileOpUnlockedIoctl’中:
/tmp/modconfig-czFWqw/vmnet-only/driver.c:1194:20: 错误:‘struct file’没有名为‘f_dentry’的成员
if (filp && filp->f_dentry) {
^
/tmp/modconfig-czFWqw/vmnet-only/driver.c:1195:19: 错误:‘struct file’没有名为‘f_dentry’的成员
inode = filp->f_dentry->d_inode;
^
/tmp/modconfig-czFWqw/vmnet-only/userif.c: 在函数‘VNetCopyDatagram’中:
/tmp/modconfig-czFWqw/vmnet-only/userif.c:526:4: 错误:隐式声明函数‘skb_copy_datagram_iovec’ [-Werror=implicit-function-declaration]
return skb_copy_datagram_iovec(skb, 0, &iov, len);
^
scripts/Makefile.build:257: recipe for target '/tmp/modconfig-czFWqw/vmnet-only/driver.o' failed
make[2]: *** [/tmp/modconfig-czFWqw/vmnet-only/driver.o] Error 1
make[2]: *** 正在等待未完成的任务....
In file included from include/linux/pci.h:34:0,
from /tmp/modconfig-czFWqw/vmnet-only/compat_netdevice.h:27,
from /tmp/modconfig-czFWqw/vmnet-only/netif.c:43:
include/linux/pci_ids.h:2251:0: 警告:“PCI_VENDOR_ID_VMWARE”重定义
#define PCI_VENDOR_ID_VMWARE 0x15ad
^
In file included from /tmp/modconfig-czFWqw/vmnet-only/net.h:38:0,
from /tmp/modconfig-czFWqw/vmnet-only/vnetInt.h:26,
from /tmp/modconfig-czFWqw/vmnet-only/netif.c:42:
/tmp/modconfig-czFWqw/vmnet-only/vm_device_version.h:56:0: 附注:这是先前定义的位置
#define PCI_VENDOR_ID_VMWARE 0x15AD
^
cc1: some warnings being treated as errors
scripts/Makefile.build:257: recipe for target '/tmp/modconfig-czFWqw/vmnet-only/userif.o' failed
make[2]: *** [/tmp/modconfig-czFWqw/vmnet-only/userif.o] Error 1
Makefile:1386: recipe for target '_module_/tmp/modconfig-czFWqw/vmnet-only' failed
make[1]: *** [_module_/tmp/modconfig-czFWqw/vmnet-only] Error 2
make[1]: Leaving directory '/usr/src/kernels/3.19.5-200.fc21.x86_64'
Makefile:120: recipe for target 'vmnet.ko' failed
make: *** [vmnet.ko] Error 2
make: Leaving directory '/tmp/modconfig-czFWqw/vmnet-only'
Starting vmware (via systemctl): Job for vmware.service failed. See "systemctl status vmware.service" and "journalctl -xe" for details.
[失败]
即头文件中的内容和安装过程要求不符合的话,可以
使用修复后的源码包:
http://pan.baidu.com/s/1hqAcYzU
复制到以下目录下覆盖:
sudo cp vmnet.tar /usr/lib/vmware/modules/source
问题就解决了!
<linux报错解决>在Fedora21下安装vmware报错的解决办法的更多相关文章
- 解决Mac OS下安装MyEclipse报错:Your system does not have sufficient memory to support MyEclipse
最近想尝尝鲜,FQ去www.myeclipseide.com上下载了最新版的MyEclipse 15CI版,安装的时候,报告如下错误(MyEclipse 14也会出现这个问题): Your syste ...
- linux下安装php报错configure: error: Cannot find MySQL header files under /usr/include/mysql.
linux下安装php报错configure: error: Cannot find MySQL header files under /usr/include/mysql. 2013-03-04 1 ...
- window下安装redis报错: creating server tcp listening socket 127.0.0.1:6379: bind No error
window下安装redis报错: creating server tcp listening socket 127.0.0.1:6379: bind No error 解决: 如果没有配置环境,在安 ...
- windows下安装pywin32报错:close failed in file object destructor:sys.excepthook is missing lost sys.stderr
今晚要写搜索引擎作业,搭scrapy环境,遇到了下面问题: windows下安装pywin32报错:close failed in file object destructor:sys.excepth ...
- [原创] ubuntu下安装scrapy报错 error: command 'x86_64-linux-gnu-gcc' failed with exit status 1
Ubuntu14.04在virtualenv下安装scrapy报错,Failed building wheel for cffi,lxml,cryptography 等. error: command ...
- Linux下安装Android的adb驱动-解决不能识别的问题
Linux下安装Android的adb驱动-解决不能识别的问题 20141011更新: 老方法对我当时使用的一款设备一直都没有出现问题,最后遇到小米手机还有Android4.4版本的系统都会 ...
- 5分钟教你在Linux下安装VMware
如果我们只有一台笔记本,又想要搭建一个小集群,怎么办?虚拟机帮你实现梦想,市面上较为常用的虚拟机软件有VMware.VirtualBox.Xen.KVM.hyper-v等,本文主要介绍如何在Linux ...
- Ubuntu杂记——Ubuntu下安装VMware
转战Ubuntu,不知道能坚持多久,但是自己还是要努力把转战过程中的学习到的给记录下来.这次就来记录一下,Ubuntu下如何安装VMware. 就我所知,Linux下有VirtualBox和VMwar ...
- Ubuntu 14.04/14.10下安装VMware Workstation 11图文教程
VMware workstation 是一个可以进行桌面操作的虚拟软件.它可以让我们在一台电脑或者虚拟机中运行多个虚拟机. 由VMware公司研发和维护.由于是商业软件,我们需要买他们家的许可证或者说 ...
随机推荐
- 用yum源安装nginx(转)
新建一个nginx的源,/etc/yum.repos.d/nginx.repo 编辑此文件内容如下: [nginx]name=nginx repobaseurl=http://nginx.org/pa ...
- js 温故而知新 webkitTransitionEnd 监听Transition动画结束事件
css3的过渡属性transition,在动画结束时,也存在结束的事件:webkitTransitionEnd; 注意:transition,也仅仅有这一个事件. http://www.runoob. ...
- PHP array_walk() 函数
定义和用法 array_walk() 函数对数组中的每个元素应用用户自定义函数.在函数中,数组的键名和键值是参数. <?php function myfunction($value,$key,$ ...
- sublime 插件(持续更新)
sublime text 3创建新文件插件-AdvanceNewFile 这里要记录sublime text 3 在创建新文件时安装的插件–AdvanceNewFile ST本来自带的创建新文件的快捷 ...
- ubuntu打开终端多开标签的快捷键是ctrl+ shift+ T 对比ctrl+ alt+ T 另外窗口打开一个终端
ubuntu打开终端多开标签的快捷键是ctrl+ shift+ T 对比ctrl+ alt+ T 另外窗口打开一个终端
- java锁之wait,notify(wait会释放锁,notify仅仅只是通知,不释放锁)
wait是指在一个已经进入了同步锁的线程内,让自己暂时让出同步锁,以便其他正在等待此锁的线程可以得到同步锁并运行,只有其他线程调用了notify方法(notify并不释放锁,只是告诉调用过wait方法 ...
- Linux进程的虚拟内存区域划分
Linux进程的虚拟内存区域分为:代码区.只读常量区.全局区.BSS段.堆区.栈区 代码区:存储功能代码,函数名所在的区域 只读常量区:存放字符串常量,以及const修饰的全局变量 全局区/数据区:存 ...
- 什么是Java Server Pages?
JSP全称Java Server Pages,是一种动态网页开发技术.它使用JSP标签在HTML网页中插入Java代码.标签通常以<%开头以%>结束. JSP是一种Java servlet ...
- SQL-SQL基础
SQL(Structured Query Language)是通用的数据库查询语言,各个数据库厂商均对SQL-92标准做了支持,同一时候各家又再次基础上做了相应扩展,比如oracle的PL/SLQ. ...
- JVM调优- jmap(转)
http://blog.csdn.net/fenglibing/article/details/6411953 1.介绍 打印出某个java进程(使用pid)内存内的,所有‘对象’的情况(如:产生那些 ...