U2
  android的XML文件(包括layout下的和values下的)注释一般采用 <!--注释内容 -->的方式进行,也就是说,采用//是行不通的,不信你可以试试看。

    在XML中,形如    <Button           />      的表示方式,其中“/>”的含义表示这个XML中没有内文,他是一个最小组成单元,也就是说他的中间不能包含其他任何< >的代码,所以在<Button />中间注释会出现错误
dp:密度无关像素(dip) 无论屏幕的分辨率如何,总能显示相同的大小,一般使用dp作为控件与布局的宽高单位。

sp:可伸缩像素。在设置字体大小时使用。
 <?xml version="1.0" encoding="utf-8"?>

 <RelativeLayout xmlns:android="http://schemas.android.com/apk/res/android"

     xmlns:tools="http://schemas.android.com/tools"

     android:layout_width="match_parent"

     android:layout_height="match_parent"

     tools:context = "com.example.helloworld.relativelayout.MainActivity">

     <!-- context  要写文档对应目录下的 -->

     <!-- android:layout_toRightOf 后面的@+id/button要和第一个Button  一致,包括空格

     不然或出错  ,没写android:layout_below 会让布局混乱  -->

     <Button

         android:id = "@+id/button"

         android:layout_width="wrap_content"

         android:layout_height="wrap_content"

         android:layout_alignParentTop = "true"

         android:layout_marginTop = "100dp"

         android:layout_marginLeft = "50dp"

         android:text = "Button1"/>

      <Button

          android:id = "@+id/button2"

          android:layout_width="wrap_content"

          android:layout_height="wrap_content"

          android:layout_toRightOf = "@+id/button"

          android:layout_below = "@+id/button"

          android:layout_marginTop = "15dp"

          android:text = "Button2"/>

 </RelativeLayout>
package com.example.helloworld;

import android.support.v7.app.AppCompatActivity;

import android.os.Bundle;

public class MainActivity extends AppCompatActivity {

    @Override

    protected void onCreate(Bundle savedInstanceState) {

        super.onCreate(savedInstanceState);

        setContentView(R.layout.layout1); 要改成layout1才可以

    }

}
<?xml version="1.0" encoding="utf-8"?>

<manifest xmlns:android="http://schemas.android.com/apk/res/android"

    package="com.example.helloworld">

 <!--  android:label 后的内容是可以改的  -->

    <application

        android:allowBackup="true"

        android:icon="@mipmap/ic_launcher"

      android:label="布局管理器"

        android:roundIcon="@mipmap/ic_launcher_round"

        android:supportsRtl="true"

        android:theme="@style/AppTheme">

        <activity android:name=".MainActivity">

            <intent-filter>

                <action android:name="android.intent.action.MAIN" />

                <category android:name="android.intent.category.LAUNCHER" />

            </intent-filter>

        </activity>

    </application>

</manifest>
<!-- 网格布局  实现计算器  -->

<!--  要>=6列  -->

<?xml version="1.0" encoding="utf-8"?>

<GridLayout xmlns:android="http://schemas.android.com/apk/res/android"

    android:layout_width="match_parent"

    android:layout_height="match_parent"

    android:layout_gravity="center"

    android:columnCount=""

    android:rowCount = ""

    android:orientation="horizontal">

    <Button  android:text = "/"

        android:layout_column=""/>

    <Button  android:text = ""/>

    <Button  android:text = ""/>

    <Button  android:text = ""/>

    <Button  android:text = "*"/>

    <Button  android:text = ""/>

    <Button  android:text = ""/>

    <Button  android:text = ""/>

    <Button  android:text = "-"/>

    <Button  android:text = ""/>

    <Button  android:text = ""/>

    <Button  android:text = ""/>

    <Button  android:text = "+"

         android:layout_gravity = "fill_vertical"

         android:layout_rowSpan=""/>

    <Button  android:text = ""/>

    <Button  android:text = "="

        android:layout_gravity = "fill_horizontal"

        android:layout_columnSpan=""/>

</GridLayout>
 )fill_parent

 设置一个构件的布局为fill_parent将强制性地使构件扩展,以填充布局单元内尽可能多的空间。这跟Windows控件的dockstyle属性大体一致。设置一个顶部布局或控件为fill_parent将强制性让它布满整个屏幕。

 ) wrap_content

 设置一个视图的尺寸为wrap_content将强制性地使视图扩展以显示全部内容。以TextView和ImageView控件为例,设置为wrap_content将完整显示其内部的文本和图像。布局元素将根据内容更改大小。设置一个视图的尺寸为wrap_content大体等同于设置Windows控件的Autosize属性为True。

 )match_parent

 Android2.2中match_parent和fill_parent是一个意思 .两个参数意思一样,match_parent更贴切,于是从2.2开始两个词都可以用。那么如果考虑低版本的使用情况你就需要用fill_pa
 <?xml version="1.0" encoding="utf-8"?>

 <LinearLayout xmlns:android="http://schemas.android.com/apk/res/android"

     android:layout_width="match_parent"

     android:layout_height="match_parent">

     android:orientation = "vertical">

     <!-- 单选按钮  必须写明id,不然都可选择 -->

     <RadioGroup

         android:layout_width = "match_parent"

         android:layout_height = "wrap_content">

         <RadioButton

              android:id = "@+id/radiobutton1"

             android:layout_width="wrap_content"

             android:layout_height="wrap_content"

             android:checked = "true"

             android:text = "男"

             />

         <RadioButton

             android:id = "@+id/radiobutton2"

             android:layout_width="wrap_content"

             android:layout_height="wrap_content"

             android:text = "女"

             />

     </RadioGroup>

 </LinearLayout>
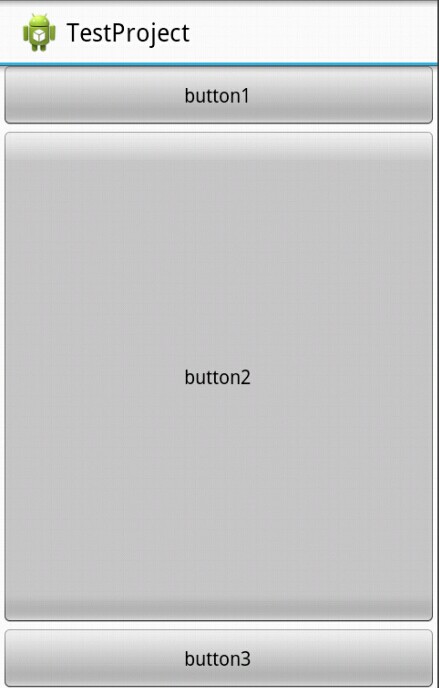
我们可以发现这三个button并没有将整个屏幕占据,而是根据内容适配大小。
我们在button2里面添加一个属性 android:layout_weight="1" ,发现布局变成这样了:
我们发现这次屏幕被三个button占据了,而且第一个和第三个button还是保持与内容适配大小,而第二个button而占据了剩余屏幕空间。
我们对上面的情况进行讲解:
1、我们只有在button2使用了layout_weight属性,并赋值为1;但是button1和button2并没有使用这个属性,根据API可以知道,他们的layout_weight属性等于0。
2、LinearLayout如果显式包含layout_weight属性时,会measure两次;第一次将正常计算三个button的宽高,第二次将结合layout_weight的值分配剩余的空间。
通俗点来总结:Android系统先按照你设置的3个Button高度Layout_height=wrap_content,给你分配好他们3个的高度,然后会把剩下来的屏幕空间全部赋给Button2,因为只有他的权重值是1,这也是为什么Button2占了那么大的一块空间。
U2的更多相关文章
- CF1143F/1142C U2
CF1143F/1142C U2 巧妙的思维题.注意到这里只用两个点就可以确定一根抛物线,联想到两点确定一条直线,尝试转化. \(y=x^2+bx+c\) 就可以写成 \(y-x^2=bx+c\) , ...
- VMware ESXi 7.0 U2 SLIC & Unlocker Intel NUC 专用镜像
构建 Nano Datacenter 的两大平台 在测试环境或者家庭实验室(Home lab)中使用 VMware vSphere 作为虚拟化平台非常普遍,笔者更倾向使用 Nano Datacente ...
- VMware ESXi 7.0 U2 SLIC & Unlocker Intel NUC 专用镜像 202109 更新
2021.08.31 更新:集成 "vmkusb-nic-fling" 和 "nvme-community",现在只有一个镜像. 2021.06.16 更新:集 ...
- VMware ESXi 7.0 U2 SLIC & Unlocker USB 网卡驱动集成镜像 202109更新
2021.08.31 更新:集成 "vmkusb-nic-fling"."net-community" 和 "nvme-community" ...
- VMware ESXi 7.0 U2 SLIC 2.6 & Unlocker 集成 Intel NUC 网卡、USB 网卡和 NVMe 驱动
ESXi 7 U2 标准版镜像集成 NUC 网卡.USB 网卡 和 NVMe 驱动. 请访问原文链接:https://sysin.org/blog/vmware-esxi-7-u2-nuc-usb-n ...
- CF1142C U2
题目链接:洛谷 codeforces $y>x^2+bx+c$也就是$y-x^2>bx+c$ 左边是点,右边是直线. 维护上凸包. 虽然这么简单但就是做不出来. #include<c ...
- CF1142C U2(计算几何,凸包)
题目大意:平面上有 $n$ 个点,第 $i$ 个点是 $(x_i,y_i)$.问有多少条抛物线(二次项系数为 $1$),经过这些点中不同的两个点,并且内部(不含边界)没有任何这些点.重合的抛物线只算一 ...
- U2随笔
Html 结构化 CSS 样式 JavaScript 行为交互 1.JavaScript基础 2.JavaScript操作BOM对象 3.JavaScript操作DOM对象***** 4.JavaSc ...
- ESXI 7.0.0 U2 部署
文章目录 什么是ESXI? ESXi 的优势 功能特性 部署ESXI 创建虚拟机 开始安装 打开浏览器输入ip进行管理 什么是ESXI? ESXI官网:https://www.vmware.com/c ...
随机推荐
- Java对象转换成Json字符串是无法获得对应字段名
问题: 代码中已经标注 @JSONField(name = "attrs") private String abc; public String getA() { return a ...
- (生产)vue-router:路由
参考:https://router.vuejs.org/zh-cn/ 安装 直接下载 / CDN https://unpkg.com/vue-router/dist/vue-router.js 使用: ...
- vue-router配置
首先在App.vue中 1.使用router-link组件来导航,通过‘to'属性指定链接,<router-link> 默认会被渲染成一个 `<a>` 标签 <route ...
- JavaScript精简代码 非一般的写法(转载)
摘要:最近在编写一个前端模块功能,编写了大量的代码,其中一般图片特效展示是参考别人的代码来写的,发现有些代码似乎看得明白又好像不确定是不是哪个意思,所以在网上问了一下程序员们,原来是JS代码简写. 转 ...
- Eclipse常用设置和快捷键
1.提示键配置一般默认情况下,Eclipse ,MyEclipse 的代码提示功能是比Microsoft Visual Studio的差很多的,主要是Eclipse ,MyEclipse本身有很多选项 ...
- KinSlideshow焦点图轮播插件
KinSlideshow默认设置效果代码: *焦点图显示的标题为 img 中 alt 属性中的文字 *当只有一张图片时不显示按钮,但也会有无缝切换效果 * jquery ..以上版本 jvascrip ...
- GNU Nano编辑器
^表示 control建 ^X 退出 nano ^O 保存文件 ^R 插入其他文件内容至光标位置 ^W 查找字符串 ^Y 跳至前一屏 ^V 跳至后一屏 ^K 剪切光标所在行并保存到剪贴板,或剪切选中内 ...
- caffe RandomBrightness和RandomContrast
1. void RandomBrightness(const cv::Mat& in_img, cv::Mat* out_img, const float brightness_prob, c ...
- Python学习之路——基础1
python作为一门解释型的编程语言,和c/c++等其他语言都或多或少有相通的地方,所以有语言基础的话,学起来还是方便一些.所以我的笔记对于相对简单的概念可能会选择放过,但对自己记录的东西我会力求完备 ...
- Angular项目下载启动
Angular cmdb-front 新建项目流程 打开idea New>Project 2,打开项目仓库,拷贝项目地址 拷贝项目路径,填写项目名 点击clone,然后一路Next 项目代码已 ...