springboot深入学习(二)-----profile配置、运行原理、web开发
profile配置
通常企业级应用都会区分开发环境、测试环境以及生产环境等等。spring提供了全局profile配置的方式,使得在不同环境下使用不同的applicaiton.properties,走不同的配置。
模板:application-{profile}.properties
示例:


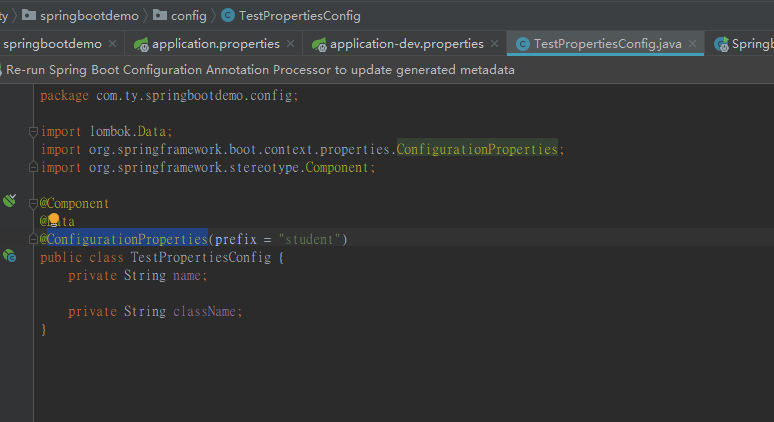
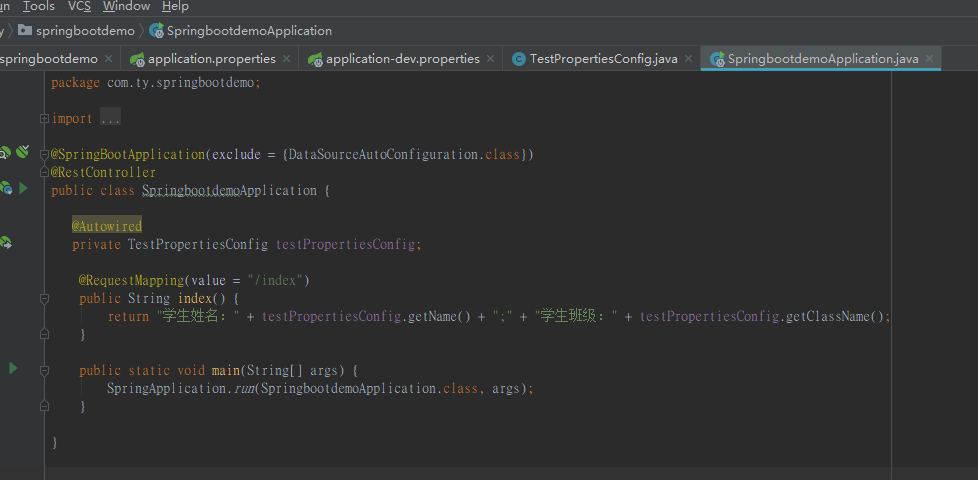
程序会根据application.properties文件中配置的spring.profiles.active=xxx的值,找到对应的application-xxx.properties中具体的属性值
当springboot项目打成jar包之后,可以直接通过命令方式执行,如下:
java -jar xxx.jar --spring.profiles.active=test
这样就是将当前项目运行模式调整为test,从而找到不同的application-xxx.properties文件。
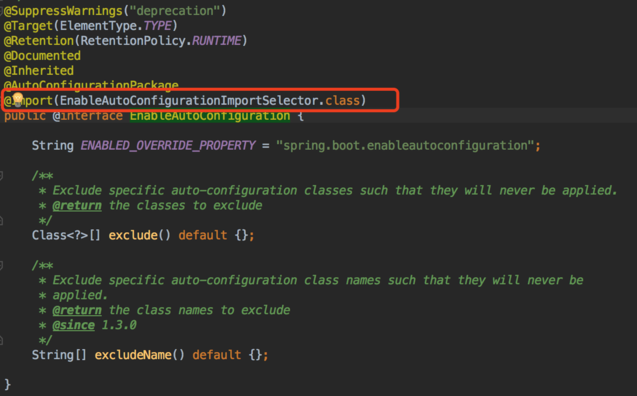
springboot运行原理
springboot关于自动配置的源码在spring-boot-autoconfigure.jar中,查看源码可以到此包。
@SpringBootApplication的核心功能其实是由@EnableAutoConfiguration注解提供,源码如下:
原理这块这篇文章讲的不错:https://www.cnblogs.com/shamo89/p/8184960.html
spring boot的web开发
springboot提供了spring-boot-starter-web对web开发予以支持,主要嵌入了tomcat以及springmvc的相关依赖。
1、静态资源访问
Spring Boot默认提供静态资源⽬录位置需置于classpath下,⽬录名需符合如下规则:
- /static
- /public
- /resources
- /META-INF/resources
2、web页面
通常我们需要返回一个页面,springboot默认的模板配置路径为: src/main/resources/templates 。springboot推荐使用模板引擎,不推荐使用jsp,并且使用jsp还相对麻烦。
thymeleaf模板引擎
在springboot中,jsp不推荐使用,因为jsp在内嵌的servlet的容器上运行有一些问题,内嵌的tomcat不支持以jar形式运行jsp。最为推荐的则是thymeleaf,提供了完美的springmvc的支持。
Thymeleaf是⼀个XML/XHTML/HTML5模板引擎,可⽤于Web与⾮Web环境中的应⽤开发。
A、引入jar包
<dependency>

<groupId>org.springframework.boot</groupId>

<artifactId>spring-boot-starter-thymeleaf</artifactId>

</dependency>
B、页面中引入thymeleaf
<html xmlns:th="http://www.thymeleaf.org">
C、访问model中的数据
<span th:text="${singlePerson.name}">name</span>
D、model数据迭代
<div class="panel-body">

    <ul class="list-group">

    <li class="list-group-item" th:each="person:${people}">

      <span th:text="${person.name}">name</span>

      <span th:text="${person.age}">age</span>

    </li>

    </ul>

</div>
E、数据判断
<div th:if="${not #lists.isEmpty(people)}">

    <div class="panel-body">

        <ul class="list-group">

        <li class="list-group-item" th:each="person:${people}">

          <span th:text="${person.name}">name</span>

          <span th:text="${person.age}">age</span>

        </li>

        </ul>

    </div>

</div>
F、js中获取model数据
<script th:inline="javascript">

    var single = [[${singlePerson}]];

    console.log(single.name + "/" + single.age);

</script>
通过<script th:inline="javascript">才能使js直接获取到model中的数据;[[${}]]获取model中的数据
如果需要修改Thymeleaf的相关默认配置,只需要在application.properties文件中修改以下属性即可,默认配置如下:
# Enable template caching.

spring.thymeleaf.cache=true

# Check that the templates location exists.

spring.thymeleaf.check-template-location=true

# Content-Type value.

spring.thymeleaf.content-type=text/html

# Enable MVC Thymeleaf view resolution.

spring.thymeleaf.enabled=true

# Template encoding.

spring.thymeleaf.encoding=UTF-8

# Comma-separated list of view names that should be excluded from resolution.

spring.thymeleaf.excluded-view-names=

# Template mode to be applied to templates. See also StandardTemplateModeHandlers.

spring.thymeleaf.mode=HTML5

# Prefix that gets prepended to view names when building a URL.

spring.thymeleaf.prefix=classpath:/templates/

# Suffix that gets appended to view names when building a URL.

spring.thymeleaf.suffix=.html spring.thymeleaf.template-resolver-order= # Order of

the template resolver in the chain. spring.thymeleaf.view-names= # Comma-separated

list of view names that can be resolved.
统一异常处理
springboot中默认定义了异常处理页面,如果我们访问的url出现错误,springboot会自动将我们的请求转发到/error中,会出现如下的界面:
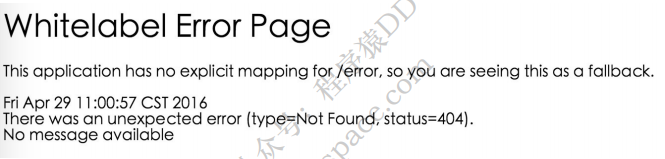
这个页面太草率了,你当然可以自己去实现:
//创建全局的异常处理类

@ControllerAdvice

class GlobalExceptionHandler {

    public static final String DEFAULT_ERROR_VIEW = "error";

    //针对不同的异常单独处理,这里则统一处理了

    @ExceptionHandler(value = Exception.class)

    public ModelAndView defaultErrorHandler(HttpServletRequest req, Exception e) throws Exception {

        ModelAndView mav = new ModelAndView();

        mav.addObject("exception", e);

        mav.addObject("url", req.getRequestURL());

        mav.setViewName(DEFAULT_ERROR_VIEW);

        return mav;

    }

}
自己实现error.html
<!DOCTYPE html>

<html>

<head lang="en">

<meta charset="UTF-8" />

<title>统⼀异常处理</title>

</head>

<body>

<h1>Error Handler</h1>

<div th:text="${url}"></div>

<div th:text="${exception.message}"></div>

</body>

</html>
效果如下:

如果你返回的不是页面,而是json报错信息,也可以支持,如下:
异常信息类:
public class ErrorInfo<T> {

    public static final Integer OK = 0;

    public static final Integer ERROR = 100;

    private Integer code;

    private String message;

    private String url;

    private T data;

    // 省略getter和setter

}
自定义异常:
public class MyException extends Exception {

    public MyException(String message) {

        super(message);

    }

}
controller:
@Controller

public class HelloController {

    @RequestMapping("/json")

    public String json() throws MyException {

        throw new MyException("发⽣错误2");

    }

}
全局异常处理类:
@ControllerAdvice

public class GlobalExceptionHandler {

    @ExceptionHandler(value = MyException.class)

    @ResponseBody

    public ErrorInfo<String> jsonErrorHandler(HttpServletRequest req, MyException e) throws Exception {

        ErrorInfo<String> r = new ErrorInfo<>();

        r.setMessage(e.getMessage());

        r.setCode(ErrorInfo.ERROR);

        r.setData("Some Data");

        r.setUrl(req.getRequestURL().toString());

        return r;

    }

}
运行效果如下:
{

    code: 100,

    data: "Some Data",

    message: "发⽣错误2",

    url: "http://localhost:8080/json"

}
如何接收xml的请求参数
大部分开发过程中使用的请求参数无非就是json、string等,但是xml偶尔也会遇到,那么遇到xml的请求参数如何处理呢?
思路:在本人的spring系列文章中,曾提到springmvc是怎么将请求参数绑定到处理方法的入参中的,里面涉及到一个叫做HttpMessageConverter的东西,那么思路就来了,只要在收到请求后将参数解析成对应的对象即可。
1、引入MappingJackson2XmlHttpMessageConverter
<dependency>

<groupId>com.fasterxml.jackson.dataformat</groupId>

<artifactId>jackson-dataformat-xml</artifactId>

</dependency>
2、定义对象与对象之间的关系
假设请求xml是这样的格式:
<User>

    <name>aaaa</name>

    <age>10</age>

</User>
@Data

@NoArgsConstructor

@AllArgsConstructor

//上面三个都是lombok的注解,注解名字也非常清晰了

@JacksonXmlRootElement(localName = "User")

public class User {

    @JacksonXmlProperty(localName = "name")

    private String name;

    @JacksonXmlProperty(localName = "age")

    private Integer age;

}
3、创建接口
@Controller

public class UserController {

    //@PostMapping = @RequestMapping(method = RequestMethod.POST)

    //consumes指定处理请求的提交内容类型(Content-Type),例如application/json, text/html;

    //produces指定返回的内容类型,仅当request请求头中的(Accept)类型中包含该指定类型才返回

    @PostMapping(value = "/user",consumes = MediaType.APPLICATION_XML_VALUE,produces = MediaType.APPLICATION_XML_VALUE)

    @ResponseBody

    public User create(@RequestBody User user) {

        user.setName("didispace.com : " + user.getName());

        user.setAge(user.getAge() + 100);

        return user;

    }

}
整合spring security
我们在编写Web应用时,经常需要对⻚⾯做⼀些安全控制,⽐如:对于没有访问权限的用户需要转到登录表单页面。要实现访问控制的方法多种多样,可以通过Aop、拦截器实现,也可以通过框架实现(如:Apache Shiro、Spring Security)。
controller:
@Controller

public class HelloController {

    @RequestMapping("/")

    public String index() {

        return "index";

    }

    @RequestMapping("/hello")

    public String hello() {

        return "hello";

    }

  @RequestMapping("/login")
  public String login() {
    return "login";
  }

}
index.html
<!DOCTYPE html>

<html xmlns="http://www.w3.org/1999/xhtml" xmlns:th="http://www.thymeleaf.org"

xmlns:sec="http://www.thymeleaf.org/thymeleaf-extras-springsecurity3">

<head>

    <title>Spring Security入门</title>

</head>

<body>

    <h1>欢迎使用Spring Security!</h1>

    <p>点击 <a th:href="@{/hello}">这里</a> 打个招呼吧</p>

</body>

</html>
hello.html
<!DOCTYPE html>

<html xmlns="http://www.w3.org/1999/xhtml" xmlns:th="http://www.thymeleaf.org"

xmlns:sec="http://www.thymeleaf.org/thymeleaf-extras-springsecurity3">

<head>

    <title>Hello World!</title>

</head>

<body>

    <h1>Hello world!</h1>

</body>

</html>
login.html
<!DOCTYPE html>

<html xmlns="http://www.w3.org/1999/xhtml"

xmlns:th="http://www.thymeleaf.org"

xmlns:sec="http://www.thymeleaf.org/thymeleaf-extras-springsecurity3">

<head>

    <title>Spring Security Example </title>

</head>

<body>

    <div th:if="${param.error}">

        用户名或密码错误

    </div>

    <div th:if="${param.logout}">

        您已注销成功

    </div>

    <form th:action="@{/login}" method="post">

        <div>

            <label> 用户名 : <input type="text" name="username"/>

            </label>

        </div>

        <div>

            <label> 密 码 : <input type="password" name="password"/>

            </label>

        </div>

        <div><input type="submit" value="登录"/></div>

    </form>

</body>

</html>
添加依赖:
<dependency>

    <groupId>org.springframework.boot</groupId>

    <artifactId>spring-boot-starter-security</artifactId>

</dependency>
spring security配置:
@Configuration

@EnableWebSecurity

public class WebSecurityConfig extends WebSecurityConfigurerAdapter {

    @Override

    protected void configure(HttpSecurity http) throws Exception {

        http

        .authorizeRequests()

        .antMatchers("/", "/home").permitAll()

        .anyRequest().authenticated()

        .and()

        .formLogin()

        .loginPage("/login")

        .permitAll()

        .and()

        .logout()

        .permitAll();

    }

    @Autowired

    public void configureGlobal(AuthenticationManagerBuilder auth) throws Exception{

        auth

        .inMemoryAuthentication()

        .withUser("user").password("password").roles("USER");

    }

}
- 通过 @EnableWebSecurity 注解开启Spring Security的功能
- 继承 WebSecurityConfigurerAdapter ,并重写它的方法来设置一些web安全的细节
- configure(HttpSecurity http) 方法
- 通过 authorizeRequests() 定义哪些URL需要被保护、哪些不需要被保护。例如以上代码指定了 / 和 /home 不需要任何认证就可以访问,其他的路径都必须通过身份验证。
- 通过 formLogin() 定义当需要用户登录时候,转到的登录页面。
- configureGlobal(AuthenticationManagerBuilder auth) 方法,在内存中创建了一个用户,该用户的名称为user,密码为password,用户角色为USER。
springboot深入学习(二)-----profile配置、运行原理、web开发的更多相关文章
- AgileEAS.NET SOA 中间件平台5.2版本下载、配置学习(二):配置WinClient分布式运行环境
一.前言 AgileEAS.NET SOA 中间件平台是一款基于基于敏捷并行开发思想和Microsoft .Net构件(组件)开发技术而构建的一个快速开发应用平台.用于帮助中小型软件企业建立一条适合市 ...
- SpringBoot系列(十二)过滤器配置详解
SpringBoot(十二)过滤器详解 往期精彩推荐 SpringBoot系列(一)idea新建Springboot项目 SpringBoot系列(二)入门知识 springBoot系列(三)配置文件 ...
- JavaWeb(二)jsp运行原理,九大内置对象
JSP运行原理: 每个JSP页面在第一次被访问时,WEB容器都会把请求交给JSP引擎(即一个Java程序)去处理.JSP引擎先将JSP翻译成一个_jspServlet(实质上也是一个servlet) ...
- JavaWeb学习 (二十一)————基于Servlet+JSP+JavaBean开发模式的用户登录注册
一.Servlet+JSP+JavaBean开发模式(MVC)介绍 Servlet+JSP+JavaBean模式(MVC)适合开发复杂的web应用,在这种模式下,servlet负责处理用户请求,jsp ...
- JavaWeb学习 (二十)————JavaWeb的两种开发模式
一.JSP+JavaBean开发模式 1.1.jsp+javabean开发模式架构 jsp+javabean开发模式的架构图如下图(图1-1)所示
- springboot深入学习(四)-----tomcat配置、websocket
一.更改servlet服务器 springboot中默认可以集成多种servlet容器,当引入如下依赖时: springboot默认以tomcat作为项目的servlet容器,如果用户想要替换tomc ...
- SpringBoot的学习二:整合Redis,JPA,Mybatis
Redis介绍: 是一个开源的使用ANSI C语言编写.支持网络.可基于内存亦可持久化的日志型.Key-Value数据库,并提供多种语言的API 特性: Redis 与其他 key - value 缓 ...
- 学习IIS & MVC的运行原理 (转)
我一直疑惑于以下问题,从客户端发出一个请求,请求到达服务器端是怎样跟iis衔接起来的,而iis又是怎样读取我发布的代码的,并返回服务器上的文件.这其中是怎样的一个处理过程. 1:当你从浏览器中输入一个 ...
- 学习IIS & MVC的运行原理
我一直疑惑于以下问题,从客户端发出一个请求,请求到达服务器端是怎样跟iis衔接起来的,而iis又是怎样读取我发布的代码的,并返回服务器上的文件.这其中是怎样的一个处理过程. 1:当你从浏览器中输入一个 ...
随机推荐
- jquery一些容易混淆的
1.父级元素.append子集元素 == 子集元素.appendTo父级元素 2.父级元素.prepend子集元素 == 子集元素.prependTo父级元素 3.同辈1.insertBefore同辈 ...
- java中元注解有四个
@Retention @Target @Document @Inherited: @Retention:注解的保留位置 @Retention(RetentionPolicy.SOURCE) // ...
- ScrollView定时器复用
起始偏移量设置为一个宽度 [NSTimer scheduledTimerWithTimeInterval:2 target:self selector:@selector(refreshPic) us ...
- MVC的Forms登录验证
第一步:修改web.config配置 在 <system.web>节点下加入配置:未登录的用户跳转到/Home/Login,登录后跳转到/Home/UserCenter,登录后票证记录到c ...
- C语言常用关键字及运算符操作
1.关键字 (1)数据类型 char 1字节,8bit==256 int long,short unsgined ,signed 无符号为 ...
- 分享插件的使用加一个echart走数据
html部分: <div class="topLink clearfix bdsharebuttonbox bdshare-button-style0-16" data-b ...
- 12.Mysql存储过程和函数
12.存储过程和函数12.1 什么是存储过程和函数存储过程和函数是事先经过编译并存储在数据库中的一段SQL语句的集合,调用存储过程和函数简化应用开发人员的工作,减少数据在数据库和应用服务器之间的传输, ...
- hdu 1757 (矩阵快速幂) 一个简单的问题 一个简单的开始
题目链接:http://acm.hdu.edu.cn/showproblem.php?pid=1757 题意不难理解,当x小于10的时候,数列f(x)=x,当x大于等于10的时候f(x) = a0 * ...
- 八皇后问题(dfs)
#include <iostream> #include <stdio.h> using namespace std; ; ], b[], c[], vis[][]; //a, ...
- 三分钟分布式CAP理论
分布式系统架构理论,定义了三种指标,理论说我们最多只能满足两个. ## 分布式系统 首先我们这个理论所说的分布式系统,是指系统内会共享数据,互相有连接有交互,才能完成系统功能的的分布式系统.而这个理论 ...