
树莓派安装 Ubuntu 20.04 LTS 碰壁指南
树莓派安装 Ubuntu 20.04 LTS 碰壁指南
设备 Raspberry 4B 4+32G
系统 Ubuntu 20.04 LTS
1.镜像下载与烧录
烧录工具
SD Card Formatter
Win32DiskImager
2.启用root账户
输入命令后根据提示操作
su passwd root
3.无线网络连接初始化
进入netplan配置文件夹
cd /etc/netplan/
配置无线网
sudo vim 50-cloud-init.yaml
配置如下,仅供参考
# This file is generated from information provided by the datasource.  Changes

# to it will not persist across an instance reboot.  To disable cloud-init's

# network configuration capabilities, write a file

# /etc/cloud/cloud.cfg.d/99-disable-network-config.cfg with the following:

# network: {config: disabled}

network:

    ethernets:

        eth0:

            dhcp4: true

            optional: true

    version: 2

    wifis:

      wlan0:

        dhcp4: true

        optional: true

        access-points:

              "你的无线网络名称":

               password: "123456789"
注意在冒号后面,记得要有个空格或者换行
启用配置
sudo netplan try

sudo netplan apply

systemctl daemon-reload
4.更换树莓派国内镜像源
sudo vim /etc/apt/sources.list
我全部更换为阿里镜像源,最终配置如下
## Note, this file is written by cloud-init on first boot of an instance

## modifications made here will not survive a re-bundle.

## if you wish to make changes you can:

## a.) add 'apt_preserve_sources_list: true' to /etc/cloud/cloud.cfg

##     or do the same in user-data

## b.) add sources in /etc/apt/sources.list.d

## c.) make changes to template file /etc/cloud/templates/sources.list.tmpl

# See http://help.ubuntu.com/community/UpgradeNotes for how to upgrade to

# newer versions of the distribution.

#deb http://ports.ubuntu.com/ubuntu-ports focal main restricted

deb https://mirrors.aliyun.com/ubuntu-ports/ focal main restricted

# deb-src http://ports.ubuntu.com/ubuntu-ports focal main restricted

## Major bug fix updates produced after the final release of the

## distribution.

#deb http://ports.ubuntu.com/ubuntu-ports focal-updates main restricted

deb https://mirrors.aliyun.com/ubuntu-ports/ focal-updates main restricted

# deb-src http://ports.ubuntu.com/ubuntu-ports focal-updates main restricted

## N.B. software from this repository is ENTIRELY UNSUPPORTED by the Ubuntu

## team. Also, please note that software in universe WILL NOT receive any

## review or updates from the Ubuntu security team.

#deb http://ports.ubuntu.com/ubuntu-ports focal universe

deb https://mirrors.aliyun.com/ubuntu-ports focal universe

# deb-src http://ports.ubuntu.com/ubuntu-ports focal universe

#deb http://ports.ubuntu.com/ubuntu-ports focal-updates universe

deb https://mirrors.aliyun.com/ubuntu-ports focal-updates universe

# deb-src http://ports.ubuntu.com/ubuntu-ports focal-updates universe

## N.B. software from this repository is ENTIRELY UNSUPPORTED by the Ubuntu

## team, and may not be under a free licence. Please satisfy yourself as to

## your rights to use the software. Also, please note that software in

## multiverse WILL NOT receive any review or updates from the Ubuntu

## security team.

#deb http://ports.ubuntu.com/ubuntu-ports focal multiverse

deb https://mirrors.aliyun.com/ubuntu-ports focal multiverse

# deb-src http://ports.ubuntu.com/ubuntu-ports focal multiverse

#deb http://ports.ubuntu.com/ubuntu-ports focal-updates multiverse

deb https://mirrors.aliyun.com/ubuntu-ports focal-updates multiverse

# deb-src http://ports.ubuntu.com/ubuntu-ports focal-updates multiverse

## N.B. software from this repository may not have been tested as

## extensively as that contained in the main release, although it includes

## newer versions of some applications which may provide useful features.

## Also, please note that software in backports WILL NOT receive any review

## or updates from the Ubuntu security team.

#deb http://ports.ubuntu.com/ubuntu-ports focal-backports main restricted universe multiverse

deb https://mirrors.aliyun.com/ubuntu-ports focal-backports main restricted universe multiverse

# deb-src http://ports.ubuntu.com/ubuntu-ports focal-backports main restricted universe multiverse

## Uncomment the following two lines to add software from Canonical's

## 'partner' repository.

## This software is not part of Ubuntu, but is offered by Canonical and the

## respective vendors as a service to Ubuntu users.

# deb http://archive.canonical.com/ubuntu focal partner

# deb-src http://archive.canonical.com/ubuntu focal partner

#deb http://ports.ubuntu.com/ubuntu-ports focal-security main restricted

deb https://mirrors.aliyun.com/ubuntu-ports focal-security main restricted

# deb-src http://ports.ubuntu.com/ubuntu-ports focal-security main restricted

#deb http://ports.ubuntu.com/ubuntu-ports focal-security universe

deb https://mirrors.aliyun.com/ubuntu-ports focal-security universe

# deb-src http://ports.ubuntu.com/ubuntu-ports focal-security universe

#deb http://ports.ubuntu.com/ubuntu-ports focal-security multiverse

deb https://mirrors.aliyun.com/ubuntu-ports focal-security multiverse

# deb-src http://ports.ubuntu.com/ubuntu-ports focal-security multiverse
刷新镜像源
source source.list

apt get update

apt get upgrade
4.启用SSH(*)
sudo apt install openssh-server
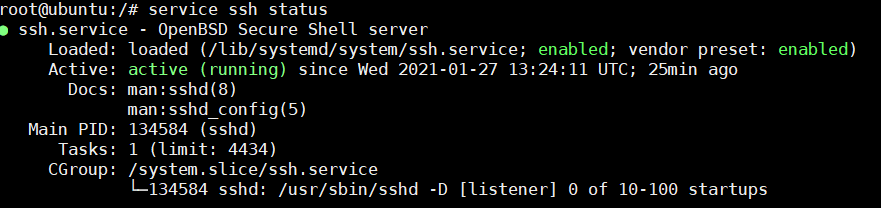
查看
ssh状态
防火墙端口放行SSH
ufw allow ssh
尝试一下用默认账户连接(我尝试失败,您可以一试)
方法一:修改
sshd_config
修改配置文件
sudo vim /etc/ssh/sshd_config
在vim中搜索定位PermitRootLogin,可直接查找:
/PermitRootLogin
修改以下配置:
33 #LoginGraceTime 2m
34 #PermitRootLogin prohibit-password
35 #StrictModes yes
36 #MaxAuthTries 6
37 #MaxSessions 10
修改为:
 LoginGraceTime 2m

 PermitRootLogin yes

 StrictModes yes

 #MaxAuthTries 6

 #MaxSessions 10
- 重启ssh,使配置生效
sudo service ssh restart
现在可是使用root用户登录ssh了!!!
方法二:建立新用户(*)
我使用该方法完成ssh连接
不知为何默认账户ubuntu和root无法进行SSH连接认证,但是可以通过自己添加账户进行SSH连接
直接输入
adduser your_username
按照指示配置新用户信息,最后使用该用户名称完成SSH连接
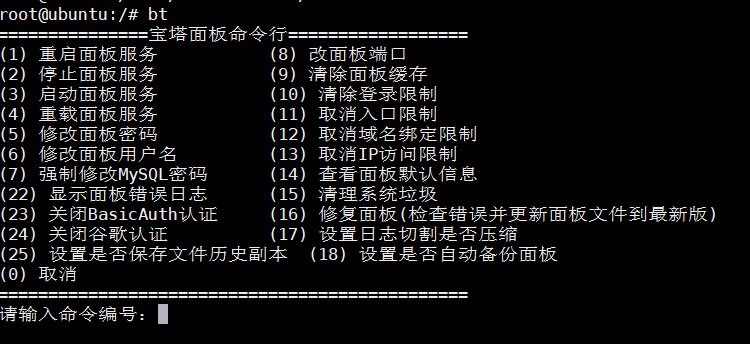
5. BT宝塔面板安装
wget -O install.sh http://download.bt.cn/install/install-ubuntu_6.0.sh && bash install.sh
参考文档
1.https://blog.csdn.net/zx3517288/article/details/109889688
2.https://blog.csdn.net/john1337/article/details/109465781
3.https://blog.csdn.net/qq_35975447/article/details/105858964
树莓派安装 Ubuntu 20.04 LTS 碰壁指南的更多相关文章
- 树莓派初体验,安装Ubuntu 14.04 LTS
转载自:http://www.polarxiong.com/archives/%E6%A0%91%E8%8E%93%E6%B4%BE%E5%88%9D%E4%BD%93%E9%AA%8C-%E5%AE ...
- win10 + Ubuntu 20.04 LTS 双系统 引导界面美化
版权声明:本文为CSDN博主「ZChen1996」的原创文章,遵循CC 4.0 BY-SA版权协议,转载请附上原文出处链接及本声明. 原文链接:https://blog.csdn.net/ZChen1 ...
- Windows10 + Ubuntu 20.04 LTS 双系统安装 (UEFI + GPT)(图文,多图预警)
版权声明:本文为CSDN博主「ZChen1996」的原创文章,遵循CC 4.0 BY-SA版权协议,转载请附上原文出处链接及本声明. 原文链接:https://blog.csdn.net/ZChen1 ...
- VirtualBox 安装 Ubuntu 20.04 全流程
VirtualBox 安装 Ubuntu 20.04 全流程 内容概要 这个作业属于哪个课程 2022面向对象程序设计 这个作业要求在哪里 2022面向对象程序设计寒假作业1 这个作业的目标 在虚拟机 ...
- ubuntu 14.04 lts安装教程:u盘安装ubuntu 14.04 lts步骤
绿茶小编带来了ubuntu 14.04 lts安装教程,下文详细讲解了u盘安装ubuntu 14.04 lts的步骤,很简单,只需要一个工具就能够轻松使用u盘安装ubuntukylin 14.04系统 ...
- VMware Workstation 14 PRO 下安装Ubuntu 16.04 LTS教程
一.准备好安装的VMware Workstation 14 PRO 1.VMware Workstation 14 PRO下载链接:http://rj.baidu.com/soft/detail/13 ...
- t420 win7 硬盘安装ubuntu 10.04 LTS 备忘
http://zhangwen.sinaapp.com/?p=5 t420 win7 硬盘安装ubuntu 10.04 LTS 备忘 发表于 2011 年 10 月 25 日 对ubuntu的新版没有 ...
- U盘安装Ubuntu 14.04 LTS正式版
Ubuntu 14.04 LTS正式版发布,而且提供五年的支持和维护服务.Ubuntu 14.04是Ubuntu开发团队历经五年的心血之作.许多新手都喜欢把Linux安装文件刻录成光盘再安装,而安装好 ...
- 记录2-在mac上安装ubuntu 16.04 LTS
前几天升级了我用了六七年mac硬件,内存由4G变为8G,硬盘也换成1T SSD,索性把一直想装的ubuntu也装了,方便温习下以前的工作环境. 我比较喜欢LTS的版本,所以安装了16.04. 主要步骤 ...
随机推荐
- Error:(18) error: '#FFFF782' is incompatible with attribute android:endColor (attr) color. --Android
android studio 编译是报如下错误: Error:(18) error: '#FFFF782' is incompatible with attribute android:endCol ...
- docker 使用教程1
1.概念理解 镜像:docker镜像就像一个个模具. 容器:docker容器就是模具翻模出来的东西. 仓库:仓库就是存放模具的地方. 下面通过运行 hello-world 来理解 docker镜像运行 ...
- js:表单校验(获取元素、事件)
1.表单校验步骤 (1)确定事件(submit事件),创建一个函数并和该事件绑定. (2)书写函数对输入的数据是否合法进行校验(需要设定ID并通过ID来获取用户输入的数据的值). (3)输入的信息合法 ...
- Thread.join详解
/** * 如果某个线程在另一个线程t上调用t.join:那么此线程将被挂起,直到目标t线程的结束才恢复即t.isAlive返回为假 * * @date:2018年6月27日 * @author:zh ...
- Spring Boot中初始化资源的几种方式
CommandLineRunner 定义初始化类 MyCommandLineRunner 实现 CommandLineRunner接口,并实现它的 run()方法,在该方法中编写初始化逻辑 注册成Be ...
- ASP.NET Core路由中间件[1]: 终结点与URL的映射
目录 一.路由注册 二.设置内联约束 三.默认路由参数 四.特殊的路由参数 借助路由系统提供的请求URL模式与对应终结点(Endpoint)之间的映射关系,我们可以将具有相同URL模式的请求分发给应用 ...
- 性能超四倍的高性能.NET二进制序列化库
二进制序列化在.NET中有很多使用场景,如我们使用分布式缓存时,通常将缓存对象序列化为二进制数据进行缓存,在ASP.NET中,很多中间件(如认证等)也都是用了二进制序列化. 在.NET中我们通常使用S ...
- Termux键盘配置
通过编辑~/.termux/termux.properties配置 extra-keys = [\ ['ESC', 'CTRL', '&', '$', '!', '%', '<', '& ...
- 【小菜学网络】MAC地址详解
上一小节介绍了以太网帧的结构,以及帧中各个字段的作用.参与以太网通讯的实体,由以太网地址唯一标识.以太网地址也叫做 MAC 地址,我们对它仍知之甚少. 以太网地址在不同场景,称谓也不一样,常用叫法包括 ...
- 利用Python下载:You-Get的安装及使用方法
You-Get是一个非常优秀的网站视频下载工具.使用You-Get可以很轻松的下载到网络上的视频.图片及音乐. 1.打开这个网址https://www.python.org/ 下载并安装Python, ...