vue2 实现可拖拽悬浮球
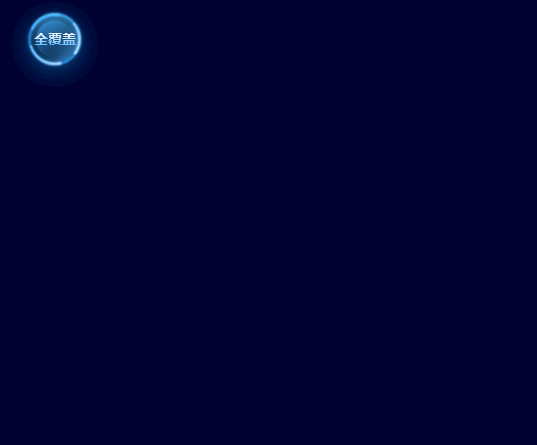
实现效果
相关代码
点击查看代码
<template>

  <div class="float-box">

    <div

      class="button-box"

      @mousedown="mousedown"

      @mousemove="mousemove"

      @touchmove="mousemove"

      @mouseup="mouseup"

      @touchstart="mousedown"

      @touchend="mouseup"

      @click="onClick"

      ref="flbutton"

    >

      <span class="title">{{ title }}</span>

    </div>

    <div

      :style="{ left: left + 'px', top: top + 'px' }"

      v-if="menuFlag"

      :class="menuPosition === 'right' ? 'menu-item-right':'menu-item-left'"

    >

      <div :class="tabBackImg(index)" class="box-title-box-item" v-for="(item,index) in circleList"

           @click="circleClick(item,index)">

        <span :class="'text'+index">{{ item }}</span>

      </div>

    </div>

  </div>

</template>

<script>

export default {

  name: "FloatButton",

  props: {

    circleList: {

      type: Array,

      default: () => []

    },

  },

  data() {

    return {

      title: '',

      left: 0,

      top: 40,

      menuFlag: false,//菜单显隐

      mouseDownflag: false, // 鼠标点击状态

      position: {

        x: 0,

        y: 0,

      },

      nx: "",

      ny: "",

      dx: "",

      dy: "",

      xPum: "",

      yPum: "",

      movb: 1,//区分拖拽还是点击

      menuPosition: 'right',

    };

  },

  mounted() {

    this.left = this.$refs.flbutton.offsetLeft + 20;

    this.top = this.$refs.flbutton.offsetTop;

    this.title = this.circleList[0];

  },

  computed: {

    tabBackImg() {

      return (index) => {

        if (index === 0) {

          return 'tab-item-1'

        } else if (index === 1) {

          return 'tab-item-2'

        } else if (index === 2) {

          return 'tab-item-3'

        } else if (index === 3) {

          return 'tab-item-4'

        }

      }

    }

  },

  methods: {

    circleClick(item, index) {

      this.title = item

      this.$emit('circleClick', item, index)

    },

    //鼠标摁下

    mousedown() {

      this.mouseDownflag = true;

      /*此处判断pc 或移动端得到event 事件*/

      var touch;

      if (event.touches) {

        touch = event.touches[0];

      } else {

        touch = event;

      }

      //鼠标点击面向页面的x坐标y坐标

      this.position.x = touch.clientX;

      this.position.y = touch.clientY;

      //鼠标x坐标-拖拽按钮x坐标得到鼠标距离拖拽按钮的间距

      this.dx = this.$refs.flbutton.offsetLeft;

      //鼠标y坐标-拖拽按钮y坐标得到鼠标距离拖拽按钮的间距

      this.dy = this.$refs.flbutton.offsetTop;

    },

    //鼠标拖拽移动

    mousemove() {

      if (this.mouseDownflag) {

        this.movb = 2;

        this.menuFlag = false;

        /*此处判断得到event事件*/

        var touch;

        if (event.touches) {

          touch = event.touches[0];

        } else {

          touch = event;

        }

        //鼠标坐标-鼠标与拖拽按钮的间距坐标得到拖拽按钮的左上角x轴y轴坐标

        this.nx = touch.clientX - this.position.x;

        this.ny = touch.clientY - this.position.y;

        this.xPum = this.dx + this.nx;

        this.yPum = this.dy + this.ny;

        let width = window.innerWidth - this.$refs.flbutton.offsetWidth; //屏幕宽度减去自身控件宽度

        let height = window.innerHeight - this.$refs.flbutton.offsetHeight; //屏幕高度减去自身控件高度

        /* 此处判断

          拖拽按钮 如果超出屏幕宽高或者小于

          设置屏幕最大 x=全局容器x y=全局容器y

          否则 设置 为 x=0 y=0

        */

        this.xPum < 0 && (this.xPum = 0);

        this.yPum < 0 && (this.yPum = 0);

        this.xPum > width && (this.xPum = width);

        this.yPum > height && (this.yPum = height);

        if (this.xPum > 900) {

          this.menuPosition = 'left'

        } else {

          this.menuPosition = 'right'

        }

        // 计算后坐标  设置 按钮位置

        this.$refs.flbutton.style.left = this.xPum + "px";

        this.$refs.flbutton.style.top = this.yPum + "px";

        this.left = this.xPum + 20;

        this.top = this.yPum;

        //阻止页面的滑动默认事件

        document.addEventListener("touchmove", function () {

          event.preventDefault();

        }, false);

      }

    },

    //鼠标抬起

    mouseup() {

      this.mouseDownflag = false;

    },

    onClick() {

      if (this.movb === 2) {

        this.movb = 1;

      } else {

        this.menuFlag = !this.menuFlag;

      }

    },

  },

};

</script>

<style scoped lang="scss">

.float-box {

  position: relative;

  .button-box {

    width: 110px;

    height: 110px;

    position: fixed;

    top: 100px;

    left: 500px;

    touch-action: none;

    text-align: center;

    color: white;

    background-image: url("~@/assets/images/screen/float-button/button.png");

    background-repeat: no-repeat;

    background-size: 100% 100%;

    line-height: 100px;

    font-size: 14px;

    cursor: pointer;

    z-index: 99;

    .title {

      background: linear-gradient(rgba(255, 255, 255, 1) 25%, rgba(69, 177, 254, 1) 100%);;

      -webkit-background-clip: text;

      color: transparent;

      font-weight: bolder;

    }

  }

  .menu-item-left {

    position: absolute;

    z-index: 99;

    .box-title-box-item {

      color: #FFFFFF;

      cursor: pointer;

      font-size: 13px;

      cursor: pointer;

      display: flex;

      justify-content: center;

      align-items: center;

    }

    .tab-item-1 {

      height: 53px;

      width: 43px;

      position: absolute;

      top: -8px;

      left: -42px;

      background: url("~@/assets/images/screen/float-button/button-l1.png") no-repeat;

      background-size: 100% 100%;

      line-height: 43px;

      padding-top: 10px;

    }

    .tab-item-2 {

      height: 53px;

      width: 44px;

      background: url("~@/assets/images/screen/float-button/button-l2.png") no-repeat;

      background-size: 100% 100%;

      position: absolute;

      top: 46px;

      left: -42px;

      line-height: 43px;

    }

    .tab-item-3 {

      height: 43px;

      width: 53px;

      background: url("~@/assets/images/screen/float-button/button-r3.png") no-repeat;

      background-size: 100% 100%;

      position: absolute;

      top: 80px;

      left: 37px;

      line-height: 43px;

    }

    .tab-item-4 {

      height: 43px;

      width: 53px;

      background: url("~@/assets/images/screen/float-button/button-r4.png") no-repeat;

      background-size: 100% 100%;

      position: absolute;

      top: 80px;

      left: -17px;

      line-height: 40px;

    }

    .tab-item-1:hover, .tab-item-2:hover, .tab-item-3:hover, .tab-item-4:hover {

      transform: scale(1.2);

    }

    .text0, .text1, .text2, .text3 {

      display: inline-block;

    }

    .text0 {

      writing-mode: vertical-rl;

      letter-spacing: 1px;

      transform: rotate(17deg);

    }

    .text1 {

      writing-mode: vertical-rl;

      letter-spacing: 1px;

      transform: rotate(335deg);

    }

    .text2 {

      transform: rotate(340deg);

    }

    .text3 {

      transform: rotate(20deg);

    }

  }

  .menu-item-right {

    position: absolute;

    z-index: 99;

    .box-title-box-item {

      color: #FFFFFF;

      cursor: pointer;

      font-size: 13px;

      cursor: pointer;

      display: flex;

      justify-content: center;

      align-items: center;

    }

    .tab-item-1 {

      height: 53px;

      width: 43px;

      position: absolute;

      top: -10px;

      left: 67px;

      background: url("~@/assets/images/screen/float-button/button-r1.png") no-repeat;

      background-size: 100% 100%;

      line-height: 43px;

      padding-top: 10px;

    }

    .tab-item-2 {

      height: 53px;

      width: 43px;

      background: url("~@/assets/images/screen/float-button/button-r2.png") no-repeat;

      background-size: 100% 100%;

      position: absolute;

      top: 45px;

      left: 69px;

      line-height: 43px;

    }

    .tab-item-3 {

      height: 43px;

      width: 53px;

      background: url("~@/assets/images/screen/float-button/button-r3.png") no-repeat;

      background-size: 100% 100%;

      position: absolute;

      top: 80px;

      left: 35px;

      line-height: 43px;

    }

    .tab-item-4 {

      height: 43px;

      width: 53px;

      background: url("~@/assets/images/screen/float-button/button-r4.png") no-repeat;

      background-size: 100% 100%;

      position: absolute;

      top: 80px;

      left: -20px;

      line-height: 40px;

    }

    .tab-item-1:hover, .tab-item-2:hover, .tab-item-3:hover, .tab-item-4:hover {

      transform: scale(1.2);

    }

    .text0, .text1, .text2, .text3 {

      display: inline-block;

    }

    .text0 {

      writing-mode: vertical-rl;

      letter-spacing: 1px;

      transform: rotate(345deg);

    }

    .text1 {

      writing-mode: vertical-rl;

      letter-spacing: 1px;

      transform: rotate(21deg);

      margin-bottom: 5px;

    }

    .text2 {

      transform: rotate(337deg);

      margin-right: 10px;

    }

    .text3 {

      transform: rotate(20deg);

      margin-left: 5px;

    }

  }

}

</style>
vue2 实现可拖拽悬浮球的更多相关文章
- vue2+element表格拖拽
1.定义好拖拽元素 ref标识,以及 row-key="id" (row-key拖拽标识,拖拽后数据不会乱, id为tableDataNew数据对象id) 2.下载cnpm in ...
- js制作可拖拽可点击的悬浮球
兼容mouse事件和touch事件,支持IE9及其以上 效果展示:https://jsfiddle.net/shifeng/7xebf3u0/ // index.html <!DOCTYPE h ...
- [Winform]无边框窗口悬浮右下角并可以拖拽移动
摘要 简单实现了一个这样的功能,程序启动时,窗口悬固定在右下角,并可以通过鼠标拖拽移动. 核心代码块 无边框窗口并不出现在任务栏 //无边框 this.FormBorderStyle = System ...
- selenium中各个模块操作:下拉框、鼠标悬浮连贯、拼图拖拽操作、以及其他拖拽操作、连线操作
1.下拉框的修改操作 方法一:定位到元素后,通过select选择对应的值 方法二:通过两次点击的方法:没有select的value属性时,采用click两次的方法去选择: click第一次后,出现下拉 ...
- 微软出品自动化神器【Playwright+Java】系列(六) 之 字符输入、单元素键盘事件操作、上传文件、聚焦、拖拽、悬浮操作
前言: 今天一早起床,就一直太阳穴疼,吃了四片去痛片已经无效,真的是疼的直恶心. 如果说学习或者写文章,能够或者头疼的话,那我想说,我还能坚持一会..... 很久没更新这系列的文章了,那么我们将Pla ...
- vue2.0 不引用第三方包的情况下实现嵌套对象的拖拽排序功能
先上一张效果图,然后再上代码(由于只做效果,未做数据相关的处理:实际处理数据时不修改 dom 元素,只是利用 dom 元素传递数据,然后需改数据,靠数据驱动效果) <div :id=" ...
- vue2.0使用Sortable.js实现的拖拽功能
简介 在使用vue1.x之前的版本的时候,页面中的拖拽功能,我在项目中是直接用的jQuery ui中的sortable.js,只是在拖拽完成后,在update的回调函数中又重新排序了存放数据的数组.但 ...
- [vue2 + jointjs + svg-pan-zoom] 节点自动布局渲染 + 拖拽缩放
启动vue项目,执行以下命令安装dagre.graphlib.jointjs.svg-pan-zoom. npm install dagre graphlib jointjs svg-pan-zoom ...
- HTML5之拖拽(兼容IE和非IE)
前世:项目中需要拖动div,然后和某个div进行位置交换,这不是关键,关键是还要保存位置,然后在下次打开的时候按照保存的位置显示.还好本人功力深厚,一下子就想到了用localStorage来保存,事实 ...
- Android6.0 源码修改之 仿IOS添加全屏可拖拽浮窗返回按钮
前言 之前写过屏蔽系统导航栏功能的文章,具体可看Android6.0 源码修改之屏蔽导航栏虚拟按键(Home和RecentAPP)/动态显示和隐藏NavigationBar 在某些特殊定制的版本中要求 ...
随机推荐
- [FAQ] Python的虚拟环境和包管理
1. 创建虚拟环境 $ python -m venv test-env 2. 激活虚拟环境 windows:tutorial-env\Scripts\activate (powershell: . ...
- WPF 由于系统颜色配置 Mscms 组件损坏启动失败
本文记录 WPF 应用程序,因为系统的颜色配置 Mscms.dll 组件损坏导致应用加载图片失败,从而启动失败的原因和解决方法 在 WPF 应用加载图片时,将会调用到系统的 Mscms.dll 组件. ...
- VisualStudio 如何快速添加一个 Git Tag 推送
在 VisualStudio 的团队管理功能,提供了方便的添加 Tag 的方法,可以新建一个 Tag 添加 Tag 信息,同时推送某个特定的 Tag 到服务器.配合推 Tag 打包 NuGet 的方法 ...
- 2019-11-29-dotnet-代码调试方法
title author date CreateTime categories dotnet 代码调试方法 lindexi 2019-11-29 8:50:0 +0800 2019-6-5 9:4:4 ...
- 举例useContext性能低下的样例,同时推荐用什么方法改进
在React中,useContext 是一种非常方便的全局状态管理工具,它可以让我们在组件之间共享状态,而不需要通过层层传递 props.然而,当我们在一个大型的 React 应用中过度使用 useC ...
- 2024-05-01:用go语言,给定两个长度为偶数n的整数数组nums1和nums2, 分别移除它们各自的一半元素, 将剩下的元素合并成集合s。 找出集合s中可能包含的最多元素数量。 输入:nums
2024-05-01:用go语言,给定两个长度为偶数n的整数数组nums1和nums2, 分别移除它们各自的一半元素, 将剩下的元素合并成集合s. 找出集合s中可能包含的最多元素数量. 输入:nums ...
- 关于ITIL的习惯性误解
关于ITIL的习惯性误解 1. ITIL是标准?不是!ITIL本质是一套适合西方社会信息化阶段的 模板原版教材 最佳实践(Best Practice),不是标准. 大量的培训师和咨询顾问将其包装成&q ...
- 欧几里得算法求最大公因数gcd原理证明
要证明欧几里得算法原理,首先需要证明下面两个定理(其中a,b都是整数): 1 如果c可以整除a,同时c也可以整除b,那么c就可以整除au + bv(u,v是任意的整数). 这个定理的证明很简单,$\f ...
- Oracle数据库下的DDL、DML、DQL、TCL、DCL
首发微信公众号:SQL数据库运维 原文链接:https://mp.weixin.qq.com/s?__biz=MzI1NTQyNzg3MQ==&mid=2247485212&idx=1 ...
- web页面打开直接调用vlc播放视频
简介 大家都知道现在我们在网页所播放的视频都是h264编码格式,可以供所有设备正常播放.然而,相比h265它的体积更大.质量更差.目前h265大多应用于安防,体积小可以更好的存储,不过它也有着缺点,成 ...