Arduino IDE for ESP8266 项目(3)创建AP+STA

官网API:http://arduino-esp8266.readthedocs.io/en/latest/esp8266wifi/readme.html
STA (客户端)手机连接路由器

S1 *简单的连接WIFI
自己当手机,连接wifi
#include <ESP8266WiFi.h>


void setup()

{

  Serial.begin(115200);

  Serial.println();


  WiFi.begin("network-name", "pass-to-network");


  Serial.print("Connecting");

  while (WiFi.status() != WL_CONNECTED)

  {

    delay(500);

    Serial.print(".");

  }

  Serial.println();


  Serial.print("Connected, IP address: ");

  Serial.println(WiFi.localIP());

}


void loop() {}
S2 *添加WIFI备用,自动连接
/*

 *  This sketch trys to Connect to the best AP based on a given list

 *

 */


#include <ESP8266WiFi.h>

#include <ESP8266WiFiMulti.h>


ESP8266WiFiMulti wifiMulti;


void setup() {

    Serial.begin(115200);

    Serial.setDebugOutput(true);

    Serial.println();

    delay(10);


    wifiMulti.addAP("dongdong", "dongdong");

    wifiMulti.addAP("ssid_from_AP_2", "your_password_for_AP_2");

    wifiMulti.addAP("ssid_from_AP_3", "your_password_for_AP_3");


    Serial.println("Connecting Wifi...");

    if(wifiMulti.run() == WL_CONNECTED) {

        Serial.println("");

        Serial.println("WiFi connected");

        Serial.println("IP address: ");

        Serial.println(WiFi.localIP());

    }

}


void loop() {

    if(wifiMulti.run() != WL_CONNECTED) {

        Serial.println("WiFi not connected!");

        delay(1000);

    }

}
S3 连接WIFI,主动设置静态地址
#include <ESP8266WiFi.h>

const char* ssid = "dongdong";

const char* password = "dongdong";

String name="DD_Station_01";

IPAddress staticIP(192,168,1,22);

IPAddress gateway(192,168,1,9);

IPAddress subnet(255,255,255,0);

void setup(void)

{

  Serial.begin(115200);

  Serial.println();

  Serial.printf("Connecting to %s\n", ssid);

  WiFi.begin(ssid, password);

  WiFi.config(staticIP, gateway, subnet);

  // 修改主机名

  WiFi.hostname(name);

  Serial.printf("New hostname: %s\n", WiFi.hostname().c_str());

  while (WiFi.status() != WL_CONNECTED)

  {

    delay(500);

    Serial.print(".");

  }

  Serial.println();

  Serial.print("Connected, IP address: ");

  Serial.println(WiFi.localIP());   // 分配的动态地址&自己设置的静态地址

  Serial.printf("SSID: %s\n", WiFi.SSID().c_str());// 连接的WIFI名

}

void loop() {}
S4 http连接网络,访问网页
/*

 *  This sketch sends data via HTTP GET requests to data.sparkfun.com service.

 *

 *  You need to get streamId and privateKey at data.sparkfun.com and paste them

 *  below. Or just customize this script to talk to other HTTP servers.

 *

 */

#include <ESP8266WiFi.h>


const char* ssid     = "Doit";

const char* password = "doit3305";

const char* host = "data.sparkfun.com";

const char* streamId   = "ESPDUINO_STA";

const char* privateKey = "pzRb9dawqocbP9n0K0M9";


void setup() {

  Serial.begin(115200);

  delay(10);

  // We start by connecting to a WiFi network

  Serial.println();

  Serial.println();

  Serial.print("Connecting to ");

  Serial.println(ssid);

  WiFi.begin(ssid, password);

  while (WiFi.status() != WL_CONNECTED) {

  delay(500);

  Serial.print(".");

  }

  Serial.println("");

  Serial.println("WiFi connected");

  Serial.println("IP address: ");

  Serial.println(WiFi.localIP());

}


int value = 0;


void loop() {

  delay(5000);

  ++value;

  Serial.print("connecting to ");

  Serial.println(host);

  // Use WiFiClient class to create TCP connections

  WiFiClient client;

  const int httpPort = 80;

  if (!client.connect(host, httpPort)) {

    Serial.println("connection failed");

    return;

  }

  // We now create a URI for the request

  String url = "/input/";

  url += streamId;

  url += "?private_key=";

  url += privateKey;

  url += "&value=";

  url += value;

  Serial.print("Requesting URL: ");

  Serial.println(url);

  // This will send the request to the server

  client.print(String("GET ") + url + " HTTP/1.1\r\n" +"Host: " + host + "\r\n" + "Connection: close\r\n\r\n");

  delay(10);

  // Read all the lines of the reply from server and print them to Serial

  while(client.available()){

    String line = client.readStringUntil('\r');

    Serial.print(line);

  }


  Serial.println();

  Serial.println("closing connection");


}
AP(服务器) 自己当WIFI
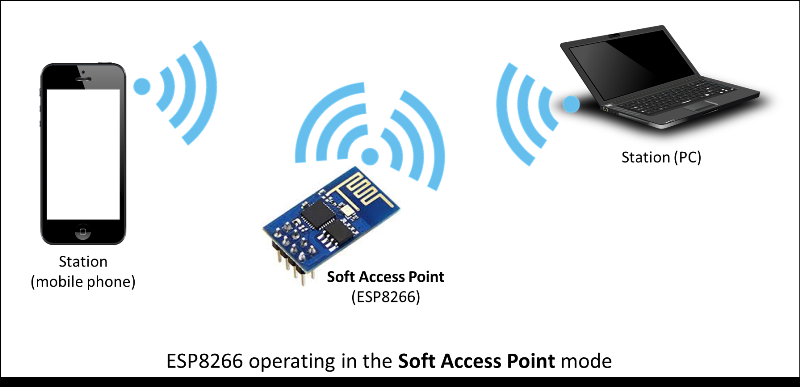
A1 自己当WIFI wifi名称+密码+ IP 不提供服务
#include <ESP8266WiFi.h>

const char *ssid = "Charlie Testing AP";

const char *password = "12345678";

void setup()

{

  Serial.begin(115200);

  Serial.println();

  Serial.print("Setting soft-AP ... ");


IPAddress softLocal(192,168,128,1);

IPAddress softGateway(192,168,128,1);

IPAddress softSubnet(255,255,255,0);

WiFi.softAPConfig(softLocal, softGateway, softSubnet);

    WiFi.softAP(ssid, password);


   IPAddress myIP = WiFi.softAPIP();

  Serial.print("AP IP address: ");

  Serial.println(myIP);

}

void loop()

{

  delay(3000);

}
A2 1主动设置自己的WIFI wifi名称+密码+ IP 2建立一个服务接收手机的请求和信息 3网页返回给手机
#include <ESP8266WiFi.h>

const char *ssid = "Charlie Testing AP";

const char *password = "12345678";

WiFiServer server(80);

void setup()

{

  Serial.begin(115200);

  Serial.println();

  Serial.print("Setting soft-AP ... ");

IPAddress softLocal(192,168,128,1);

IPAddress softGateway(192,168,128,1);

IPAddress softSubnet(255,255,255,0);

WiFi.softAPConfig(softLocal, softGateway, softSubnet);

    WiFi.softAP(ssid, password);

   IPAddress myIP = WiFi.softAPIP();

  Serial.print("AP IP address: ");

  Serial.println(myIP);

 server.begin();

 Serial.printf("Web server started, open %s in a web browser\n", WiFi.localIP().toString().c_str());

}

void loop()

{

 WiFiClient client = server.available();

 if (client)

  {

    Serial.println("\n[Client connected]");

    while (client.connected())

    {

      // read line by line what the client (web browser) is requesting

      if (client.available())

      {

        String line = client.readStringUntil('\r');

        Serial.print(line);

        // wait for end of client's request, that is marked with an empty line

        if (line.length() == 1 && line[0] == '\n')

        {

          client.println(prepareHtmlPage());

          break;

        }

      }

    }

    delay(1); // give the web browser time to receive the data

    // close the connection:

    client.stop();

    Serial.println("[Client disonnected]");

  }

}

// prepare a web page to be send to a client (web browser)

String prepareHtmlPage()

{

  String htmlPage =

     String("HTTP/1.1 200 OK\r\n") +

            "Content-Type: text/html\r\n" +

            "Connection: close\r\n" +  // the connection will be closed after completion of the response

            "Refresh: 5\r\n" +  // refresh the page automatically every 5 sec

            "\r\n" +

            "<!DOCTYPE HTML>" +

            "<html>" +

            "Analog input:  " + String(analogRead(A0)) +

            "</html>" +

            "\r\n";

  return htmlPage;

}
STA (客户端)+ AP(服务器)
#include <ESP8266WiFi.h>

#include <WiFiUdp.h>

/******************* STA 当手机 *****************************/

//设置STA网络参数

IPAddress sip(192, 168, 1, 29);//本地IP

IPAddress sip1(192, 168, 1, 1);//本地网关

IPAddress sip2(255, 255, 255, 0);//本地子网掩码

//设置STA

const char *ssid = "Netcore_wsn";

const char *password = "99325408322";

/**********************************************************/

/******************* AP 当wifi *****************************/

IPAddress xip(192, 168,2, 2);//下位远程IP

//设置AP网络参数

IPAddress lxip(192, 168,2, 1);//AP端IP

IPAddress lxip1(192, 168,2, 1);//AP端网关

IPAddress lxip2(255, 255,255, 0);//AP端子网掩码

//设置AP账号密码

const char *ssid1 = "Netcore_wsn1";//AP  wifi名

const char *password1 = "99325408322";//AP  wifi密码

/**********************************************************/

IPAddress Serverip(192, 168, 1, 4);//上位机远程IP

unsigned int localPort = 9999;//本地端口

unsigned int remoteport = 9999;//远程端口

WiFiUDP udp;

char packetBuffer[255];//收发缓冲区

void setup() {

Serial.begin(115200);//初始化串口波特率

delay(5000);//延时5S

WiFi.mode(WIFI_AP_STA);//设置模式为AP+STA

/******************* AP 当WIFI  *****************************/

WiFi.softAPConfig(lxip,lxip1,lxip2);//设置AP网络参数

WiFi.softAP(ssid1,password1,1);//设置AP账号密码

/******************************************************************/

Serial.print("apip:");

Serial.println(WiFi.softAPIP());// AP 自己当WIFI 自己设置的内网地址

/******************* STA 当手机连接WIFI *****************************/

WiFi.begin(ssid,password);//连接指定路由

WiFi.config(sip,sip1,sip2);//设置本地网络参数

Serial.print("Is connection routing, please wait");

while(WiFi.status()!=WL_CONNECTED)//等待路由连接

{

delay(500);

Serial.print(".");

}

/******************************************************************/

Serial.println(" ");

udp.begin(localPort);//监听指定端口

Serial.print("ip:");

Serial.println(WiFi.localIP());// STA 当手机连接WIFI 自己设置的静态地址

}

void loop()

{

if(udp.parsePacket())

{

udp.read(packetBuffer,255);//读取数据

udp.beginPacket(Serverip,remoteport);

udp.write(packetBuffer,255);

udp.endPacket();

Serial.println(packetBuffer);

udp.beginPacket(xip,remoteport);

udp.write(packetBuffer,255);

udp.endPacket();

memset(packetBuffer, 0, 255);//清除缓冲器数值

}

}
Arduino IDE for ESP8266 项目(3)创建AP+STA的更多相关文章
- Arduino IDE for ESP8266教程(二) 创建WIFI AP模式
创建WIFI热点 #include <ESP8266WiFi.h> void setup() { Serial.begin ( 115200 ); Serial.println(" ...
- Arduino IDE for ESP8266 项目云盒子 (1)AP直接模式
手机直接连接esp8266辐射的WIFI,通信. https://item.taobao.com/item.htm?spm=a230r.1.14.20.eYblO3&id=5219451024 ...
- Arduino IDE for ESP8266 项目云盒子(2)一键自配置+网页服务器
https://item.taobao.com/item.htm?spm=a230r.1.14.20.eYblO3&id=521945102409&ns=1&abbucket= ...
- Arduino IDE for ESP8266 项目(4)HTTP客户端+服务端
Arduio for esp8266 官网API:http://arduino-esp8266.readthedocs.io/en/latest/esp8266wifi/readme.html 很有 ...
- Arduino IDE for ESP8266 项目(1) 点亮灯+按键LED+pwm
官方文档 http://esp8266.github.io/Arduino/versions/2.1.0/doc/libraries.html 引脚口说明 http://yfrobot.com/thr ...
- Arduino IDE for ESP8266 项目云盒子(3)外网访问
互联网访问esp8266 https://item.taobao.com/item.htm?spm=a230r.1.14.20.eYblO3&id=521945102409&ns=1& ...
- Arduino IDE for ESP8266 项目(2)wifi扫描
#include "ESP8266WiFi.h" void setup() { Serial.begin(115200); //设定WiFi为STA模式,如果先前已连接上AP,则与 ...
- Arduino IDE for ESP8266 项目云盒子(4)组网
- ESP8266开发之旅 进阶篇② 闲聊Arduino IDE For ESP8266烧录配置
授人以鱼不如授人以渔,目的不是为了教会你具体项目开发,而是学会学习的能力.希望大家分享给你周边需要的朋友或者同学,说不定大神成长之路有博哥的奠基石... QQ技术互动交流群:ESP8266&3 ...
随机推荐
- python取余
a=-7,b=3, a % b = 2 #取余 a-((a/b)*b) a / b= -3 #整除 int(math.floor(-7/3.0))
- 关于MVC的感悟
代码一定要静下心来自己琢磨感悟,才会发现一些细节,只注重实现的结果是要不得的. 室友有些奋进,我得努力啊!
- Moco服务器jar包实现简易的API搭建
永远不要停止前进的脚步,就像你不会忘记以前那些窘迫的连一无所有都称不上的裸露的记忆一样.追求永远的打怪升级,武装自己.双手的努力让曾经那些不堪的记忆在时间的长河中渐渐风化隐匿,但请不要忘记它留下的那一 ...
- elasticsearch6.7 01.入门指南(1)
Elasticsearch 是一个高度可扩展且开源的全文检索和分析引擎.它可以让您快速.近实时地存储.检索以及分析海量数据.它通常用作那些具有复杂搜索功能和需求的应用的底层引擎或者技术. 下面是 El ...
- 第一篇 Spring boot 配置文件笔记
spring boot 不需要配置太多文件程序便可正常运行,特殊情况需要我们自己配置文件. 项目以IDEA写实例,系统会默认在src/main/java/resources目录下创建applicati ...
- 140 - The 12th Zhejiang Provincial Collegiate Programming Contest(浙江省赛2015)
Ace of Aces Time Limit: 2 Seconds Memory Limit: 65536 KB There is a mysterious organization c ...
- 手把手教你实现Confluence6.7.1安装与破解
Confluence是一个专业的企业知识管理与协同软件,也可以用于构建企业wiki. 一.准备工作 下载confluence6.7.1 wget https://downloads.atlassian ...
- 前端的业余设计-about my 毕业季
++++++++++++++++++++++++++++++++++++++++++++++++++++++++++++++++++++++++++++++++++++++++++++++++++++ ...
- 洛谷P2447 [SDOI2010]外星千足虫(异或方程组)
题意 题目链接 Sol 异或高斯消元的板子题. bitset优化一下,复杂度\(O(\frac{nm}{32})\) 找最优解可以考虑高斯消元的过程,因为异或的特殊性质,每次向下找的时候找到第一个1然 ...
- Wepy在VScode中的高亮显示
小程序的wepy框架会生成后缀名为.wpy的文件,此文件用VScode打开时并不是高亮的,官方文档给我们提供了两种方案进行高亮 方案一: 1. 在 Code 里先安装 Vue 的语法高亮插件 Ve ...