Android_GLSurfaceView
使用open GL ES 绘制三角形
首先自定义一个GLSurfaceView
    class MyGLSurceView extends GLSurfaceView {

        public MyGLSurceView(Context context, AttributeSet attrs) {

            super(context, attrs);

        }

        public MyGLSurceView(Context context) {

            super(context);

        }

    }
再定义一个给GLSurfaceView进行渲染的渲染器Renderer,他是GLSurfaceView的内部接口类。
class MyRenderer implements GLSurfaceView.Renderer {

        @Override

        public void onDrawFrame(GL10 gl) {

            //清除缓存颜色区域

            gl.glClear(GL10.GL_COLOR_BUFFER_BIT);

            //设置模型视图

            gl.glMatrixMode(GL10.GL_MODELVIEW);

            gl.glLoadIdentity();//加载单位矩阵

            //眼睛放置的位置

            //GL10 gl, float eyeX, float eyeY, float eyeZ, 眼睛放置的位置

            //float centerX, float centerY, float centerZ, 相机放置的位置

            //float upX, float upY, float upZ 相机的朝向

            GLU.gluLookAt(gl, 0, 0, 5, 0, 0, 0, 0, 1, 0);

            //定义三角形的点x,y,z

            float[] coords = {

                    0f,0.5f,0f,

                    -0.5f,-0.5f,0f,

                    0.5f,-0.5f,0f

            };

            //存到内存缓存区

            ByteBuffer buffer = ByteBuffer.allocateDirect(coords.length *4);

            buffer.order(ByteOrder.nativeOrder());

            //放置顶点坐标

            FloatBuffer floatBuf = buffer.asFloatBuffer();

            floatBuf.put(coords);//将点存放到floatBuffer里面

            buffer.position(0);//指针指向0

            //制定绘制点的颜色

            gl.glColor4f(1f, 0f, 0f, 1f);

            //开始绘制点

            //3 三维点, type数据类型,0跨度,顶点缓冲区

            gl.glVertexPointer(3, GL10.GL_FLOAT, 0, buffer);

            //设置绘制三角形

            gl.glDrawArrays(GL10.GL_TRIANGLES, 0, 3);

        }

        @Override

        public void onSurfaceChanged(GL10 gl, int width, int height) {

            //设置视口区域

            gl.glViewport(0, 0, width, height);

            //设置绘制模式

            gl.glMatrixMode(GL10.GL_PROJECTION);

            //设置为单例矩阵

            gl.glLoadIdentity();

            float ration = (float)width/(float)height;

            //设置平截头体 左,右,下,上,近平面,远平面

            gl.glFrustumf(-1f, 1f, -ration, ration, 3, 7);

        }

        @Override

        public void onSurfaceCreated(GL10 gl, EGLConfig arg1) {

            //设置清屏颜色

            gl.glClearColor(1, 1, 1, 1);

            //启动绘制顶点数组

            gl.glEnableClientState(GL10.GL_VERTEX_ARRAY);

        }

    }
public class MainActivity extends Activity {

    @Override

    protected void onCreate(Bundle savedInstanceState) {

        super.onCreate(savedInstanceState);

        MyGLSurceView glSurceView = new MyGLSurceView(this);

        glSurceView.setRenderer(new MyRenderer());

        setContentView(glSurceView);

    }

}
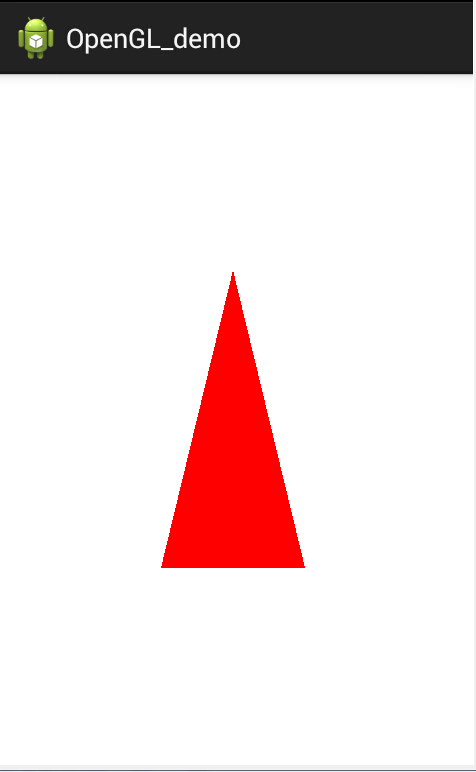
运行效果图如下:
Android_GLSurfaceView的更多相关文章
随机推荐
- web项目局部打印
window.print()方法是打印整个body,若想打印局部区域,网上出现了各种解决办法,我觉得都挺好的.我最推荐jquery.PrintArea.js插件形式 点击上述链接首先下载下来,我的是版 ...
- 244. Shortest Word Distance II 实现数组中的最短距离单词
[抄题]: Design a class which receives a list of words in the constructor, and implements a method that ...
- spring多线程
Spring4.x高级话题(二):多线程 一. 点睛 Spring通过任务执行器(TaskExecutor)来实现多线程和并发编程.使用ThreadPoolTaskExecutor可实现一个基于线程池 ...
- Python项目--Scrapy框架(二)
本文主要是利用scrapy框架爬取果壳问答中热门问答, 精彩问答的相关信息 环境 win8, python3.7, pycharm 正文 1. 创建scrapy项目文件 在cmd命令行中任意目录下执行 ...
- Solidity类型Uint类型区分?
1. Solidity中默认 Uint 也就是Uint256, 也就是 无符号 256位整数范围,即 2的 256次方 减一的 10进制范围, 预计大小为: 115792089237316195423 ...
- MySQL开发——【数据的基本操作】
增加数据 基本语法: insert into 数据表 [字段名称1,字段名称2..] values (数据1,数据2...); 特别注意:针对数据类型整型.浮点型数据可以不加单引或双引号,但是如果字段 ...
- ubuntu中运行java程序
查找jdk rivsidn@rivsidn:~/demo/java$ sudo apt-cache search jdk default-jdk - Standard Java or Java com ...
- jdbc随笔
通过jdbc连接数据库的基本步骤: 导入jar包驱动类 jdbc语法:jdbc:子协议:厂商内容 对于mysql而言:jdbc:mysql://主机地址:端口号/库名 ...
- android 测试
Android Monkey压力测试 monkey测试结果详细分析 Android自动化测试工具 UiAutomator使用详解 在Android Sudio中使用Uiautomator 六款Andr ...
- usb协议栈学习笔记
1.usb 集线器为什么一般都是只有4个扩展口? PC的根集线器可为每个A型连接器提供5V.500mA电源.一个总线供电的外部集线器可为每个端口提供100mA电流.由于USB为为外部集线器电路分配10 ...