C# WCF实现聊天室功能
1、WCF是什么
Windows Communication Foundation(WCF)是由微软开发的一系列支持数据通信的应用程序框架
看这篇文章之前,可以先看我的另一篇文章,初步了解一下WCF:https://www.cnblogs.com/wskxy/p/9435300.html
2、如何通过WCF做聊天室
首先,我们画个示意图:

按照图示,我们来建立Service和Client
客户端选择WinForm,这是不用争议的
服务端为啥要选用Web呢,这是为了方便IIS配置
3、首先是ServiceWeb
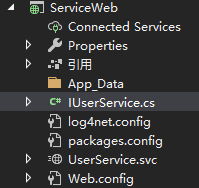
IUserService.cs 定义好接口(IUserService)和关联回调(IUserCallback)
using System.ServiceModel;

namespace ServiceWeb

{

    //信息类,懒得新建,放一起了

    [ServiceContract]

    public class UserInfo

    {

        public string acc;

        public string sayContext;

    }

    [ServiceContract]

    public class UserInfoSubscriber : UserInfo

    {

        public IUserCallback subscriber;

    }

    //回调Client函数接口

    public interface IUserCallback

    {

        [OperationContract(IsOneWay = true)]

        void OnLogin(UserInfo user);

        [OperationContract(IsOneWay = true)]

        void OnQuit(UserInfo user);

        [OperationContract(IsOneWay = true)]

        void OnSay(UserInfo user);

    }

    //Service服务函数接口

    [ServiceContract(SessionMode = SessionMode.Required, CallbackContract = typeof(IUserCallback))]

    public interface IUserService

    {

        [OperationContract(IsOneWay = true)]

        void Login(string acc, string pwd);

        [OperationContract(IsOneWay = true)]

        void Quit(string acc);

        [OperationContract(IsOneWay = true)]

        void Say(UserInfo user);

    }

}
UserService.svc 实现接口函数
using System.Collections.Generic;

using System.Linq;

using System.ServiceModel;

namespace ServiceWeb

{

    // 注意: 使用“重构”菜单上的“重命名”命令,可以同时更改代码和配置文件中的类名“User”。

    [ServiceBehavior(InstanceContextMode = InstanceContextMode.PerSession, ConcurrencyMode = ConcurrencyMode.Multiple)]

    public class UserService : IUserService

    {

        /*存储登录信息*/

        /*必须加static,不然每次都被重新实例化*/

        public static List<UserInfoSubscriber> userList = new List<UserInfoSubscriber>();

        public void Login(string acc, string pwd)

        {

            /*1、检测登录,在数据库判断登录信息,不涉及本章重点,为方便代码省略,默认成功*/

            /*2、成功登录后广播*/

            //为当前用户创建订阅者(回调接口)

            IUserCallback subscriber = OperationContext.Current.GetCallbackChannel<IUserCallback>();

            if (userList.FindIndex(x => x.acc == acc) == -1)//避免重复登录

            {

                var user = new UserInfoSubscriber()

                {

                    acc = acc,

                    subscriber = subscriber

                };

                userList.Add(user);

                //user.subscriber.OnLogin(user);//用子类作为参数无效,所以需要重新new返回信息(可能和WCF协议有关)

                //user.subscriber.OnLogin((UserInfo)user);//这样也不行

                user.subscriber.OnLogin(new UserInfo() { acc = acc });//成功执行回调

                foreach (UserInfoSubscriber item in userList.Where(x => x.acc != acc))  //告知其他客户端当前用户已上线

                {

                    item.subscriber.OnLogin(new UserInfo() { acc = acc });

                }

            }

        }

        public void Quit(string acc)

        {

            var user = userList.Find(x => x.acc == acc);

            if (user != null)

            {

                user.subscriber.OnQuit(new UserInfo() { acc = acc });

                userList.Remove(user);

            }

        }

        public void Say(UserInfo _user)

        {

            var user = userList.Find(x => x.acc == _user.acc);

            foreach (UserInfoSubscriber item in userList)

            {

                item.subscriber.OnSay(_user);

            }

        }

    }

}
注意 Web.config 的<services>,需要有User服务(有的不会自动建立,然后产生错误,缺了就补上)
      <services>

          <service name="ServiceWeb.UserService">

              <!--问题:协定需要会话,但是绑定“BasicHttpBinding”不支持它或者因配置不正确而无法支持它-->

              <!--解决:将BasicHttpBinding换成wsDualHttpBinding-->

              <endpoint address="" binding="wsDualHttpBinding" contract="ServiceWeb.IUserService">

                  <identity>

                      <dns value="localhost"/>

                  </identity>

              </endpoint>

              <endpoint address="mex" binding="mexHttpBinding" contract="IMetadataExchange"/>

              <host>

                  <baseAddresses>

                      <add baseAddress="http://localhost:8733/Design_Time_Addresses/Service/UserService/"/>

                  </baseAddresses>

              </host>

          </service>

      </services>
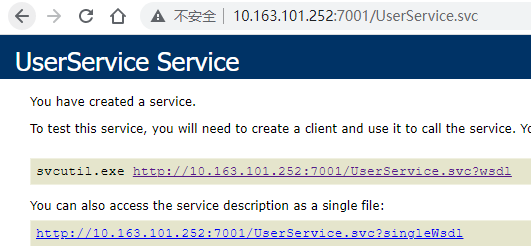
这样,Service就算定义好了,可以直接配置到IIS,打开svc可以看到:
4、Client
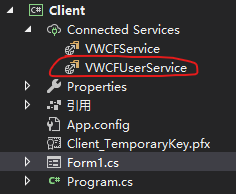
先把服务引用进来,引用后配置文件有如下信息:
    <system.serviceModel>

        <bindings>

            <wsDualHttpBinding>

                <binding name="WSDualHttpBinding_IUserService" />

            </wsDualHttpBinding>

        </bindings>

        <client>

            <endpoint

                address="http://10.163.101.252:7001/UserService.svc"

                binding="wsDualHttpBinding" bindingConfiguration="WSDualHttpBinding_IUserService"

                contract="VWCFUserService.IUserService" name="WSDualHttpBinding_IUserService">

                <identity>

                    <dns value="localhost" />

                </identity>

            </endpoint>

        </client>

    </system.serviceModel>
然后,让我们开心写界面
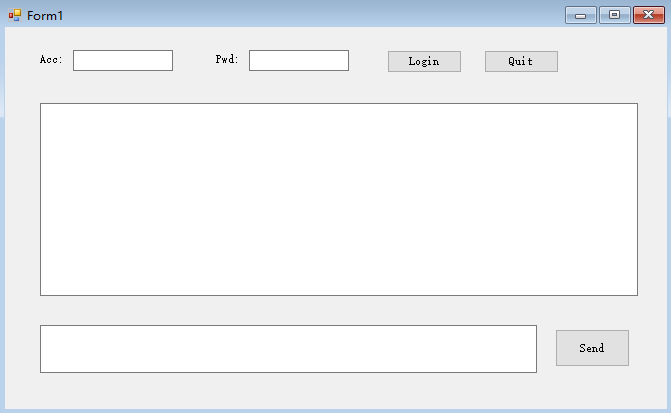
代码如下:
using Client.VWCFUserService;

using System;

using System.Collections.Generic;

using System.ComponentModel;

using System.Data;

using System.Drawing;

using System.Linq;

using System.ServiceModel;

using System.Text;

using System.Threading.Tasks;

using System.Windows.Forms;

namespace Client

{

    public partial class Form1 : Form, IUserServiceCallback

    {

        InstanceContext context;

        UserServiceClient sc;

        public Form1()

        {

            InitializeComponent();

        }

        private void Form1_Load(object sender, EventArgs e)

        {

            this.tb_Acc.Text = "kxy";

            this.tb_Pwd.Text = "123";

            this.tb_Message_Box.ReadOnly = true ;

            this.btn_Quit.Enabled = false;

            this.btn_Send.Enabled = false;

            //this.tb_Send_Box.Focus();  //这个不知道为啥无效

            this.ActiveControl = this.tb_Send_Box;

        }

        private void Login_Click(object sender, EventArgs e)

        {

            context = new InstanceContext(this);

            sc = new UserServiceClient(context);

            //sc.Login(sc.InnerChannel.SessionId, this.tbAcc.Text);

            sc.Login(this.tb_Acc.Text, this.tb_Pwd.Text);

        }

        private void Quit_click(object sender, EventArgs e)

        {

            if (sc != null)

                sc.Quit(this.tb_Acc.Text);

        }

        private void send_Click(object sender, EventArgs e)

        {

            if (!string.IsNullOrEmpty(tb_Send_Box.Text))

            {

                sc.Say(new UserInfo() { acc = this.tb_Acc.Text, sayContext = this.tb_Send_Box.Text });

            }

        }

        private void Form1_FormClosing(object sender, FormClosingEventArgs e)

        {

            if (sc != null)

                sc.Quit(this.tb_Acc.Text);

        }

        public void OnLogin(VWCFUserService.UserInfo user)

        {

            tb_Message_Box.Text += $"\r\n已登录:{user.acc}";

            this.tb_Acc.ReadOnly = true;

            this.tb_Pwd.ReadOnly = true;

            this.btn_Login.Enabled = false;

            this.btn_Quit.Enabled = true;

            this.btn_Send.Enabled = true;

        }

        public void OnQuit(VWCFUserService.UserInfo user)

        {

            tb_Message_Box.Text += $"\r\n已退出:{user.acc}";

            this.tb_Acc.ReadOnly = false;

            this.tb_Pwd.ReadOnly = false;

            this.btn_Login.Enabled = true;

            this.btn_Quit.Enabled = false;

            this.btn_Send.Enabled = false;

        }

        public void OnSay(VWCFUserService.UserInfo user)

        {

            tb_Message_Box.Text += $"\r\n{user.acc}-{DateTime.Now.ToString("f")}";

            tb_Message_Box.Text += $"\r\n{user.sayContext}";

            this.tb_Send_Box.Text = "";

            this.tb_Send_Box.Focus();

        }

    }

}
到这里,我们的通讯就可以正常进行了。
请大家自己尝试,可以打开多个进程,体验多人在线!!!
5、Client的发布和版本更新
WinForm怎么进行发布和检测更新呢?
也是利用IIS!!!
具体操作如下:
首先将WinForm发布打包(一步一步截图太麻烦,直接看最后信息呈现)
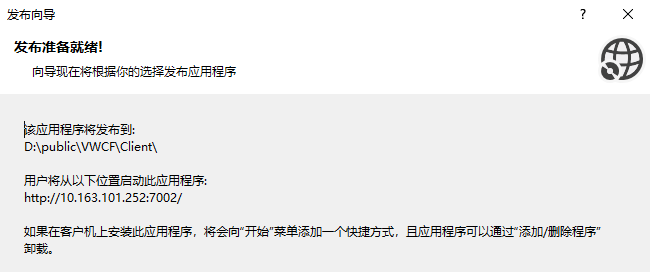
参数解释:

1、该应用程序将发布到(发布生产程序存放的位置,本地随便都行)

2、用户将从以下位置启动此应用程序(这个地址是后面程序将要在IIS上的host地址)
生成文件如下:
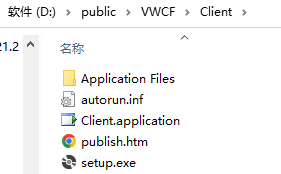
将文件发布到服务器(服务器文件位置随便),定义站点10.163.101.252:7002
访问http://10.163.101.252:7002/publish.htm,可以进行Client下载安装
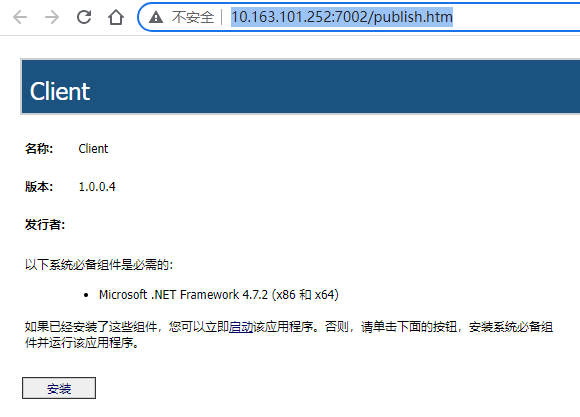
并且每次启动Client的时候,会自动检查是否有版本更新
(当然需要发布新版本,并将新程序Copy到站点,才会进行更新)
C# WCF实现聊天室功能的更多相关文章
- Netty学习笔记(四) 简单的聊天室功能之服务端开发
前面三个章节,我们使用了Netty实现了DISCARD丢弃服务和回复以及自定义编码解码,这篇博客,我们要用Netty实现简单的聊天室功能. Ps: 突然想起来大学里面有个课程实训,给予UDP还是TCP ...
- 使用epoll实现聊天室功能,同时比较epoll和select的异同
1.首先介绍一下select和epoll的异同,如下(摘抄自https://www.cnblogs.com/Anker/p/3265058.html) select的几大缺点: (1)每次调用sele ...
- [Python] socket发送UDP广播实现聊天室功能
一.说明 本文主要使用socket.socket发送UDP广播来实现聊天室功能. 重点难点:理解UDP通讯流程.多线程.UDP广播收发等. 测试环境:Win10\Python3.5. 程序基本流程:创 ...
- SignalR实现在线聊天室功能
一.在线聊天室 1.新建解决方案 SignalROnlineChatDemo 2.新建MVC项目 SignalROnlineChatDemo.Web (无身份验证) 3.安装SignalR PM> ...
- 03_netty实现聊天室功能
[概述] 聊天室主要由两块组成:聊天服务器端(ChatRoomServer)和聊天客户端(ChatClient). [ 聊天服务器(ChatRoomServer)功能概述 ] 1.监听所有客户端的接入 ...
- PHP 之websocket实现聊天室功能
一.功能界面 具体的详细代码:https://github.com/yangsphp/websocket-master/tree/master 二.具体代码实现 1.前端代码如下 <!DOCTY ...
- 黑科技!仅需 3 行代码,就能将 Gitter 集成到个人网站中,实现一个 IM 即时通讯聊天室功能?
欢迎关注个人微信公众号: 小哈学Java, 文末分享阿里 P8 高级架构师吐血总结的 <Java 核心知识整理&面试.pdf>资源链接!! 个人网站: https://www.ex ...
- java web利用mvc结构实现简单聊天室功能
简单聊天室采用各种内部对象不适用数据库实现. 一个聊天室要实现的基本功能是: 1.用户登录进入聊天室, 2.用户发言 3.用户可以看见别人发言 刚才算是简单的需求分析了,现在就应该是进 ...
- 通过WebSocket实现一个简单的聊天室功能
WebSocket WebSocket是一个协议,它是是基于TCP的一种新的网络协议,TCP协议是一种持续性的协议,和HTTP不同的是,它可以在服务器端主动向客户端推送消息.通过这个协议,可以在建立一 ...
- Netty学习笔记(六) 简单的聊天室功能之WebSocket客户端开发实例
在之前的Netty相关学习笔记中,学习了如何去实现聊天室的服务段,这里我们来实现聊天室的客户端,聊天室的客户端使用的是Html5和WebSocket实现,下面我们继续学习. 创建客户端 接着第五个笔记 ...
随机推荐
- Windows10下python3和python2同时安装(一)安装python3和python2
Windows10下python3和python2同时安装(一) 安装python3和python2 特别说明,本文是在Windows64位系统下进行的,32位系统请下载相应版本的安装包,安装方法类似 ...
- 前端Ui设计常用WEB框架
目录 一:前端Ui常用框架 1.Bootstrap 2.Font Awesome框架 二.前端其他UI框架 1.Pure 2.bootstrap 3.EasyUI 4.Ant Design 5. La ...
- 从0到1学Python丨图像平滑方法的两种非线性滤波:中值滤波、双边滤波
摘要:常用于消除噪声的图像平滑方法包括三种线性滤波(均值滤波.方框滤波.高斯滤波)和两种非线性滤波(中值滤波.双边滤波),本文将详细讲解两种非线性滤波方法. 本文分享自华为云社区<[Python ...
- 【机器学习】李宏毅——Recurrent Neural Network(循环神经网络)
假设我们当前要做一个人工智能客服系统,那该系统就需要对用户输入的话语进行辨认,例如用户输入: I want to arrive Taipei on November 2nd 那么该系统就能够辨认出来T ...
- 过debugger的几种方法+案例
受益匪浅 https://mp.weixin.qq.com/s/559so0RheeiQdA670J23yghttps://blog.csdn.net/weixin_43834227/article/ ...
- 【Vue】启动vue项目报错: errno: -4058, code: ‘ENOENT‘, syscall: ‘spawn cmd‘
运行vue项目(npm run dev)报错 报错如下 问题原因 缺少cmd运行程序的环境变量 解决方法在环境变量Path中加上C:\windows\system32
- 启动springboot项目报错Unable to start embedded Tomcat
1.问题描述 最近在学习springcloud的时候,在父工程下新建一个model后,引入dashboard相关依赖后启动报错 2.产生原因 产生原因有可能就是pom.xml中下载的jar包版本冲突 ...
- S2-017 CVE-2013-2248
漏洞名称 Apache Struts 多个开放重定向漏洞 (CVE-2013-2248) s2-017 利用条件 Struts 2.0.0 - Struts 2.3.15 漏洞原理 通过操作前缀为&q ...
- npm 环境搭建---全局安装angular cli ---升级本地angular版本---搭建ng-alain
1.环境搭建 node -v # 查看 Node.js 当前版本 npm -v # 查看 Npm 当前版本 2.设定淘宝提供 Npm 源镜像 # 设置淘宝源 npm config set regist ...
- hashlib加密模块及subprocess远程命令模块
hashlib加密模块及subprocess远程命令模块 一.hashlib加密模块 1.加密模块简介 1.加密模块简介 将明文数据进行加密处理,转变为密文数据再存储或者传输,这样的安全机制可以让用户 ...