Python安装MySQL数据库模块
背景
折腾:
的过程中,需要去安装MySQLdb。
下载MySQLdb
去官网:
http://pypi.python.org/pypi/MySQL-python/
看到有1.2.4和1.2.3
所以去最新的1.2.4:
http://pypi.python.org/pypi/MySQL-python/1.2.4
下载对应的编译好的版本:
MySQL-python-1.2.4.win32-py2.7.exe
得到1MB的
MySQL-python-1.2.4.win32-py2.7.exe
安装MySQLdb
双击安装:
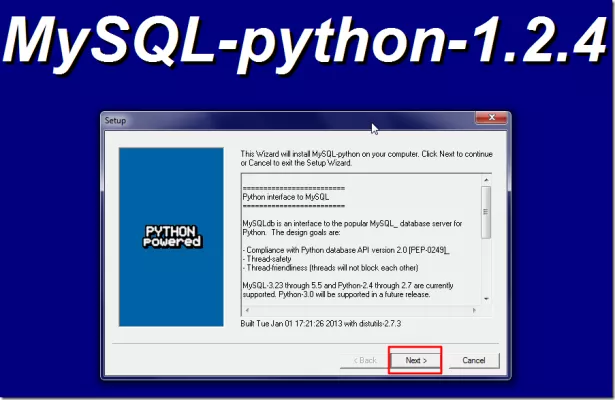
结果出错:

看来此x86的exe,是不支持我的win7 x64。
所以只能去下载源码再去安装了。
下载源码:
然后再去解压和安装,结果果然出现
error: Unable to find vcvarsall.bat
的错误:
D:\tmp\dev_tools\python\mysql\MySQL-python-1.2.4\MySQL-python-1.2.4>setup.py install
Downloading http://pypi.python.org/packages/source/d/distribute/distribute-0.6.28.tar.gz
Extracting in c:\users\cli\appdata\local\temp\tmpkapo0l
Now working in c:\users\cli\appdata\local\temp\tmpkapo0l\distribute-0.6.28
Building a Distribute egg in D:\tmp\dev_tools\python\mysql\MySQL-python-1.2.4\MySQL-python-1.2.4
D:\tmp\dev_tools\python\mysql\MySQL-python-1.2.4\MySQL-python-1.2.4\distribute-0.6.28-py2.7.egg
running install
running bdist_egg
running egg_info
writing MySQL_python.egg-info\PKG-INFO
writing top-level names to MySQL_python.egg-info\top_level.txt
writing dependency_links to MySQL_python.egg-info\dependency_links.txt
writing MySQL_python.egg-info\PKG-INFO
writing top-level names to MySQL_python.egg-info\top_level.txt
writing dependency_links to MySQL_python.egg-info\dependency_links.txt
reading manifest file ‘MySQL_python.egg-info\SOURCES.txt’
reading manifest template ‘MANIFEST.in’
writing manifest file ‘MySQL_python.egg-info\SOURCES.txt’
installing library code to build\bdist.win-amd64\egg
running install_lib
running build_py
creating build
creating build\lib.win-amd64-2.7
copying _mysql_exceptions.py -> build\lib.win-amd64-2.7
creating build\lib.win-amd64-2.7\MySQLdb
copying MySQLdb\__init__.py -> build\lib.win-amd64-2.7\MySQLdb
copying MySQLdb\converters.py -> build\lib.win-amd64-2.7\MySQLdb
copying MySQLdb\connections.py -> build\lib.win-amd64-2.7\MySQLdb
copying MySQLdb\cursors.py -> build\lib.win-amd64-2.7\MySQLdb
copying MySQLdb\release.py -> build\lib.win-amd64-2.7\MySQLdb
copying MySQLdb\times.py -> build\lib.win-amd64-2.7\MySQLdb
creating build\lib.win-amd64-2.7\MySQLdb\constants
copying MySQLdb\constants\__init__.py -> build\lib.win-amd64-2.7\MySQLdb\constants
copying MySQLdb\constants\CR.py -> build\lib.win-amd64-2.7\MySQLdb\constants
copying MySQLdb\constants\FIELD_TYPE.py -> build\lib.win-amd64-2.7\MySQLdb\constants
copying MySQLdb\constants\ER.py -> build\lib.win-amd64-2.7\MySQLdb\constants
copying MySQLdb\constants\FLAG.py -> build\lib.win-amd64-2.7\MySQLdb\constants
copying MySQLdb\constants\REFRESH.py -> build\lib.win-amd64-2.7\MySQLdb\constants
copying MySQLdb\constants\CLIENT.py -> build\lib.win-amd64-2.7\MySQLdb\constants
running build_ext
building ‘_mysql’ extension
error: Unable to find vcvarsall.bat
D:\tmp\dev_tools\python\mysql\MySQL-python-1.2.4\MySQL-python-1.2.4>
然后参考之前的办法,结果还是出错:
D:\tmp\dev_tools\python\mysql\MySQL-python-1.2.4\MySQL-python-1.2.4>SET VS90COMNTOOLS=%VS100COMNTOOLS%
D:\tmp\dev_tools\python\mysql\MySQL-python-1.2.4\MySQL-python-1.2.4>setup.py install
running install
running bdist_egg
running egg_info
writing MySQL_python.egg-info\PKG-INFO
writing top-level names to MySQL_python.egg-info\top_level.txt
writing dependency_links to MySQL_python.egg-info\dependency_links.txt
writing MySQL_python.egg-info\PKG-INFO
writing top-level names to MySQL_python.egg-info\top_level.txt
writing dependency_links to MySQL_python.egg-info\dependency_links.txt
reading manifest file ‘MySQL_python.egg-info\SOURCES.txt’
reading manifest template ‘MANIFEST.in’
writing manifest file ‘MySQL_python.egg-info\SOURCES.txt’
installing library code to build\bdist.win-amd64\egg
running install_lib
running build_py
copying MySQLdb\release.py -> build\lib.win-amd64-2.7\MySQLdb
running build_ext
building ‘_mysql’ extension
creating build\temp.win-amd64-2.7
creating build\temp.win-amd64-2.7\Release
C:\Program Files (x86)\Microsoft Visual Studio 10.0\VC\BIN\amd64\cl.exe /c /nologo /Ox /MD /W3 /GS- /DNDEBUG -Dversion_info=(1,2,4,’final’,1) -D__version__=1.2.4 "-IC:\Program Files (x86)\MySQL\MySQL
Connector C 6.0.2\include" -ID:\tmp\dev_install_root\Python27_x64\include -ID:\tmp\dev_install_root\Python27_x64\PC /Tc_mysql.c /Fobuild\temp.win-amd64-2.7\Release\_mysql.obj /Zl
_mysql.c
_mysql.c(42) : fatal error C1083: Cannot open include file: ‘config-win.h’: No such file or directory
error: command ‘"C:\Program Files (x86)\Microsoft Visual Studio 10.0\VC\BIN\amd64\cl.exe"’ failed with exit status 2
D:\tmp\dev_tools\python\mysql\MySQL-python-1.2.4\MySQL-python-1.2.4>
然后再参考:
所说的:
1)问题 : _mysql.c(34) : fatal error C1083: Cannot open include file: ‘config-win.h’: No such file or directory
error: command ‘”C:/Program Files/Microsoft Visual Studio 9.0/VC/BIN/cl.exe”‘ failed with exit status 2原因 :原因是安装MySQL的时候没有安装C语言库。
解决 :重新运行MySQL的安装程序,选择Modify,把“C Include Files / Lib Files”勾选上,并安装。
去重新安装mysql。
继续:
【记录】为Python安装MySQL数据库模块:MySQLdb
的折腾:
1.参考:
MySQL-python 1.2.3 for Windows and Python 2.7, 32bit and 64bit versions
得知:
python的
此处的要安装x64还是x86,是取决于你所安装的Python的版本,而不是OS的版本。
所以此处去x64 win7中的cmd中确认一下python的版本:
|
C:\Users\CLi>python |
的确是x64的,所以的确要安装的是x64。
2.下载对应的:
MySQL-python-1.2.3.win-amd64-py2.7.exe (1.0 MiB)
结果链接失效:“File does not exist.”
3.从:
http://www.codegood.com/downloads
找到一堆的下载,但是结果都失效了。
4.参考:
Python: How to install mysqldb on windows 7 x64?
结果最后找到的下载地址也是上面的那个失效的地址。
5.还是参考:
Install MySQLdb for Python 2.6 in Windows 7 64-bit
和
python MySQLdb在windows环境下的快速安装、问题解决方式
去自己编译吧。
6.然后还是同样错误:
|
D:\tmp\dev_tools\python\mysql\MySQL-python-1.2.4\MySQL-python-1.2.4>SET VS90COMNTOOLS=%VS100COMNTOOLS% D:\tmp\dev_tools\python\mysql\MySQL-python-1.2.4\MySQL-python-1.2.4>setup.py install |
然后参考:
Install Python-MySql on Windows 7 64-bit
看到了site.cfg内容是:
|
1
2
3
4
5
6
7
8
9
10
11
12
13
14
15
16
17
|
[options]# embedded: link against the embedded server library# threadsafe: use the threadsafe client# static: link against a static library (probably required for embedded)embedded = Falsethreadsafe = Truestatic = False# The path to mysql_config.# Only use this if mysql_config is not on your PATH, or you have some weird# setup that requires it.#mysql_config = /usr/local/bin/mysql_config# http://stackoverflow.com/questions/1972259/mysql-python-install-problem-using-virtualenv-windows-pip# Windows connector libs for MySQL. You need a 32-bit connector for your 32-bit Python build.connector = C:\Program Files (x86)\MySQL\MySQL Connector C 6.0.2 |
然后注意到了,上面的编译过程中的include的路径,就是此处的connector的值。
7.又在这里:
Unofficial Windows Binaries for Python Extension Packages
找到了一个已编译的版本的下载地址:
MySQL-python-1.2.3.win-amd64-py2.7.exe [1.1 Mb] [Python 2.7] [64 bit] [JUN 08, 2011] |
然后去安装:


然后就可以写代码去测试是否工作了。
在Python中使用MySQLdb操作MySQL数据库
参考:
然后用:
|
1
2
3
4
5
6
7
8
9
10
11
12
13
14
15
16
17
18
19
20
21
22
23
24
25
26
27
28
29
30
31
32
33
34
35
36
|
#!/usr/bin/python# -*- coding: utf-8 -*-"""-------------------------------------------------------------------------------Function:【记录】为Python安装MySQL数据库模块:MySQLdbAutor: Crifan LiDate: 2013-04-22-------------------------------------------------------------------------------"""#---------------------------------import---------------------------------------import MySQLdbdef python_mysql_test(): """ try to use mysql in python """ try: conn=MySQLdb.connect(host='localhost',user='root',passwd='xxx',db='wordpress',port=3306) print "conn=",conn; cur=conn.cursor() print "cur=",cur; cur.execute('select * from wp_users') cur.close() conn.close() except MySQLdb.Error,e: print "Mysql Error %d: %s" % (e.args[0], e.args[1])###############################################################################if __name__=="__main__": python_mysql_test(); |
可以显示连接成功了:
|
D:\tmp\tmp_dev_root\python\tutorial_summary\python_mysql_test>python_mysql_test.py conn= <_mysql.connection open to ‘localhost’ at 2a46ad8> cur= <MySQLdb.cursors.Cursor object at 0x0000000002A54C50> |
对应的wordpress的数据库是:

9.再去折腾新建数据项试试:
|
1
2
3
4
5
6
7
8
9
10
11
12
13
14
15
16
17
18
19
20
21
22
23
24
25
26
27
28
29
30
31
32
33
34
35
36
37
38
39
40
41
42
43
44
45
46
47
48
49
50
51
52
53
54
55
56
57
58
59
60
61
62
63
|
#!/usr/bin/python# -*- coding: utf-8 -*-"""-------------------------------------------------------------------------------Function:【记录】为Python安装MySQL数据库模块:MySQLdbAutor: Crifan LiDate: 2013-04-22-------------------------------------------------------------------------------"""#---------------------------------import---------------------------------------import MySQLdbdef python_mysql_test(): """ try to use mysql in python """ try: conn=MySQLdb.connect(host='localhost',user='root',passwd='xxx',db='test',port=3306, charset='utf8') print "conn=",conn; cur=conn.cursor() print "cur=",cur; createdDb = cur.execute('create database if not exists pythonMysql') print "createdDb=",createdDb; selectedDb = conn.select_db('pythonMysql') print "selectedDb=",selectedDb; createdTable = cur.execute('create table test(id int,info varchar(20))') print "createdTable=",createdTable; value=[1,'hi rollen'] insertedValue = cur.execute('insert into test values(%s,%s)',value) print "insertedValue=",insertedValue; values=[] for i in range(20): values.append((i,'hi rollen'+str(i))) insertedValues = cur.executemany('insert into test values(%s,%s)',values) print "insertedValues=",insertedValues; updatedInfo = cur.execute('update test set info="I am rollen" where id=3') print "updatedInfo=",updatedInfo; committed = conn.commit() print "committed=",committed; closedCur = cur.close() print "closedCur=",closedCur; closedConn = conn.close() print "closedConn=",closedConn; except MySQLdb.Error,e: print "Mysql Error %d: %s" % (e.args[0], e.args[1])###############################################################################if __name__=="__main__": python_mysql_test(); |
结果如下:
|
D:\tmp\tmp_dev_root\python\tutorial_summary\python_mysql_test>python_mysql_test.py conn= <_mysql.connection open to ‘localhost’ at 2a46ad8> cur= <MySQLdb.cursors.Cursor object at 0x0000000002A54C50> D:\tmp\tmp_dev_root\python\tutorial_summary\python_mysql_test>python_mysql_test.py conn= <_mysql.connection open to ‘localhost’ at 2be06a8> cur= <MySQLdb.cursors.Cursor object at 0x00000000028B7BE0> createdDb= 1 selectedDb= None createdTable= 0 insertedValue= 1 insertedValues= 20 updatedInfo= 1 committed= None closedCur= None closedConn= None |
数据库中去看看结果:


都是可以正常工作的。
至此,简单的操作,到此结束。
以后就是针对要操作的数据,如何导入数据库,如何操作数据库了。
数据库操作:
python操作MySQL数据库
坚持每天学一点,每天积累一点点,作为自己每天的业余收获,这个文章是我在吃饭的期间写的,利用自己零散的时间学了一下python操作MYSQL,所以整理一下。
我采用的是MySQLdb操作的MYSQL数据库。先来一个简单的例子吧:
|
1
2
3
4
5
6
7
8
9
10
|
import MySQLdbtry: conn=MySQLdb.connect(host='localhost',user='root',passwd='root',db='test',port=3306) cur=conn.cursor() cur.execute('select * from user') cur.close() conn.close()except MySQLdb.Error,e: print "Mysql Error %d: %s" % (e.args[0], e.args[1]) |
请注意修改你的数据库,主机名,用户名,密码。
下面来大致演示一下插入数据,批量插入数据,更新数据的例子吧:
|
1
2
3
4
5
6
7
8
9
10
11
12
13
14
15
16
17
18
19
20
21
22
23
24
25
26
27
|
import MySQLdbtry: conn=MySQLdb.connect(host='localhost',user='root',passwd='root',port=3306) cur=conn.cursor() cur.execute('create database if not exists python') conn.select_db('python') cur.execute('create table test(id int,info varchar(20))') value=[1,'hi rollen'] cur.execute('insert into test values(%s,%s)',value) values=[] for i in range(20): values.append((i,'hi rollen'+str(i))) cur.executemany('insert into test values(%s,%s)',values) cur.execute('update test set info="I am rollen" where id=3') conn.commit() cur.close() conn.close()except MySQLdb.Error,e: print "Mysql Error %d: %s" % (e.args[0], e.args[1]) |
请注意一定要有conn.commit()这句来提交事务,要不然不能真正的插入数据。
运行之后我的MySQL数据库的结果就不上图了。
|
1
2
3
4
5
6
7
8
9
10
11
12
13
14
15
16
17
18
19
20
21
22
23
24
25
26
27
28
29
30
31
32
33
|
import MySQLdbtry: conn=MySQLdb.connect(host='localhost',user='root',passwd='root',port=3306) cur=conn.cursor() conn.select_db('python') count=cur.execute('select * from test') print 'there has %s rows record' % count result=cur.fetchone() print result print 'ID: %s info %s' % result results=cur.fetchmany(5) for r in results: print r print '=='*10 cur.scroll(0,mode='absolute') results=cur.fetchall() for r in results: print r[1] conn.commit() cur.close() conn.close()except MySQLdb.Error,e: print "Mysql Error %d: %s" % (e.args[0], e.args[1]) |
运行结果就不贴了,太长了。
查询后中文会正确显示,但在数据库中却是乱码的。经过我从网上查找,发现用一个属性有可搞定:
在Python代码
conn = MySQLdb.Connect(host='localhost', user='root', passwd='root', db='python') 中加一个属性:
改为:
conn = MySQLdb.Connect(host='localhost', user='root', passwd='root', db='python',charset='utf8')
charset是要跟你数据库的编码一样,如果是数据库是gb2312 ,则写charset='gb2312'。
下面贴一下常用的函数:
然后,这个连接对象也提供了对事务操作的支持,标准的方法
commit() 提交
rollback() 回滚
cursor用来执行命令的方法:
callproc(self, procname, args):用来执行存储过程,接收的参数为存储过程名和参数列表,返回值为受影响的行数
execute(self, query, args):执行单条sql语句,接收的参数为sql语句本身和使用的参数列表,返回值为受影响的行数
executemany(self, query, args):执行单挑sql语句,但是重复执行参数列表里的参数,返回值为受影响的行数
nextset(self):移动到下一个结果集
cursor用来接收返回值的方法:
fetchall(self):接收全部的返回结果行.
fetchmany(self, size=None):接收size条返回结果行.如果size的值大于返回的结果行的数量,则会返回cursor.arraysize条数据.
fetchone(self):返回一条结果行.
scroll(self, value, mode='relative'):移动指针到某一行.如果mode='relative',则表示从当前所在行移动value条,如果 mode='absolute',则表示从结果集的第一行移动value条.
Python安装MySQL数据库模块的更多相关文章
- python操作三大主流数据库(1)python操作mysql①windows环境中安装python操作mysql数据库的MySQLdb模块mysql-client
windows安装python操作mysql数据库的MySQLdb模块mysql-client 正常情况下应该是cmd下直接运行 pip install mysql-client 命令即可,试了很多台 ...
- pymysql模块使用---Python连接MySQL数据库
pymysql模块使用---Python连接MySQL数据库 浏览目录 pymysql介绍 连接数据库 execute( ) 之 sql 注入 增删改查操作 进阶用法 一.pymysql介绍 1.介绍 ...
- Windows下安装MySQLdb, Python操作MySQL数据库的增删改查
这里的前提是windows上已经安装了MySQL数据库,且配置完成,能正常建表能操作. 在此基础上仅仅需安装MySQL-python-1.2.4b4.win32-py2.7.exe就ok了.仅仅有1M ...
- mysql安装和简要操作命令+python基本操作mysql数据库
mysql数据库是一种关系型数据库管理系统. 一. windows平台安装Mysql数据库. Mysql数据库官网 :https://dev.mysql.com/downloads/windows/ ...
- 解决python无法安装mysql数据库问题
解决python无法安装mysql数据库问题: pip install pymysql[使用这个命令来安装]
- python使用mysql数据库
一,安装mysql 如果是windows 用户,mysql 的安装非常简单,直接下载安装文件,双击安装文件一步一步进行操作即可. Linux 下的安装可能会更加简单,除了下载安装包进行安装外,一般的l ...
- python专题-Mysql数据库(python2._+ Mysqldb)
Python使用MySQL数据库 MySQLdb驱动从2014年1月停止了维护. Python2 MySQLdb 一,安装mysql 如果是windows 用户,mysql 的安装非常简单,直接下载安 ...
- Python使用MySQL数据库【转】
转自 Python使用MySQL数据库(新)[很详细][fetchall和fetchmany有啥区别呢?] - CSDN博客https://blog.csdn.net/u011350541/artic ...
- Python使用MySQL数据库(新)(转)
http://www.cnblogs.com/fnng/p/3565912.html 一,安装mysql 如果是windows 用户,mysql 的安装非常简单,直接下载安装文件,双击安装文件一步一步 ...
随机推荐
- 标题 发布状态 评论数 阅读数 操作 操作 CNN目标检测系列算法发展脉络简析——学习笔记(三):Fast R-CNN
最近两周忙着上网课.投简历,博客没什么时间写,姑且把之前做的笔记放上来把... 下面是我之前看论文时记的笔记,之间copy上来了,内容是Fast R-CNN的,以后如果抽不出时间写博客,就放笔记上来( ...
- WxPython 4.0.4多线程访问UI
最开始做框架的时候的需求就是多线程访问UI,以前在.NET WPF使用MVVM和数据驱动很容易做到,在JavaSwing中使用另类的观察者模式也实现了.在WxPython中使用观察者模式直接程序崩溃, ...
- Requests库发送post请求,传入接口参数后报JSON parse error
报错信息: {"timestamp":"2020-01-08T14:42:40.894+0000","status":400,"e ...
- 远程调试docker构建的weblogic
环境信息 OSType: CentOS Linux 7 (Core) x86_64 3.10.0-957.21.3.el7.x86_64 DockerVersion: 19.03.8 Mirrors: ...
- 回文串的Manacher算法
Manacher算法较传统算法的优化之处在于它对每个回文中心寻找回文半径的时候并不是都从半径为1开始找的,而是利用前面已经完成的任务,寻找一个初始的开始搜索的半径大小,复杂度是线性的. 参考博客:ht ...
- 【2019多校第一场补题 / HDU6582】2019多校第一场E题1005Path——最短路径+网络流
HDU6582链接 题意 在一张有向图中,有一个起点和一个终点,你需要删去部分路径,使得起点到终点的最短距离增加(并不要求需要使得距离变成最大值),且删除的路径长度最短.求删去的路径总长为多少 分析 ...
- 五、运算符的补充与if语句
1.可变不可变类型 指:对前面所学类型做一个可变和不可变类型的分类 可变类型:值改变,ID不变,证明改的是原值,原值是可以被改变的 不可变类型:值改变,ID也变了,证明是产生新的值,压根没有改变原值, ...
- 利用Python获取文件类型
这里选择使用使用filetype获取文件的类型. 使用filetype之前,先用pip安装filetype. #!/usr/bin/python3 import filetype import arg ...
- NSArray、NSDictionary
一.NSDictionary 1.1 使用自定义对象 key Dictionaries manage pairs of keys and values. A key-value pair within ...
- 下拉框select->option中如何把参数传到视图函数中去
例子: <select name="p_id" id=""> {% for p in permissions %} <option value ...