keras实现简单性别识别(二分类问题)
keras实现简单性别识别(二分类问题)
第一步:准备好需要的库
- tensorflow 1.4.0
- h5py 2.7.0
- hdf5 1.8.15.1
- Keras 2.0.8
- opencv-python 3.3.0
- numpy 1.13.3+mkl
- 所需要的人脸检测模块
- mtcnn和opencv
- https://pan.baidu.com/s/1rhP7mcnAtiojhk8eiLroEw
第二步:准备数据集:
将性别不同的图片按照不同的分类放到不同的文件夹内。
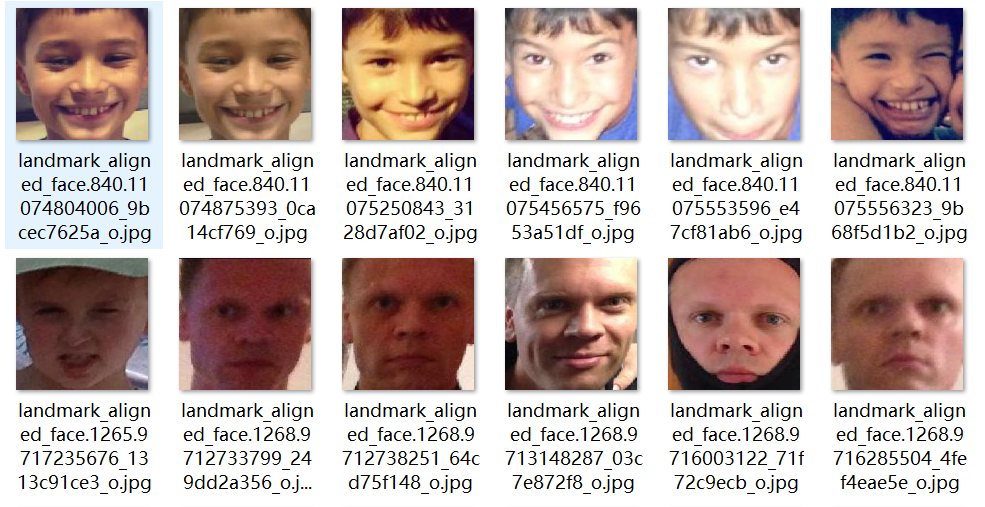

数据集
https://pan.baidu.com/s/1_f36Gw4PWztUXZWH_jLWcw
 import shutil

 # 读取文件中图片信息根据性别分类图片到对应目录中

 dirroot = "D:\\Users\\a\\Pictures\\adience"

 f = open(dirroot+"\\fold_frontal_3_data.txt","r")

 i = 0

 for line in f.readlines():

     line = line.split()

     dir = line[0]

     imgName = "landmark_aligned_face."+ line[2] +'.'+ line[1]

     if i > 0:

         if line[5]== "f":

             print("female")

             shutil.copy(dirroot+'\\faces\\'+dir+'\\'+imgName, "D:\\pycode\\learn\\data\\validation\\"+imgName)

         #     移动图片到female目录

         elif line[5]=="m":

             print("male")

             shutil.copy(dirroot+'\\faces\\'+dir+'\\'+imgName, "D:\\pycode\\learn\\data\\validation\\"+imgName)

         #     移动图片到male目录

         else:

             print("N")

             # 未识别男女

     i += 1

 f.close()
使用ImageDataGenerator,来对图片进行归一化和随机旋转。使用flow_from_directory,来自动产生图片标签生成器。
 class Dataset(object):

     def __init__(self):

         self.train = None

         self.valid = None

     def read(self, img_rows=IMAGE_SIZE, img_cols=IMAGE_SIZE):

         train_datagen = ImageDataGenerator(

             rescale=1. / 255,

             horizontal_flip=True)

         test_datagen = ImageDataGenerator(rescale=1. / 255)

         train_generator = train_datagen.flow_from_directory(

             train_data_dir,

             target_size=(img_rows, img_cols),

             batch_size=batch_size,

             class_mode='binary')

         validation_generator = test_datagen.flow_from_directory(

             validation_data_dir,

             target_size=(img_rows, img_cols),

             batch_size=batch_size,

             class_mode='binary')

         self.train = train_generator

         self.valid = validation_generator
第三部:网络
 class Model(object):

     def __init__(self):

         self.model = Sequential()

         self.model.add(Conv2D(32, (3, 3), input_shape=(IMAGE_SIZE,IMAGE_SIZE,3)))

         self.model.add(Activation('relu'))

         self.model.add(MaxPooling2D(pool_size=(2, 2)))

         self.model.add(Conv2D(32, (3, 3)))

         self.model.add(Activation('relu'))

         self.model.add(MaxPooling2D(pool_size=(2, 2)))

         self.model.add(Conv2D(64, (3, 3)))

         self.model.add(Activation('relu'))

         self.model.add(MaxPooling2D(pool_size=(2, 2)))

         self.model.add(Conv2D(64, (3, 3)))

         self.model.add(Activation('relu'))

         self.model.add(MaxPooling2D(pool_size=(2, 2)))

         self.model.add(Flatten())

         self.model.add(Dense(64))

         self.model.add(Activation('relu'))

         self.model.add(Dropout(0.85))

         self.model.add(Dense(1))

         self.model.add(Activation('sigmoid'))

     def train(self, dataset, batch_size=batch_size, nb_epoch=epochs):

         self.model.compile(loss='binary_crossentropy',

                       optimizer='adam',

                       metrics=['accuracy'])

         self.model.fit_generator(dataset.train,

                                  steps_per_epoch=nb_train_samples // batch_size,

                                  epochs=epochs,

                                  validation_data=dataset.valid,

                                  validation_steps=nb_validation_samples//batch_size)

     def save(self, file_path=FILE_PATH):

         print('Model Saved.')

         self.model.save_weights(file_path)

     def load(self, file_path=FILE_PATH):

         print('Model Loaded.')

         self.model.load_weights(file_path)

     def predict(self, image):

         # 预测样本分类

         img = image.resize((1, IMAGE_SIZE, IMAGE_SIZE, 3))

         img = image.astype('float32')

         img /= 255

         #归一化

         result = self.model.predict(img)

         print(result)

         # 概率

         result = self.model.predict_classes(img)

         print(result)

         # 0/1

         return result[0]

     def evaluate(self, dataset):

         # 测试样本准确率

         score = self.model.evaluate_generator(dataset.valid,steps=2)

         print("样本准确率%s: %.2f%%" % (self.model.metrics_names[1], score[1] * 100))
第四部:主程序
 if __name__ == '__main__':

     dataset = Dataset()

     dataset.read()

     model = Model()

     model.load()

     model.train(dataset)

     model.evaluate(dataset)

     model.save()
第五步:识别程序
opencv检测模块版
#!/usr/bin/env python
"""
从摄像头中获取图像实时监测
"""
import numpy as np
import cv2
from GenderTrain import Model def detect(img, cascade):
"""
检测图像是否含有人脸部分
:param img: 待检测帧图像
:param cascade: 面部对象检测器
:return: 面部图像标记
"""
rects = cascade.detectMultiScale(img, scaleFactor=1.3, minNeighbors=4, minSize=(30, 30),
flags=cv2.CASCADE_SCALE_IMAGE)
if len(rects) == 0:
return []
rects[:,2:] += rects[:,:2]
return rects def draw_rects(img, rects, color):
"""
根据图像标记人脸区域与性别
:param img:
:param rects:
:param color:
:return:
"""
for x, y, w, h in rects:
face = img[x:x+w,y:y+h]
face = cv2.resize(face,(224,224))
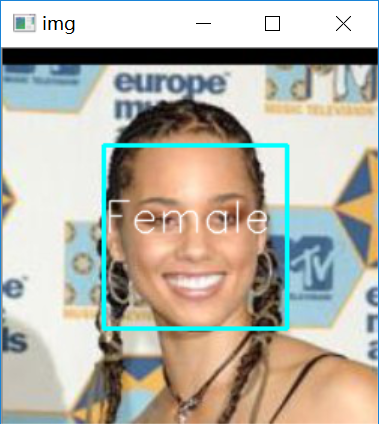
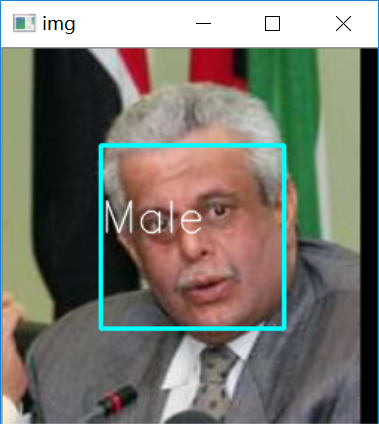
if gender.predict(face)==1:
text = "Male"
else:
text = "Female"
cv2.rectangle(img, (x, y), (w, h), color, 2)
cv2.putText(img, text, (x, h), cv2.FONT_HERSHEY_SIMPLEX, 2.0, (255, 255, 255), lineType=cv2.LINE_AA) if __name__ == '__main__':
haar__cascade_path = "D:\\opencv\\sources\\data\\haarcascades\\haarcascade_frontalface_default.xml" cascade = cv2.CascadeClassifier( haar__cascade_path)
cam = cv2.VideoCapture(0)
# 获取摄像头视频
gender = Model()
gender.load()
# 加载性别模型
while True:
ret, img = cam.read()
# 读取帧图像
rects = detect(img, cascade)
print(rects)
vis = img.copy()
draw_rects(vis, rects, (0, 255, 0))
cv2.imshow('Gender', vis)
if cv2.waitKey(5) == 27:
break
cv2.destroyAllWindows()
MTCNN检测版
"""

从摄像头中获取图像实时监测

"""

import PIL

import numpy as np

import detect_face

import tensorflow as tf

import cv2

from GenderTrain import Model

with tf.Graph().as_default():

    gpu_options = tf.GPUOptions(per_process_gpu_memory_fraction=0.5)

    sess = tf.Session(config=tf.ConfigProto(gpu_options=gpu_options, log_device_placement=False))

    with sess.as_default():

        pnet, rnet, onet = detect_face.create_mtcnn(sess,

                                                    'E:\\pycode\\real-time-deep-face-recognition-master\\20170512-110547')

minsize = 20  # minimum size of face

threshold = [0.6, 0.7, 0.7]  # three steps's threshold

factor = 0.709  # scale factor

margin = 44

frame_interval = 3

batch_size = 1000

image_size = 182

input_image_size = 160

def draw_rects(img, rects, color):

    """

    根据图像标记人脸区域与性别

    :param img:

    :param rects:

    :param color:

    :return:

    """

    for x, y, w, h in rects:

        face = img[x:x+w,y:y+h]

        face = cv2.resize(face,(224,224))

        if gender.predict(face)==1:

            text = "Male"

        else:

            text = "Female"

        cv2.rectangle(img, (x, y), (w, h), color, 2)

        cv2.putText(img, text, (x, h), cv2.FONT_HERSHEY_SIMPLEX, 2.0, (255, 255, 255), lineType=cv2.LINE_AA)

if __name__ == '__main__':

    cam = cv2.VideoCapture(0)

    # 获取摄像头视频

    gender = Model()

    gender.load()

    # 加载性别模型

    while True:

        ret, img = cam.read()

        # 读取帧图像

        bounding_boxes, _ = detect_face.detect_face(img, minsize, pnet, rnet, onet, threshold, factor)

        # 读取帧图像

        for face_position in bounding_boxes:

            face_position = face_position.astype(int)

            print(face_position[0:4])

            rects = [[face_position[0], face_position[1], face_position[2], face_position[3]]]

            vis = img.copy()

            draw_rects(vis, rects, (255, 255, 255))

            cv2.imshow('Gender', vis)

        if cv2.waitKey(5) == 27:

            break

    cv2.destroyAllWindows()
完全版
import os

import random

import cv2

import numpy as np

from tensorflow.contrib.keras.api.keras.preprocessing.image import ImageDataGenerator,img_to_array

from tensorflow.contrib.keras.api.keras.models import Sequential

from tensorflow.contrib.keras.api.keras.layers import Dense, Dropout, Activation, Flatten

from tensorflow.contrib.keras.api.keras.layers import Conv2D, MaxPooling2D

from tensorflow.contrib.keras.api.keras.optimizers import SGD

IMAGE_SIZE = 182

# 训练图片大小

epochs = 150#原来是50

# 遍历次数

batch_size = 32

# 批量大小

nb_train_samples = 512*2

# 训练样本总数

nb_validation_samples = 128*2

# 测试样本总数

train_data_dir = 'D:\\code\\learn\\data_sex\\train_data\\'

validation_data_dir = 'D:\\data_sex\\test_data\\'

# 样本图片所在路径

FILE_PATH = 'Gender_new.h5'

# 模型存放路径

class Dataset(object):

    def __init__(self):

        self.train = None

        self.valid = None

    def read(self, img_rows=IMAGE_SIZE, img_cols=IMAGE_SIZE):

        train_datagen = ImageDataGenerator(

            rescale=1. / 255,

            horizontal_flip=True)

        test_datagen = ImageDataGenerator(rescale=1. / 255)

        train_generator = train_datagen.flow_from_directory(

            train_data_dir,

            target_size=(img_rows, img_cols),

            batch_size=batch_size,

            class_mode='binary')

        validation_generator = test_datagen.flow_from_directory(

            validation_data_dir,

            target_size=(img_rows, img_cols),

            batch_size=batch_size,

            class_mode='binary')

        self.train = train_generator

        self.valid = validation_generator

class Model(object):

    def __init__(self):

        self.model = Sequential()

        self.model.add(Conv2D(32, (3, 3), input_shape=(IMAGE_SIZE,IMAGE_SIZE,3)))

        self.model.add(Activation('relu'))

        self.model.add(MaxPooling2D(pool_size=(2, 2)))

        self.model.add(Conv2D(32, (3, 3)))

        self.model.add(Activation('relu'))

        self.model.add(MaxPooling2D(pool_size=(2, 2)))

        self.model.add(Conv2D(64, (3, 3)))

        self.model.add(Activation('relu'))

        self.model.add(MaxPooling2D(pool_size=(2, 2)))

        self.model.add(Flatten())

        self.model.add(Dense(64))

        self.model.add(Activation('relu'))

        self.model.add(Dropout(0.5))

        self.model.add(Dense(1))

        self.model.add(Activation('sigmoid'))

    def train(self, dataset, batch_size=batch_size, nb_epoch=epochs):

        self.model.compile(loss='binary_crossentropy',

                      optimizer='adam',

                      metrics=['accuracy'])

        self.model.fit_generator(dataset.train,

                                 steps_per_epoch=nb_train_samples // batch_size,

                                 epochs=epochs,

                                 validation_data=dataset.valid,

                                 validation_steps=nb_validation_samples//batch_size)

    def save(self, file_path=FILE_PATH):

        print('Model Saved.')

        self.model.save_weights(file_path)

    def load(self, file_path=FILE_PATH):

        print('Model Loaded.')

        self.model.load_weights(file_path)

    def predict(self, image):

        # 预测样本分类

        img = image.resize((1, IMAGE_SIZE, IMAGE_SIZE, 3))

        img = image.astype('float32')

        img /= 255

        #归一化

        result = self.model.predict(img)

        print(result)

        # 概率

        result = self.model.predict_classes(img)

        print(result)

        # 0/1

        return result[0]

    def evaluate(self, dataset):

        # 测试样本准确率

        score = self.model.evaluate_generator(dataset.valid,steps=2)

        print("样本准确率%s: %.2f%%" % (self.model.metrics_names[1], score[1] * 100))

if __name__ == '__main__':

    dataset = Dataset()

    dataset.read()

    model = Model()

    model.load()

    model.train(dataset)

    model.evaluate(dataset)

    model.save()
keras实现简单性别识别(二分类问题)的更多相关文章
- keras框架下的深度学习(二)二分类和多分类问题
本文第一部分是对数据处理中one-hot编码的讲解,第二部分是对二分类模型的代码讲解,其模型的建立以及训练过程与上篇文章一样:在最后我们将训练好的模型保存下来,再用自己的数据放入保存下来的模型中进行分 ...
- 1.keras实现-->自己训练卷积模型实现猫狗二分类(CNN)
原数据集:包含 25000张猫狗图像,两个类别各有12500 新数据集:猫.狗 (照片大小不一样) 训练集:各1000个样本 验证集:各500个样本 测试集:各500个样本 1= 狗,0= 猫 # 将 ...
- 基于Keras的imdb数据集电影评论情感二分类
IMDB数据集下载速度慢,可以在我的repo库中找到下载,下载后放到~/.keras/datasets/目录下,即可正常运行.)中找到下载,下载后放到~/.keras/datasets/目录下,即可正 ...
- [DeeplearningAI笔记]卷积神经网络4.1-4.5 人脸识别/one-shot learning/Siamase网络/Triplet损失/将面部识别转化为二分类问题
4.4特殊应用:人脸识别和神经网络风格转换 觉得有用的话,欢迎一起讨论相互学习~Follow Me 4.1什么是人脸识别 Face verification人脸验证 VS face recogniti ...
- xgb, lgb, Keras, LR(二分类、多分类代码)
preprocess # 通用的预处理框架 import pandas as pd import numpy as np import scipy as sp # 文件读取 def read_csv_ ...
- C++开发人脸性别识别教程(16)——视频人脸性别识别
在之前的博文中我们已经可以顺利驱动摄像头来採集源图像.在这篇博文中将正式为其加入性别识别的代码,实现摄像头视频的人脸性别识别. 一.人脸检測 在得到摄像头採集的源图像之后,首先要做的就是对其进行人脸检 ...
- C++开发人脸性别识别教程(5)——通过FaceRecognizer类实现性别识别
在之前的博客中已经攻克了人脸检測的问题,我们计划在这篇博客中介绍人脸识别.性别识别方面的相关实现方法. 事实上性别识别和人脸识别本质上是相似的,由于这里仅仅是一个简单的MFC开发,主要工作并不在算法研 ...
- 基于深度学习的人脸性别识别系统(含UI界面,Python代码)
摘要:人脸性别识别是人脸识别领域的一个热门方向,本文详细介绍基于深度学习的人脸性别识别系统,在介绍算法原理的同时,给出Python的实现代码以及PyQt的UI界面.在界面中可以选择人脸图片.视频进行检 ...
- 基于OpenCV性别识别
叙述性说明 所谓的性别识别推断检测到的面部是男性还是女性.它是一个二值分类问题. 识别算法可以用于SVM,BP神经网络.LDA,PCA,PCA+LDA等等.OpenCV官网给出的文档是基于Fisher ...
随机推荐
- 新知识:JQuery语法基础与操作
jQuery是一个快速.简洁的JavaScript框架,是继Prototype之后又一个优秀的JavaScript代码库(或JavaScript框架).jQuery设计的宗旨是"write ...
- python---内置函数,匿名函数,嵌套函数,高阶函数,序列化
函数简单说明 # 函数即"变量" # 高阶函数 # a.把一个函数名当做实参传给另一个函数(在不修改被装饰函数的源代码的情况下,为其添加功能) # b.返回值中包含函数名(不修改函 ...
- 关于Resin SSL支持的两个问题
1.Resin的OpenSLL支持功能只有收费Pro版才支持,这一点,只有你做好配置,测试的时候才会在提示中发现,文档里没有说明. 2.它的官方文档这部分有问题,第一个问题就是上面第一条没有说,第二个 ...
- AngularJS - 使用RequireJS还是Browserify?
http://www.html-js.com/article/2126 AngularJS - 使用RequireJS还是Browserify? AngularJS之所以吸引了很多开发者的关注,很大一 ...
- Python_单元测试
Stack.py class Stack: def __init__(self, size = 10): self._content = [] #使用列表存放栈的元素 self._size = siz ...
- Java 开发环境配置
window系统安装java 下载JDK 首先我们需要下载java开发工具包JDK,下载地址:http://www.oracle.com/technetwork/java/javase/downloa ...
- 深入浅出 TCP/IP 协议
TCP/IP 协议栈是一系列网络协议的总和,是构成网络通信的核心骨架,它定义了电子设备如何连入因特网,以及数据如何在它们之间进行传输.TCP/IP 协议采用4层结构,分别是应用层.传输层.网络层和链路 ...
- LR测试
LoadRunner种预测系统行性能负载测试工具通模拟千万用户实施并发负载及实性能监测式确认查找问题LoadRunner能够整企业架构进行测试通使用 LoadRunner企业能限度缩短测试间优化性能加 ...
- idea快捷
IntelliJ Idea 常用快捷键 列表(实战终极总结!!!!) 1. -----------自动代码-------- 常用的有fori/sout/psvm+Tab即可生成循环.System.ou ...
- Mysql服务启动与关闭
启动: 在cmd中输入 net start mysql 关闭: 在cmd中输入 net stop mysql