vue mock数据(模拟后台)
本文转载自:https://blog.csdn.net/benben513624/article/details/78562529
vue实现ajax获取后台数据是通过vue-resource,首先通过npm安装vue-resource
npm install vue-resource --save
安装完成以后,把vue-resource引入到main.js文件中
src/main.js
// The Vue build version to load with the `import` command

// (runtime-only or standalone) has been set in webpack.base.conf with an alias.

import Vue from 'vue'

import App from './App'

import router from './router'

import VueResource from 'vue-resource'

import Layout from './components/layout'

Vue.use(VueResource);

/* eslint-disable no-new */

new Vue({

  el: '#app',

  router,

  template: '<Layout/>',

  components: { Layout }

})
把vue-resource引入项目以后,就可以在任何组件里面直接用了
<template>

    <div class="index-wrap">

      <div class="index-left">

        <div class="index-left-block lastest-news">

          <h2>最新消息</h2>

          <ul>

            <li v-for="news in newsList">

              <a :href="news.url" class="new-item">{{news.title}}</a>

            </li>

          </ul>

        </div>

      </div>

      <div class="index-right">

      </div>

    </div>

</template>

<script type="text/ecmascript-6">

    export default{

      created(){

        this.$http.get('api/getNewsList').then((res)=>{  //可用post请求,this.$http.post('api/getNewsList',{'userId':123})

          console.log(res.data);

          this.newsList=res.data;

          console.log( this.newsList);

        },(err)=>{

          console.log(err);

        });

      },

        data(){

            return {

              newsList:[],

            }

        }

    }

</script>

<style scoped>

  .index-wrap{

    width: 1200px;

    margin:  auto;

    overflow: hidden;

    background: blue;

  }

  .index-left{

    float: left;

    width: 300px;

    text-align: left;

    background: red;

  }

  .index-right {

    float: left;

    width: 900px;

  }

  .index-left-block{

    margin: 15px;

    background: #fff;

    box-shadow:   1px #ddd;

  }

  .index-left-block .hr {

    margin-bottom: 20px;

    border-bottom: 1px solid #ddd;

  }

  .index-left-block h2 {

    background: #4fc08d;

    color: #fff;

    padding: 10px 15px;

    margin-bottom: 20px;

  }

  .index-left-block h3 {

    padding:  15px 5px 15px;

    font-weight: bold;

    color: #;

  }

  .index-left-block ul {

    padding: 10px 15px;

  }

  .index-left-block li {

    padding: 5px;

  }

  .hot-tag{

    background: red;

    color:#fff;

    font-size: 10px;

    border-radius: 10px;

  }

</style>
上面这个就是用vue-resource来进行数据请求的大体流程,作为前端,在开发的过程,遇到这种调用后端接口调试起来还是很麻烦的,我们要找后端的一个服务器,然后关联起来 ,或者把前端代码放上去,这样都是挺麻烦的,解决的办法就是前端放mock data,主要有两种方式:
(1)json-server模拟数据
使用json-server这个工具,可以虚构出后端接口对应的数据,然后在项目里发送特定的请求,就可以发请求拿到模拟的数据,首先npm安装
npm install json-server --save
然后在build/webpack.dev.conf.js中进行配置,参考json-server
'use strict'

const utils = require('./utils')

const webpack = require('webpack')

const config = require('../config')

const merge = require('webpack-merge')

const baseWebpackConfig = require('./webpack.base.conf')

const HtmlWebpackPlugin = require('html-webpack-plugin')

const FriendlyErrorsPlugin = require('friendly-errors-webpack-plugin')

const portfinder = require('portfinder')

const devWebpackConfig = merge(baseWebpackConfig, {

  module: {

    rules: utils.styleLoaders({ sourceMap: config.dev.cssSourceMap, usePostCSS: true })

  },

  // cheap-module-eval-source-map is faster for development

  devtool: config.dev.devtool,

  // these devServer options should be customized in /config/index.js

  devServer: {

    clientLogLevel: 'warning',

    historyApiFallback: true,

    hot: true,

    host: process.env.HOST || config.dev.host,

    port: process.env.PORT || config.dev.port,

    open: config.dev.autoOpenBrowser,

    overlay: config.dev.errorOverlay ? {

      warnings: false,

      errors: true,

    } : false,

    publicPath: config.dev.assetsPublicPath,

    proxy: config.dev.proxyTable,

    quiet: true, // necessary for FriendlyErrorsPlugin

    watchOptions: {

      poll: config.dev.poll,

    }

  },

  plugins: [

    new webpack.DefinePlugin({

      'process.env': require('../config/dev.env')

    }),

    new webpack.HotModuleReplacementPlugin(),

    new webpack.NamedModulesPlugin(), // HMR shows correct file names in console on update.

    new webpack.NoEmitOnErrorsPlugin(),

    // https://github.com/ampedandwired/html-webpack-plugin

    new HtmlWebpackPlugin({

      filename: 'index.html',

      template: 'index.html',

      inject: true

    }),

  ]

})

//这里是json-server配置信息

// json-server.js

const jsonServer = require('json-server')

const apiServer = jsonServer.create()

const apiRouter = jsonServer.router('db.json') //数据关联server,db.json与index.html同级

const middlewares = jsonServer.defaults()

apiServer.use(middlewares)

apiServer.use('/api',apiRouter)

apiServer.listen(, () => {                 //监听端口

  console.log('JSON Server is running')

})

module.exports = new Promise((resolve, reject) => {

  portfinder.basePort = process.env.PORT || config.dev.port

  portfinder.getPort((err, port) => {

    if (err) {

      reject(err)

    } else {

      // publish the new Port, necessary for e2e tests

      process.env.PORT = port

      // add port to devServer config

      devWebpackConfig.devServer.port = port

      // Add FriendlyErrorsPlugin

      devWebpackConfig.plugins.push(new FriendlyErrorsPlugin({

        compilationSuccessInfo: {

          messages: [`Your application is running here: http://${config.dev.host}:${port}`],

        },

        onErrors: config.dev.notifyOnErrors

        ? utils.createNotifierCallback()

        : undefined

      }))

      resolve(devWebpackConfig)

    }

  })

})
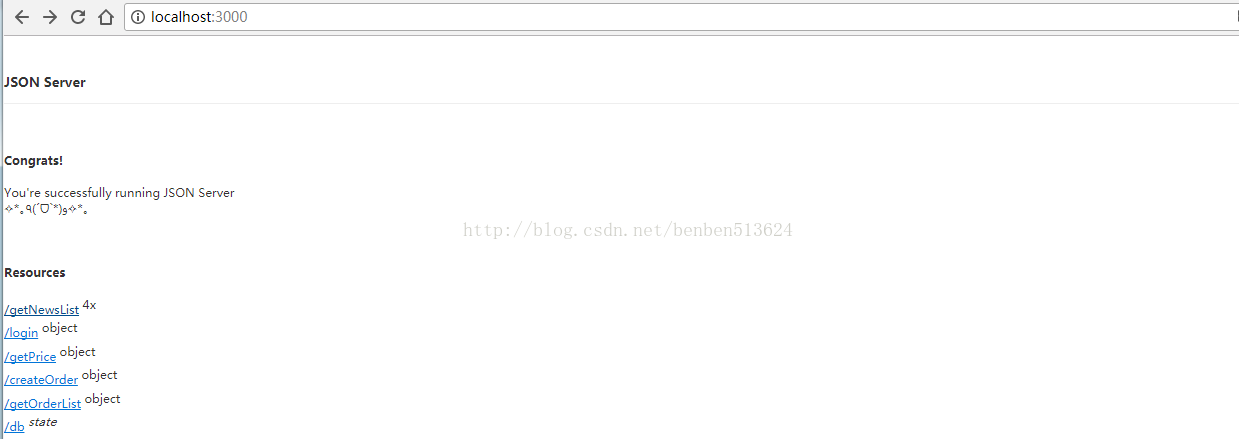
配置完成以后,npm run dev 启动,浏览器输入localhost:3000,出现如下图,说明配置成功
那么现在还有一个问题,我们代码的服务端接口是8080,json-server的服务端端口是3000,由于浏览器的同源策略问题,这样请求会存在一个跨域问题,所以这里要做一个服务端代理的配置,配置build/index.js中的proxyTable:
    host: 'localhost', // can be overwritten by process.env.HOST

    port: , // can be overwritten by process.env.HOST, if port is in use, a free one will be determined

    autoOpenBrowser: false,

    errorOverlay: true,

    notifyOnErrors: true,

    poll: false, // https://webpack.js.org/configuration/dev-server/#devserver-watchoptions-

    proxyTable:{

      '/api/':'http://localhost:3000/'

    },
这样就可以在localhost:8080下访问接口了

(2)express启动数据服务
在实际开发中,发现json-server只能用于get请求,不能进行post请求,在网上找的另外一种方法,express既能用于get请求,又能用于post请求,下面说一下express启动服务的配置方法:
'use strict'

const utils = require('./utils')

const webpack = require('webpack')

var express = require('express')

const config = require('../config')

const merge = require('webpack-merge')

const baseWebpackConfig = require('./webpack.base.conf')

const HtmlWebpackPlugin = require('html-webpack-plugin')

const FriendlyErrorsPlugin = require('friendly-errors-webpack-plugin')

const portfinder = require('portfinder')

const devWebpackConfig = merge(baseWebpackConfig, {

  module: {

    rules: utils.styleLoaders({ sourceMap: config.dev.cssSourceMap, usePostCSS: true })

  },

  // cheap-module-eval-source-map is faster for development

  devtool: config.dev.devtool,

  // these devServer options should be customized in /config/index.js

  devServer: {

    clientLogLevel: 'warning',

    historyApiFallback: true,

    hot: true,

    host: process.env.HOST || config.dev.host,

    port: process.env.PORT || config.dev.port,

    open: config.dev.autoOpenBrowser,

    overlay: config.dev.errorOverlay ? {

      warnings: false,

      errors: true,

    } : false,

    publicPath: config.dev.assetsPublicPath,

    proxy: config.dev.proxyTable,

    quiet: true, // necessary for FriendlyErrorsPlugin

    watchOptions: {

      poll: config.dev.poll,

    }

  },

  plugins: [

    new webpack.DefinePlugin({

      'process.env': require('../config/dev.env')

    }),

    new webpack.HotModuleReplacementPlugin(),

    new webpack.NamedModulesPlugin(), // HMR shows correct file names in console on update.

    new webpack.NoEmitOnErrorsPlugin(),

    // https://github.com/ampedandwired/html-webpack-plugin

    new HtmlWebpackPlugin({

      filename: 'index.html',

      template: 'index.html',

      inject: true

    }),

  ]

})

// json-server.js

//const jsonServer = require('json-server')

//const apiServer = jsonServer.create()

//const apiRouter = jsonServer.router('db.json')

//const middlewares = jsonServer.defaults()

//

//apiServer.use(middlewares)

//apiServer.use('/api',apiRouter)

//apiServer.listen(3000, () => {

//  console.log('JSON Server is running')

//})

//express 配置server

var apiServer = express()

var bodyParser = require('body-parser')

apiServer.use(bodyParser.urlencoded({ extended: true }))

apiServer.use(bodyParser.json())

var apiRouter = express.Router()

var fs = require('fs')

apiRouter.route('/:apiName') //接口路径

  .all(function (req, res) {

    fs.readFile('./db.json', 'utf8', function (err, data) {  //读取接口文件

      if (err) throw err

      var data = JSON.parse(data)

      if (data[req.params.apiName]) {

        res.json(data[req.params.apiName])

      }

      else {

        res.send('no such api name')

      }

    })

  })

apiServer.use('/api', apiRouter);

apiServer.listen(, function (err) {

  if (err) {

    console.log(err)

    return

  }

  console.log('Listening at http://localhost:' +  + '\n')

})

module.exports = new Promise((resolve, reject) => {

  portfinder.basePort = process.env.PORT || config.dev.port

  portfinder.getPort((err, port) => {

    if (err) {

      reject(err)

    } else {

      // publish the new Port, necessary for e2e tests

      process.env.PORT = port

      // add port to devServer config

      devWebpackConfig.devServer.port = port

      // Add FriendlyErrorsPlugin

      devWebpackConfig.plugins.push(new FriendlyErrorsPlugin({

        compilationSuccessInfo: {

          messages: [`Your application is running here: http://${config.dev.host}:${port}`],

        },

        onErrors: config.dev.notifyOnErrors

        ? utils.createNotifierCallback()

        : undefined

      }))

      resolve(devWebpackConfig)

    }

  })

})
在浏览器中输入接口地址,如下:

vue mock数据(模拟后台)的更多相关文章
- Vue+Mock.js模拟登录和表格的增删改查
有三类人不适合此篇文章: "喜欢站在道德制高点的圣母婊" -- 适合去教堂 "无理取闹的键盘侠" -- 国际新闻版块欢迎你去 "有一定基础但又喜欢逼逼 ...
- vue mock数据设置
1.新建mock文件夹 2.添加你需要的数据例如新建商品表goods.json { "status":"0", "result":[ { & ...
- vue 项目初始化、mock数据以及安装less
vue 创建一个项目 1.首先建立一个空文件夹,然后将这个文件夹要放到码云或者其他代码管理平台. 例如码云: 在码云上建立一个项目,然后在控制台进入这文件夹执行 git clone 地址是码云上创建的 ...
- 深入浅出的webpack4构建工具--webpack4+vue+vuex+mock模拟后台数据(十九)
mock的官网文档 mock官网 关于mockjs的优点,官网这样描述它:1)可以前后端分离.2)增加单元测试的真实性(通过随机数据,模拟各种场景).3)开发无侵入(不需要修改既有代码,就可以拦截 A ...
- vue mock(模拟后台数据) +axios 简单实例(二)
需装上axios,build文件夹中webpack.dev.conf.js文件添加上vue mock配置的东东, 如,继(一) //组件<template> <div> &l ...
- Vue笔记:使用 mock.js 模拟数据
在我们的项目实际开发过程中,后端的接口往往是较晚才会提供出来,并且还要写接口文档,如果前端的开发都要等到接口开发完成才开始就非常影响项目整体开发进度了,mock.js 的出现使前后端分离并行开发成为可 ...
- mock数据(模拟后台数据)
mock数据(模拟后台数据) - Emily恩 - 博客园 https://www.cnblogs.com/enboke/p/vue.html Mock.js http://mockjs.com/ 前 ...
- vue项目中使用mockjs+axios模拟后台数据返回
自己写练手项目的时候常常会遇到一个问题,没有后台接口,获取数据总是很麻烦,于是在网上找了下,发现一个挺好用的模拟后台接口数据的工具:mockjs.现在把自己在项目中使用的方法贴出来 先看下项目的目 ...
- vue从mock数据过渡到使用后台接口
说明: 最近在搭建一个前端使用vue-element-admin,后端使用springBoot的项目. 由于vue-element-admin使用的是mock的模拟数据跑起来的项目,所以在开发过程中难 ...
随机推荐
- CentOS下Java的安装与环境配置
网上的文章很多,但我还是不知道下次需要看谁的,或是给朋友推荐谁的,索性我都整理出来,方便下次需要的时候能很快的看到或是给朋友链接.两种安装方式:解压安装和包安装 1.安装前检查: 因为安 ...
- xstart使用方法
版权声明:本文为博主原创文章,遵循 CC 4.0 by-sa 版权协议,转载请附上原文出处链接和本声明.本文链接:https://blog.csdn.net/YABIGNSHI/article/det ...
- upc组队赛16 GCDLCM 【Pollard_Rho大数质因数分解】
GCDLCM 题目链接 题目描述 In FZU ACM team, BroterJ and Silchen are good friends, and they often play some int ...
- Java业务代理模式~
业务代理模式用于解耦表示层和业务层. 它基本上用于减少表示层代码中的业务层代码的通信或远程查找功能.在业务层有以下实体. 客户端(Client) - 表示层代码可以是JSP,servlet或UI ja ...
- git提交时,仓库是空的,本地有源码。
应该打开cmd 归到项目路径 然后输入git push -u origin master -f 是把本地的项目强制推送到空的仓库 git init (在当前文件夹下初始化一个git仓库) git ...
- 插件化框架解读之android系统服务实现原理(五)
阿里P7移动互联网架构师进阶视频(每日更新中)免费学习请点击:https://space.bilibili.com/474380680 一.系统服务提供方式 1.我们平时最常见的系统服务使用方式 Wi ...
- 《零基础学习Python制作ArcGIS自定义工具》课程简介
Python for ArcGIS Python for ArcGIS是借助Python语言实现ArcGIS自动化行为的综合,它不止是如课程标题所述的“制作ArcGIS自定义工具”,还包括使用Pyth ...
- Mybatis+Springmvc+Spring整合常用的配置文件
1.创建web项目 2.导入mabatis spring springnvc 需要的jar包 3.创建mybatis,spring,springmvc的配置文件 (1)web.xml配置文件 < ...
- 大哥带我走渗透ii--时间盲注,布尔盲注
5/27 基于布尔的盲注 我连题目都看不懂555,先去补充一点知识.https://blog.csdn.net/weixin_40709439/article/details/81355856 返回的 ...
- 工作中SQL语句的优化
在我们的工作中,数据是很多的,这是我常见问题遇到的问题做了简短总结. 1.对查询进行优化,应尽量避免全表扫描,首先应考虑在 where 及 order by 涉及的列上建立索引. 2.应尽量避免在 w ...