使用CIFAR-10样本数据集测试卷积神经网络(ConvolutionalNeuralNetwork,CNN)
第一次将例程跑起来了,有些兴趣。
参考的是如下URL:
http://www.yidianzixun.com/article/0KNz7OX1
本来是比较Keras和Tensorflow的,我现在的水平,只能是跑通一个算一个啦。
因为要比较CPU和GPU的性能,两个DOCKER如下:
tensorflow/tensorflow:1.12.0-gpu-py3
tensorflow/tensorflow:1.12.0-py3
CIFAR-10的数据自已从网上下载,所以出现如下错误时,要自己更改成一个内网URL地址:
Traceback (most recent call last):
  File , in <module>
    split = tf.keras.datasets.cifar10.load_data()
  File , in load_data
    path = get_file(dirname, origin=origin, untar=True)
  File , in get_file
    raise Exception(error_msg.format(origin, e.errno, e.reason))
Exception: URL fetch failure on https://www.cs.toronto.edu/~kriz/cifar-10-python.tar.gz: None -- [Errno -3] Temporary failure in name resolution
/usr/local/lib/python3.5/dist-packages/tensorflow/python/keras/datasets/cifar10.py这个文件40行是一个网址,更改一下就OK了。一,modle层实现代码pyimagesearch/minivggnettf.py
# import the necessary packages
import tensorflow as tf

class MiniVGGNetTF:
    @staticmethod
    def build(width, height, depth, classes):
        # initialize the input shape and channel dimension, assuming
        # TensorFlow/channels-last ordering
        inputShape = (height, width, depth)
        chanDim = -1

        # define the model input
        inputs = tf.keras.layers.Input(shape=inputShape)

        # first (CONV => RELU) * 2 => POOL layer set
        x = tf.keras.layers.Conv2D(32, (3, 3), padding="same")(inputs)
        x = tf.keras.layers.Activation("relu")(x)
        x = tf.keras.layers.BatchNormalization(axis=chanDim)(x)
        x = tf.keras.layers.Conv2D(32, (3, 3), padding="same")(x)
        x = tf.keras.layers.Lambda(lambda t: tf.nn.crelu(x))(x)
        x = tf.keras.layers.BatchNormalization(axis=chanDim)(x)
        x = tf.keras.layers.MaxPooling2D(pool_size=(2, 2))(x)
        x = tf.keras.layers.Dropout(0.25)(x)

        # second (CONV => RELU) * 2 => POOL layer set
        x = tf.keras.layers.Conv2D(64, (3, 3), padding="same")(x)
        x = tf.keras.layers.Lambda(lambda t: tf.nn.crelu(x))(x)
        x = tf.keras.layers.BatchNormalization(axis=chanDim)(x)
        x = tf.keras.layers.Conv2D(64, (3, 3), padding="same")(x)
        x = tf.keras.layers.Lambda(lambda t: tf.nn.crelu(x))(x)
        x = tf.keras.layers.BatchNormalization(axis=chanDim)(x)
        x = tf.keras.layers.MaxPooling2D(pool_size=(2, 2))(x)
        x = tf.keras.layers.Dropout(0.25)(x)

        # first (and only) set of FC => RELU layers
        x = tf.keras.layers.Flatten()(x)
        x = tf.keras.layers.Dense(512)(x)
        x = tf.keras.layers.Lambda(lambda t: tf.nn.crelu(x))(x)
        x = tf.keras.layers.BatchNormalization()(x)
        x = tf.keras.layers.Dropout(0.5)(x)

        # softmax classifier
        x = tf.keras.layers.Dense(classes)(x)
        x = tf.keras.layers.Activation("softmax")(x)

        # create the model
        model = tf.keras.models.Model(inputs, x, name="minivggnet_tf")

        # return the constructed network architecture
        return model
二,数据训练
train_network_tf.py
# USAGE
# python train_network_tf.py
# set the matplotlib backend so figures can be saved in the background
import matplotlib
matplotlib.use("Agg")
# import the necessary packages
from pyimagesearch.minivggnettf import MiniVGGNetTF
from sklearn.preprocessing import LabelBinarizer
from sklearn.metrics import classification_report
import matplotlib.pyplot as plt
import tensorflow as tf
import numpy as np
import argparse
# construct the argument parser and parse the arguments
ap = argparse.ArgumentParser()
ap.add_argument("-p", "--plot", type=str, default="plot_tf.png",
help="path to output loss/accuracy plot")
args = vars(ap.parse_args())
# load the training and testing data, then scale it into the
# range [0, 1]
print("[INFO] loading CIFAR-10 data...")
split = tf.keras.datasets.cifar10.load_data()
((trainX, trainY), (testX, testY)) = split
trainX = trainX.astype("float") / 255.0
testX = testX.astype("float") / 255.0
# convert the labels from integers to vectors
lb = LabelBinarizer()
trainY = lb.fit_transform(trainY)
testY = lb.transform(testY)
# initialize the label names for the CIFAR-10 dataset
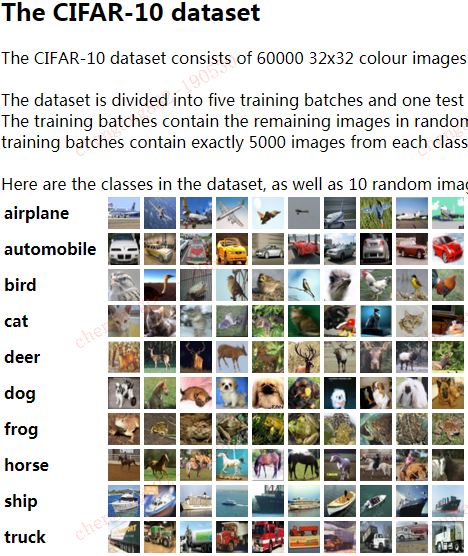
labelNames = ["airplane", "automobile", "bird", "cat", "deer",
"dog", "frog", "horse", "ship", "truck"]
# initialize the initial learning rate, total number of epochs to
# train for, and batch size
INIT_LR = 0.01
EPOCHS = 5
BS = 32
# initialize the optimizer and model
print("[INFO] compiling model...")
opt = tf.keras.optimizers.SGD(lr=INIT_LR, decay=INIT_LR / EPOCHS)
model = MiniVGGNetTF.build(width=32, height=32, depth=3,
classes=len(labelNames))
model.compile(loss="categorical_crossentropy", optimizer=opt,
metrics=["accuracy"])
# train the network
print("[INFO] training network for {} epochs...".format(EPOCHS))
H = model.fit(trainX, trainY, validation_data=(testX, testY),
batch_size=BS, epochs=EPOCHS, verbose=1)
# evaluate the network
print("[INFO] evaluating network...")
predictions = model.predict(testX, batch_size=32)
print(classification_report(testY.argmax(axis=1),
predictions.argmax(axis=1), target_names=labelNames))
# plot the training loss and accuracy
plt.style.use("ggplot")
plt.figure()
plt.plot(np.arange(0, EPOCHS), H.history["loss"], label="train_loss")
plt.plot(np.arange(0, EPOCHS), H.history["val_loss"], label="val_loss")
plt.plot(np.arange(0, EPOCHS), H.history["acc"], label="train_acc")
plt.plot(np.arange(0, EPOCHS), H.history["val_acc"], label="val_acc")
plt.title("Training Loss and Accuracy on Dataset")
plt.xlabel("Epoch #")
plt.ylabel("Loss/Accuracy")
plt.legend(loc="lower left")
plt.savefig(args["plot"])
三,结果对比:
当使用GPU吧,一个批次完成需要30秒上下。
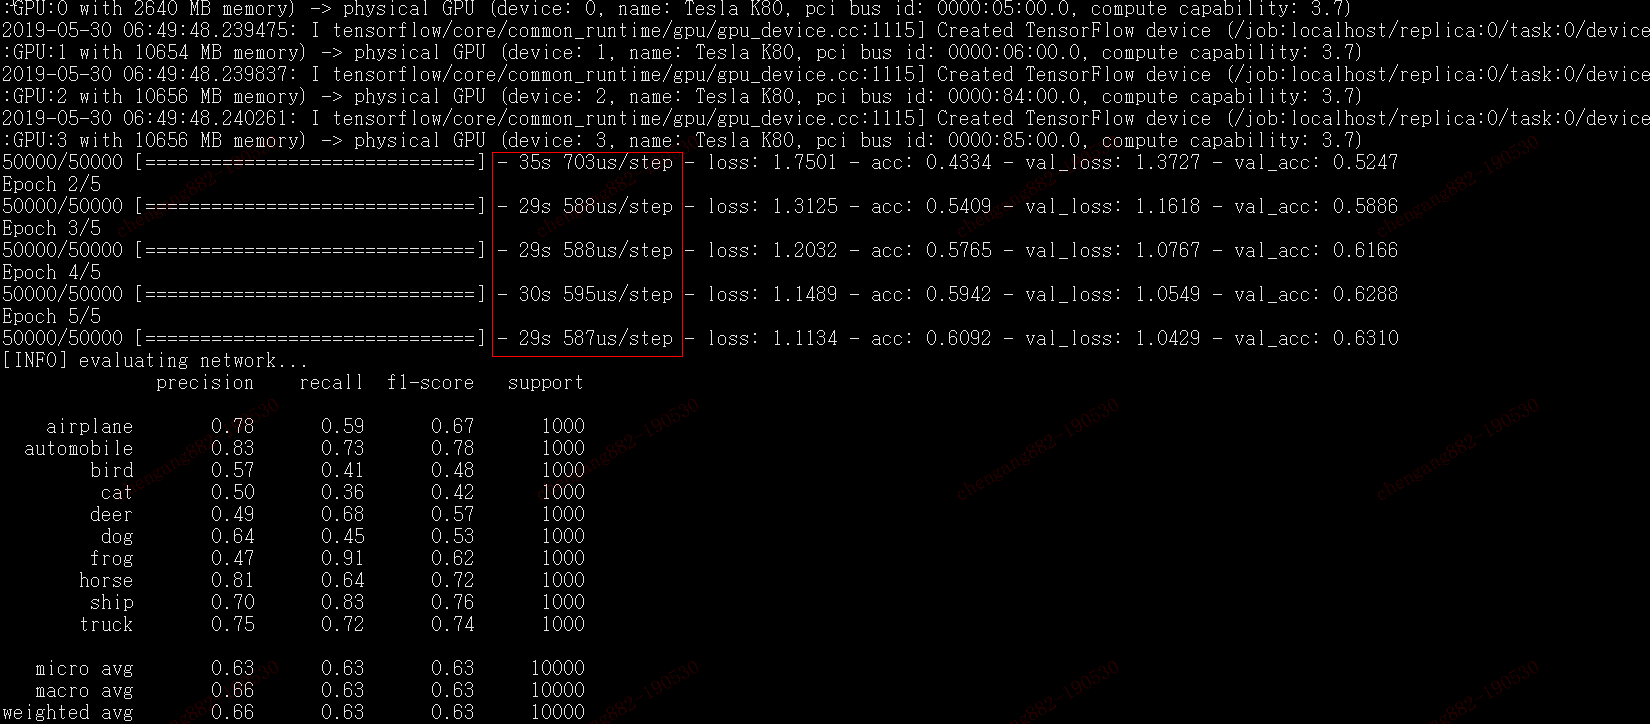
而只使用CPU的话,一个批次完成则需要330秒以上。

效率提高10倍以上啊。
使用CIFAR-10样本数据集测试卷积神经网络(ConvolutionalNeuralNetwork,CNN)的更多相关文章
- MNIST数据集上卷积神经网络的简单实现(使用PyTorch)
设计的CNN模型包括一个输入层,输入的是MNIST数据集中28*28*1的灰度图 两个卷积层, 第一层卷积层使用6个3*3的kernel进行filter,步长为1,填充1.这样得到的尺寸是(28+1* ...
- Tensorflow之卷积神经网络(CNN)
前馈神经网络的弊端 前一篇文章介绍过MNIST,是采用的前馈神经网络的结构,这种结构有一个很大的弊端,就是提供的样本必须面面俱到,否则就容易出现预测失败.如下图: 同样是在一个图片中找圆形,如果左边为 ...
- TensorFlow.NET机器学习入门【7】采用卷积神经网络(CNN)处理Fashion-MNIST
本文将介绍如何采用卷积神经网络(CNN)来处理Fashion-MNIST数据集. 程序流程如下: 1.准备样本数据 2.构建卷积神经网络模型 3.网络学习(训练) 4.消费.测试 除了网络模型的构建, ...
- Deep learning with Theano 官方中文教程(翻译)(四)—— 卷积神经网络(CNN)
供大家相互交流和学习,本人水平有限,若有各种大小错误,还请巨牛大牛小牛微牛们立马拍砖,这样才能共同进步!若引用译文请注明出处http://www.cnblogs.com/charleshuang/. ...
- 卷积神经网络总结CNN【转载】
卷积神经网络CNN总结 从神经网络到卷积神经网络(CNN)我们知道神经网络的结构是这样的: 那卷积神经网络跟它是什么关系呢?其实卷积神经网络依旧是层级网络,只是层的功能和形式做了变化,可以说是传统神经 ...
- 深度学习项目——基于卷积神经网络(CNN)的人脸在线识别系统
基于卷积神经网络(CNN)的人脸在线识别系统 本设计研究人脸识别技术,基于卷积神经网络构建了一套人脸在线检测识别系统,系统将由以下几个部分构成: 制作人脸数据集.CNN神经网络模型训练.人脸检测.人脸 ...
- 跟我学算法-图像识别之图像分类(上)(基础神经网络, 卷积神经网络(CNN), AlexNet,NIN, VGG)
1.基础神经网络: 输入向量x,权重向量w, 偏置标量b, 激活函数sigmoid(增加非线性度) 优化手段: 梯度下降优化, BP向后传播(链式规则) 梯度下降优化: 1. 使用得目标函数是交叉熵 ...
- 人脸检测及识别python实现系列(4)——卷积神经网络(CNN)入门
人脸检测及识别python实现系列(4)——卷积神经网络(CNN)入门 上篇博文我们准备好了2000张训练数据,接下来的几节我们将详细讲述如何利用这些数据训练我们的识别模型.前面说过,原博文给出的训练 ...
- 理解NLP中的卷积神经网络(CNN)
此篇文章是Denny Britz关于CNN在NLP中应用的理解,他本人也曾在Google Brain项目中参与多项关于NLP的项目. · 翻译不周到的地方请大家见谅. 阅读完本文大概需要7分钟左右的时 ...
随机推荐
- [LeetCode] 290. Word Pattern 单词模式
Given a pattern and a string str, find if str follows the same pattern. Here follow means a full mat ...
- [LeetCode] 489. Robot Room Cleaner 扫地机器人
Given a robot cleaner in a room modeled as a grid. Each cell in the grid can be empty or blocked. Th ...
- 转载:Python Web开发最难懂的WSGI协议,到底包含哪些内容?
原文:PSC推出的第二篇文章-<Python Web开发最难懂的WSGI协议,到底包含哪些内容?>-2017.9.27 我想大部分Python开发者最先接触到的方向是WEB方向(因为总是有 ...
- DB2执行计划分析
多表连接的三种方式详解 hash join.merge join. nested loop 项目中的SQL执行效率太低,就用执行计划看一下执行SQL,看不懂,百度一下,纪录下来: 大多数人从来没有听说 ...
- Survey of single-target visual tracking methods based on online learning 翻译
基于在线学习的单目标跟踪算法调研 摘要 视觉跟踪在计算机视觉和机器人学领域是一个流行和有挑战的话题.由于多种场景下出现的目标外貌和复杂环境变量的改变,先进的跟踪框架就有必要采用在线学习的原理.本论文简 ...
- [转]NGINX-检测客户端是通过电脑还是移动设备访问的,将请求重定向到适配的WEB站点
原文地址:https://blog.51cto.com/10978134/2163757 检测客户端是通过电脑还是移动设备访问的,将请求重定向到适配的WEB站点 此配置方法由Detect Mobile ...
- LeetCode 686. 重复叠加字符串匹配(Repeated String Match)
686. 重复叠加字符串匹配 686. Repeated String Match 题目描述 给定两个字符串 A 和 B,寻找重复叠加字符串 A 的最小次数,使得字符串 B 成为叠加后的字符串 A 的 ...
- docker(三):服务services
docker中services位于container上面,services可以控制image的运行方式,包括image运行时所需资源的大小 创建yml文件 yml文件定义了容器运行时的行为.我们先创建 ...
- GC收集器
新生代收集器 Serial New 单线程收集器,工作时必须暂停其他线程: 简单高效,没有线程交互开销: 基于复制算法: Parallel New 对Serial的改进,多线程: CPU数量<4 ...
- quartz2.3.0(九)job任务监听器,监听任务执行前、后、取消手动处理方法
job1任务类 package org.quartz.examples.example9; import java.util.Date; import org.quartz.Job; import o ...