bitmap-setBounds方法参数研究
对于如下的代码,一直有点不明白它具体每一步操作的影响。今天就稍微研究下。代码如下
xml代码
<RelativeLayout xmlns:android="http://schemas.android.com/apk/res/android"

    xmlns:tools="http://schemas.android.com/tools"

    xmlns:internal="http://schemas.android.com/apk/prv/res/android"

    android:layout_width="match_parent"

    android:layout_height="match_parent"

    android:background="#555555"

    android:paddingBottom="@dimen/activity_vertical_margin"

    android:paddingLeft="@dimen/activity_horizontal_margin"

    android:paddingRight="@dimen/activity_horizontal_margin"

    android:paddingTop="@dimen/activity_vertical_margin"

    tools:context="com.example.test1.MainActivity" >

    <LinearLayout

        android:layout_width="wrap_content"

        android:layout_height="wrap_content"

        android:layout_centerInParent="true"

        internal:layout_maxHeight="20dp"

        internal:layout_maxWidth="100dp"

        internal:layout_minHeight="20dp"

        android:orientation="vertical" >

        <ImageButton

            android:id="@+id/tv"

            android:layout_width="150dp"

            android:layout_height="150dp"

            android:background="#0000ff" />

        <ImageButton

            android:id="@+id/tv2"

            android:layout_width="150dp"

            android:layout_height="150dp"

            android:layout_marginTop="20dp"

            android:background="#ff0000" />

        <ImageButton

            android:id="@+id/tv3"

            android:layout_width="150dp"

            android:layout_height="150dp"

            android:layout_marginTop="20dp"

            android:background="#ff0000" />

    </LinearLayout>

</RelativeLayout>
activity中的代码如下
package com.example.testcode;

import android.app.Activity;

import android.graphics.Bitmap;

import android.graphics.Canvas;

import android.graphics.PixelFormat;

import android.graphics.drawable.BitmapDrawable;

import android.graphics.drawable.Drawable;

import android.os.Bundle;

import android.util.Log;

import android.view.Menu;

import android.view.MenuItem;

import android.widget.ImageButton;

import android.widget.ImageView;

public class MainActivity extends Activity {

    ImageButton tView;

    ImageButton tView2;

    ImageButton tView3;

    @Override

    protected void onCreate(Bundle savedInstanceState) {

        super.onCreate(savedInstanceState);

        setContentView(R.layout.activity_main);

        tView = (ImageButton) findViewById(R.id.tv);

        tView3 = (ImageButton) findViewById(R.id.tv3);

        Drawable drawable = getResources().getDrawable(R.drawable.test);

        int w = drawable.getIntrinsicWidth();

        int h = drawable.getIntrinsicHeight();

        Log.e("123", "drawable:w==" + w + "|||" + "drawable:h===" + h);

        Bitmap bitmap = ((BitmapDrawable) drawable).getBitmap();

        w = bitmap.getWidth();

        h = bitmap.getHeight();

        Log.e("123", "bitmap:w==" + w + "|||" + "bitmap:h===" + h);

        tView.setImageDrawable(new BitmapDrawable(getResources(), bitmap));

        tView3.setImageDrawable(getResources().getDrawable(

                R.drawable.test));

        tView2 = (ImageButton) findViewById(R.id.tv2);

        Drawable drawable2 = getResources().getDrawable(R.drawable.test);

        int w2 = drawable2.getIntrinsicWidth();

        int h2 = drawable2.getIntrinsicHeight();

        Log.e("123", "drawable2:w2==" + w2 + "|||" + "drawable2:h2===" + h2);

        Bitmap.Config config = drawable.getOpacity() != PixelFormat.OPAQUE ? Bitmap.Config.ARGB_8888

                : Bitmap.Config.RGB_565;

        Bitmap bitmap2 = Bitmap.createBitmap(150, 150, config);

        w2 = bitmap2.getWidth();

        h2 = bitmap2.getHeight();

        Log.e("123", "bitmap2:w2==" + w2 + "|||" + "bitmap2:h2===" + h2);

        Canvas canvas = new Canvas(bitmap2);

        drawable2.setBounds(50, 50, w2 + 50, h2 + 50);

        drawable2.draw(canvas);

        w2 = drawable2.getIntrinsicWidth();

        h2 = drawable2.getIntrinsicHeight();

        Log.e("123", "drawable3:w2==" + w2 + "|||" + "drawable3:h2===" + h2);

        tView2.setImageDrawable(new BitmapDrawable(getResources(), bitmap2));

    }

    @Override

    public boolean onCreateOptionsMenu(Menu menu) {

        // Inflate the menu; this adds items to the action bar if it is present.

        getMenuInflater().inflate(R.menu.main, menu);

        return true;

    }

    @Override

    public boolean onOptionsItemSelected(MenuItem item) {

        // Handle action bar item clicks here. The action bar will

        // automatically handle clicks on the Home/Up button, so long

        // as you specify a parent activity in AndroidManifest.xml.

        int id = item.getItemId();

        if (id == R.id.action_settings) {

            return true;

        }

        return super.onOptionsItemSelected(item);

    }

}
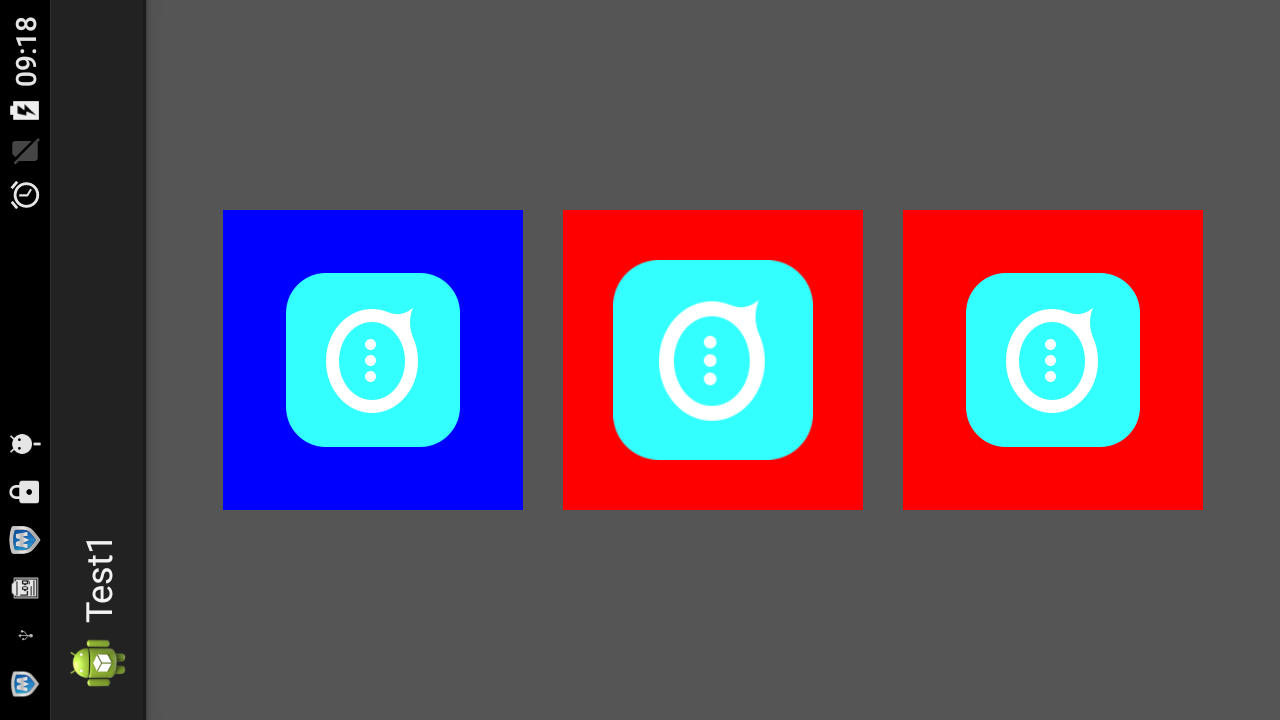
图片

1)对于上面的代码,打印log如下
  1 01-01 09:12:10.867: E/123(3373): drawable:w==174|||drawable:h===174
  2 01-01 09:12:10.867: E/123(3373): bitmap:w==174|||bitmap:h===174
  3 01-01 09:12:10.869: E/123(3373): drawable2:w2==174|||drawable2:h2===174
  4 01-01 09:12:10.870: E/123(3373): bitmap2:w2==150|||bitmap2:h2===150
  5 01-01 09:12:10.872: E/123(3373): drawable3:w2==174|||drawable3:h2===174
效果图如下

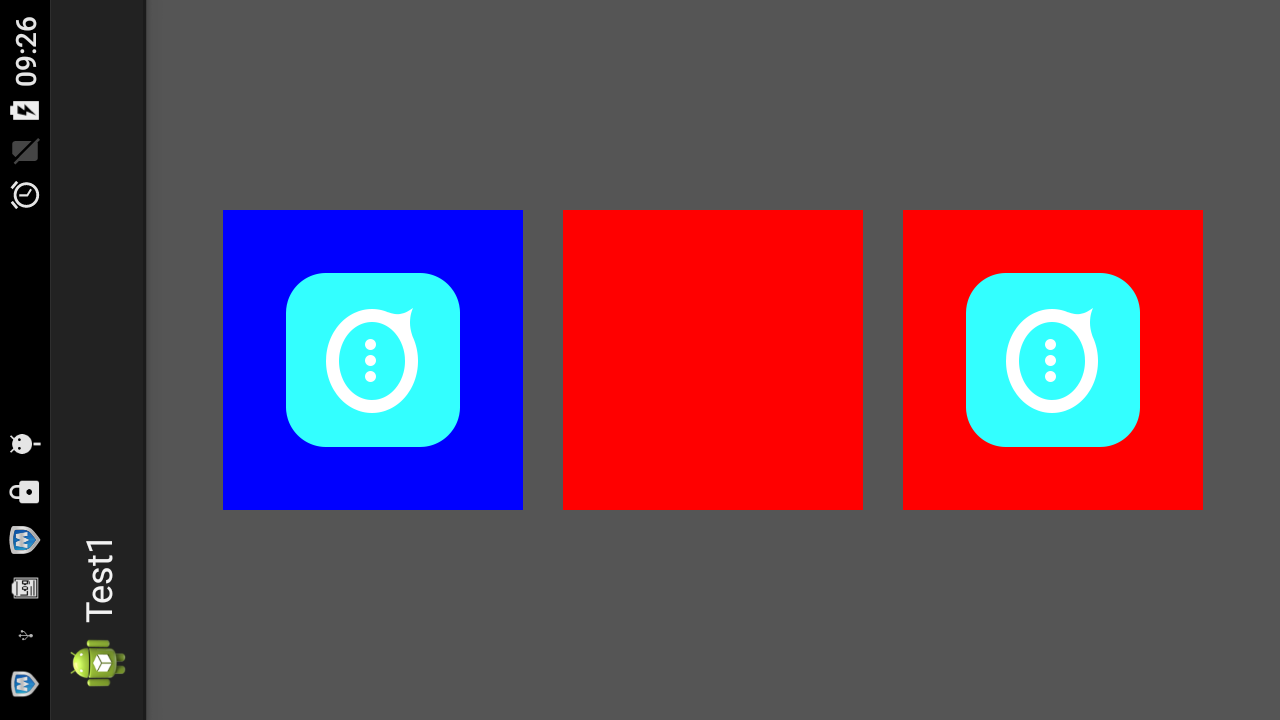
2)现在我们研究
drawable2.setBounds(0, 0, w2, h2);
Bitmap bitmap2 = Bitmap.createBitmap(150, 150, config);
这个属性的影响
修改1
Bitmap bitmap2 = Bitmap.createBitmap(200, 200, config);
drawable2.setBounds(0, 0, w2, h2);
结果
  1 01-01 09:16:18.529: E/123(3986): drawable:w==174|||drawable:h===174
  2 01-01 09:16:18.530: E/123(3986): bitmap:w==174|||bitmap:h===174
  3 01-01 09:16:18.531: E/123(3986): drawable2:w2==174|||drawable2:h2===174
  4 01-01 09:16:18.532: E/123(3986): bitmap2:w2==200|||bitmap2:h2===200
  5 01-01 09:16:18.536: E/123(3986): drawable3:w2==174|||drawable3:h2===174
修改2
drawable2.setBounds(100, 100, w2, h2);
结果
  1 01-01 09:16:18.529: E/123(3986): drawable:w==174|||drawable:h===174
  2 01-01 09:16:18.530: E/123(3986): bitmap:w==174|||bitmap:h===174
  3 01-01 09:16:18.531: E/123(3986): drawable2:w2==174|||drawable2:h2===174
  4 01-01 09:16:18.532: E/123(3986): bitmap2:w2==200|||bitmap2:h2===200
  5 01-01 09:16:18.536: E/123(3986): drawable3:w2==174|||drawable3:h2===174

现在证明了,这个方法,对于原来的图片是没有任何的影响的。
修改3
drawable2.setBounds(100, 100, 99, 99);
修改4)
drawable2.setBounds(100, 100, 120, 120);

修改5)
drawable2.setBounds(100, 100, 200, 200);

修改7)
drawable2.setBounds(100, 100, 220, 220);

结论明了了
1.createBitmap(w,h,config)的w,h决定了一个矩形区域。我们的setbounds 的显示区域就在这里
2.setbounds(left,top,right,bottom),它是在bitmap的区域里面画一个矩形,我们的drawable就显示在这个矩形里。
这个矩形的正对角线端点坐标为(left,top),(right,bottom)

3.我们图形的可见区域就是这两个矩形的交集。所以说,
(1)如果我们的bound矩形全部可见的话,right>left,bottom>left,而且这个矩形整个的都要在bitmap矩形内
(2)如果bound矩形超出了bitmap矩形,那么超出部分就不会再显示了
bitmap-setBounds方法参数研究的更多相关文章
- Java基础学习笔记十二 类、抽象类、接口作为方法参数和返回值以及常用API
不同修饰符使用细节 常用来修饰类.方法.变量的修饰符 public 权限修饰符,公共访问, 类,方法,成员变量 protected 权限修饰符,受保护访问, 方法,成员变量 默认什么也不写 也是一种权 ...
- Python进阶----反射(四个方法),函数vs方法(模块types 与 instance()方法校验 ),双下方法的研究
Python进阶----反射(四个方法),函数vs方法(模块types 与 instance()方法校验 ),双下方法的研究 一丶反射 什么是反射: 反射的概念是由Smith在1982年首次提出的 ...
- JAVA8初探-让方法参数具备行为能力并引入Lambda表达式
关于JAVA8学习的意义先来贴一下某网站上的对它的简单介绍:“Java 8可谓Java语言历史上变化最大的一个版本,其承诺要调整Java编程向着函数式风格迈进,这有助于编写出更为简洁.表达力更强,并且 ...
- 关于PHP的方法参数类型约束
在之前的文章PHP方法参数的那点事儿中,我们讲过关于PHP方法参数的一些小技巧.今天,我们带来的是更加深入的研究一下PHP中方法的参数类型. 在PHP5之后,PHP正式引入了方法参数类型约束.也就是如 ...
- 【.net 深呼吸】细说CodeDom(6):方法参数
本文老周就给大伙伴们介绍一下方法参数代码的生成. 在开始之前,先补充一下上一篇烂文的内容.在上一篇文章中,老周检讨了 MemberAttributes 枚举的用法,老周此前误以为该枚举不能进行按位操作 ...
- Eclipse中自动提示的方法参数都是arg0,arg1的解决方法
Eclipse中自动提示的方法参数都是arg0,arg1,就不能根据参数名来推断参数的含义,非常不方便. 解决方法:Preferences->Java->Installed JREs,发现 ...
- java中方法参数的一些总结(1)
1.问题说明 在C++中,函数调用时有传值调用和传址调用两种方式,但在Java中只有传值调用一种方式.Java中的方法参数为那几种基本数据类型的情况跟C++中一样,传入的只是变量的拷贝. ...
- php课程---Windows.open()方法参数详解
Window.open()方法参数详解 1, 最基本的弹出窗口代码 window.open('page.html'); 2, 经过设置后的弹出窗口 window.open('page.html ...
- Scala正则和抽取器:解析方法参数
在<正则表达式基础知识>中概括了正则表达式的基础知识, 本文讲解如何使用正则表达式解析方法参数,从而可以根据 DAO 自动生成 Service. 在做 Java 项目时,常常要根据 DAO ...
随机推荐
- Eight hdu 1043 poj 1077
Description The 15-puzzle has been around for over 100 years; even if you don't know it by that name ...
- @Html.Raw() 方法输出带有html标签的字符串
@Html.Raw() 方法输出带有html标签的字符串,如:@Html.Raw("<div style='color:red'>输出字符串</div>") ...
- python学习二,字符串常用操作
字符串可以说是在日常开发中应用最广泛的了,现在来总结下有关python中有关字符串一些常用操作 首先我们声明一个字符串变量 str = "hello world" 下面我们来依次介 ...
- Swift学习笔记(11)--类与结构体
类与结构是编程人员在代码中会经常用到的代码块.在类与结构中可以像定义常量,变量和函数一样,定义相关的属性和方法以此来实现各种功能. 和其它的编程语言不太相同的是,Swift不需要单独创建接口或者实现文 ...
- 便捷编程-Xcode常用第三方插件 (随时更新)
Xcode工具插件 1.XAlign 让Xcode编辑器中的代码以多种方式瞬间对齐 地址:https://github.com/qfish/XAlign 2.VVDocumenter-Xcode 在X ...
- 【Uva 1601】The Morning after Halloween
[Link]: [Description] 给你一张平面图; 最多可能有3只鬼; 给出这几只鬼的初始位置; 然后,这几只鬼有各自的终点; 每秒钟,这几只鬼能同时移动到相邻的4个格子中的一个 任意两只鬼 ...
- WEB开发中一些常见的攻击方式及简单的防御方法
WEB开发中一些常见的攻击方式及简单的防御方法 转载:http://blog.csdn.net/seven__________7/article/details/70896913
- qt获取磁盘序列号
#include "windows.h" QString lpRootPathName = "c:\\"; LPTSTR lpVolumeNameBuffer= ...
- 负载均衡(LB)具体解释
二.LB LoadBalance就是把负载均衡分配到集群的各个节点,从而提高总体的吞吐能力.Oracle 10g RAC提供了两种手段来实现负载,其一是通过Connection Balancing.依 ...
- iOS8开发~Swift(五)Swift与OC混编
一.概要 首先看<The Swift Programming Language>中提到"Swift's compatibility with Objective-C lets y ...