
Thumbnailator处理图片
读取源图
of(String... files)
of(File... files)
of(InputStream... inputStreams)
of(URL... urls)
输出文件
toFile(String outFilepath)
toFile(File outFile)
toOutputStream(OutputStream os)
缩放
size(int width,int height)
width(int width)
height(int height)
forceSize(int width, int height)
scale(double scaleWidth, double scaleHeight)
scale(double scale)
裁剪
sourceRegion(int x, int y, int width, int height)
sourceRegion(Position position, int width, int height)
sourceRegion(Position position, Size size)
sourceRegion(Region sourceRegion)
sourceRegion(Rectangle region) crop(Position position)
crop(Position position)
覆盖
allowOverwrite(boolean allowOverwrite)
输出格式
outputFormat(String format)
输出质量
outputQuality(float quality)
水印
watermark(BufferedImage image)
watermark(BufferedImage image, float opacity)
watermark(Position position, BufferedImage image, float opacity)
watermark(Watermark w)
旋转
rotate(double angle)
读取源图
of(String... files)
本地的字符串路径,写的可以传递多个但是我试了多个会报错,最好只用一个。
Thumbnails.of("C:\\Users\\86152\\Desktop\\1\\原图.png").scale(1f).toFile("C:\\Users\\86152\\Desktop\\1\\1.jpg");

of(File... files)
将字符串抽象成File也可以。
Thumbnails.of(new File("C:\\Users\\86152\\Desktop\\1\\原图.png")).scale(1f).toFile("C:\\Users\\86152\\Desktop\\1\\1.jpg");

of(InputStream... inputStreams)
从输入流读取源文件。
Thumbnails.of(new FileInputStream("C:\\Users\\86152\\Desktop\\1\\原图.png")).scale(1f).toFile("C:\\Users\\86152\\Desktop\\1\\1.jpg");

of(URL... urls)
从网络流读取源文件。
Thumbnails.of(new URL("https://images0.cnblogs.com/blog/651487/201410/191023445446341.png")).scale(1f).toFile("C:\\Users\\86152\\Desktop\\1\\1.jpg");

输出文件
toFile(String outFilepath)
将图片输出到本地,接收字符串路径。
Thumbnails.of(new FileInputStream("C:\\Users\\86152\\Desktop\\1\\原图.png")).scale(1f).toFile("C:\\Users\\86152\\Desktop\\1\\1.jpg");

toFile(File outFile)
将图片输出到文件。
Thumbnails.of(new FileInputStream("C:\\Users\\86152\\Desktop\\1\\原图.png")).scale(1f).toFile(new File("C:\\Users\\86152\\Desktop\\1\\1.jpg"));

toOutputStream(OutputStream os)
将图片输出到输出流。
Thumbnails.of(new FileInputStream("C:\\Users\\86152\\Desktop\\1\\原图.png")).scale(1f).toOutputStream(new FileOutputStream("C:\\Users\\86152\\Desktop\\1\\1.jpg"));

缩放
size(int width,int height)
size(int width,int height)会对图片进行缩放,会改变图片的分辨率随之图片的大小也会改变,但它并不会严格按照我们输入的width,height进行缩放,因为这样图片的比例可能不对称,最终的结果会稍微的微调。
Thumbnails.of(new FileInputStream("C:\\Users\\86152\\Desktop\\1\\原图.png")).size(500, 500).toFile("C:\\Users\\86152\\Desktop\\1\\1.jpg");

width(int width)
width(int width)和size(int width,int height)的区别是它允许你单独指定width然后它会自动根据width自适应的对height进行缩放。
Thumbnails.of(new FileInputStream("C:\\Users\\86152\\Desktop\\1\\原图.png")).width(100).toFile("C:\\Users\\86152\\Desktop\\1\\1.jpg");

height(int height)
height(int height)和width(int width)的区别很明显,它指定height,width会自动根据height自适应的缩放。
Thumbnails.of(new FileInputStream("C:\\Users\\86152\\Desktop\\1\\原图.png")).height(100).toFile("C:\\Users\\86152\\Desktop\\1\\1.jpg");

forceSize(int width, int height)
forceSize(int width, int height)跟size(int width,int height)的区别是它会严格按照参数width,height对图片进行缩放。
Thumbnails.of(new FileInputStream("C:\\Users\\86152\\Desktop\\1\\原图.png")).forceSize(111,222).toFile("C:\\Users\\86152\\Desktop\\1\\1.jpg");

scale(double scaleWidth, double scaleHeight)
scale(double scaleWidth, double scaleHeight)根据比例对图片进行缩放,它是严格按照参数比例的,如果是1则是原图,如果大于1则分辨率也会增大。
Thumbnails.of(new FileInputStream("C:\\Users\\86152\\Desktop\\1\\原图.png")).scale(0.1d, 0.5).toFile("C:\\Users\\86152\\Desktop\\1\\1.jpg");

scale(double scale)
scale(double scale)和scale(double scaleWidth, double scaleHeight)的别是,指定一个参数就可以代表width和height。
Thumbnails.of(new FileInputStream("C:\\Users\\86152\\Desktop\\1\\原图.png")).scale(0.1d).toFile("C:\\Users\\86152\\Desktop\\1\\1.jpg");

裁剪
sourceRegion(int x, int y, int width, int height)
sourceRegion(int x, int y, int width, int height)四个参数分别是指定从原图片的X轴,Y轴,向右取width的宽,height的高开始裁剪,裁剪的区域就是新的图片。
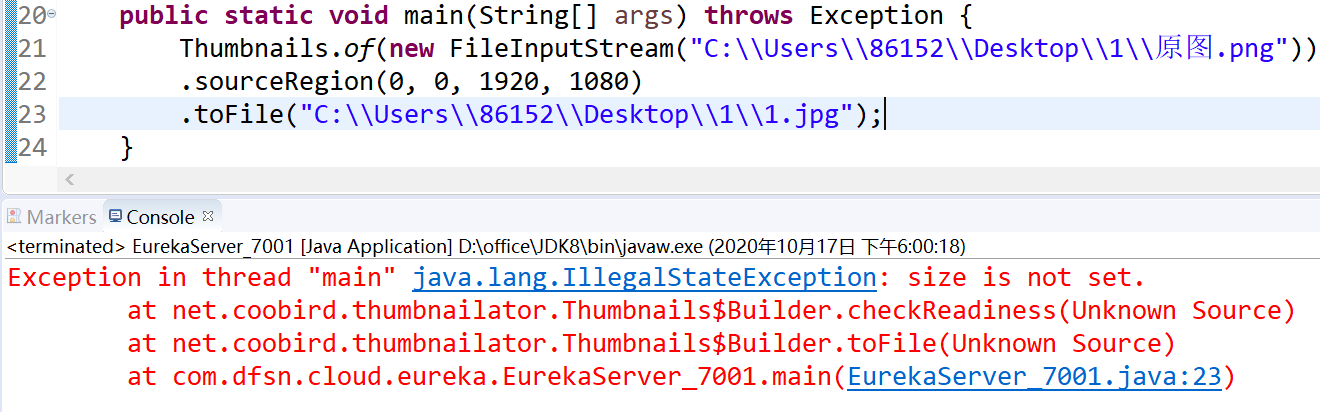
出现以下错误,缺少size,也就是说当指定了需要裁剪的图片区域后,要先变成一个新的图片必须找到一个容器存放,可以选择缩放里的几个函数。
Thumbnails.of(new FileInputStream("C:\\Users\\86152\\Desktop\\1\\原图.png")).sourceRegion(0, 0, 1920, 1080).toFile("C:\\Users\\86152\\Desktop\\1\\1.jpg");
从下图看缩略图原图和这个图片其实差不多的包括的它们的分辨率,但它的大小其实是改变了。
Thumbnails.of(new FileInputStream("C:\\Users\\86152\\Desktop\\1\\原图.png")).sourceRegion(0, 0, 1920, 1080).size(1920, 1080).toFile("C:\\Users\\86152\\Desktop\\1\\1.jpg");

这次我们将输出的width,height改成100,100。图片的分辨率和大小都改变了。
Thumbnails.of(new FileInputStream("C:\\Users\\86152\\Desktop\\1\\原图.png")).sourceRegion(0, 0, 1920, 1080).size(100, 100).toFile("C:\\Users\\86152\\Desktop\\1\\1.jpg");

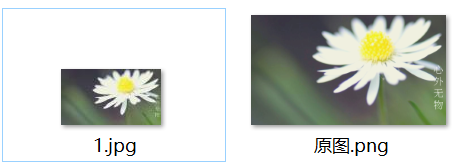
换成forceSize后整体的效果就出来了,因为他严格按照指定的width和height改变输出图片。
Thumbnails.of(new FileInputStream("C:\\Users\\86152\\Desktop\\1\\原图.png")).sourceRegion(0, 0, 1920, 1080).forceSize(100, 100).toFile("C:\\Users\\86152\\Desktop\\1\\1.jpg");

sourceRegion(Position position, int width, int height)
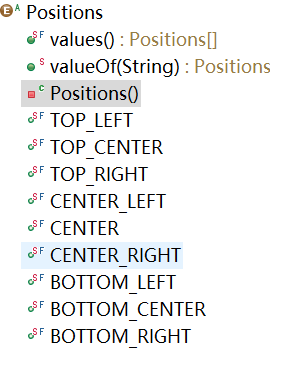
sourceRegion(Position position, int width, int height)是sourceRegion(int x, int y, int width, int height)重载,Position将X,Y封装成了对象,Position是一个接口它的唯一实现类是Positions。TOP_LEFT代表的是X(0),Y(0)。
Thumbnails.of(new FileInputStream("C:\\Users\\86152\\Desktop\\1\\原图.png")).sourceRegion(Positions.TOP_LEFT, 1920, 1080).forceSize(1920,1080).toFile("C:\\Users\\86152\\Desktop\\1\\1.jpg");
sourceRegion(Position position, Size size)
sourceRegion(Position position, Size size)是sourceRegion(int x, int y, int width, int height)重载它将X,Y封装成了Position,将width,height封装成了Size,Size是一个接口它的唯一实现类是RelativeSize这个类的构造器接收一个参数,没错一个参数就是百分比,而且是width,height的百分比就像scale(double scale)。
Thumbnails.of(new FileInputStream("C:\\Users\\86152\\Desktop\\1\\原图.png")).sourceRegion(Positions.TOP_LEFT, new RelativeSize(1)).forceSize(1920, 1080)
.toFile("C:\\Users\\86152\\Desktop\\1\\1.jpg");
sourceRegion(Region sourceRegion)
sourceRegion(Region sourceRegion)其实就是上边三个重载形式最终组成的对象,Region的构造器是Position和Size。
Thumbnails.of(new FileInputStream("C:\\Users\\86152\\Desktop\\1\\原图.png")).sourceRegion(new Region(Positions.TOP_LEFT, new RelativeSize(1))).forceSize(1920, 1080).toFile("C:\\Users\\86152\\Desktop\\1\\1.jpg");
sourceRegion(Rectangle region)
sourceRegion(Rectangle region)参数Rectangle跟Region差不多,不过它有无参构造,如果使用无参构造Rectangle()相当于sourceRegion(0, 0, 0, 0)如果用这个会报错,因为width,height为0。同样你也可以直接指定它的四个参数。
Thumbnails.of(new FileInputStream("C:\\Users\\86152\\Desktop\\1\\原图.png")).sourceRegion(new Rectangle(0, 0, 1920, 1080)).forceSize(1920, 1080).toFile("C:\\Users\\86152\\Desktop\\1\\1.jpg");
crop(Position position)
crop(Position position)这个方法就有点意思了,相比sourceRegion(int x, int y, int width, int height)少了width,height那它是如何指定X,Y的横向纵向距离呢?谜底是它使用size(int width, int height)。也就是输出的width,height既是裁剪的width,height。
Thumbnails.of(new FileInputStream("C:\\Users\\86152\\Desktop\\1\\原图.png")).crop(Positions.TOP_LEFT).size(500, 500).toFile("C:\\Users\\86152\\Desktop\\1\\1.jpg");

覆盖
allowOverwrite(boolean allowOverwrite)
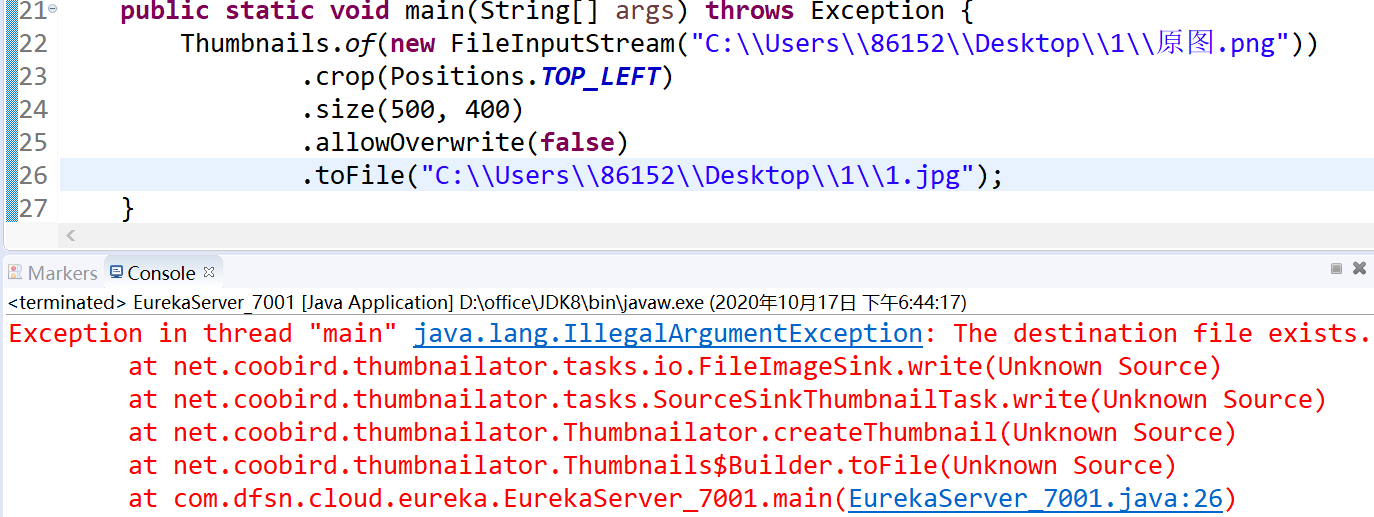
是否允许覆盖源文件,如果要输出的图片已经存在(路径和文件名相同),默认是覆盖掉源文件,使用此方法传值false则可以避免文件覆盖。
Thumbnails.of(new FileInputStream("C:\\Users\\86152\\Desktop\\1\\原图.png")).crop(Positions.TOP_LEFT).size(500, 400).allowOverwrite(false).toFile("C:\\Users\\86152\\Desktop\\1\\1.jpg");
输出格式
outputFormat(String format)
outputFormat(String format)这个方法用于更改输出文件的类型,如果指定了输出类型,那输出文件名就不要带文件类型了。
Thumbnails.of(new FileInputStream("C:\\Users\\86152\\Desktop\\1\\原图.png")).scale(1f).outputFormat("png").toFile("C:\\Users\\86152\\Desktop\\1\\1");

输出质量
outputQuality(float quality)
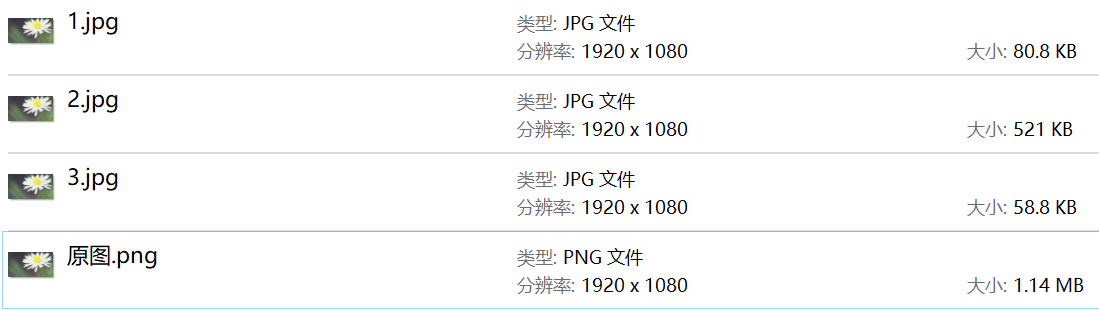
outputQuality(float quality)设置输出图片的质量,0.1-1,1表示最大质量。下面看三种情况下的输出对比。
1 缩略模式,width,height保持原图1:1。
Thumbnails.of(new FileInputStream("C:\\Users\\86152\\Desktop\\1\\原图.png")).scale(1f).toFile("C:\\Users\\86152\\Desktop\\1\\1.jpg");

2 缩略模式,width,height保持原图1:1,outputQuality(1f)输出全量质量。
Thumbnails.of(new FileInputStream("C:\\Users\\86152\\Desktop\\1\\原图.png")).scale(1f).outputQuality(1f).toFile("C:\\Users\\86152\\Desktop\\1\\2.jpg");
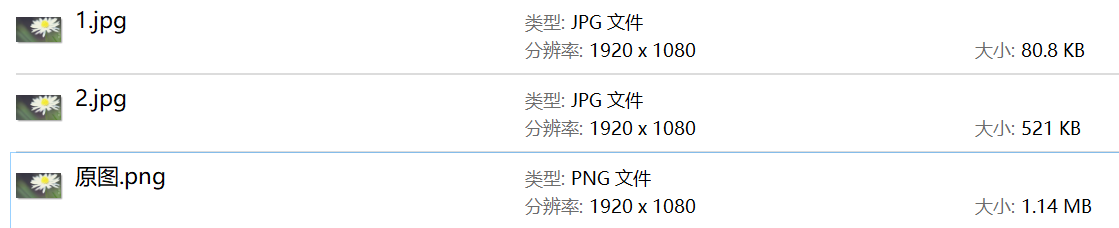
3 缩略模式,width,height保持原图1:1,outputQuality(0.5f)输出一半质量。
Thumbnails.of(new FileInputStream("C:\\Users\\86152\\Desktop\\1\\原图.png")).scale(1f).outputQuality(0.5f).toFile("C:\\Users\\86152\\Desktop\\1\\3.jpg");
水印
watermark(BufferedImage image)
watermark(BufferedImage image)给图片打水印,BufferedImage是水印图片的抽象表示。使用ImageIO.read(InputStream in)构造一个水印的图片的表示类。
Thumbnails.of(new FileInputStream("C:\\Users\\86152\\Desktop\\1\\原图.png")).scale(1f).watermark(ImageIO.read(new FileInputStream("C:\\Users\\86152\\Desktop\\1\\水印.jpg"))).toFile("C:\\Users\\86152\\Desktop\\1\\1.jpg");

watermark(BufferedImage image, float opacity)
watermark(BufferedImage image, float opacity)和watermark(BufferedImage image)的区别是第二个参数它表示水印的不透明度从0.1-1,不指定则是0.5,下图设置不透明度为0.1
Thumbnails.of(new FileInputStream("C:\\Users\\86152\\Desktop\\1\\原图.png")).scale(1f).watermark(ImageIO.read(new FileInputStream("C:\\Users\\86152\\Desktop\\1\\水印.jpg")), 0.1f).toFile("C:\\Users\\86152\\Desktop\\1\\2.jpg");
下图设置不透明度为0.1。
Thumbnails.of(new FileInputStream("C:\\Users\\86152\\Desktop\\1\\原图.png")).scale(1f).watermark(ImageIO.read(new FileInputStream("C:\\Users\\86152\\Desktop\\1\\水印.jpg")), 1f).toFile("C:\\Users\\86152\\Desktop\\1\\3.jpg");

watermark(Position position, BufferedImage image, float opacity)
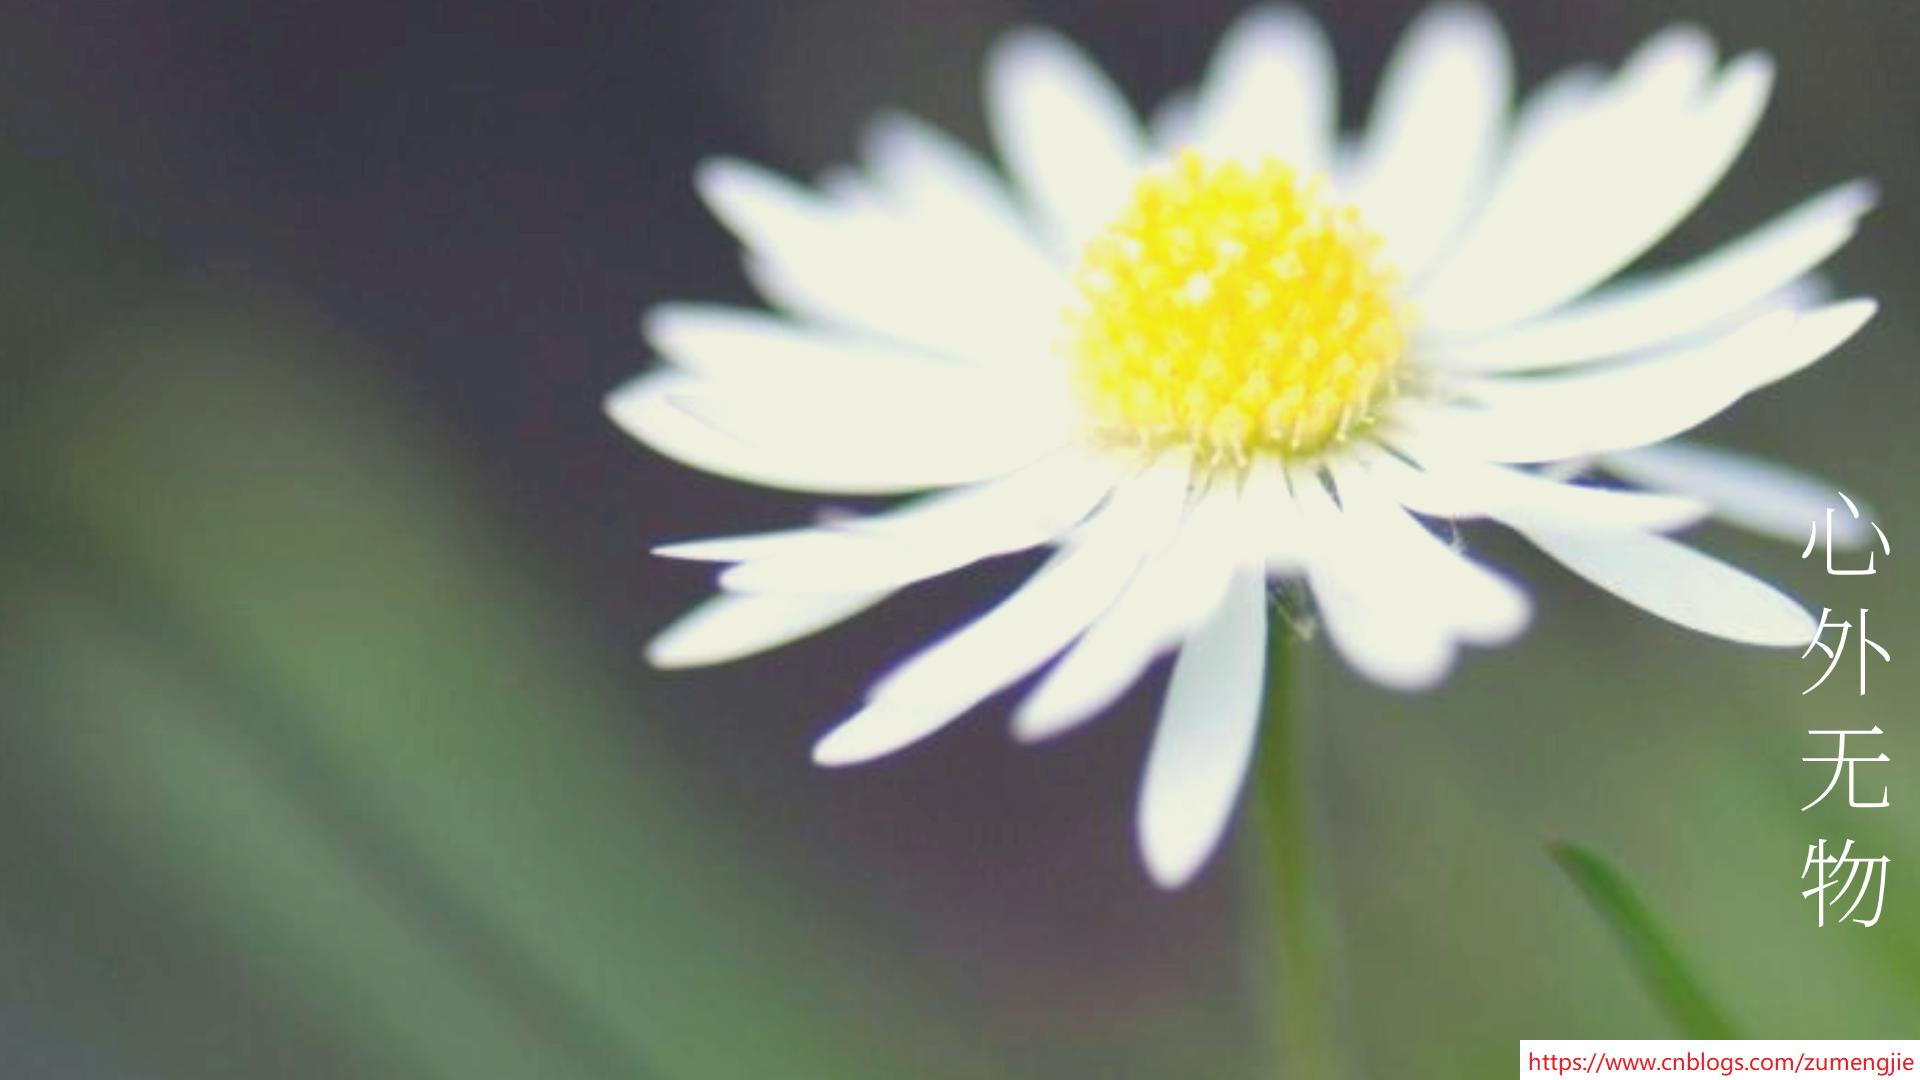
watermark(Position position, BufferedImage image, float opacity)是上边两个的完整体,默认的水印位置在输出图片的中间,使用Position指定水印输出位置。
Thumbnails.of(new FileInputStream("C:\\Users\\86152\\Desktop\\1\\原图.png")).scale(1f).watermark(Positions.BOTTOM_RIGHT,ImageIO.read(new FileInputStream("C:\\Users\\86152\\Desktop\\1\\水印.jpg")), 1f).toFile("C:\\Users\\86152\\Desktop\\1\\1.jpg");
如果需要打上多个水印,也可以连续调用watermark。下图在输出图底部中间和底部右边打上水印。
Thumbnails.of(new FileInputStream("C:\\Users\\86152\\Desktop\\1\\原图.png")).scale(1f).watermark(Positions.BOTTOM_RIGHT,ImageIO.read(new FileInputStream("C:\\Users\\86152\\Desktop\\1\\水印.jpg")), 1f).watermark(Positions.BOTTOM_CENTER,ImageIO.read(new FileInputStream("C:\\Users\\86152\\Desktop\\1\\水印.jpg")), 1f).toFile("C:\\Users\\86152\\Desktop\\1\\1.jpg");
watermark(Watermark w)
watermark(Watermark w)其实就是把Position,BufferedImage,opacity封装成了Watermark对象,可以使水印共同使用。
Watermark watermark1 = new Watermark(Positions.BOTTOM_RIGHT,ImageIO.read(new FileInputStream("C:\\Users\\86152\\Desktop\\1\\水印.jpg")), 1f);
Watermark watermark2 = new Watermark(Positions.BOTTOM_LEFT,ImageIO.read(new FileInputStream("C:\\Users\\86152\\Desktop\\1\\水印.jpg")), 1f);
Thumbnails.of(new FileInputStream("C:\\Users\\86152\\Desktop\\1\\原图.png")).scale(1f).watermark(watermark1).watermark(watermark2).toFile("C:\\Users\\86152\\Desktop\\1\\1.jpg");
旋转
rotate(double angle)
rotate(double angle)对输出图片做旋转操作。
Thumbnails.of(new FileInputStream("C:\\Users\\86152\\Desktop\\1\\原图.png")).scale(1f).rotate(180).toFile("C:\\Users\\86152\\Desktop\\1\\1.jpg");

Thumbnailator处理图片的更多相关文章
- java使用Thumbnailator处理图片
Thumbnailator是一款不可多得的处理图片的第三方工具包,它写法简单到让人无法相信,Java本身也有处理图片压缩的方法,但是代码冗长到让人痛不欲生,在篇末会给出Java本身的实现方式,做下对比 ...
- Java语言利用Google的Thumbnailator处理图片
导读:在Java中制作高质量的缩略图可能是一项相当困难的任务,或者图片质量高页面加载慢等等原因使需要对图片进行处理,但是又不想写太多的代码太麻烦去处理图片,那么就可以使用Thumbnailator—— ...
- thumbnailator + webp-imageio-core实现java处理图片支持webp
thumbnailator提供了便捷的图片处理api,webp-imageio-core屏蔽了不同平台webp本地库的差异. <dependency> <groupId>com ...
- Thumbnailator压缩图片
Thumbnailator是一款不可多得的处理图片的第三方工具包,它写法简单到让人无法相信,Java本身也有处理图片压缩的方法,但是代码冗长到让人痛不欲生,在篇末会给出Java本身的实现方式,做下对比 ...
- 玩转 SpringBoot2.x 之整合 thumbnailator 图片处理
1.序 在实际项目中,有时为了响应速度,难免会对一些高清图片进行一些处理,比如图片压缩之类的,而其中压缩可能就是最为常见的.最近,阿淼就被要求实现这个功能,原因是客户那边嫌速度过慢.借此机会,阿淼今儿 ...
- nodejs处理图片、CSS、JS链接
接触Nodejs不深,看到页面上每一个链接都要写一个handler,像在页面显示图片,或者调用外部CSS.JS文件,每个链接都要写一个handler,觉得太麻烦,是否可以写个程序出来,能够自动识别图片 ...
- PHPThumb处理图片,生成缩略图,图片尺寸调整,图片截取,图片加水印,图片旋转
[强烈推荐]下载地址(github.com/masterexploder/PHPThumb). 注意这个类库有一个重名的叫phpThumb,只是大小写的差别,所以查找文档的时候千万注意. 在网站建设过 ...
- Filter Effects - 使用 CSS3 滤镜处理图片
CSS3 Filter(滤镜)属性提供了提供模糊和改变元素颜色的功能.CSS3 Fitler 常用于调整图像的渲染.背景或边框显示效果.这里给大家分享的这个网站,大家可以体验下 CSS3 对图片的处理 ...
- 安装glue,用glue批量处理图片的步骤
glue批量处理图片:http://glue.readthedocs.io/en/latest/quickstart.html#and-why-those-css-class-names 首先需要安 ...
随机推荐
- python pyinstaller生成 Windows 可运行的 .exe 程序
1.安装 pip install pyinstaller 2.检查 pyinstaller --version 3.参数说明 pyinstaller -w -F python.py -i img.ic ...
- 【二叉树-最长路径系列(任意路径)】直径、最长同值路径、 最大路径和(DFS、树形DP)
总述 这类题目都是求一个最长路径,这个路径可以不经过根节点. 使用dfs(即递归地遍历树)的方法.维护一个全局最长路径max作为最终结果,而递归方法dfs返回的是含根节点的最长路径.(若不使用全局变量 ...
- Java成神之路:第三帖----数据结构与算法之队列
数据结构与算法--队列 今天掉了两根头发,摸掉的,记得 别乱摸,很珍贵的!! 什么是队列? 1)队列是一个有序列表,可以用数组或是链表来实现 2)遵循 先入先出 的原则.即:先存入队列的数据,要先取出 ...
- Python实现GUI开发 PySide2&PyQt环境配置
更新于2020-09-15 - 18:50:37 [前言] 关于Python开发GUI图形界面程序的问题,大概是19年十分困扰我,主要是没有经验以及缺乏高效简洁的视频或教学文档,导致在19年中秋前后花 ...
- web网站——apache和nginx对比02
nginx介绍 Nginx是俄罗斯人编写的十分轻量级的HTTP服务器,Nginx,它的发音为“engine X”,是一个高性能的HTTP和反向代理服务器,同时也是一个IMAP/POP3/SMTP 代理 ...
- maximo----对比竞品的优势,以及sp的优势
众多资产密集型企业对eam产品关注度都很高,尤其是eam产品的功能差别,这与行业差别有直接关系,如电力行业.煤炭行业或石油行业等,各行有各行的运营特点,那么eam产品在共性的基础上定出存在细小差异.下 ...
- nacos快速安装
一 什么是 Nacos 服务注册中心和配置中心. 二 使用 下载和启动 使用有两种方式 1.自己下载源码编译 2.下载编译好的压缩包 我比较懒选择了第二种方式. 最新稳定版本 下载地址:https:/ ...
- 容器云平台No.9~kubernetes日志收集系统EFK
EFK介绍 EFK,全称Elasticsearch Fluentd Kibana ,是kubernetes中比较常用的日志收集方案,也是官方比较推荐的方案. 通过EFK,可以把集群的所有日志收集到El ...
- manacher(马拉车算法)
Manacher(马拉车算法) 序言 mannacher 是一种在 O(n)时间内求出最长回文串的算法 我们用暴力求解最长回文串长度的时间复杂度为O(n3) 很明显,这个时间复杂度我们接受不了,这时候 ...
- 针对python字符串有哪些操作呢?本文详解!
1.1 字符串字符串就是一系列字符.在Python中,用引号括起的都是字符串,其中的引号可以是单引号,也可以是双引号.1.2 一些对字符串的操作(1)使用方法修改字符串的大小写name = " ...