NIO(二):Channel通道
一.Channel概述
channel(通道):进行IO的连接通道,为NIO的几个核心(Buffer,selector,channel)之一,相比于IO的stream具有较高的性能。
IO |
单向传输 |
NIO |
异步双向传输 |
使用时需要和buffer(缓冲区一切使用),将数据暂存入Buffer中,通过channel通道连接传输buffer以此传输数据。

二.channel继承结构

其中主要的几个实现类如下:
FileChannel: 本地文件传输通道
SocketChannel: 通过TCP传输通道
ServerSocketChannel: 监听新的TCP连接,并创建一个新的SocketChannel,通过.open()方法进行创建。
DatagramChannel: 发送和接收UDP数据包的channel
通过Buffer的两种传输数据方式:
非直接缓冲区传输数据 - - > ByteBuffer.allocate()方法;
直接缓冲区传输数据 - - > ByteBuffer.allocateDriect()方法;
几种获取channel的方式:
本地通过FileInPutStream/FileOutPutStream 使用getChannel()方法获取;
本地FileChannel 的open()方法获取;
本地RandomAccessFile的getChannel()方法获取;
网络socket、ServerSocket、DatagramSocket
三.FileInputStream获取通道方式
非直接缓冲区方式,再程序与本地磁盘中,并不是直接进行数据的交流。而是在用户和内核之间通过复制的形式。每次read 和write 都在中间进行复制。程序可以控制数据。
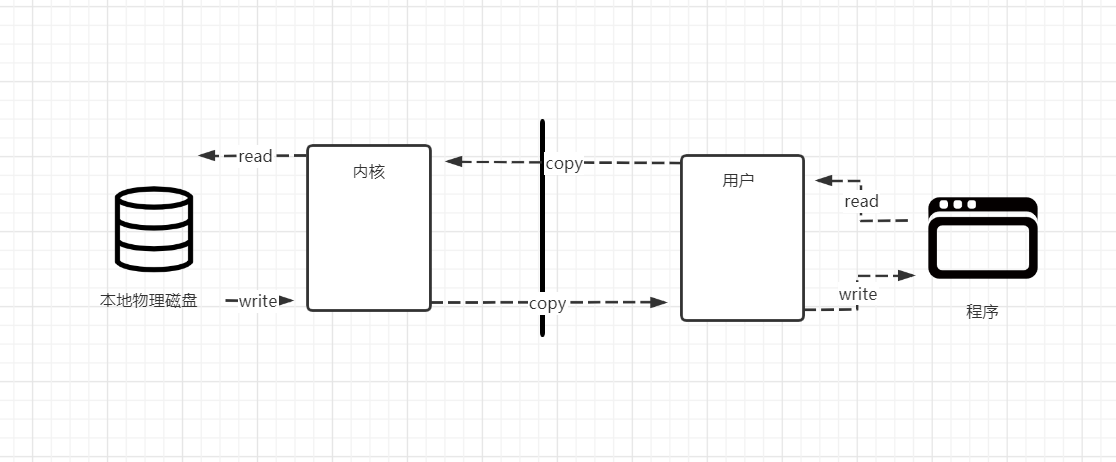
流程:FileInputStream写入文件 --> FileOutputStream的getChannel()获取通道 --> 开辟一个具有一定容量的buffer缓冲区 --> 将缓冲区的内容通过channel传输 --> 关闭流
 //使用非直接缓冲区 传输数据

     //通过流的方式

     @Test

     public void NoDirect(){

         FileInputStream fileInputStream = null;

         FileOutputStream fileOutputStream =null;

         FileChannel fileInputStreamChannel = null;

         FileChannel fileOutputStreamChannel = null;

         long start = 0;

         try {

             //查看耗时

              start = System.currentTimeMillis();

             //写入

             fileInputStream = new FileInputStream("D:/DataTestFile/1.zip");

             //读取到

             fileOutputStream = new FileOutputStream("D:/DataTestFile/2.zip");

             //使用通道进行文件传输

             //在传输前先获取传输通道channel

              fileInputStreamChannel = fileInputStream.getChannel();

              fileOutputStreamChannel = fileOutputStream.getChannel();

             //将数据写入缓冲区 -->   开辟缓冲区容量  --> 后使用通道传输

             ByteBuffer buf = ByteBuffer.allocate(1024);

             //将通道中的数据送入缓冲区  数据为空时跳出循环

             while(fileInputStreamChannel.read(buf) != -1){

                 //切换读写模式

                 buf.flip();

                 //读出缓冲区的数据写入通道中

                 fileOutputStreamChannel.write(buf);

                 //清空缓冲区

                 buf.clear();

             }

         } catch (FileNotFoundException e) {

             e.printStackTrace();

         } catch (IOException e) {

             e.printStackTrace();

         }

         //最终需要执行的步骤 需要关闭流  和通道

         finally {

             //写入流关闭

             if (fileInputStream != null){

                 try {

                     fileInputStream.close();

                 } catch (IOException e) {

                     e.printStackTrace();

                 }

             }

             //读出流关闭

             if (fileOutputStream != null){

                 try {

                     fileOutputStream.close();

                 } catch (IOException e) {

                     e.printStackTrace();

                 }

             }

            if (fileInputStreamChannel != null){

                try {

                    fileInputStreamChannel.close();

                } catch (IOException e) {

                    e.printStackTrace();

                }

            }

             //读出通道关闭

             if (fileOutputStreamChannel != null){

                 try {

                     fileOutputStreamChannel.close();

                 } catch (IOException e) {

                     e.printStackTrace();

                 }

             }

             //查看耗时

             long end = System.currentTimeMillis();

             System.out.println("总共耗时:"+(end-start));

         }

     }
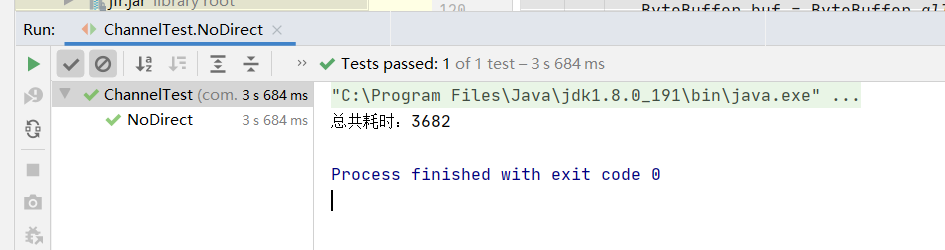
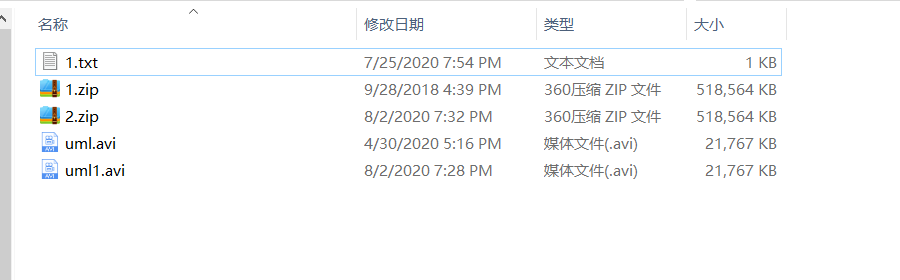
测试数据大小
使用IO流的方式(FileInPutStream/FileOutPutStream)写入文件或者读取文件,FileInPutStream实现方式:(FileOutPutStream 与之类似)
   public FileInputStream(String name) throws FileNotFoundException {

         this(name != null ? new File(name) : null);

     }

  //获取本地文件

 public File(String pathname) {

         if (pathname == null) {

             throw new NullPointerException();

         }

         this.path = fs.normalize(pathname);

         this.prefixLength = fs.prefixLength(this.path);

     }
三.FileChannel方式+mapped*ByteBuffer(内存映射文件)传输数据
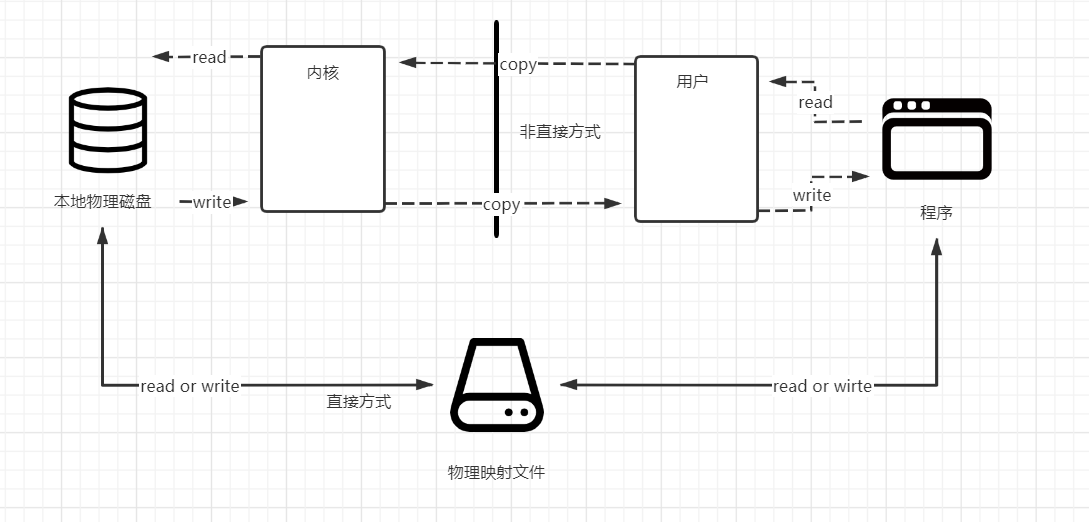
直接传输方式,在本地形成一个本地映射文件,程序通过本地映射直接传输给物理磁盘,没有复制的操作。在传输速度上优于非直接的传输
但是程序的数据一旦交给映射文件,程序将无法控制数据。
流程: FileChannel.open 获取通道 (写入和读取文件,并规定Read Or Write ,create等方式) - - > .map(将通道的一个区域映射到内存中) - - > 将映射文件中的数据存入数组,写入或读出到MappedByteBuffer
  /*

     * 通过直接缓冲区的方式进行传输数据

     * 通过使用映射文件的方式MappedByteBuffer传输

     * */

     @Test

     public void Driect(){

         FileChannel fileInChannel = null;

         FileChannel fileOutChannel = null;

         MappedByteBuffer mappedInByteBuffer = null;

         MappedByteBuffer mappedOutByteBuffer = null;

         long start = 0;

         try {

             //耗时查询

              start = System.currentTimeMillis();

              fileInChannel = FileChannel.open(Paths.get("D:/DataTestFile/1.zip"), StandardOpenOption.READ,StandardOpenOption.WRITE);

              fileOutChannel = FileChannel.open(Paths.get("D:/DataTestFile/2.zip"), StandardOpenOption.READ, StandardOpenOption.WRITE,StandardOpenOption.CREATE);

             //使用内存映射文件 ,杜绝非直接缓存区中的通过用户态 和核心态的相互复制影响性能的问题

             //直接通过本地映射文件。但是一旦传输后,不归程序所管理

              mappedInByteBuffer = fileInChannel.map(FileChannel.MapMode.READ_ONLY, 0, fileInChannel.size());

              mappedOutByteBuffer = fileOutChannel.map(FileChannel.MapMode.READ_WRITE, 0, fileInChannel.size());

             //直接对缓冲区进行读写操作

             //定义一个数组,将映射文件的数据存入其中

             byte[] bt = new byte[mappedInByteBuffer.limit()];

             //先从本地映射文件中读取  后写入传输

             mappedInByteBuffer.get(bt);

             mappedOutByteBuffer.put(bt);

         } catch (IOException e) {

             e.printStackTrace();

         }

         finally {

             if (fileInChannel != null){

                 try {

                     fileInChannel.close();

                 } catch (IOException e) {

                     e.printStackTrace();

                 }

             }

             if (fileOutChannel != null){

                 try {

                     fileOutChannel.close();

                 } catch (IOException e) {

                     e.printStackTrace();

                 }

             }

             //耗时结束查询

             long end = System.currentTimeMillis();

             System.out.println("总共耗时:"+(end-start));

         }

相比较于非直接的方式,在相同资源下的第一次传输,性能更高。传输速度更快。
五.分散传输
将一个整体文件,分散成多个部分,使用多缓冲区分别进行分散。
流程:使用RandomAccessFile读取写入文件 - - > 通过RandomAccessFile.getChannel 获取通道 - - > 将两个开辟的缓冲区,存入数组中,并循环读入通道 - - > 转换成可以直观查看的String类型
package com.cllover.nio; import org.junit.Test; import java.io.FileNotFoundException;
import java.io.IOException;
import java.io.RandomAccessFile;
import java.nio.ByteBuffer;
import java.nio.channels.FileChannel; /*
* @Author chengpunan
* @Description //TODO 18609
* @Date 7:29 PM 7/25/2020
* @Param
* @return
*
* 分散读写和聚集读写测试类
* Disperse:分散读写
* gather: 聚集读写
**/
public class DisperseAndGather { // 分散读写 将通道中的数据分散到缓冲区中,
@Test
public void Disperse(){
RandomAccessFile randomAccessFile = null;
FileChannel randomAccessFileChannel = null; try {
//随机访问文件流以RW形式访问某文件
randomAccessFile = new RandomAccessFile("D:/DataTestFile/1.txt","rw"); //获取通道
randomAccessFileChannel = randomAccessFile.getChannel(); //开辟两个缓冲区
ByteBuffer byteBuffer100 = ByteBuffer.allocate(100);
ByteBuffer byteBuffer200 = ByteBuffer.allocate(200);
//数值初始化:存入两个缓冲区的数据
41 //分散读取
42 ByteBuffer[] byteBuffer = {byteBuffer100,byteBuffer200};
43
44 //存入读取通道
45 randomAccessFileChannel.read(byteBuffer);
46
47 for (ByteBuffer bf: byteBuffer) {
48 bf.flip(); //切换读写方式
49 }
//转换成字符串
//public String(byte bytes[], int offset, int length)
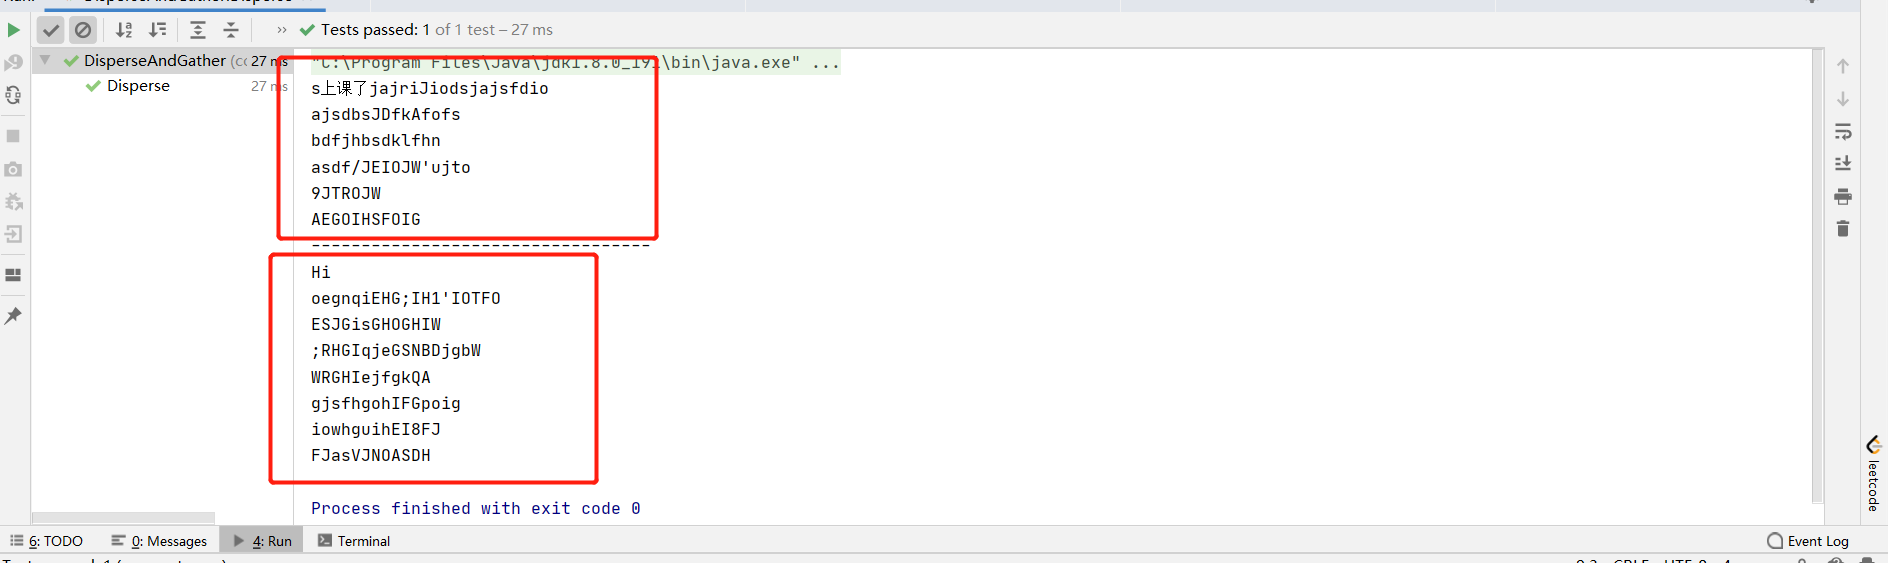
System.out.println(new String(byteBuffer[0].array(),0,byteBuffer[0].limit()));
System.out.println("----------------------------------");
System.out.println(new String(byteBuffer[1].array(),0,byteBuffer[1].limit())); } catch (FileNotFoundException e) {
e.printStackTrace();
} catch (IOException e) {
e.printStackTrace();
}
finally {
if (randomAccessFile != null){
try {
randomAccessFile.close();
} catch (IOException e) {
e.printStackTrace();
}
}
if (randomAccessFileChannel != null){
try {
randomAccessFileChannel.close();
} catch (IOException e) {
e.printStackTrace();
}
}
if (randomAccessFile != null){
try {
randomAccessFile.close();
} catch (IOException e) {
e.printStackTrace();
}
}
} } }
将单独两个开辟的缓冲区,存入数组之中。存入通道后,用foreach循环遍历index[0]和index[1]缓冲区上的内容,并进行写入。
 //分散读取:数组初始化

             ByteBuffer[] byteBuffer = {byteBuffer100,byteBuffer200};

             //存入读取通道

             randomAccessFileChannel.read(byteBuffer);

             for (ByteBuffer bf: byteBuffer) {

                 bf.flip();   //切换读写方式

             }
资源内容:

运行结果:
聚集写入:
  //聚集写入

             RandomAccessFile randomAccessFile1 = new RandomAccessFile("D:/DataTestFile/2.txt", "rw");

             FileChannel channel = randomAccessFile1.getChannel();

             //将全部内容。将上段代码红色部分,存入数组中的数据直接通过通道写入另一个文件中

             channel.write(byteBuffer);
写入文件后,原本文件中的内容会被覆盖或者丢失。
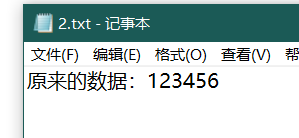
写入后:

六.总结
channel作为一个连接通道,支持异步传输。
总是基于Buffer缓冲区配合使用。
在传输时,需要在buffer中暂存入数据后开启channel通道,进行读写操作。
下一篇将会写关于网络传输 和 selector的用法。
NIO(二):Channel通道的更多相关文章
- JAVA NIO学习二:通道(Channel)与缓冲区(Buffer)
今天是2018年的第三天,真是时光飞逝,2017年的学习计划还没有学习完成,因此继续开始研究学习,那么上一节我们了解了NIO,那么这一节我们进一步来学习NIO相关的知识.那就是通道和缓冲区.Java ...
- Java NIO 之 Channel(通道)
历史回顾: Java NIO 概览 Java NIO 之 Buffer(缓冲区) 其他高赞文章: 面试中关于Redis的问题看这篇就够了 一文轻松搞懂redis集群原理及搭建与使用 一 Channel ...
- Java NIO Channel通道
原文链接:http://tutorials.jenkov.com/java-nio/channels.html Java NIO Channel通道和流非常相似,主要有以下几点区别: 通道可以读也可以 ...
- 【Java nio】Channel
package com.slp.nio; import org.junit.Test; import java.io.*; import java.nio.ByteBuffer; import jav ...
- java输入输出 -- java NIO之文件通道
一.简介 通道是 Java NIO 的核心内容之一,在使用上,通道需和缓存类(ByteBuffer)配合完成读写等操作.与传统的流式 IO 中数据单向流动不同,通道中的数据可以双向流动.通道既可以读, ...
- Java基础知识强化之IO流笔记73:NIO之 Channel
1. Java NIO的Channel(通道)类似 Stream(流),但又有些不同: 既可以从通道中读取数据,又可以写数据到通道.但流的读写通常是单向的. 通道可以异步地读写. 通道中的数据总是要先 ...
- JAVA NIO 之Channel
缓冲区本质上是一块可以写入数据,然后可以从中读取数据的内存.Channel 通道就是将数据传输给 ByteBuffer 对象或者从 ByteBuffer 对象获取数据进行传输. Channel 用于在 ...
- NIO组件Channel
基本介绍 NIO的通道类似于流, 但有些区别: 通道可以同时进行读写, 而流只能读或者只能写 通道可以实现异步读写数据 通道可以从缓冲区(Buffer)读数据, 也可以写数据到缓冲区 BIO中的str ...
- Golang 入门 : channel(通道)
笔者在<Golang 入门 : 竞争条件>一文中介绍了 Golang 并发编程中需要面对的竞争条件.本文我们就介绍如何使用 Golang 提供的 channel(通道) 消除竞争条件. C ...
随机推荐
- kafka 监控工具 eagle 的安装(内附高速下载地址)
简介 如图 kafka eagle 是可视化的 kafka 监视系统,用于监控 kafka 集群 环境准备: 需要的内存:1.5G+ 支持的 kafka 版本:0.8.2.x,0.9.x,0.10.x ...
- 用matplotlib绘制图片示例(新)
test /*! * * Twitter Bootstrap * */ /*! * Bootstrap v3.3.7 (http://getbootstrap.com) * Copyright 201 ...
- 美国数学家维纳(N.Wiener)智力早熟,11岁就上了大学。他曾在1935~1936年应邀来中国清华大学讲学。 一次,他参加某个重要会议,年轻的脸孔引人注目。于是有人询问他的年龄,他回答说:我年龄的立方是个4位数。 我年龄的4次方是个6位数。这10个数字正好包含了从0到9这10个数字,每个都恰好出现1次。” 请你推算一下,他当时到底有多年轻。 结果只有一个数。
#include<stdio.h>int main(){ int age=1; int san=0; int si=0; int sum=0; while(age>0) { san= ...
- IDEA 2020版破解
这期教一下大家如何破解IDEA 最新版破解教程 有以前的idea建议卸载哈~安装最新版的版本 一:我们首先去idea官网下载最新版 下方是idae官网2020最新链接 https://www.jetb ...
- vue : watch、computed、以及对象数组
watch和computed是vue框架中很重要的特性. 那么,他们是怎么作用于对象数组的? 今天我们就来探究一下. 上代码. <template> <div class=" ...
- 字符串学习总结(Hash & Manacher & KMP)
前言 终于开始学习新的东西了,总结一下字符串的一些知识. NO.1 字符串哈希(Hash) 定义 即将一个字符串转化成一个整数,并保证字符串不同,得到的哈希值不同,这样就可以用来判断一个该字串是否重复 ...
- java 之死循环
public class StringTest { public static void main(String[] args) { System.out.println(getStringCount ...
- 全卷积神经网络FCN详解(附带Tensorflow详解代码实现)
一.导论 在图像语义分割领域,困扰了计算机科学家很多年的一个问题则是我们如何才能将我们感兴趣的对象和不感兴趣的对象分别分割开来呢?比如我们有一只小猫的图片,怎样才能够通过计算机自己对图像进行识别达到将 ...
- Go语言系列之手把手教你撸一个ORM(一)
项目地址:https://github.com/yoyofxteam/yoyodata 欢迎星星,感谢 前言:最近在学习Go语言,就出于学习目的手撸个小架子,欢迎提出宝贵意见,项目使用Mysql数据库 ...
- 常见的HTTP返回状态值
200 (成功) 服务器已成功处理了请求. 通常,这表示服务器提供了请求的网页. 301 (永久移动) 请求的网页已永久移动到新位置. 服务器返回此响应(对 GET 或 HEAD 请求的响应)时,会自 ...