1,turicreate入门 - jupyter & turicreate安装
turicreate入门系列文章目录
1,turicreate入门 - jupyter & turicreate安装
3,turicreate入门 - 优化回归模型,使得预测更准确
1,Windows10 WSL 安装ubuntu18.04。Windows10如何安装,请自行百度。
2,更新apt源
sudo apt-get update
3,更改apt源为阿里源,提高下载速度
sudo mv /etc/apt/source.list /ect/apt/source.list.bak //对原文件备份

sudo vim /etc/apt/source.list //编辑apt源
deb http://mirrors.aliyun.com/ubuntu/ bionic main restricted universe multiverse

deb-src http://mirrors.aliyun.com/ubuntu/ bionic main restricted universe multiverse

deb http://mirrors.aliyun.com/ubuntu/ bionic-security main restricted universe multiverse

deb-src http://mirrors.aliyun.com/ubuntu/ bionic-security main restricted universe multiverse

deb http://mirrors.aliyun.com/ubuntu/ bionic-updates main restricted universe multiverse

deb-src http://mirrors.aliyun.com/ubuntu/ bionic-updates main restricted universe multiverse

deb http://mirrors.aliyun.com/ubuntu/ bionic-proposed main restricted universe multiverse

deb-src http://mirrors.aliyun.com/ubuntu/ bionic-proposed main restricted universe multiverse

deb http://mirrors.aliyun.com/ubuntu/ bionic-backports main restricted universe multiverse

deb-src http://mirrors.aliyun.com/ubuntu/ bionic-backports main restricted universe multiverse
:wq保存退出后,更新设置
sudo apt-get update
4,安装pip3
sudo apt-get install python3-pip
5,更改pip源为阿里源,提高下载速度
cd ~

mkdir .pip

cd .pip

sudo vim pip.conf
输入以下内容:
[global]

timeout = 6000

index-url = https://mirrors.aliyun.com/pypi/simple

trusted-host = mirros.aliyun.com
:wq保存退出后,更新pip设置
sudo pip3 install update
6,安装jupyter notebook
pip3 install jupyter
如果使用WSL,输入
sudo jupyter notebook --allow-root
如果是ubuntu,直接输入
jupyter notebook
这时候,一切正常的话,就可以打开网页了
7,至此,安装完成了一半了!下面开始安装turicreate。先安装虚拟环境。
sudo pip3 install virtualenv

cd ~

virtualenv turienv

cd turienv

source ~/turienv/bin/activate  //激活虚拟环境
再安装turicreate。
//在虚拟环境下安装turicreate和ipykernel内核,并且配置jupyter notebook的显示

pip3 install update

pip3 install ipykernel

pip3 install turicreate

python -m ipykernel install --user --name turienv --display-name turienv
8,退出虚拟环境,启动jupyter
deactivate

//wsl输入

sudo jupyter notebook --allow-root

//ubuntu输入

jupyter notebook
可以看到turi内核
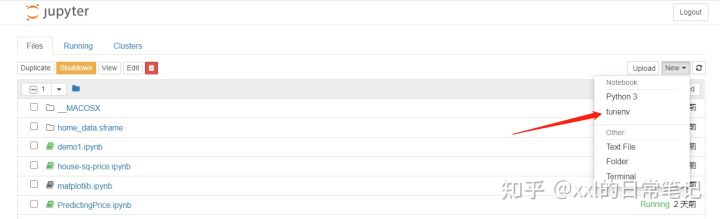
Done!
1,turicreate入门 - jupyter & turicreate安装的更多相关文章
- 3,turicreate入门 - 优化回归模型,使得预测更准确
turicreate入门系列文章目录 1,turicreate入门 - jupyter & turicreate安装 2,turicreate入门 - 一个简单的回归模型 3,turicrea ...
- 2,turicreate入门 - 一个简单的回归模型
turicreate入门系列文章目录 1,turicreate入门 - jupyter & turicreate安装 2,turicreate入门 - 一个简单的回归模型 3,turicrea ...
- Jupyter notebook安装扩展插件
1. 安装Jupyter Notebook pip install jupyter 2. 安装Jypyter Notebook扩展包 pip install jupyter_contrib_nbext ...
- Windows下的Jupyter Notebook 安装与自定义启动(图文详解)
不多说,直接上干货! 前期博客 Windows下的Python 3.6.1的下载与安装(适合32bits和64bits)(图文详解) 这是我自定义的Python 的安装目录 (D:\SoftWare\ ...
- jmeter安装教程与新手入门(附jdk安装教程)
一.前言 最近要对网站做性能测试,提到了并发数测试,查了下,还是决定使用jmeter来完成这项测试,这里总结了jmeter完整的安装教程,附上新手使用教程. 二.jmeter安装 1.jdk安装(jm ...
- MQTT入门1 -- mosquitto 安装
原文链接:https://www.cnblogs.com/NickQ/p/9247638.html MQTT入门1 -- mosquitto 安装 简介: MQTT(Message Queuing T ...
- [转] Spark快速入门指南 – Spark安装与基础使用
[From] https://blog.csdn.net/w405722907/article/details/77943331 Spark快速入门指南 – Spark安装与基础使用 2017年09月 ...
- 『NiFi 学习之路』入门 —— 下载、安装与简单使用
一.概述 "光说不练假把式." 官网上的介绍多少让人迷迷糊糊的,各种高大上的词语仿佛让 NiFi 离我们越来越远. 实践是最好的老师.那就让我们试用一下 NiFi 吧! 二.安装 ...
- Python3入门之软件安装
获得更多资料欢迎进入我的网站或者 csdn或者博客园 最近将我的Python笔记整理下,希望能对他人有所帮助,这是第一课,安装入门篇: windows下安装Python 1.下载,从这里下载:[下载链 ...
随机推荐
- H.265 & H.264
H.265 & H.264 HEVC (H.265) vs. AVC (H.264) https://en.wikipedia.org/wiki/High_Efficiency_Video_C ...
- Flutter Demo: PageView横向使用
video import 'package:flutter/material.dart'; void main() => runApp(MyApp()); class MyApp extends ...
- 以NGK 呼叫河马为例分析智能合约漏洞在哪?
合约交易是指买方和卖方根据约定,在未来某一时刻,以指定价格接受某一资产的协议. 合约是买卖双方之间权利义务的表现形式.合约交易是一种金融衍生工具,与现货市场相比,用户通过判断期货合约交易的涨跌,选择买 ...
- 启动Turtlesim,输入roscore命令,报错
Error: Traceback (most recent call last): File "/opt/ros/indigo/lib/python2.7/dist-packages/r ...
- 死磕Spring之IoC篇 - 解析自定义标签(XML 文件)
该系列文章是本人在学习 Spring 的过程中总结下来的,里面涉及到相关源码,可能对读者不太友好,请结合我的源码注释 Spring 源码分析 GitHub 地址 进行阅读 Spring 版本:5.1. ...
- 第七届蓝桥杯JavaB组——第7题剪邮票
题目: 剪邮票 如[图1.jpg], 有12张连在一起的12生肖的邮票. 现在你要从中剪下5张来,要求必须是连着的. (仅仅连接一个角不算相连) 比如,[图2.jpg],[图3.jpg]中,粉红色所示 ...
- 一次Ubuntu16.04 虚拟机挂起,ping不到网络引发的思考
虚拟机挂起 无网络 情况复现 can@ubuntu:~$ ping www.baidu.com ping: unknown host www.baidu.com 挂起重开虚拟机,遇到无网络状态: 首先 ...
- 剑指 Offer 61. 扑克牌中的顺子 + 简单题 + 思维
剑指 Offer 61. 扑克牌中的顺子 Offer_61 题目描述 java代码 package com.walegarrett.offer; /** * @Author WaleGarrett * ...
- pygame模块使用时出现AttributeError: module ‘pygame’ has no attribute '…'错误解决方法
pygame模块使用时出现AttributeError: module 'pygame' has no attribute '-'错误解决方法 首先在pygame中存在init()模块,出现这样的问题 ...
- locust工具使用详解
今年负责部门的人员培养工作,最近在部门内部分享和讲解了locust这个工具,今天再博客园记录下培训细节 一.简介 1.优势 locust是python语言开发的一款的开源的的性能测试框架,他比jmet ...