LAMP 是服务器系统中开源软件的一个完美组合。它是 Linux 、Apache HTTP 服务器、MySQL 数据库、PHP(或者 Perl、Python)的第一个字母的缩写代码。对于很多系统管理员来说安装 LAMP 除了是必备的技能外,都已经具有驾轻就熟的操作他们的能力了。不过新手们通常希望有没完没了的这方面的教程来告诉自己怎么做,下面我就和大家说说我的方法步骤。

LAMP 是服务器系统中开源软件的一个完美组合。它是 Linux 、Apache
HTTP 服务器、MySQL 数据库、PHP(或者 Perl、Python)的第一个字母的缩写代码。对于很多系统管理员来说安装
LAMP 除了是必备的技能外,都已经具有驾轻就熟的操作他们的能力了。不过新手们通常希望有没完没了的这方面的教程来告诉自己怎么做,下面我就和大家说说我的方法步骤。

现在,很多时候我们需要用 MariaDB 来代替 MySQL 了。在这里我会告诉大家 MariaDB 的安装过程。

我的测试主机名为:server.linux.cn,测试 IP 地址为:192.168.1.200/24

安装 Apache


Apache 是​​一个开源的跨平台的 Web 服务器。它提供了一个全方位的 Web 服务器功能,包括CGI,SSL 和virtual domains (虚拟域)。


安装命令非常简单,只需要打开一个终端,在终端中输入如下命令:

[root@server ~]# yum install httpd -y

安装完毕后,需要设置让 Apache 服务启动,并且在每次服务器重启的时候都自动启动,输入如下命令来完成:

[root@server ~]# /etc/init.d/httpd start

[root@server ~]# chkconfig httpd on

如果您想通过您的防火墙活路由器来远程连接,那么需要允许 Apache 服务接管服务器的 80 端口:

[root@server ~]# vi /etc/sysconfig/iptables

[...]

-A INPUT -p udp -m state --state NEW --dport 80 -j ACCEPT

-A INPUT -p tcp -m state --state NEW --dport 80 -j ACCEPT

[...]

重新启动 iptables :

[root@server ~]# /etc/init.d/iptables restart

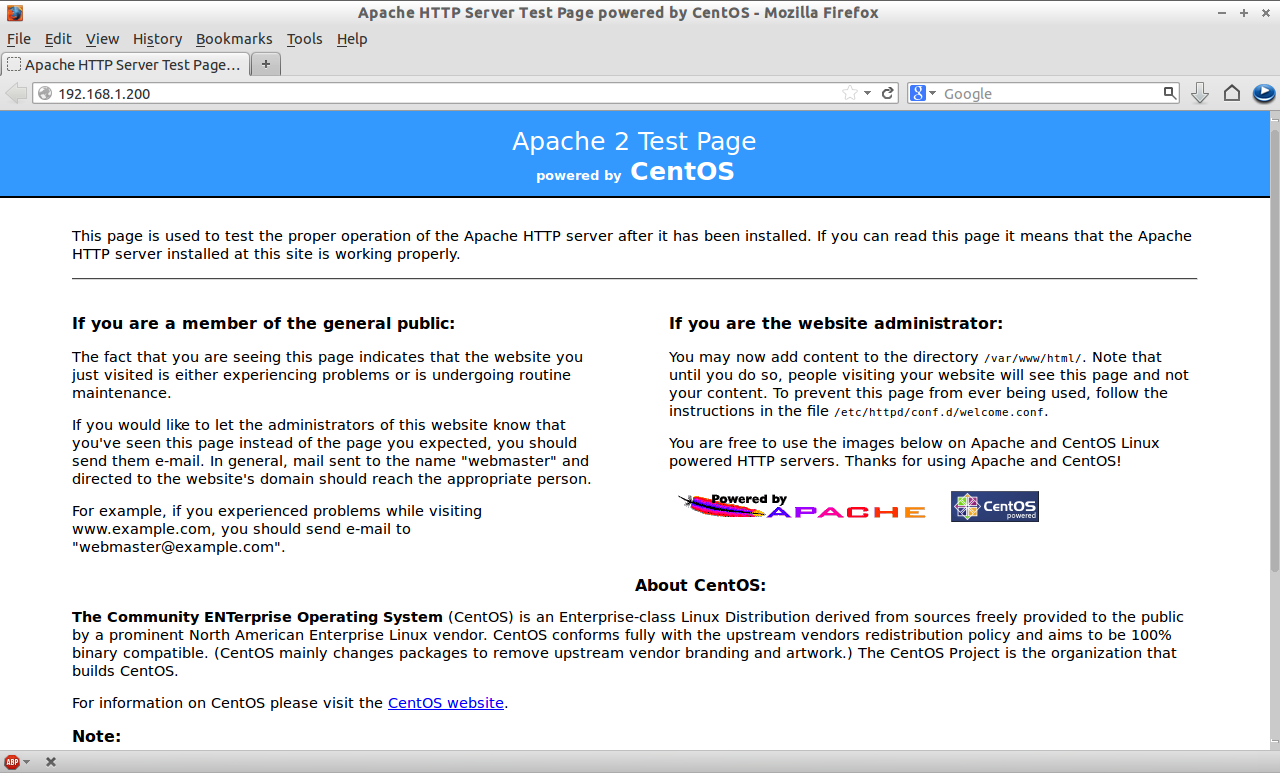
打开您的浏览器访问 http://localhost/ 或者 http://server-ip-address/ 测试 Apache 安装是否成功。

安装 MariaDB

MariaDB 是一个替换 MySQL 的产品。功能强大而可靠。安装前,如果您的服务器中安装有 MySQL ,那么您需要删除它。删除命令:

[root@server ~]# yum remove mysql* mysql-server mysql-devel mysql-libs

为了让 MariaDB 同时兼容 MySQL,我们需要安装 REMI 库来解决兼容性和安装 MariaDB 时软件包依赖性问题。安装命令:

[root@server ~]# rpm -ivh http://rpms.famillecollet.com/enterprise/remi-release-6.rpm

安装兼容 mysql55 包命令:

[root@server ~]# yum --enablerepo=remi-test --disablerepo=remi install compat-mysql55

为 MariaDB 创建一个 repository 文件,并在其中输入如下代码:

32 位系统:

[root@server ~]# vi /etc/yum.repos.d/mariadb.repo

# MariaDB 5.5 CentOS repository list - created 2013-06-06 07:42 UTC

# http://mariadb.org/mariadb/repositories/

[mariadb]

name = MariaDB

baseurl = http://yum.mariadb.org/5.5/centos6-x86

gpgkey=https://yum.mariadb.org/RPM-GPG-KEY-MariaDB

gpgcheck=1

64 位系统:

[root@server ~]# vi /etc/yum.repos.d/mariadb.repo

# MariaDB 5.5 CentOS repository list - created 2013-06-06 07:53 UTC

# http://mariadb.org/mariadb/repositories/

[mariadb]

name = MariaDB

baseurl = http://yum.mariadb.org/5.5/centos6-amd64

gpgkey=https://yum.mariadb.org/RPM-GPG-KEY-MariaDB

gpgcheck=1

保存并退出该文件,并运行 yum update 命令:

[root@server ~]# yum update

现在开始安装 MariaDB :

[root@server ~]# yum install MariaDB-devel MariaDB-client MariaDB-server -y

安装完毕后,启动 MariaDB 服务,并让它在每次重启服务器后自动启动。

[root@server ~]# /etc/init.d/mysql start

Starting MySQL... SUCCESS!

[root@server ~]# chkconfig mysql on

为 MySQL 的 root 设置密码,默认情况下,MySWL root 密码是空的。为了防止未经授权的用户访问 MySQL 我们需要设置 root 用户密码:

[root@server ~]# /usr/bin/mysql_secure_installation

/usr/bin/mysql_secure_installation: line 379: find_mysql_client: command not found


NOTE: RUNNING ALL PARTS OF THIS SCRIPT IS RECOMMENDED FOR ALL MariaDB

      SERVERS IN PRODUCTION USE!  PLEASE READ EACH STEP CAREFULLY!


In order to log into MariaDB to secure it, we'll need the current

password for the root user.  If you've just installed MariaDB, and

you haven't set the root password yet, the password will be blank,

so you should just press enter here.


Enter current password for root (enter for none): 

OK, successfully used password, moving on...


Setting the root password ensures that nobody can log into the MariaDB

root user without the proper authorisation.


You already have a root password set, so you can safely answer 'n'.


Change the root password? [Y/n] y

New password: 

Re-enter new password: 

Password updated successfully!

Reloading privilege tables..

 ... Success!


By default, a MariaDB installation has an anonymous user, allowing anyone

to log into MariaDB without having to have a user account created for

them.  This is intended only for testing, and to make the installation

go a bit smoother.  You should remove them before moving into a

production environment.


Remove anonymous users? [Y/n] 

 ... Success!


Normally, root should only be allowed to connect from 'localhost'.  This

ensures that someone cannot guess at the root password from the network.


Disallow root login remotely? [Y/n] 

 ... Success!


By default, MariaDB comes with a database named 'test' that anyone can

access.  This is also intended only for testing, and should be removed

before moving into a production environment.


Remove test database and access to it? [Y/n] 

 - Dropping test database...

ERROR 1008 (HY000) at line 1: Can't drop database 'test'; database doesn't exist

 ... Failed!  Not critical, keep moving...

 - Removing privileges on test database...

 ... Success!


Reloading the privilege tables will ensure that all changes made so far

will take effect immediately.


Reload privilege tables now? [Y/n] 

 ... Success!


Cleaning up...


All done!  If you've completed all of the above steps, your MariaDB

installation should now be secure.


Thanks for using MariaDB!

安装 PHP

PHP(PHP 是:Hypertext Preprocessor 的缩写)是一种广泛使用的开放源码的通用脚本语言,适合于 Web 开发,可嵌入到 HTML 中。

安装 PHP 命令:

[root@server ~]# yum install php -y

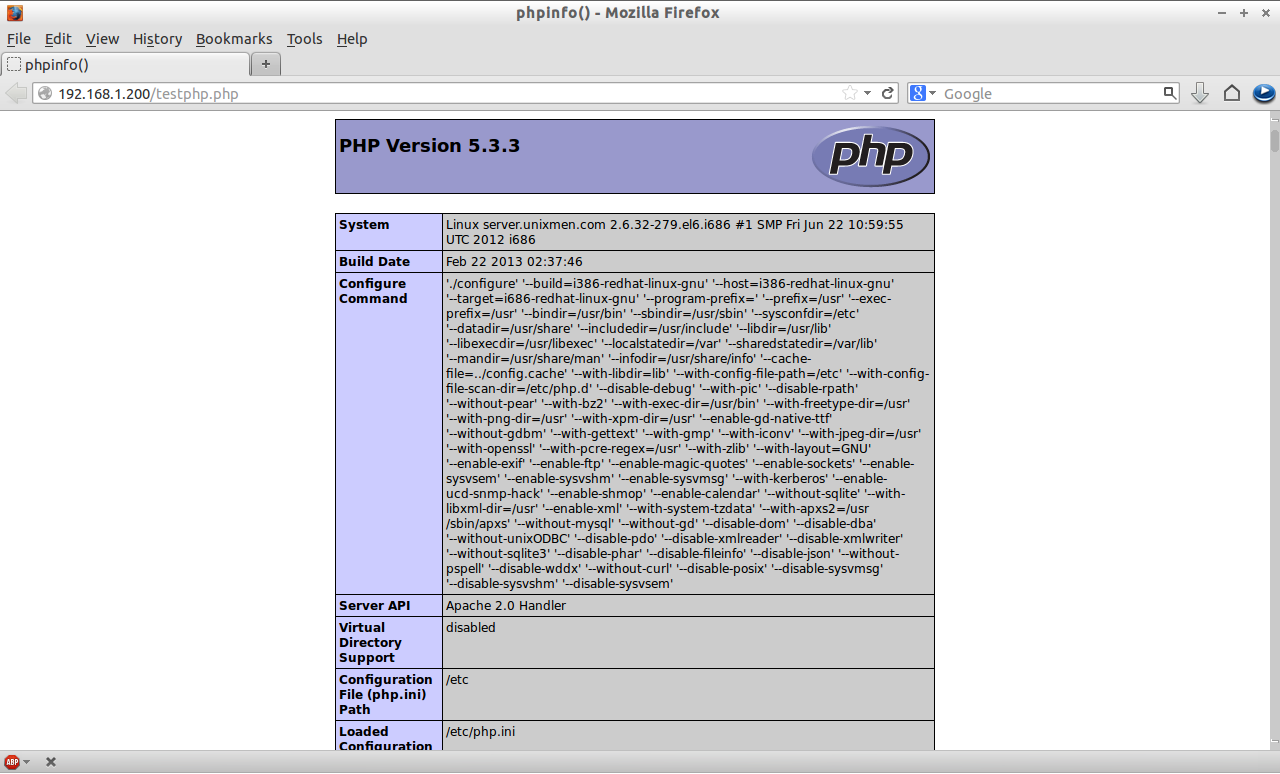
创建一个的 “testphp.php” 的文件在 Apache 的文档根目录文件夹,在其中如入如下代码。命令:

[root@server ~]# vi /var/www/html/testphp.php

<?php

phpinfo();

?>

重新启动 httpd 服务:

[root@server ~]# /etc/init.d/httpd restart

用浏览器打开 http://server-ip-address/testphp.php 。它会显示关于 PHP 的详细信息,比如版本,建立日期等。

如果您需要安装所有的 PHP 模块,可以输入 yum install php* -y 来安装,安装完毕后重启 httpd 服务。重启服务后,您可以用浏览器打开 http://server-ip-address/testphp.php 来查看您刚才安装的模块情况。

安装 nstall phpMyAdmi

根据您的情况来选择是否安装 nstall phpMyAdmin 。


phpMyAdmin 是一个免费开源的 MySQL 管理工具。默认情况下 CentOS/RHEL/Scientific Linux 官方库中没有 phpMyAdmin。所以我们需要从 EPEL 库中安装。

首先,我们需要添加 EPEL 库:

[root@server ~]# rpm -ivh http://dl.fedoraproject.org/pub/epel/6/i386/epel-release-6-8.noarch.rpm

现在我们可以安装 phpMyAdmin 了。安装命令:

[root@server ~]# yum install phpmyadmin -y

安装完毕后,我们需要配置的 phpMyAdmin。打开 phpmyadmin.conf 的文件。查找以“<Directory” 开头到 </Directory> 包含的部分,如下命令所示:

[root@server ~]# vi /etc/httpd/conf.d/phpMyAdmin.conf


Alias /phpMyAdmin /usr/share/phpMyAdmin

Alias /phpmyadmin /usr/share/phpMyAdmin


## Comment the following Section ##

#<Directory /usr/share/phpMyAdmin/>

#   <IfModule mod_authz_core.c>

#     # Apache 2.4

#     <RequireAny>

#       Require ip 127.0.0.1

#       Require ip ::1

#     </RequireAny>

#   </IfModule>

#   <IfModule !mod_authz_core.c>

#     # Apache 2.2

#     Order Deny,Allow

#     Deny from All

#     Allow from 127.0.0.1

#     Allow from ::1

#   </IfModule>

#</Directory>

打开 config.inc.php 文件,将 cookie 改为 http。

[root@server ~]# cp /usr/share/phpMyAdmin/config.sample.inc.php /usr/share/phpMyAdmin/config.inc.php 

[root@server ~]# vi /usr/share/phpMyAdmin/config.inc.php

[...] 

/* Authentication type */

$cfg['Servers'][$i]['auth_type'] = 'http';

[...]

重新启动 Apache 服务:

[root@server ~]# /etc/init.d/httpd restart

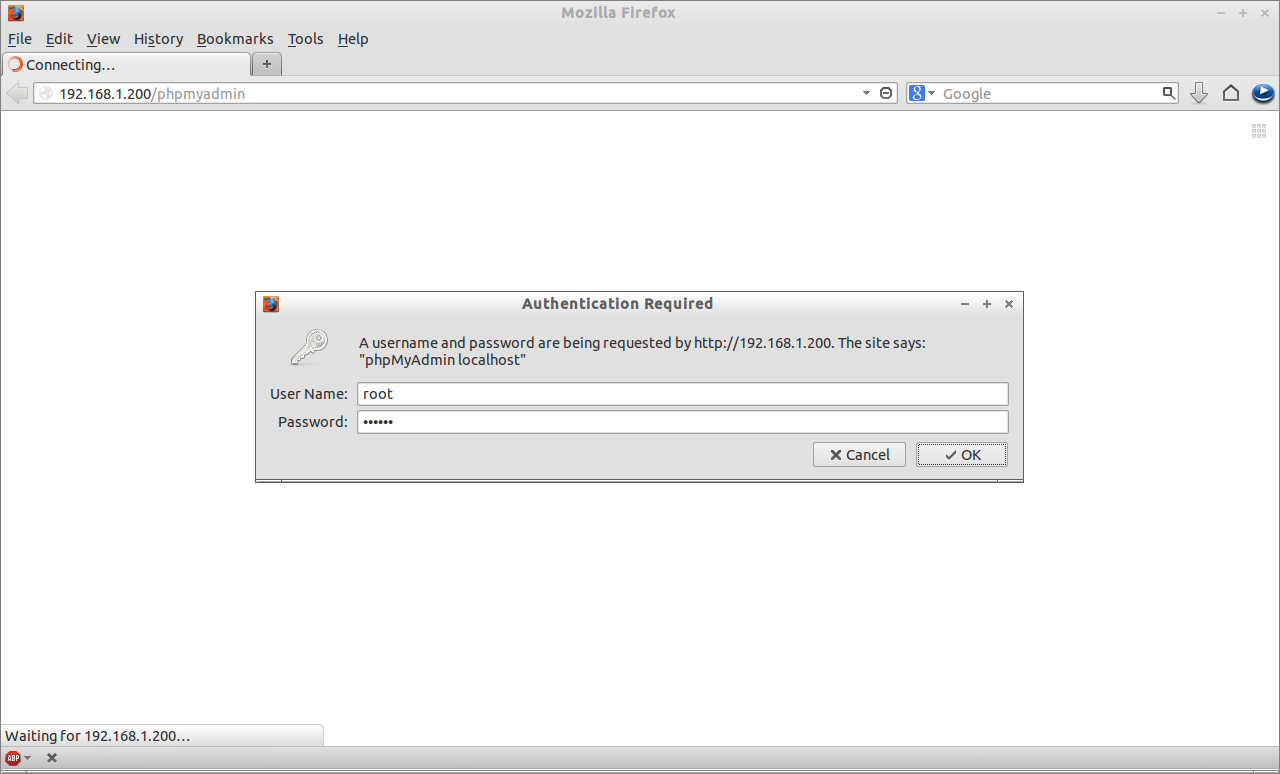
现在,您可以访问 phpmyadmin 控制太来管理 MySQL 了。打开一个浏览器,访问:http://server-ip-address/phpmyadmin/ 。需要输入您的 MySQL 用户名和密码,如果您按前面的步骤设置了密码的话。我设置的是 “root” 和 “centOS”。

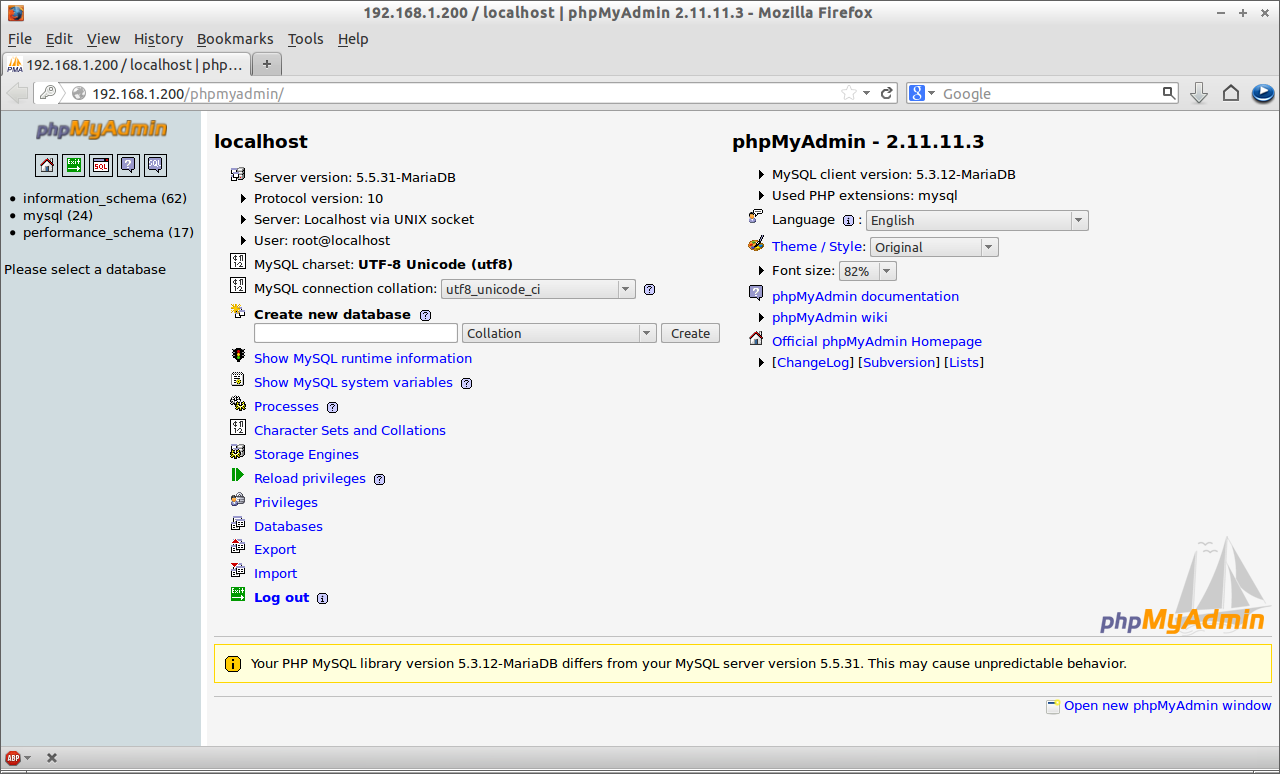
您将被重定向到 phpMyAdmin 的 Web 主界面:

现在,您能够通过 phpMyAdmin 管理您的 MariaDB 数据库了。

好了,您的 LAMP 服务器已经安装完毕并运行起来了。


在CentOS/RHEL/Scientific Linux 6下安装 LAMP的更多相关文章

  1. Install LAMP Server (Apache, MariaDB, PHP) On CentOS/RHEL/Scientific Linux 7

    Install LAMP Server (Apache, MariaDB, PHP) On CentOS/RHEL/Scientific Linux 7 By SK  - August 12, 201 ...

  2. Setup FTP Server On CentOS, RHEL, Scientific Linux 6.5/6.4/6.3

    setsebool allow_ftpd_full_access onsetsebool -P ftp_home_dir on vsftpd (Very Secure File Transport P ...

  3. linux之 CentOS/RHEL/Scientific Linux 6 & 7上安装Telnet

    声明: 在安装和使用Telnet之前,需要记住以下几点. 在公网(WAN)中使用Telnet是非常不好的想法.它会以明文的格式传输登入数据.每个人都可以看到明文.如果你还是需要Telnet,强烈建议你 ...

  4. centos 64位linux系统下安装appt命令

    首先,安装apktool包 1. wget http://android-apktool.googlecode.com/files/apktool-install-linux-r04-brut1.ta ...

  5. Setup VSFTPD Server with Virtual Users On CentOS, RHEL, Scientific Linux 6.5/6.4/6.3

    We have already shown you How to Setup VSFTPD Server on CentOS 6.5/6.4 in our previous article. In t ...

  6. linux环境下安装sphinx中文支持分词搜索(coreseek+mmseg)

     linux环境下安装sphinx中文支持分词搜索(coreseek+mmseg) 2013-11-10 16:51:14 分类: 系统运维 为什么要写这篇文章? 答:通过常规的三大步(./confi ...

  7. 【android开发】如何在Linux平台下安装JDK环境

    原文:http://android.eoe.cn/topic/android_sdk Linux平台JDK安装 本文主要描述如何在Linux平台下安装JDK环境.进入网页:http://www.ora ...

  8. Linux系统下安装Gitlab

    Linux系统下安装Gitlab 一.简介 GitLab是利用 Ruby on Rails 一个开源的版本管理系统,实现一个自托管的Git项目仓库,可通过Web界面进行访问公开的或者私人项目.它拥有与 ...

  9. 尚学linux课程---10、linux环境下安装python

    尚学linux课程---10.linux环境下安装python 一.总结 一句话总结: 直接在官网下载python的源码包即可,然后在linux下安装 linux下安装软件优先想到的的确是yum,但是 ...

随机推荐

  1. 关于tomcat的clean

    1 添加了一个web项目到tomcat,然后进行clean的时候,根目录实际上是在WebContent下,也就是说存放在WebContent目录下的所有文件在clean的时候才会被添加到tomcat对 ...

  2. win7 64位 TortoiseSVN-1.8.4客户端安装

    下载地址链接:http://pan.baidu.com/s/1nukeBVz 密码:tc79 (32 64位都有,注意区分) next一路安装 安装好后,在需要和服务器同步的文件夹图标上--鼠标右键- ...

  3. python安装集成包

    anaconda, 包含各种科学运算包以及astropy.装完它一劳永逸. https://www.continuum.io/downloads

  4. MVC-04 视图(3)

    五.Url辅助方法 Url辅助方法与HTML辅助方法很类似,HTML辅助方法用来产生HTML标签,而Url辅助方法则负责用来产生Url网址. @Url.Action("About" ...

  5. linux下c/c++方式访问curl的帮助手册

    自:http://blog.chinaunix.net/u1/47395/showart_1768832.html 有个业务需求需要通过curl 代理的方式来访问外网 百度了一把,测试可以正常使用.记 ...

  6. 第一讲 一个简单的Qt程序分析

    本文概要:通过一个简单的Qt程序来介绍Qt程序编写的基本框架与一些Qt程序中常见的概念 #include <QApplication> #include <QPushButton&g ...

  7. python字符串操作总结

    python中有各种字符串操作,一开始python有个专门的string模块,要使用需先import string.后来从python2.0开始,string方法改用str.method()形式调用, ...

  8. SVN同步出现故障

    1.错误描写叙述    同步SVNStatusSubscribe时报告了错误,1中的0个资源已经同步    同步/frame时错误发生:Error getting status for resourc ...

  9. Git基础 1 ---- 版本控制系统的介绍

    1 Git 1 版本控制系统 vcs - version control system 2 版本控制是一种记录一个或若干文件内容变化,以便将来查阅特定版本修订情况的系统 3 版本控制系统的主要功能 1 ...

  10. 深度学习 Deep Learning UFLDL 最新 Tutorial 学习笔记 1:Linear Regression

    1 前言 Andrew Ng的UFLDL在2014年9月底更新了. 对于開始研究Deep Learning的童鞋们来说这真的是极大的好消息! 新的Tutorial相比旧的Tutorial添加了Conv ...