
从Socket入门到BIO,PIO,NIO,multiplexing,AIO(未完待续)
Socket入门
最简单的Server端读取Client端内容的demo
public class Server {

    public static void main(String [] args) throws Exception{

        ServerSocket ss = new ServerSocket(9000);

        Socket s = ss.accept();

        InputStream input = s.getInputStream();

        byte[] bytes = new byte[1024];

        int len = input.read(bytes);

        System.out.println(new String(bytes,0,len));

    }

}
打开浏览器,输入localhost:9000
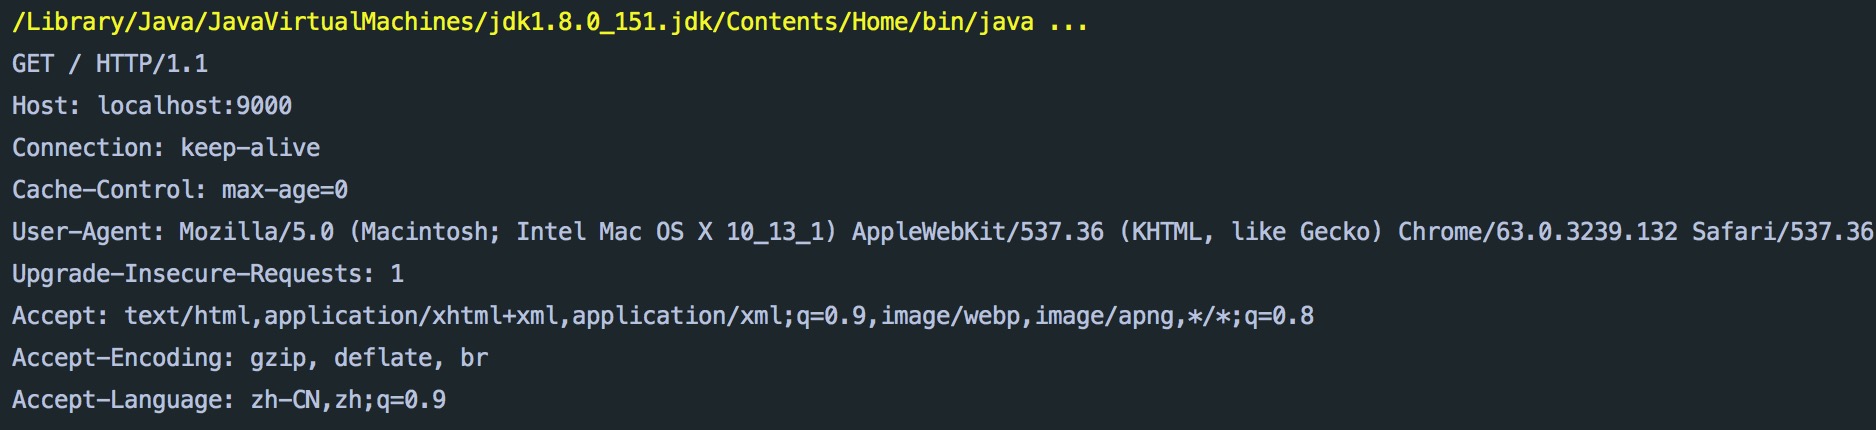
可以看到控制台输出了如下内容(HTTP请求头)
或者命令行输入:telnet localhost 9000 , 然后按下ctrl+] 然后再输入: send 发送的内容 , 然后就可以再IDEA控制台看到send的内容了.
但是现在手头是Mac系统,不知道为啥send不好使....windows下测过,肯定好使.
最简单的Server端写入到Client端内容的demo
public class Server2 {

    public static void main(String[] args) throws Exception {

        ServerSocket ssocket = new ServerSocket(9000);

        Socket socket = ssocket.accept();

        OutputStream os = socket.getOutputStream();

        os.write("http/1.0 200 OK\nContent-Type:text/html;charset:GBK\n\nhello".getBytes());

        os.flush();

        os.close();

    }

}
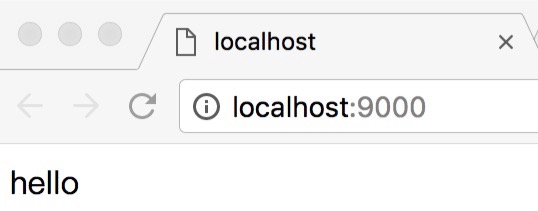
可以在浏览器输入localhost:9000来请求内容 , http响应头的那部分会被浏览器解析掉.所以只输出一段hello
或者可以使用telnet localhost 9000来访问, 得到的结果就是那段写入的内容

最简单的Client端写入到Server端的Demo
public class Client {

    public static void main(String[] args) throws Exception{

        Socket socket = new Socket("localhost",9000);

        OutputStream output = socket.getOutputStream();

        output.write("你好".getBytes());

        output.close();

        socket.close();

    }

}
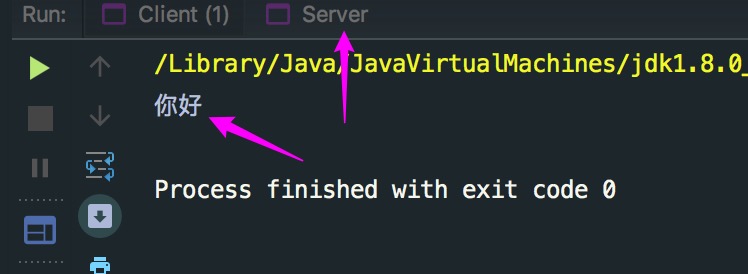
注:需要先运行上面的Server类, 然后再运行这个Client. 然后再点击Server的控制台标签, 就会发现Server类的控制台输已经出了"你好"字样.
最简单的用Client端来模拟浏览器http请求Demo
用socket作为Client来模拟浏览器访问网站, 来获取网站的html内容.以www.sohu.com 为例...为什么选sohu呢? 你试试百度,会报302....
public class Client2 {

    public static void main(String[] args) throws Exception {

        Socket socket = new Socket("www.sohu.com", 80);

        InputStream input = socket.getInputStream();

        OutputStream output = socket.getOutputStream();

        StringBuilder str = new StringBuilder();

        //http协议中请求行,必须,不然不会被识别为HTTP

        str.append("GET / HTTP/1.1\r\n");

        //http协议中的请求头

        str.append("Host: www.sohu.com\r\n");

        str.append("Connection: Keep-Alive\r\n");

        // 用于模拟浏览器的user-agent

        str.append("user-agent: Mozilla/5.0 (Macintosh; Intel Mac OS X 10_13_1) AppleWebKit/537.36 (KHTML, like Gecko) Chrome/63.0.3239.132 Safari/537.36\r\n");

        //这里一定要一个回车换行,表示消息头完,不然服务器会一直等待,认为客户端没发送完

        str.append("\r\n");

        byte[] bytes = new byte[1024];

        output.write(str.toString().getBytes());

        while (true) {

            int len = input.read(bytes);

            if (len > 0) {

                String result = new String(bytes, 0, len);

                System.out.println(result);

            } else {

                break;

            }

        }

    }

}
运行后, 前面是http响应头, 后面是html代码
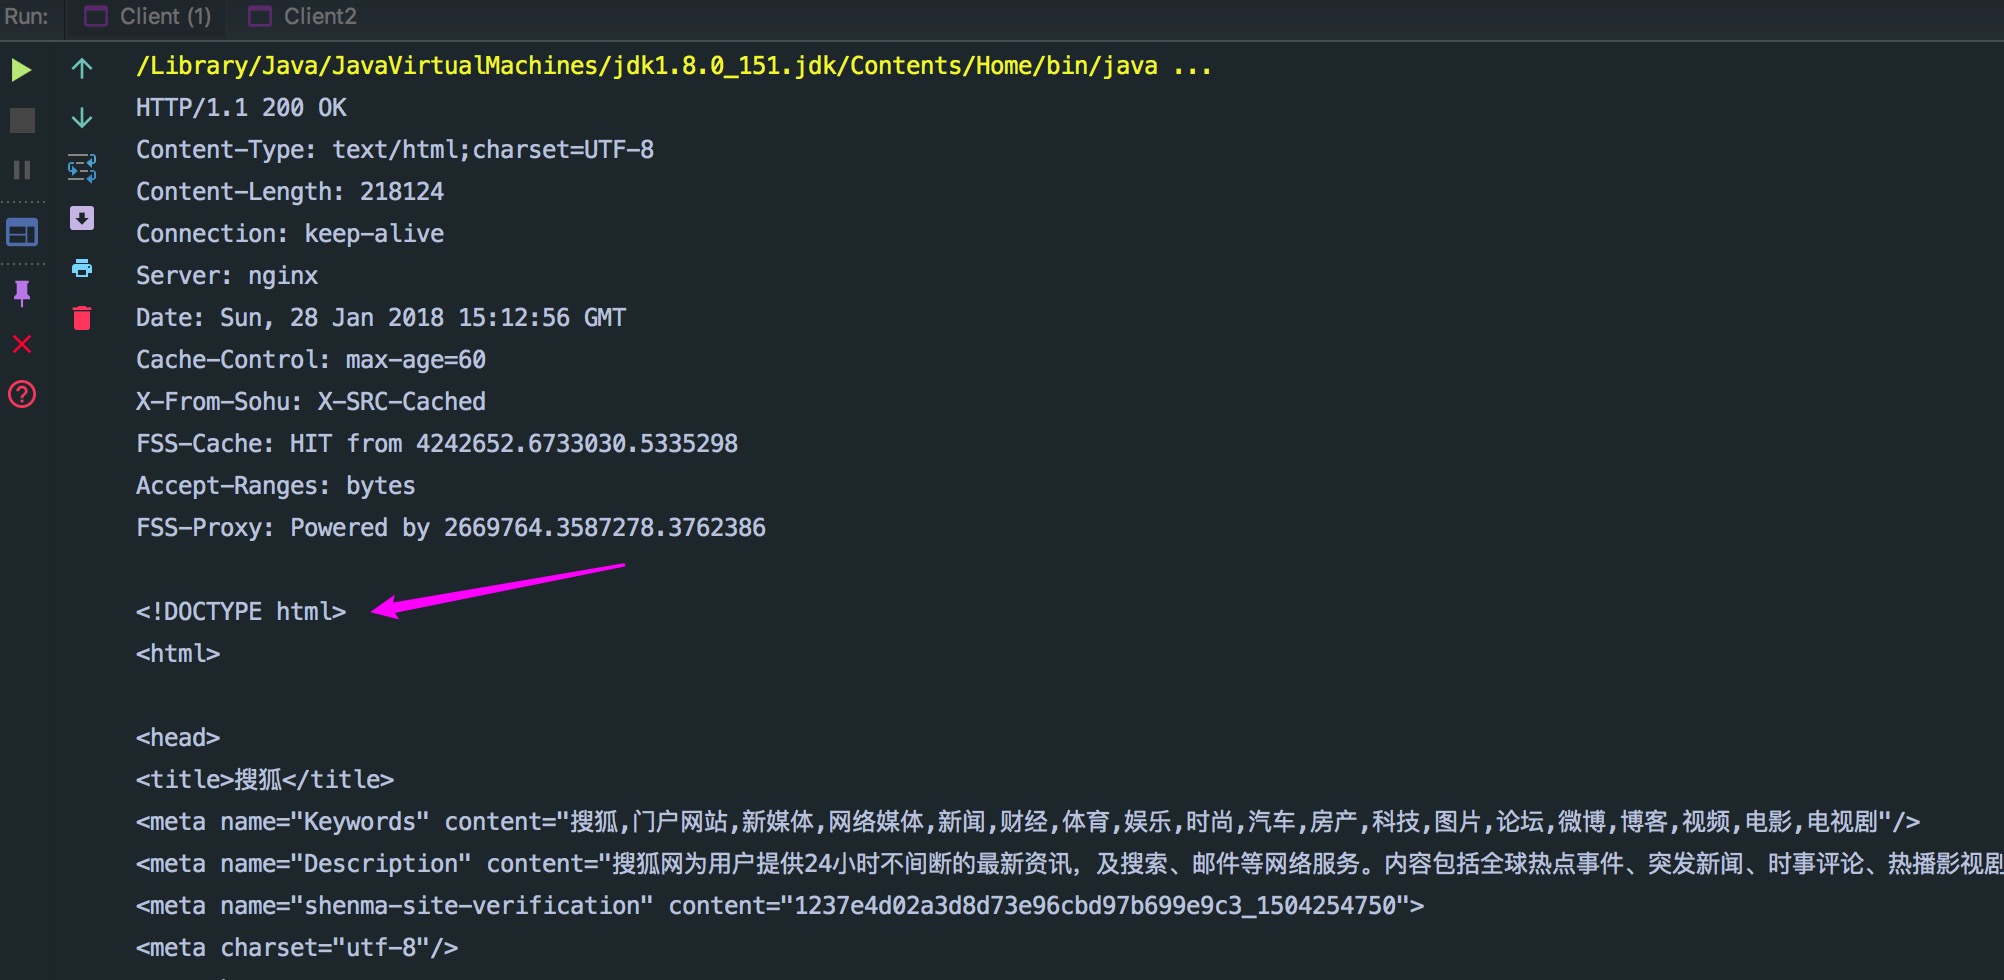
改进Server类, 循环读取
前面提到的"最简单的Server端读取Client端内容的demo"这段代码, 也就是Server类. 其实不管客户端发来多少内容, 都只能读取1024字节以内的数据. 因为代码就是这么写的....
下面进行改进, 让他循环读取, 直到读完为止.
public class Server3 {

    public static void main(String[] args) throws Exception {

        ServerSocket ss = new ServerSocket(9000);

        Socket s = ss.accept();

        InputStream input = s.getInputStream();

        byte[] bytes = new byte[1024];

        while (true) {

            int len = input.read(bytes);

            // 如果读到了内容,说明得输出啊

            if (len > 0) {

                System.out.println(new String(bytes, 0, len));

            }

            // 如果没读取到内容,或者没读满bytes数组 说明读完了, 不用再读下一次了, 该退出循环了.

            if (len < bytes.length) {

                break;

            }

        }

    }

}
可以配合着用前文中的Client类来进行测试.先跑Server来监听端口, 再运行Client发送请求. 去看Server类的控制台是否输出相应的内容.
将服务器改为循环运行
之前是Server响应一个客户端就终止了,这回用while(true)来让Server不停地进行服务.
public class Server4 {

    public static void main(String[] args) throws Exception {

        ServerSocket ss = new ServerSocket(9000);

        while (true) {

            Socket s = ss.accept();

            InputStream input = s.getInputStream();

            byte[] bytes = new byte[1024];

            while (true) {

                int len = input.read(bytes);

                // 如果读到了内容,说明得输出啊

                if (len > 0) {

                    System.out.println(new String(bytes, 0, len));

                }

                // 如果没读取到内容,或者没读满bytes数组 说明读完了, 不用再读下一次了, 该退出循环了.

                if (len < bytes.length) {

                    break;

                }

            }

        }

    }

}
可以配合着用前文中的Client类来进行测试.先跑Server来监听端口, 再运行Client发送请求. 去看Server类的控制台是否输出相应的内容.
Server运行一次就行, 一直在提供服务. 而Client这回可以运行多次了, Client运行几次, Server的控制台下就会收到几个'你好'.
BIO
同步阻塞IO, 每个线程都处理着一个客户端.客户端与线程数是1:1
public class Server5 {

    public static void main(String[] args) throws Exception {

        ServerSocket ss = new ServerSocket(9000);

        System.out.println("服务端启动");

        // 循环着监听

        while (true) {

            Socket s = ss.accept();

            System.out.println("接收到客户端");

            // 一旦接收到客户端,就开一个线程

            new Thread(() -> {

                //为了让代码简短,try多包一些代码...

                try {

                    InputStream input = s.getInputStream();

                    OutputStream output = s.getOutputStream();

                    byte[] bytes = new byte[1024];

                    while (true) {

                        int len = input.read(bytes);

                        // 如果读到了内容,说明得输出啊

                        if (len > 0) {

                            System.out.println(new String(bytes, 0, len));

                        }

                        // 如果没读取到内容,或者没读满bytes数组 说明读完了, 不用再读下一次了, 该退出循环了.

                        if (len < bytes.length) {

                            break;

                        }

                    }

                    output.write("http/1.1 200 OK\nContent-Type:text/html;charset:GBK\n\nhello".getBytes());

                    output.flush();

                    input.close();

                    output.close();

                } catch (Exception e) {

                    e.printStackTrace();

                } finally {

                    //...其实close应该出现在这里...

                    System.out.println("断开连接");

                }

            }).start();

        }

    }

}
可以在浏览器上用两个标签栏来访问localhost:9000来进行测试.
PIO
伪异步IO,为了避免Server5无限制地开一个新线程,使用线程池来统一管理线程.
public class Server6 {

    public static void main(String[] args) throws Exception {

        ServerSocket ss = new ServerSocket(9000);

        System.out.println("服务端启动");

        ExecutorService pool = Executors.newFixedThreadPool(40);

        // 循环着监听

        while (true) {

            Socket s = ss.accept();

            System.out.println("接收到客户端");

            // 一旦接收到客户端,就放入线程池

            pool.submit(() -> {

                //为了让代码简短,try多包一些代码...

                try {

                    InputStream input = s.getInputStream();

                    OutputStream output = s.getOutputStream();

                    byte[] bytes = new byte[1024];

                    while (true) {

                        int len = input.read(bytes);

                        // 如果读到了内容,说明得输出啊

                        if (len > 0) {

                            System.out.println(new String(bytes, 0, len));

                        }

                        // 如果没读取到内容,或者没读满bytes数组 说明读完了, 不用再读下一次了, 该退出循环了.

                        if (len < bytes.length) {

                            break;

                        }

                    }

                    output.write("http/1.1 200 OK\nContent-Type:text/html;charset:GBK\n\nhello".getBytes());

                    output.flush();

                    input.close();

                    output.close();

                } catch (Exception e) {

                    e.printStackTrace();

                } finally {

                    //...其实close应该出现在这里...

                    System.out.println("断开连接");

                }

            });

        }

    }

}
NIO
首先推荐一本书,讲的详细:
nio博客 http://ifeve.com/java-nio-all/ ,这个更适合快速入门,但原理最好还是看书..讲的很详细
所以相关原理就不在这里粘贴了....再整理也没人家讲的全面易懂,这本书还是非常推荐看的,一开始我就是在网上看各种博客(当时也知道这本书), 但直到耐下心看了这本书,才发现很多地方这里讲的非常详细, 这本书是基于api讲的, 以后需要分析看源码的话还是借助博客更好一些,网上有很多大神的源码分析
public class NIOServer {

    private static int BUFFER_SIZE = 1024;

    private static int PORT = 9000;

    public static void main(String[] args) throws Exception {

        Selector selector = Selector.open();

        ServerSocketChannel serverSocketChannel = ServerSocketChannel.open();

        serverSocketChannel.socket().bind(new InetSocketAddress(PORT));

        serverSocketChannel.configureBlocking(false);

        serverSocketChannel.register(selector, SelectionKey.OP_ACCEPT);

        while (true) {

            selector.select();

            Iterator<SelectionKey> iter = selector.selectedKeys().iterator();

            while (iter.hasNext()) {

                SelectionKey key = iter.next();

                iter.remove();

                if (key.isAcceptable()) {

                    SocketChannel socketChannle = serverSocketChannel.accept();

                    socketChannle.configureBlocking(false);

                    socketChannle.register(selector, SelectionKey.OP_READ, ByteBuffer.allocate(BUFFER_SIZE));

                } else if (key.isReadable()) {

                    SocketChannel socketChannel = (SocketChannel) key.channel();

                    ByteBuffer buf = (ByteBuffer) key.attachment();

                    // 读浏览器发送的HTTP请求

                    long bytesRead = socketChannel.read(buf);

                    while (bytesRead > 0) {

                        buf.flip();

                        while (buf.hasRemaining()) {

                            System.out.print((char) buf.get());

                        }

                        System.out.println();

                        buf.clear();

                        bytesRead = socketChannel.read(buf);

                    }

                    //向浏览器返回HTTP请求

                    buf.put("http/1.1 200 OK\nContent-Type:text/html;charset:GBK\n\nhello".getBytes());

                    socketChannel = (SocketChannel) key.channel();

                    buf.flip();

                    while (buf.hasRemaining()) {

                        socketChannel.write(buf);

                    }

                    // 关闭

                    socketChannel.close();//这样浏览器才不继续拉取

                    key.cancel();

                }

            }

        }

    }

}
然后再浏览器中访问localhost:9000即可看到"hello"
或者用普通SocketClient来访问
或者用如下的NIOClient访问:
public class NIOClient {

    public static void main(String[] args) throws Exception {

        ByteBuffer buffer = ByteBuffer.allocate(1024);

        SocketChannel socketChannel = SocketChannel.open();

        socketChannel.configureBlocking(false);

        socketChannel.connect(new InetSocketAddress("localhost", 9000));

        if (socketChannel.finishConnect()) {

            //向服务器写入

            for (int i = 0; i < 3; i++) {

                String info = "hello:<" + i + ">";

                buffer.clear();

                buffer.put(info.getBytes());

                buffer.flip();

                while (buffer.hasRemaining()) {

                    socketChannel.write(buffer);

                }

            }

            //从服务器读取

            buffer.clear();

            long bytesRead = socketChannel.read(buffer);

            while (bytesRead > 0) {

                buffer.flip();

                while (buffer.hasRemaining()) {

                    System.out.print((char) buffer.get());

                }

                System.out.println();

                buffer.clear();

                bytesRead = socketChannel.read(buffer);

            }

        }

    }

}
未完待续....
从Socket入门到BIO,PIO,NIO,multiplexing,AIO(未完待续)的更多相关文章
- JAVA SOCKET 通信总结 BIO、NIO、AIO ( NIO 2) 的区别和总结
1 同步 指的是用户进程触发IO操作并等待或者轮询的去查看IO操作是否就绪 自己上街买衣服,自己亲自干这件事,别的事干不了.2 异步 异步是指用户进程触发IO操作以后便开始做自己的事情,而当IO操作已 ...
- 从Socket入门到BIO,NIO,multiplexing,AIO
Socket入门 最简单的Server端读取Client端内容的demo public class Server { public static void main(String [] args) t ...
- BIO、NIO、AIO入门认识
同步.异步.阻塞.非阻塞概念理解. 同步: 比如在执行某个逻辑业务,在没有得到结果之前一直处于等待阻塞状态,得到结果后才继续执行 异步: 比如在执行某个逻辑业务,在没有得到结果可以去干其他的事情,等待 ...
- Java IO模型:BIO、NIO、AIO
Java IO模型:BIO.NIO.AIO 本来是打算直接学习网络框架Netty的,但是先补充了一下自己对Java 几种IO模型的学习和理解.分别是 BIO.NIO.AIO三种IO模型. IO模型的基 ...
- BIO与NIO、AIO的区别
IO的方式通常分为几种,同步阻塞的BIO.同步非阻塞的NIO.异步非阻塞的AIO. 一.BIO 在JDK1.4出来之前,我们建立网络连接的时候采用BIO模式,需要先在服务端启动一个Serve ...
- Java提高班(五)深入理解BIO、NIO、AIO
导读:本文你将获取到:同/异步 + 阻/非阻塞的性能区别:BIO.NIO.AIO 的区别:理解和实现 NIO 操作 Socket 时的多路复用:同时掌握 IO 最底层最核心的操作技巧. BIO.NIO ...
- [转帖] BIO与NIO、AIO的区别
培训里面讲的东西 自己查了下 啥意思,,, 转帖强化一下. http://blog.csdn.net/skiof007/article/details/52873421 IO的方式通常分为几种,同步 ...
- JDK中关于BIO,NIO,AIO,同步,异步介绍
在理解什么是BIO,NIO,AIO之前,我们首先需要了解什么是同步,异步,阻塞,非阻塞.假如我们现在要去银行取钱: 同步 : 自己亲自出马持银行卡到银行取钱(使用同步IO时,Java自己处理IO读写) ...
- BIO与NIO、AIO的区别(这个容易理解)
转自:http://blog.csdn.net/skiof007/article/details/52873421 BIO与NIO.AIO的区别(这个容易理解) IO的方式通常分为几种,同步阻塞的BI ...
随机推荐
- navicat 将自增长字段重置(重新从1开始)的方法
先说明,此语句会将你的表中数据全部删除. 很简单,运行如下sql语句: TRUNCATE TABLE 表名;
- 【初学必备】Win10环境下Anaconda安装
Anaconda集合了python,Spyder,Jupyter notebook及conda-----包管理器与环境管理器(含常用的panda,numpy等),省去单独下载的繁琐步骤,方便使用. 注 ...
- 聚类——GMM
聚类——认识GMM算法 作者:凯鲁嘎吉 - 博客园 http://www.cnblogs.com/kailugaji/ 一.GMM概述 二.GMM算法步骤 三.具体推导参考文献 1. 李航. 统计学习 ...
- nginx [alert] 12339#0: 1024 worker_connections are not enough
进一步分析报错原因,具体步骤如下: l 查看这两台系统最大的允许文件打开数 [root@nginx01 logs]# cat /proc/sys/fs/file-max 343927 l 通过ul ...
- P1546 最短网络 Agri-Net题解(克鲁斯卡尔)
P1546 最短网络 Agri-Net 那么这个题是一道最小生成树的板子题 在此讲解kruskal克鲁斯卡尔方法: 原理: 并查集在这里被用到: 众所周知:树满足这样一个定理:如果 图 中有n个节点并 ...
- 山东省网络安全技能大赛 部分writeup
web1 提示:ip不在范围内 直接抓包加client-ip: 127.0.0.1 即可得到flag web2 <?php include 'here.php'; $key = 'kela ...
- open-falcon自定义push数据无法在grafana显示
使用open-falcon自定义push数据,在open-falcon中数据能正常显示,而在grafana中添加监控项时却无法显示. 由上述现象可判断可能是由于open-falcon的api组件有问题 ...
- 嵌入式操作系统---打印函数(printf/sprintf)的实现
一.打印函数简介 作用:将“给定的内容”按照“指定的格式”输出到“指定目标内”. 打印函数的基本格式: char print_buf[BUF_SIZE]; void printf(const char ...
- Lepus搭建企业级数据库慢查询分析平台
前言 Lepus的慢查询分析平台是独立于监控系统的模块,该功能需要使用percona-toolkit工具来采集和记录慢查询日志,并且需要部署一个我们提供的shell脚本来进行数据采集.该脚本会自动开启 ...
- Spring Boot JPA Entity Jackson序列化触发懒加载的解决方案
Spring Jpa这项技术在Spring 开发中经常用到. 今天在做项目用到了Entity的关联懒加载,但是在返回Json的时候,不管关联数据有没有被加载,都会触发数据序列化,而如果关联关系没有被加 ...