scrapy相关:splash安装 A javascript rendering service 渲染
0.
splash: 美人鱼 溅,泼
1.参考
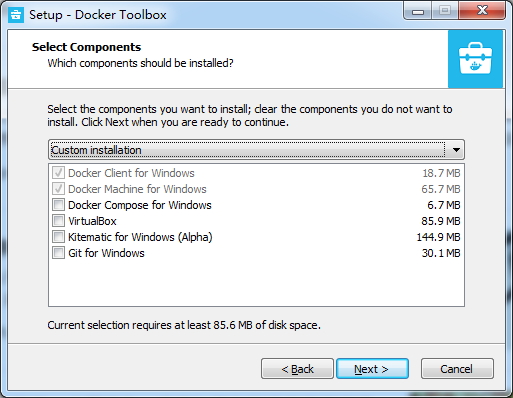
docker在windows下的安装
https://blog.scrapinghub.com/2015/03/02/handling-javascript-in-scrapy-with-splash/
Splash is our in-house solution for JavaScript rendering, implemented in Python using Twisted and QT. 官方博客介绍,splash 是 scrapinghub 的内部解决方案???
We're the creators and the main maintainers of Scrapy. 创始人和维护者...背后的大佬
Splash is a javascript rendering service with an HTTP API. It's a lightweight browser with an HTTP API, implemented in Python 3 using Twisted and QT5.
It's fast, lightweight and state-less which makes it easy to distribute. 用于渲染js页面
http://splash.readthedocs.io/en/latest/index.html
splash 官方文档
github: scrapy-plugins/scrapy-splash
This library provides Scrapy and JavaScript integration using Splash. 如何在 scrapy 中使用 splash
http://splash.readthedocs.io/en/stable/api.html#request-filters
Splash supports filtering requests based on Adblock Plus rules. 还没有搞定
2.安装使用
https://stackoverflow.com/questions/30345623/scraping-dynamic-content-using-python-scrapy
提到 ScrapyJS,但是链接地址跳转 https://github.com/scrapy-plugins/scrapy-splash#installation
https://pypi.python.org/pypi/scrapyjs
https://pypi.python.org/pypi/scrapy-splash
2.1 安装 scrapy-splash
C:\Users\win7>pip install scrapy-splash

Collecting scrapy-splash

  Downloading scrapy_splash-0.7.2-py2.py3-none-any.whl

Installing collected packages: scrapy-splash

Successfully installed scrapy-splash-0.7.2
2.2 通过 docker 安装 image:scrapinghub/splash
官网找到下载链接
https://store.docker.com/editions/community/docker-ce-desktop-windows
Docker for Windows is available for free.
Requires Microsoft Windows 10 Professional or Enterprise 64-bit. For previous versions get Docker Toolbox.
右键管理员安装,最好勾选非必要项???
右键管理员启动 Docker Quickstart Terminal ,提示没找到 bash.exe

输出:
Creating CA: C:\Users\win7\.docker\machine\certs\ca.pem

Creating client certificate: C:\Users\win7\.docker\machine\certs\cert.pem

Running pre-create checks...

(default) Image cache directory does not exist, creating it at C:\Users\win7\.docker\machine\cache...

(default) No default Boot2Docker ISO found locally, downloading the latest release...

(default) Latest release for github.com/boot2docker/boot2docker is v17.09.0-ce

(default) Downloading C:\Users\win7\.docker\machine\cache\boot2docker.iso from https://github.com/boot2docker/boot2docker/releases/download/v17.09.0-ce/boot2docker.iso...

(default) 0%....10%....20%....30%....40%....50%....60%....70%....80%....90%....100%

Creating machine...

(default) Copying C:\Users\win7\.docker\machine\cache\boot2docker.iso to C:\Users\win7\.docker\machine\machines\default\boot2docker.iso...

(default) Creating VirtualBox VM...

(default) Creating SSH key...

(default) Starting the VM...

(default) Check network to re-create if needed...

(default) Windows might ask for the permission to create a network adapter. Sometimes, such confirmation window is minimized in the taskbar.

(default) Found a new host-only adapter: "VirtualBox Host-Only Ethernet Adapter #2"

(default) Windows might ask for the permission to configure a network adapter. Sometimes, such confirmation window is minimized in the taskbar.

(default) Windows might ask for the permission to configure a dhcp server. Sometimes, such confirmation window is minimized in the taskbar.

(default) Waiting for an IP...

Waiting for machine to be running, this may take a few minutes...

Detecting operating system of created instance...

Waiting for SSH to be available...

Detecting the provisioner...

Provisioning with boot2docker...

Copying certs to the local machine directory...

Copying certs to the remote machine...

Setting Docker configuration on the remote daemon...

Checking connection to Docker...

Docker is up and running!

To see how to connect your Docker Client to the Docker Engine running on this virtual machine, run: D:\Program Files\Docker Toolbox\docker-machine.exe env default

                        ##         .

                  ## ## ##        ==

               ## ## ## ## ##    ===

           /"""""""""""""""""\___/ ===

      ~~~ {~~ ~~~~ ~~~ ~~~~ ~~~ ~ /  ===- ~~~

           \______ o           __/

             \    \         __/

              \____\_______/

docker is configured to use the default machine with IP 192.168.99.100

For help getting started, check out the docs at https://docs.docker.com

Start interactive shell

win7@win7-PC MINGW64 ~

$ docker info

Containers: 0

 Running: 0

 Paused: 0

 Stopped: 0

Images: 0

Server Version: 17.09.0-ce

Storage Driver: aufs

 Root Dir: /mnt/sda1/var/lib/docker/aufs

 Backing Filesystem: extfs

 Dirs: 0

 Dirperm1 Supported: true

Logging Driver: json-file

Cgroup Driver: cgroupfs

Plugins:

 Volume: local

 Network: bridge host macvlan null overlay

 Log: awslogs fluentd gcplogs gelf journald json-file logentries splunk syslog

Swarm: inactive

Runtimes: runc

Default Runtime: runc

Init Binary: docker-init

containerd version: 06b9cb35161009dcb7123345749fef02f7cea8e0

runc version: 3f2f8b84a77f73d38244dd690525642a72156c64

init version: 949e6fa

Security Options:

 seccomp

  Profile: default

Kernel Version: 4.4.89-boot2docker

Operating System: Boot2Docker 17.09.0-ce (TCL 7.2); HEAD : 06d5c35 - Wed Sep 27 23:22:43 UTC 2017

OSType: linux

Architecture: x86_64

CPUs: 1

Total Memory: 995.8MiB

Name: default

ID: O33J:6GDF:AQ6P:RBM7:6KLF:OZHY:2N3J:QZKV:YIJT:G3AI:XCPD:NZ3G

Docker Root Dir: /mnt/sda1/var/lib/docker

Debug Mode (client): false

Debug Mode (server): true

 File Descriptors: 17

 Goroutines: 26

 System Time: 2017-10-18T09:58:42.414047781Z

 EventsListeners: 0

Registry: https://index.docker.io/v1/

Labels:

 provider=virtualbox

Experimental: false

Insecure Registries:

 127.0.0.0/8

Live Restore Enabled: false

win7@win7-PC MINGW64 ~

$ ipconfig

Windows IP 配置

以太网适配器 lan:

   连接特定的 DNS 后缀 . . . . . . . :

   本地链接 IPv6 地址. . . . . . . . : fe80::f950:bf55:726b:b7a6%14

   IPv4 地址 . . . . . . . . . . . . : 192.168.144.100

   子网掩码  . . . . . . . . . . . . : 255.255.255.0

   默认网关. . . . . . . . . . . . . : 192.168.144.254

以太网适配器 VirtualBox Host-Only Network #2:

   连接特定的 DNS 后缀 . . . . . . . :

   本地链接 IPv6 地址. . . . . . . . : fe80::1c18:13ad:7ed2:c0ff%29

   IPv4 地址 . . . . . . . . . . . . : 192.168.99.1

   子网掩码  . . . . . . . . . . . . : 255.255.255.0

   默认网关. . . . . . . . . . . . . :

隧道适配器 isatap.{CE007B04-2C7A-4A52-8BBF-1BCB4682EEB9}:

   媒体状态  . . . . . . . . . . . . : 媒体已断开

   连接特定的 DNS 后缀 . . . . . . . :

隧道适配器 Teredo Tunneling Pseudo-Interface:

   媒体状态  . . . . . . . . . . . . : 媒体已断开

   连接特定的 DNS 后缀 . . . . . . . :

隧道适配器 isatap.{93C68FD9-301C-484C-AFCB-5549CA24453B}:

   媒体状态  . . . . . . . . . . . . : 媒体已断开

   连接特定的 DNS 后缀 . . . . . . . :

win7@win7-PC MINGW64 ~

$
里面重要信息:
(default) Copying C:\Users\win7\.docker\machine\cache\boot2docker.iso to C:\Users\win7\.docker\machine\machines\default\boot2docker.iso...

(default) Creating VirtualBox VM...

docker is configured to use the default machine with IP 192.168.99.100

For help getting started, check out the docs at https://docs.docker.com
putty 连接:
192.168.99.100

22

docker

tcuser
第一次需要从docker hub下载相关镜像文件
sudo docker pull scrapinghub/splash
后面每次启动splash服务,并通过http,https,telnet提供服务
#通常一般使用http模式 ,可以只启动一个8050就好

#Splash 将运行在 0.0.0.0 at ports 8050 (http), 8051 (https) and 5023 (telnet).

sudo docker run -p 5023:5023 -p 8050:8050 -p 8051:8051 scrapinghub/splash
浏览器打开
scrapy相关:splash安装 A javascript rendering service 渲染的更多相关文章
- scrapy相关:splash 实践
0. 1.参考 https://github.com/scrapy-plugins/scrapy-splash#configuration 以此为准 scrapy相关:splash安装 A javas ...
- Scrapy爬虫框架(实战篇)【Scrapy框架对接Splash抓取javaScript动态渲染页面】
(1).前言 动态页面:HTML文档中的部分是由客户端运行JS脚本生成的,即服务器生成部分HTML文档内容,其余的再由客户端生成 静态页面:整个HTML文档是在服务器端生成的,即服务器生成好了,再发送 ...
- Python之Scrapy爬虫框架安装及简单使用
题记:早已听闻python爬虫框架的大名.近些天学习了下其中的Scrapy爬虫框架,将自己理解的跟大家分享.有表述不当之处,望大神们斧正. 一.初窥Scrapy Scrapy是一个为了爬取网站数据,提 ...
- scrapy的splash 的简单使用
安装Splash(拉取镜像下来)docker pull scrapinghub/splash安装scrapy-splashpip install scrapy-splash启动容器docker run ...
- scrapy之环境安装
scrapy之环境安装 在之前我安装了scrapy,但是在pycharm中却无法使用. 具体情况是: 我的电脑上存在多个python,有python2,python3,anaconda,其中anaco ...
- Scrapy对接Splash基础知识学习
一:什么是Splash Splash是一个 JavaScript渲染服务,是一个带有 HTTPAPI 的轻量级浏览器 1 功能介绍 利用 Splash,我们可以实现如下功能: 口异步方式处理多个网页渲 ...
- Nutch相关框架安装使用最佳指南(转帖)
Nutch相关框架安装使用最佳指南 Chinese installing and using instruction - The best guidance in installing and u ...
- Docker 容器中相关软件安装
Docker 容器中相关软件安装 1.介绍 我们从docker hub下载的centos镜像是只有很少的命令,需要单独安装我们所需的相关软件. 2.安装软件 安装yum-utils软件包 该软件包是辅 ...
- Win8.1安装VirtualSVN Server发生service visualSVN Server failed to start解决办法
Service 'VisualSVN Server' failed to start. Please check VisualSVN Server log in Event Viewer for mo ...
随机推荐
- vue2.0用组件实现选项卡
HTML JavaScript 使用 $emit(eventName) 触发事件,在组件内部绑定点击事件,每个独立组件之间发生点击事件触发外层函数,实现选项卡功能
- Elasticsearch 创建以及修改索引结构
从问题出发,这篇内容可以解决以下几个问题: 一:如何开启关闭Es索引(数据库)? 二:如何创建索引(数据库)结构? 三:如何向已有索引(数据库)中添加类型(表)结构? 四:如何向已有类型(表)中添加新 ...
- CF908D New Year and Arbitrary Arrangement(期望Dp+数学)
题目大意:给你一个空字符串,你有\(\frac{pa}{pa+pb}\)的概率往字符串最后面加个\(a\),\(\frac{pb}{pa+pb}\)的概率往字符串最后面加个\(b\),当子序列\(ab ...
- wiki
GRANT ALL PRIVILEGES ON confluence.* TO 'confluence'@'localhost' IDENTIFIED BY '%SaRK%TDpU#CyT6i';
- C++ bitset 用法
C++的 bitset 在 bitset 头文件中,它是一种类似数组的结构,它的每一个元素只能是0或1,每个元素仅用1bit空间. 下面是具体用法 构造函数 bitset常用构造函数有四种,如下 bi ...
- Python并发编程之同步\异步and阻塞\非阻塞
一.什么是进程 进程: 正在进行的一个过程或者说一个任务.而负责执行任务则是cpu. 进程和程序的区别: 程序仅仅只是一堆代码而已,而进程指的是程序的运行过程. 需要强调的是:同一个程序执行两次,那也 ...
- phpcms 标题设置
phpcms v9网站首页的标题可以控制,但是栏目页,内容页的标题非常的长,用户体验不好修改模板文件header html的<title> < title>改成 phpcms ...
- 金融量化分析【day110】:Pandas-DataFrame索引和切片
一.实验文档准备 1.安装 tushare pip install tushare 2.启动ipython C:\Users\Administrator>ipython Python 3.7.0 ...
- command not found
1.问题(problem) #wget gzip.x86_64 0:1.5-10.el7 -bash: wget command not found 2.解决(solution) 两个都能用 yum ...
- [再寄小读者之数学篇](2014-06-23 Gronwall-type inequality)
Suppose that $$\bex \cfrac{\rd f}{\rd t}+h\leq gf\quad (f,g,h\geq 0,\ t\in [0,T]). \eex$$ Then for $ ...