Swift Modules for React Native
React Native is an Objective-C application framework that bridges JavaScript applications running in the JSCore JavaScript engine to iOS and Android native APIs.
In theory, you write your application logic in JSX and ES6/7 and transpile it to JavaScript, and the application framework loads all that as a bundle.
In practice, you will want to expose your own custom native code to your JavaScript application. You may want to provide access to 3rd party library APIs or iOS framework features that aren’t exposed (yet) by React Native.
React Native is written in Objective-C, but we can write modules in Swift and expose them to our applications. The documentation on the React Native site briefly talks about “Exporting Swift,” but is thin on the details of doing much of anything in Swift. In this article, we’ll do a deeper dive into interfacing Swift to JavaScript.
It is assumed you already have React Native and its prerequisites installed on your system. You can find the code used in this article in this GitHub repository:https://github.com/ModusCreateOrg/swift-modules-for-react-native.
Create a React Native project and open it in Xcode:
$ react-native init SwiftBridge && cd SwiftBridge

$ ls

android/         index.ios.js     node_modules/

index.android.js ios/             package.json

$ ls ios

SwiftBridge/         SwiftBridge.xcodeproj/ SwiftBridgeTests/

$ open ios/SwiftBridge.xcodeproj
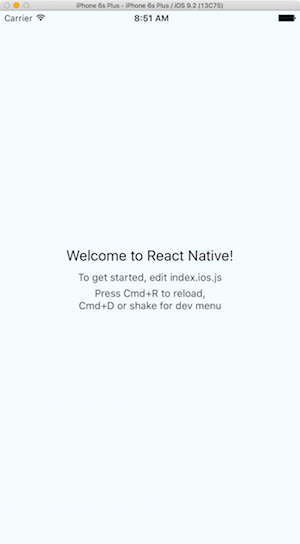
Click the run button in Xcode and see that the project builds and runs.
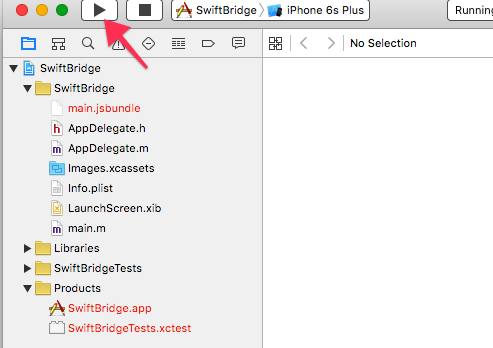
At this point, we know that if the application fails to compile or run, it is something we’ve done to the project at fault.
We’ll start by implementing the CalendarManager sample code from the React Native docs and see that it works.
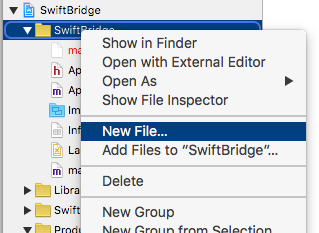
First, we need to add our Swift source file. Right click on SwiftBridge and select “New File…”:
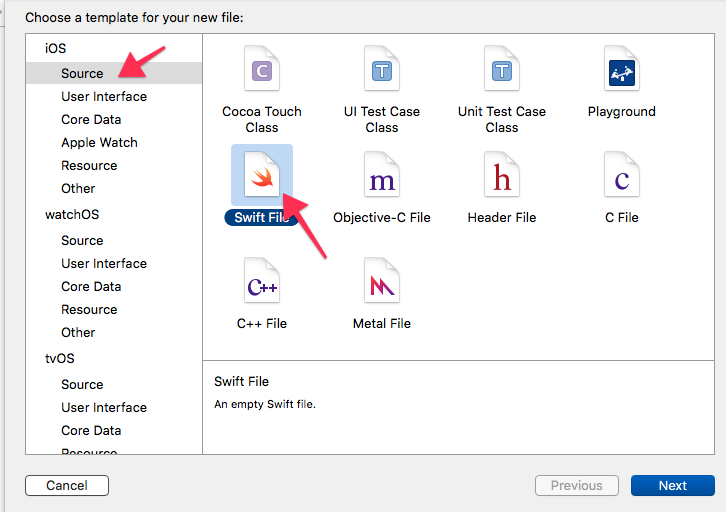
Choose iOS and Swift File from the “Choose template” dialog:
Choose a filename for the file:
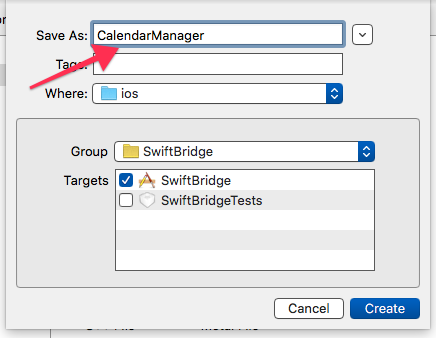
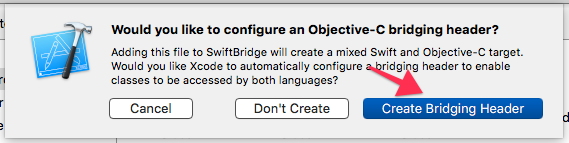
You will be asked if you would like to configure an Objective-C bridging header. We will need this, so click on the Create button:
At this point, Xcode has created two files in the project:
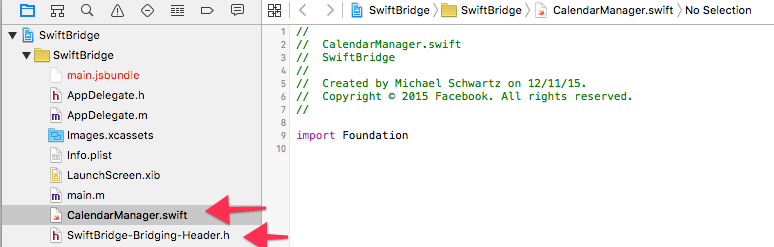
We copy the CalendarManager.swift example code from the React Native docs page and paste it into our CalendarManager.swift file:
//

//  CalendarManager.swift

//  SwiftBridge

//

//  Created by Michael Schwartz on 12/11/15.

//  Copyright © 2015 Facebook. All rights reserved.

//

import Foundation

// CalendarManager.swift

@objc(CalendarManager)

class CalendarManager: NSObject {

  @objc func addEvent(name: String, location: String, date: NSNumber) -> Void {

    // Date is ready to use!

  }

}
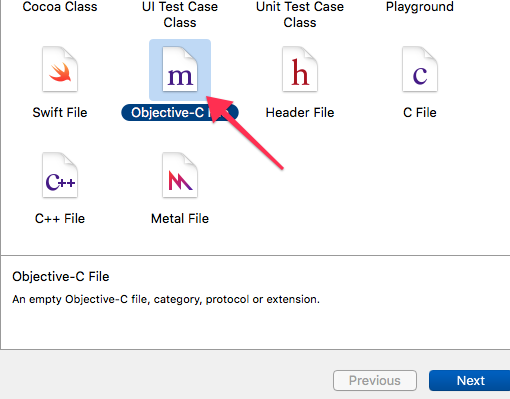
Unfortunately, we have to provide an Objective-C file that exposes our Swift to the React Native Objective-C framework. Create the file “CalendarManageBridge.m” by selecting “New File” as before and choose Objective-C File this time:
This time you will be presented with a “Choose options for your new file” dialog:
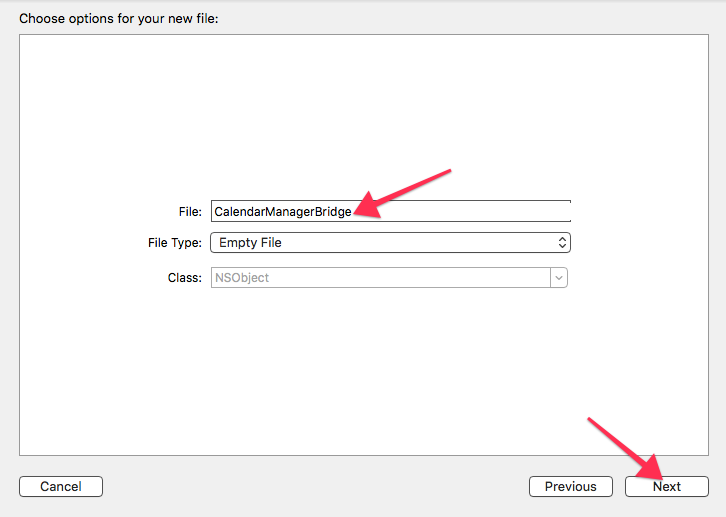
Enter “CalendarManagerBridge” in the File text field and click the Next button. Click the Create button on the next dialog:
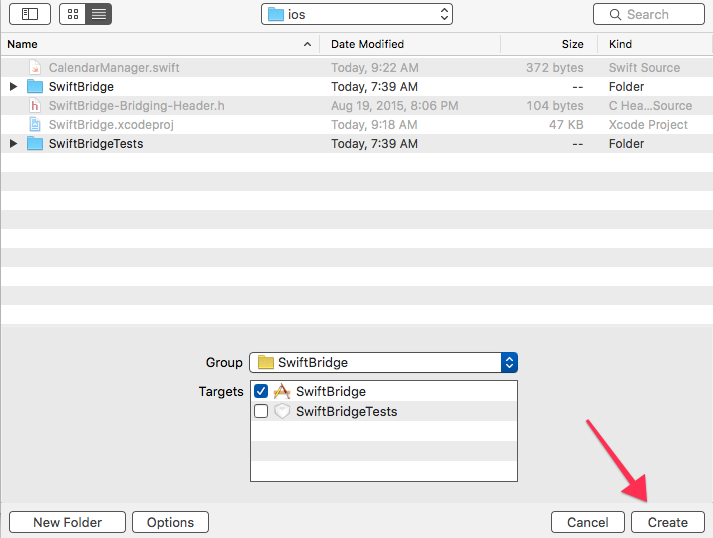
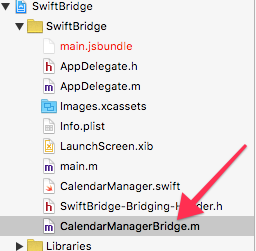
The file is added to your project.
Copy and paste the code from the React Native docs page to this file:
//

//  CalendarManagerBridge.m

//  SwiftBridge

//

//  Created by Michael Schwartz on 12/11/15.

//  Copyright © 2015 Facebook. All rights reserved.

//

#import

// CalendarManagerBridge.m

#import "RCTBridgeModule.h"

@interface RCT_EXTERN_MODULE(CalendarManager, NSObject)

RCT_EXTERN_METHOD(addEvent:(NSString *)name location:(NSString *)location date:(NSNumber *)date)

@end
Finally, we edit the SwiftBridge-Bridging-Header.h file and copy the two lines from the React Native docs page there:
//

//  Use this file to import your target's public headers that you would like to expose to Swift.

//

// CalendarManager-Bridging-Header.h

#import "RCTBridgeModule.h"
Click on the run button in Xcode again and the project should run. If not, you did something wrong in the above steps.
In theory, we now have our Swift CalendarManager class exposed to JavaScript. It should appear to JavaScript as React.NativeModules.CalendarManager. Use the editor of your choice to add the following line to index.ios.js, just after the line that required react-native:
var React = require(‘react-native’);                // after this line

console.dir(React.NativeModules.CalendarManager);  // ← add this line
When we run the project from Xcode with this line, we will get a red screen error:
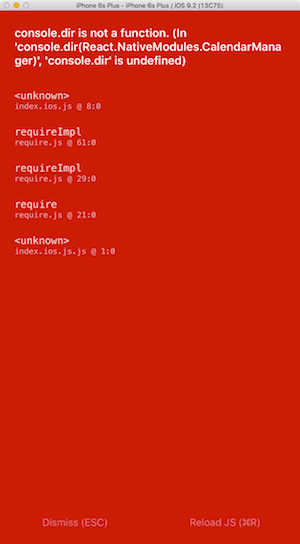
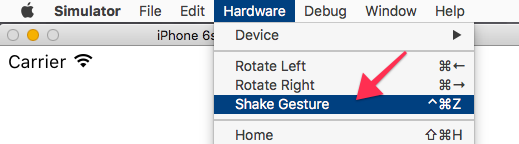
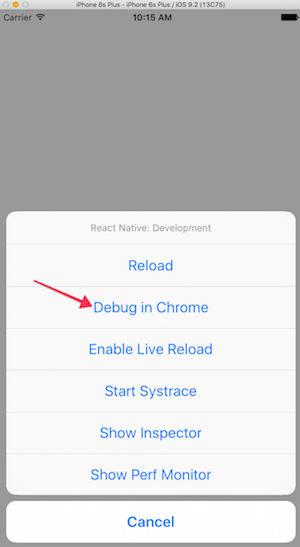
It seems console.dir() is only present if we’re debugging via Chrome. Click the Dismiss (ESC) link on the red screen, then from the Simulator’s Hardware menu, choose Shake Gesture and choose “Debug in Chrome” from the action sheet that appears in the emulator window:
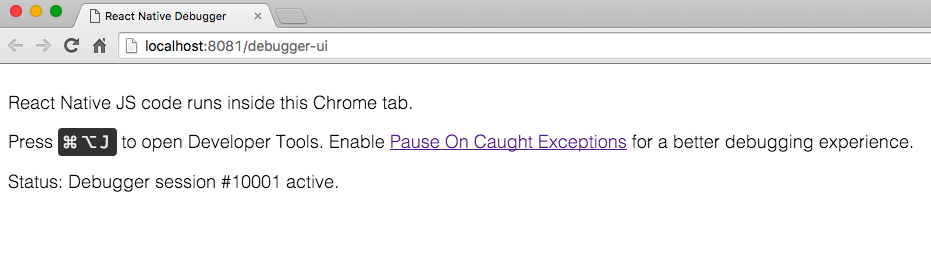
You should see a new window or tab in Chrome that looks something like this:
After hitting Command-Shift-J as the page suggests, you should see something like this:
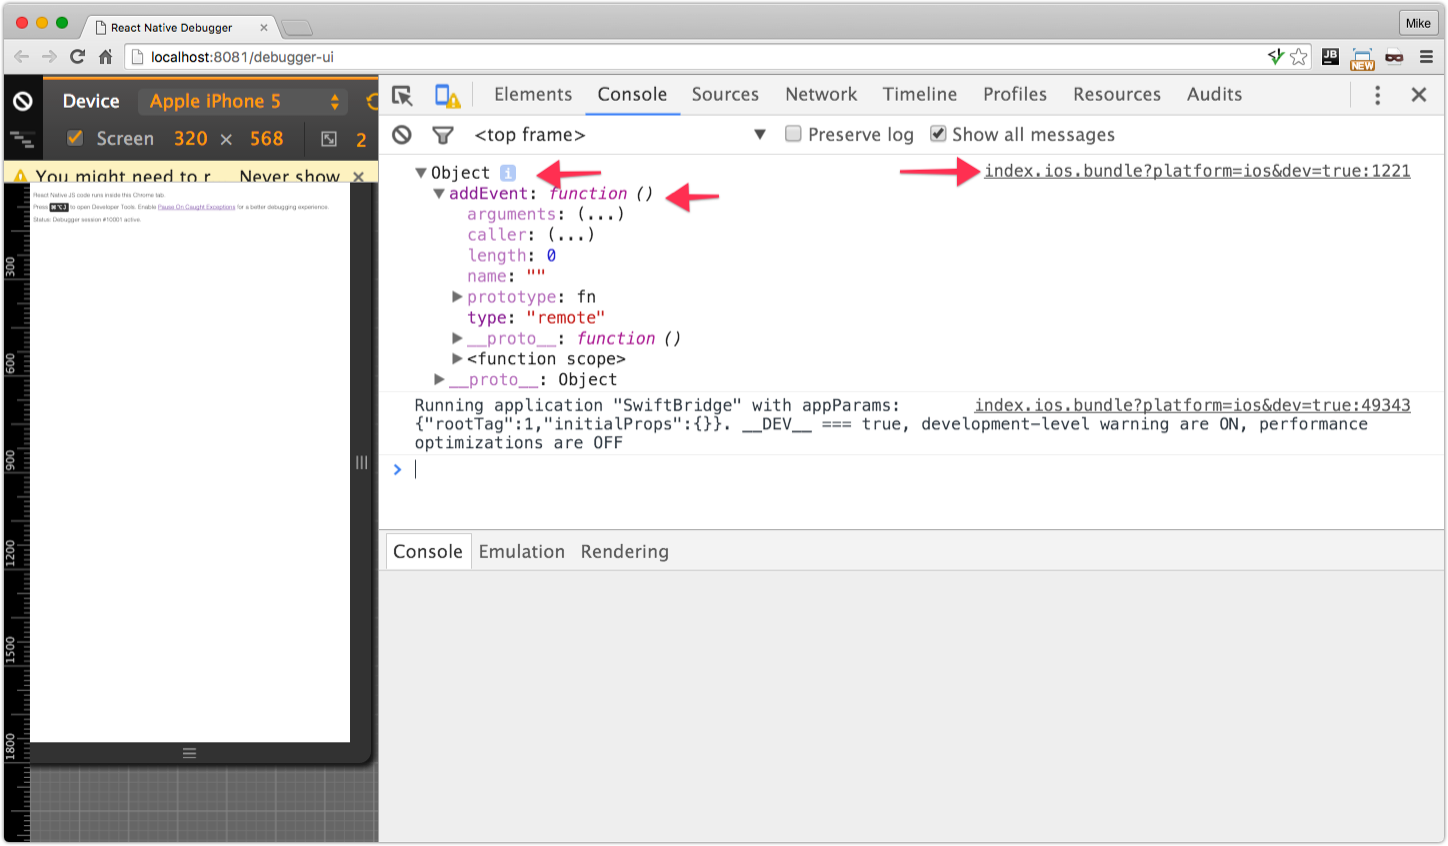
Note that the console.dir() did work and you can expand the Object to see that our React.NativeModule.CalendarManager object is exposed to JavaScript and it contains the addEvent() method as we expect.
Let’s implement some code in the addEvent() method to see that we can call it from JavaScript and access the arguments passed to Swift. Edit CalendarManager.swift so it looks like this:
//

//  CalendarManager.swift

//  SwiftBridge

//

//  Created by Michael Schwartz on 12/11/15.

//  Copyright © 2015 Facebook. All rights reserved.

//

import Foundation

// CalendarManager.swift

@objc(CalendarManager)

class CalendarManager: NSObject {

  @objc func addEvent(name: String, location: String, date: NSNumber) -> Void {

    NSLog("%@ %@ %S", name, location, date);

  }

}
All that’s really changed is the NSLog() call to dump the passed variables. Let’s also add a call to the addEvent() method to index.ios.js, just after the console.dir():
React.NativeModules.CalendarManager.addEvent(‘One’, ‘Two’, 3);
When we run this, and the application crashes. There is an error reported in both Chrome Dev Tools and Xcode and in the simulator.
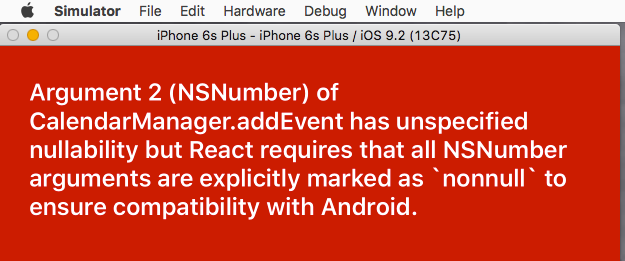


Note that the NSLog() did work, but the React Native framework displayed the red screen.
The fix for this is to add “nonnull” to the CalendarManagerBridge.m file:
RCT_EXTERN_METHOD(addEvent:(NSString *)name location:(NSString *)location date:(nonnull NSNumber *)date)
With this change, the app works without any errors. We can also see in the Xcode console the NSLog() output:
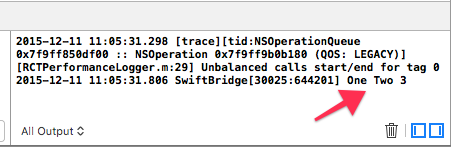
(Note: I created a GitHub issue about this problem with the React Native documentation page and it has been fixed).
We have verified we can access the arguments passed to our Swift method from JavaScript.
We cannot simply return values to JavaScript because React Native’s JavaScript/Native bridge is asynchronous. That is, you have to implement your Swift method with a callback parameter and call it with a callback function from JavaScript, or you may implement events.
Let’s examine the callback mechanism first. Change the RCT_EXTERN_METHOD line in CalendarManagerBridge.m to read:
RCT_EXTERN_METHOD(addEvent:(NSString *)name location:(NSString *)location date:(nonnull NSNumber *)date callback: (RCTResponseSenderBlock)callback);
This adds a 4th parameter to the method, a callback function. In CalendarManager.swift, we need to alter the the addEvent() method:
@objc func addEvent(name: String, location: String, date: NSNumber, callback: (NSObject) -> () ) -> Void {

 // Date is ready to use!

 NSLog("%@ %@ %@", name, location, date)

 callback( [[

   "name": name,

   "location": location,

   "date" : date

 ]])

}
What this version of addEvent() does is call the callback() method with a JavaScript Object that has the argument names/values as key/value pairs. In Swift, we create an NSObject with the [ key: value ] syntax. The argument to the callback from Swift is an array of argument values. In this case, we have just the one Object.
We need to modify the JavaScript code in index.ios.js to pass a callback. It should look like this:
React.NativeModules.CalendarManager.addEvent("One", "Two", 3, function(o) {

    console.log(‘In Callback’);

    console.dir(o);

});
When we run this version of the code in the simulator, this is displayed in the JavaScript debugger console:

In order to use events, we need to modify the ‘CalendarManager-Bridging-Header.h’ file to import additional headers from React Native. The file should read:
//

//  Use this file to import your target's public headers that you would like to expose to Swift.

//

// CalendarManager-Bridging-Header.h

#import "RCTBridge.h"

#import "RCTBridgeModule.h"

#import "RCTEventDispatcher.h"
An RCTBridge instance contains an eventDispatcher that we can use to send events to JavaScript from Swift. In order to get this instance, we can have one synthesized for us in our CalendarManager class. We can also verify that it is synthesized by using NSLog() to dump its value.
Modify the class’ code in CalendarManager.swift so it looks like this:
class CalendarManager: NSObject {

  var bridge: RCTBridge!  // this is synthesized

  @objc func addEvent(name: String, location: String, date: NSNumber, callback: (NSObject) -> () ) -> Void {

    // Date is ready to use!

    NSLog("Bridge: %@", self.bridge);

    NSLog("%@ %@ %@", name, location, date)

    callback( [[

      "name": name,

      "location": location,

      "date" : date

      ]])

  }

}
There is the bridge member that will be synthesized and in the addEvent() method there is a call to NSLog() to print the value of the bridge. The value printed should be some hex number that’s the address of the bridge instance.
When we run the code, we can see that the bridge member is synthesized:
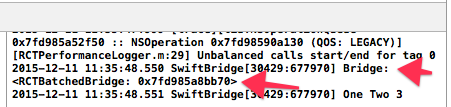
Note that the code uses NSLog() instead of print(). NSLog is synchronized and works better with threading. It also prints a timestamp and prints to the device console when running on device.
Ultimately debug logging should be wrapped by some other means so the printing can be disabled or directed as you want.
Modify the CalenderManager class one more time so it looks like this:
class CalendarManager: NSObject {

  var bridge: RCTBridge!  // this is synthesized

  @objc func addEvent(name: String, location: String, date: NSNumber, callback: (NSObject) -> () ) -> Void {

    // Date is ready to use!

    NSLog("Bridge: %@", self.bridge);

    NSLog("%@ %@ %@", name, location, date)

    let ret =  [

      "name": name,

      "location": location,

      "date" : date

      ]

    callback([ret])

    self.bridge.eventDispatcher.sendAppEventWithName("EventReminder", body: ret)

  }

}
The sendAppEventWithName() method takes an event name and an arbitrary object that is sent to the JavaScript event handler. In the code above, we’re assigning the NSObject with arguments as key/value pairs to a variable and using it to pass to both the callback() and the event argument.
Modify the JavaScript code near the top of index.ios.js so it reads:
var React = require('react-native')

console.dir(React.NativeModules.CalendarManager)

var subscription = React.NativeAppEventEmitter.addListener(

    'EventReminder',

    (reminder) => {

        console.log(‘EVENT’)

        console.log('name: ' + reminder.name)

        console.log('location: ' + reminder.location)

        console.log('date: ' + reminder.date)

    }

);

React.NativeModules.CalendarManager.addEvent("One", "Two", 3, function(o) {

    console.log('In Callback')

    console.dir(o)

})
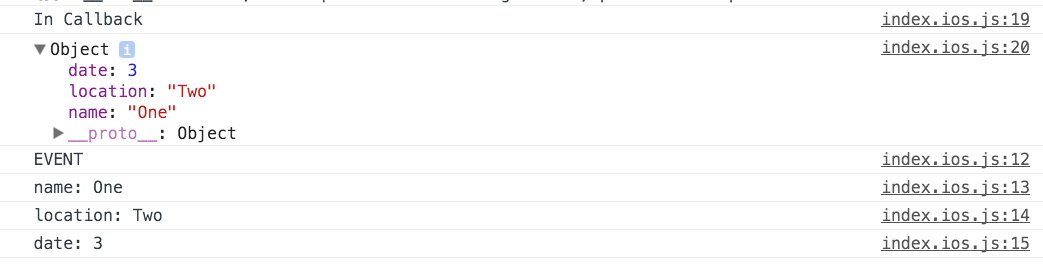
We’re really just adding the subscription logic before calling addEvent(). When we run this version of the code, we see the expected output in the Chrome console:
Finally, let’s export some constant members from the CalendarManager swift class to JavaScript. Add this code to the CalendarManager class before the closing brace:
  @objc func constantsToExport() -> NSObject {

    return [

      "x": 1,

      "y": 2,

      "z": "Arbitrary string"

    ]

  }
When we run the project and expand the first Object printed in the Chrome console, we see our constants:

In conclusion, we now have patterns to interface Swift native code to our JavaScript in React Native. From here we can implement our application logic in either language, as appropriate.
From: http://moduscreate.com/swift-modules-for-react-native/
Swift Modules for React Native的更多相关文章
- iOS、swift、React Native学习常用的社区、论坛
<!----iOS> <!----Swift>*IOS开发常用社区:http://code4app.com/ *IOS开发常用社区:http://www.cocoachina. ...
- react native 学习之 native modules
翻译自https://facebook.github.io/react-native/docs/native-modules-ios.html Native Modules 很多情况下,app需要使用 ...
- react native 0.50与OC交互 && Swift与RN交互
新公司也打算做rn,还是得捡起来再度学习.开撸! react native一个版本一个样子,之前写的rn与iOS交互系列在最新版本中有点出入(0.50.4版本).今天填一下坑. 首先上npm版本,re ...
- [React Native] Installing and Linking Modules with Native Code in React Native
Learn to install JavaScript modules that include native code. Some React Native modules include nati ...
- Kotlin & Android & Swift & Flutter & React Native
Kotlin & Android https://www.runoob.com/kotlin/kotlin-tutorial.html Swift 5 & iOS 12 https:/ ...
- React Native入门指南
转载自:http://www.jianshu.com/p/b88944250b25 前言 React Native 诞生于 2015 年,名副其实的富二代,主要使命是为父出征,与 Apple 和 Go ...
- 写给移动开发者的 React Native 指南
本文原创版权归 简书 wingjay 所有,如有转载,请于文章篇头位置显示标注原创作者及出处,以示尊重! 作者:wingjay 出处:http://www.jianshu.com/p/b8894425 ...
- Xamarin vs React Native vs Ionic vs NativeScript: Cross-platform Mobile Frameworks Comparison
CONTENTS Reading time: 14 minutes Cross-platform mobile development has long been a viable alternati ...
- 【独家】React Native 版本升级指南
前言 React Native 作为一款跨端框架,有一个最让人头疼的问题,那就是版本更新.尤其是遇到大版本更新,JavaScript.iOS 和 Android 三端的配置构建文件都有非常大的变动,有 ...
随机推荐
- Bootstrap 3之美07-插件Collapse、Accordion、Modal、Tab、Tooltip、Alert、Carousel
类似Page Header, Breadcrumbs, Dropdowns等,都是Bootstrap的组件,是静态的.如果涉及到交互,Bootstrap提供了插件.这些插件包括: ○ 过渡效果: bo ...
- Dictionary GetOrAdd
public static TValue GetOrAdd<TKey,TValue>( this Dictionary<TKey,TValue> dictionary, TKe ...
- 【笨木头Lua专栏】基础补充05:迭代器番外篇
关于迭代器的内容, 另一点点,只是已经无关紧要了.应该算是一种扩展吧.就一起来开开眼界好了~ 笨木头花心贡献.哈?花心?不.是用心~ 转载请注明,原文地址: http://www.benmutou.c ...
- java代码将e.printStackTrace()写入log4j文件异常信息
try { ... } catch (Exception e) { log.error( "failed!", e ); } 或者 try { ... } catch (Excep ...
- Rsync服务介绍与配置
Rsync 简要介绍 rsync 是一个用于增量文件传输的开源工具,不得不说,rsync简直是不同服务器间传输文件.同步文件的利器.与FTP相比,它具有非常简单的安装和配置方法.而且,rsync可以只 ...
- water-and-jug-problem
以下这个解法也是参考了一些讨论: https://leetcode.com/discuss/110235/c-solution-using-euclidean-algorithm 还有这个解释原理的, ...
- SQL Server基础知识三十三问 (15-21)
15. 存储过程可以调用自己么, 或者说可能有递归的存储过程么? SP nesting最多可以到多少层? 答: 可以的. 因为Transact-SQL 支持递归, 你可以编写可以调用自己的存储过程. ...
- Search a 2D Matrix leetcode java
题目: Write an efficient algorithm that searches for a value in an m x n matrix. This matrix has the f ...
- JavaScript中定义对象的四种方式
最近在阅读< JavaScript 高级程序设计>,未免遗忘读过的内容,就打算以博客的形式做些读书笔记.今天介绍的是 JavaScript 中的四种定义对象的方法,除了这四种方法,还有工厂 ...
- Visual Tree
1.GetVisualParent public static T GetVisualParent<T>(DependencyObject obj) where T : Dependenc ...