
实现Android包的批量删除
由于手机内存有限,有时需要一次删除很多个包,这时就需要一个实现Android包批量删除的应用。
首先是布局文件:
<?xml version="1.0" encoding="utf-8"?>

<LinearLayout xmlns:android="http://schemas.android.com/apk/res/android"

    android:layout_width="match_parent"

    android:layout_height="match_parent"

    android:orientation="vertical" >

    <LinearLayout

        android:layout_width="fill_parent"

        android:layout_height="match_parent"

        android:layout_weight="5" >

        <TextView

            android:id="@+id/textView1"

            style="@style/my_style"

            android:layout_width="match_parent"

            android:layout_height="fill_parent"

            android:layout_weight="4" />

        <TextView

            android:id="@+id/textView2"

            style="@style/my_style"

            android:layout_width="match_parent"

            android:layout_height="fill_parent"

            android:layout_gravity="center_vertical|center_horizontal"

            android:layout_weight="1"

            android:gravity="center_vertical|center_horizontal"

            android:text="应用名称" />

        <TextView

            android:id="@+id/textView3"

            android:layout_width="match_parent"

            android:layout_height="fill_parent"

            android:layout_weight="4"

            android:gravity="center_vertical|center_horizontal"

            android:text="是否系统应用" />

    </LinearLayout>

    <ListView

        android:id="@id/android:list"

        android:layout_width="fill_parent"

        android:layout_height="match_parent"

        android:layout_weight="1" >

    </ListView>

    <Button

        android:id="@+id/btn_apk"

        style="@style/my_style"

        android:layout_width="fill_parent"

        android:layout_height="match_parent"

        android:layout_weight="5"

        android:text="卸载" />

</LinearLayout>
布局文件相对简单,最重要的是列表。
然后是类文件:
package com.hzhi.sysinfor;

import java.util.ArrayList;

import java.util.HashMap;

import java.util.List;

import java.util.Map;

import android.app.AlertDialog;

import android.app.ListActivity;

import android.app.ProgressDialog;

import android.content.Context;

import android.content.DialogInterface;

import android.content.Intent;

import android.content.pm.PackageInfo;

import android.content.pm.PackageManager;

import android.graphics.drawable.Drawable;

import android.net.Uri;

import android.os.Bundle;

import android.util.Log;

import android.view.Menu;

import android.view.View;

import android.view.View.OnClickListener;

import android.view.ViewGroup;

import android.widget.BaseAdapter;

import android.widget.Button;

import android.widget.CheckBox;

import android.widget.CompoundButton;

import android.widget.CompoundButton.OnCheckedChangeListener;

import android.widget.ImageView;

import android.widget.LinearLayout;

import android.widget.TextView;

import android.widget.Toast;

public class apk<PackageDeleteObserver> extends ListActivity{

	Button btn_unload;

	PackageManager pkg_man;

	PackageDeleteObserver pkg_obs;

	list_apk list_ada;

	// 获得所有的应用列表

	public void get_app(){

		list_ada = new list_apk(this);

		// 包管理器

		PackageManager pm = getPackageManager();

		// 获取手机内所有应用

		List<PackageInfo> pi = pm.getInstalledPackages(0);

		for (int i=0; i<pi.size(); i++){

			PackageInfo pii = (PackageInfo) pi.get(i);

			String is_sys;

			Drawable icon;

			// 是否系统应用

			if ((pii.applicationInfo.flags & pii.applicationInfo.FLAG_SYSTEM) <= 0)

				is_sys = "否";

			else

				is_sys = "是";

			if (pii.applicationInfo.loadIcon(pm) != null)

				icon = (Drawable)pii.applicationInfo.loadIcon(pm);

			else

				icon = (Drawable) getResources().getDrawable(R.drawable.ic_launcher);

			list_ada.addItem(String.valueOf(pii.applicationInfo.loadLabel(pm)),

					is_sys,

					icon,

					pii.applicationInfo.packageName,

					false);

		}

        setListAdapter(list_ada);

	}

	@Override

	protected void onCreate(Bundle savedInstanceState) {

		super.onCreate(savedInstanceState);

		setContentView(R.layout.activity_list_apk);

		get_app();

        btn_unload = (Button) findViewById(R.id.btn_apk);

        btn_unload.setOnClickListener(new View.OnClickListener() {

			@Override

			public void onClick(View v) {

				for (int j=0; j<list_ada.list_data.size(); j++){

					// 该应用需要删除

					if (list_ada.list_data.get(j).is_chk){

						String name = (String)

								list_ada.list_data.get(j).
                                            txt_name.getText();

						final String pak = list_ada.list_data.get(j).item_pak;

						new AlertDialog.Builder(apk.this)

						.setTitle("删除应用")

						.setMessage("确定删除" + name + "吗?")

						.setPositiveButton("是",
                                  new DialogInterface.OnClickListener() {

							@Override

							public void onClick(DialogInterface arg0, int arg1)
                                     {

								unload(pak);

								get_app();

							}

						})

						.setNegativeButton("否", null)

						.show();

					}

				}

			}

		});

	}

	@Override

	public boolean onCreateOptionsMenu(Menu menu) {

		// Inflate the menu; this adds items to the action bar if it is present.

		getMenuInflater().inflate(R.menu.main, menu);

		return true;

	}

	public boolean unload (String n){

		boolean res = true;

		try{

			// 通过包名创建URI

			Uri pu = Uri.parse("package:" + n);

			// 创建Intent

			Intent i = new Intent(Intent.ACTION_DELETE, pu);

			// 执行卸载程序

			startActivity(i);

			res = true;

		}

		catch(Exception e){

			res = false;

		}

		finally{

			return res;

		}

	}

}

//apk列表

class list_apk extends BaseAdapter implements OnClickListener{

	public Context ctx;

	public List<item_apk> list_data;

	public list_apk(Context context){

		ctx = context;

		list_data = new ArrayList<item_apk>();

	}

	@Override

	public int getCount() {

		// TODO Auto-generated method stub

		return list_data.size();

	}

	@Override

	public Object getItem(int arg0) {

     // TODO Auto-generated method stub

     return list_data.get(arg0);

	}

	@Override

	public long getItemId(int arg0) {

     // TODO Auto-generated method stub

     return list_data.indexOf(arg0);

	}

	@Override

	public View getView(int position, View convertView, ViewGroup parent) {

		item_apk my_item;

		Integer i = 0;

		if (convertView == null)

		{

       		my_item = new item_apk(ctx,

                 (String)list_data.get(position).txt_name.getText(),

                 (String)list_data.get(position).txt_flag.getText(),

                 list_data.get(position).img_apk.getDrawable(),

                 list_data.get(position).item_pak,

                 list_data.get(position).is_chk);

		}

		else

		{

			my_item = (item_apk)convertView;

			my_item.txt_name.setText(list_data.get(position).txt_name.getText());

			my_item.txt_flag.setText(list_data.get(position).txt_flag.getText());

			my_item.img_apk.setImageDrawable(list_data.get(position).img_apk.getDrawable());

		}

		CheckBox chk_item = (CheckBox) my_item.chk_apk;

		chk_item.setOnClickListener(this);

		if (list_data.get(position).is_chk)

			Log.i(String.valueOf(position) + ".is_chk=", "true");

		else

			Log.i(String.valueOf(position) + ".is_chk=", "false");

		chk_item.setChecked(list_data.get(position).is_chk);

		chk_item.setTag(position);

		return my_item;

	}

	public void addItem(String txt_name, String txt_flag, Drawable ico_apk,

			String str_name, Boolean bol_chk)

	{

		list_data.add(new item_apk(ctx,txt_name,txt_flag,ico_apk,str_name,bol_chk));

	}

	@Override

	public void onClick(View v) {

		// TODO Auto-generated method stub

		CheckBox c = (CheckBox) v;

		int pos = Integer.parseInt(v.getTag().toString());

		list_data.get(pos).is_chk = c.isChecked();

	}

}

//apk列表的一行

class item_apk extends LinearLayout{

	public CheckBox chk_apk;

	public TextView txt_name;

	public TextView txt_flag;

	public ImageView img_apk;

	public String item_pak;

	public boolean is_chk;

	public item_apk(Context ctx, String item_name, String item_flag,

			Drawable item_draw, String str_name, Boolean bol_chk)

	{

		super(ctx);

		this.setOrientation(HORIZONTAL);

		int hei = 60;

		chk_apk = new CheckBox(ctx);

		addView(chk_apk,

				new LinearLayout.LayoutParams((int)(MainActivity.wid_scr*0.2),hei));

		img_apk = new ImageView(ctx);

		img_apk.setImageDrawable(item_draw);

		addView(img_apk,

				new LinearLayout.LayoutParams((int)(MainActivity.wid_scr*0.2),hei));

		txt_name = new TextView(ctx);

		txt_name.setText(item_name);

		addView(txt_name,

				new LinearLayout.LayoutParams((int)(MainActivity.wid_scr*0.4),hei));

		txt_flag = new TextView(ctx);

		txt_flag.setText(item_flag);

		addView(txt_flag,

				new LinearLayout.LayoutParams((int)(MainActivity.wid_scr*0.2),hei));

		item_pak = str_name;

		is_chk = bol_chk;

	 }

}
一共实现了三个类:apk、list_apk、item_apk。apk是整个Activity的类,list_apk是列表的适配器类,item_apk是列表中一行的类。list_apk的list_data是重要的变量,它记录了每一个包的信息,如包名、是否是系统应用、是否被选中等。
点击“卸载”按钮时,遍历list_data的所有元素,判断是否被选中,如果被选中,就删除。
运行效果如下:
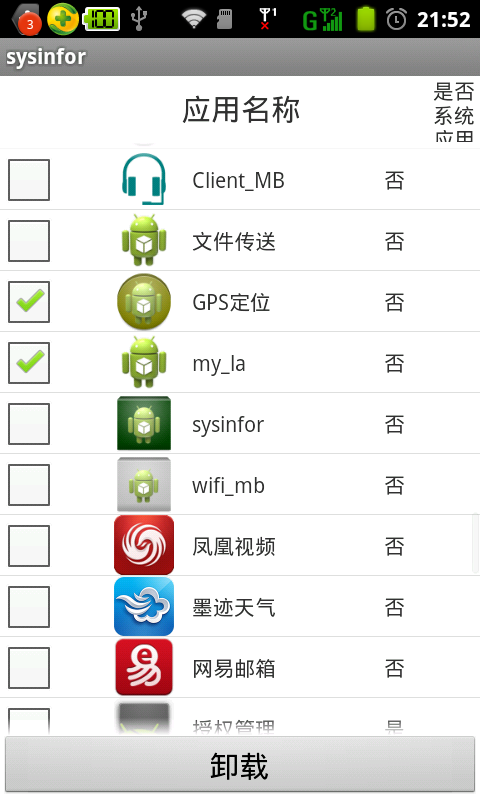
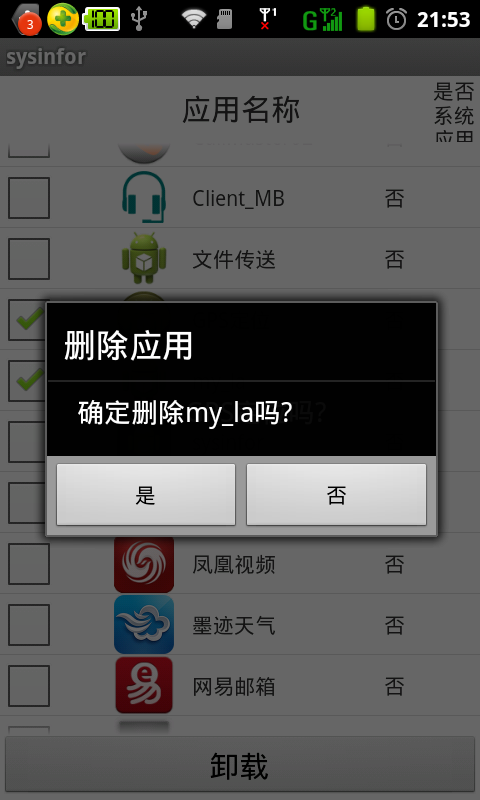
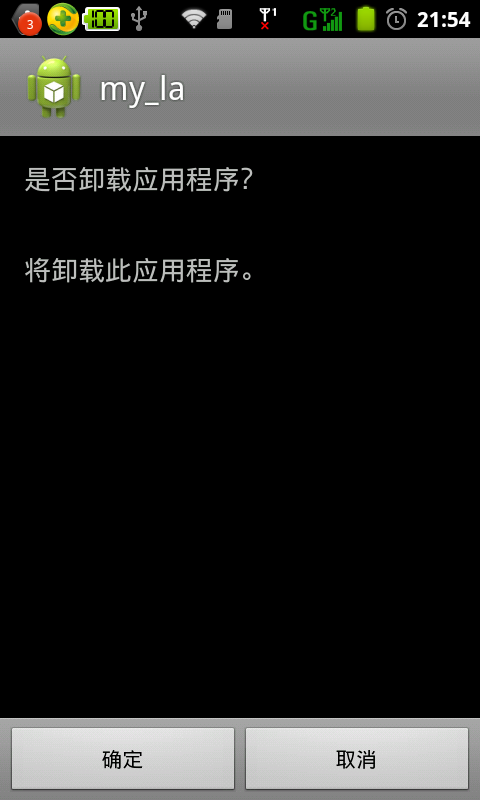
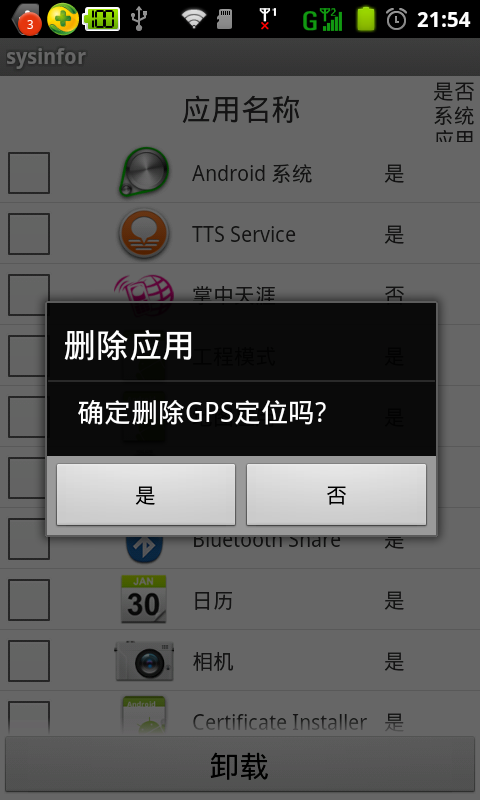
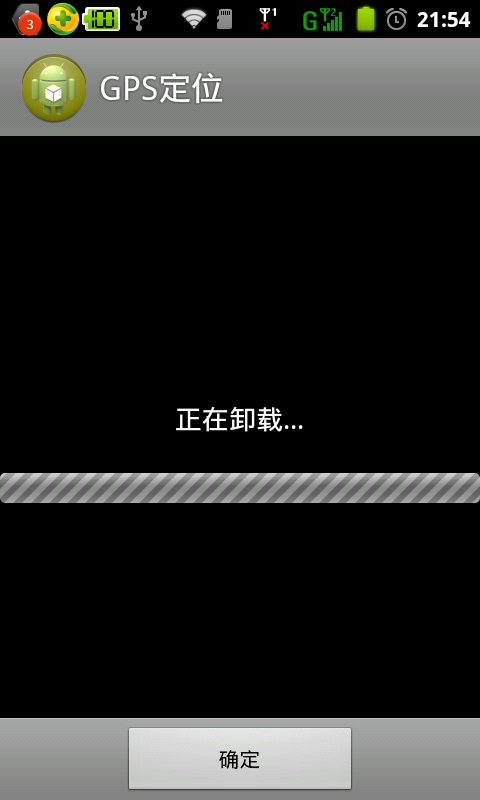

可见,选中的两个包已经被删除。
实现Android包的批量删除的更多相关文章
- Android 长按Listview显示CheckBox,实现批量删除。
ListView实现的列表,如果是可编辑,可删除的,一般都要提供批量删除功能,否则的话,一项一项的删除体验很不好,也给用户带来了很大的麻烦. 实现效果图 具体实现代码 select.xml 主布局文件 ...
- Android ListView的批量处理(多选/反选/删除)
在Android开发中经常遇到使用ListView的情况,有时候需要的不仅仅是列表显示,还有长按列表进行多选,并且批量删除的情况,在这里记录一下自己的所学. 先上效果图: 几个需要用到的核心方法: / ...
- 基于注解的Spring MVC整合Hibernate(所需jar包,spring和Hibernate整合配置,springMVC配置,重定向,批量删除)
1.导入jar watermark/2/text/aHR0cDovL2Jsb2cuY3Nkbi5uZXQvdG90b3R1enVvcXVhbg==/font/5a6L5L2T/fontsize/400 ...
- 基于注解Spring MVC综合Hibernate(需要jar包,spring和Hibernate整合配置,springMVC组态,重定向,)批量删除
1.进口jar 2.web.xml配置 <?xml version="1.0" encoding="UTF-8"?> <web-app ver ...
- StackExchange.Redis加载Lua脚本进行模糊查询的批量删除和修改
前言 使用StackExchange.Redis没有直接相关的方法进行模糊查询的批量删除和修改操作,虽然可以通过Scan相关的方法进行模糊查询,例如:HashScan("hashkey&qu ...
- mybatis(二)接口编程 、动态sql 、批量删除 、动态更新、连表查询
原理等不在赘述,这里主要通过代码展现. 在mybatis(一)基础上,新建一个dao包,并在里面编写接口,然后再在xml文件中引入接口路径,其他不变,在运用阶段将比原始方法更节约时间,因为不用再去手动 ...
- Android JUnit Test——批量运行测试代码
转载请注明出自天外归云的博客园:http://www.cnblogs.com/LanTianYou/ Android测试三要素 写Android测试用例有三要素,一是我们用的“安卓模拟器device” ...
- Zencart批量删除无图片产品
Zencart批量删除无图片产品 2012-04-23 07:26:18| 分类: 默认分类 |字号 订阅 转自 http://zhongjia33.blog.163.com/blog/#m=0 ...
- 18-09-11 软件rpm yum rm卸载 和批量删除
一 在Linux下删除文件用rm命令,具体用法如下: rm [选项] 文件 选项说明: -f -force 忽略不存在的文件,强制删除,无任何提示 -i --interactive 进行交互式地删除 ...
随机推荐
- NodeJS系列~第一个小例子,实现了request.querystring功能
返回目录 百度百科上: Node.js是一套用来编写高性能网络服务器的JavaScript工具包,一系列的变化由此开始,在Node中,Http是首要的.Node为创建http服务器作了优化,所以在网上 ...
- Node.js与Sails~方法拦截器policies
回到目录 policies sails的方法拦截器类似于.net mvc里的Filter,即它可以作用在controller的action上,在服务器响应指定action之前,对这个action进行拦 ...
- WPF入门教程系列四——Dispatcher介绍
一.Dispatcher介绍 微软在WPF引入了Dispatcher,那么这个Dispatcher的主要作用是什么呢? 不管是WinForm应用程序还是WPF应用程序,实际上都是一个进程,一个进程可以 ...
- 为什么项目的jar包会和tomcat的jar包冲突?
为什么项目的jar包会和tomcat的jar包冲突? 碰到这个问题,猜测tomcat启动时会将自己的lib和项目的lib在逻辑上归并为一个大的lib,但是并没有做版本区分以及去重,这样相同的包可能就有 ...
- jsp获得文件的绝对路径
当前WEB应用的物理路径:<%=application.getRealPath("/")%>当前访问的JSP文件的物理路径:<%=application.getR ...
- 从css3书写顺序引出来的border-radius参数
本鱼表示偶已经不会取标题了... 当时写这篇文章主要是想探讨一下优雅降级和渐进增强的区别,按照正常的逻辑思维,不管是降级还是增强,应该对于效果是没什么区别的,因为后者会覆盖前者,但今天无意看到张鑫旭的 ...
- 为什么需要Bundler
对于从Node.js转Ruby的人很可能会有和我一样的疑惑,为什么要有Bundler这个东西?Rubygems不够吗? 从Node.js到Ruby的包管理器 在Node的世界里,依赖管理是由npm来完 ...
- MAC与HMAC的介绍及其在AWS和Azure中的应用
MAC 在密码学中,(消息认证码)Message Authentication Code是用来认证消息的比较短的信息.换言之,MAC用来保证消息的数据完整性和消息的数据源认证. MAC由消息本身和一个 ...
- 【Android】Android ObjectAnimator动画初识、模仿
ObjectAnimator: ObjectAnimator的概念这里就不解释了,直接从代码中说明,以下是模仿Persicope的加载动画,简单的几行代码即可实现,当然我也是模仿的,更好的实现思路还请 ...
- DPDK学习之开篇介绍
1.前言 记得刚开始工作的时,老大将我安排到数据面组,当时第一次听说”数据面“这个概念,感觉挺新鲜的.误打误撞就开始搞了,刚开始接触的时候,由于不懂其中的原理,觉得很神奇,因为报文的转发是在应用层,通 ...