SpringBoot2+Druid+MyBatis+MySql实现增删改查
1.配置pom.xml文件
<?xml version="1.0" encoding="UTF-8"?>

<project xmlns="http://maven.apache.org/POM/4.0.0" xmlns:xsi="http://www.w3.org/2001/XMLSchema-instance"

    xsi:schemaLocation="http://maven.apache.org/POM/4.0.0 http://maven.apache.org/xsd/maven-4.0.0.xsd">

    <modelVersion>4.0.0</modelVersion>

    <parent>

        <groupId>org.springframework.boot</groupId>

        <artifactId>spring-boot-starter-parent</artifactId>

        <version>2.1.4.RELEASE</version>

        <relativePath/> <!-- lookup parent from repository -->

    </parent>

    <groupId>com.czhappy.bootlearn</groupId>

    <artifactId>03-Spring-Boot-MyBatis</artifactId>

    <version>0.0.1-SNAPSHOT</version>

    <name>03-Spring-Boot-MyBatis</name>

    <description>Demo project for Spring Boot</description>

    <properties>

        <java.version>1.8</java.version>

    </properties>

    <dependencies>

        <dependency>

            <groupId>org.springframework.boot</groupId>

            <artifactId>spring-boot-starter-test</artifactId>

            <scope>test</scope>

        </dependency>

        <dependency>

            <groupId>org.springframework.boot</groupId>

            <artifactId>spring-boot-starter-web</artifactId>

        </dependency>

        <!-- 数据库 -->

        <dependency>

            <groupId>mysql</groupId>

            <artifactId>mysql-connector-java</artifactId>

        </dependency>

        <dependency>

            <groupId>org.mybatis.spring.boot</groupId>

            <artifactId>mybatis-spring-boot-starter</artifactId>

            <version>1.3.2</version>

        </dependency>

        <!-- Druid Pool -->

        <dependency>

            <groupId>com.alibaba</groupId>

            <artifactId>druid-spring-boot-starter</artifactId>

            <version>1.1.16</version>

        </dependency>

        <dependency>

            <groupId>org.springframework</groupId>

            <artifactId>spring-jdbc</artifactId>

        </dependency>

    </dependencies>

    <build>

        <plugins>

            <plugin>

                <groupId>org.springframework.boot</groupId>

                <artifactId>spring-boot-maven-plugin</artifactId>

            </plugin>

        </plugins>

    </build>

</project>
2.修改配置文件application.yml:
server:

  port: 8080

  servlet:

   context-path: /web

spring:

  datasource:

    druid:

      # 数据库访问配置, 使用druid数据源

      type: com.alibaba.druid.pool.DruidDataSource

      driver-class-name: com.mysql.cj.jdbc.Driver

      url: jdbc:mysql://localhost:3306/springbootlearn?useUnicode=true&characterEncoding=utf8&useSSL=false&serverTimezone=UTC

      username: root

      password: root

      # 连接池配置

      initial-size: 5

      min-idle: 5

      max-active: 20

      # 连接等待超时时间

      max-wait: 30000

      # 配置检测可以关闭的空闲连接间隔时间

      time-between-eviction-runs-millis: 60000

      # 配置连接在池中的最小生存时间

      min-evictable-idle-time-millis: 300000

      validation-query: select 'x'

      test-while-idle: true

      test-on-borrow: false

      test-on-return: false

      # 打开PSCache,并且指定每个连接上PSCache的大小

      pool-prepared-statements: true

      max-open-prepared-statements: 20

      max-pool-prepared-statement-per-connection-size: 20

      # 配置监控统计拦截的filters, 去掉后监控界面sql无法统计, 'wall'用于防火墙

      filters: stat,wall

      # Spring监控AOP切入点,如x.y.z.service.*,配置多个英文逗号分隔

      aop-patterns: com.springboot.servie.*

      # WebStatFilter配置

      web-stat-filter:

        enabled: true

        # 添加过滤规则

        url-pattern: /*

        # 忽略过滤的格式

        exclusions: '*.js,*.gif,*.jpg,*.png,*.css,*.ico,/druid/*'

      # StatViewServlet配置

      stat-view-servlet:

        enabled: true

        # 访问路径为/druid时,跳转到StatViewServlet

        url-pattern: /druid/*

        # 是否能够重置数据

        reset-enable: false

        # 需要账号密码才能访问控制台

        login-username: druid

        login-password: druid123

        # IP白名单

        # allow: 127.0.0.1

        # IP黑名单(共同存在时,deny优先于allow)

        # deny: 192.168.1.218

      # 配置StatFilter

      filter:

        stat:

          log-slow-sql: true
上述配置不但配置了Druid作为连接池,而且还开启了Druid的监控功能
3.运行项目
访问http://localhost:8080/web/druid:
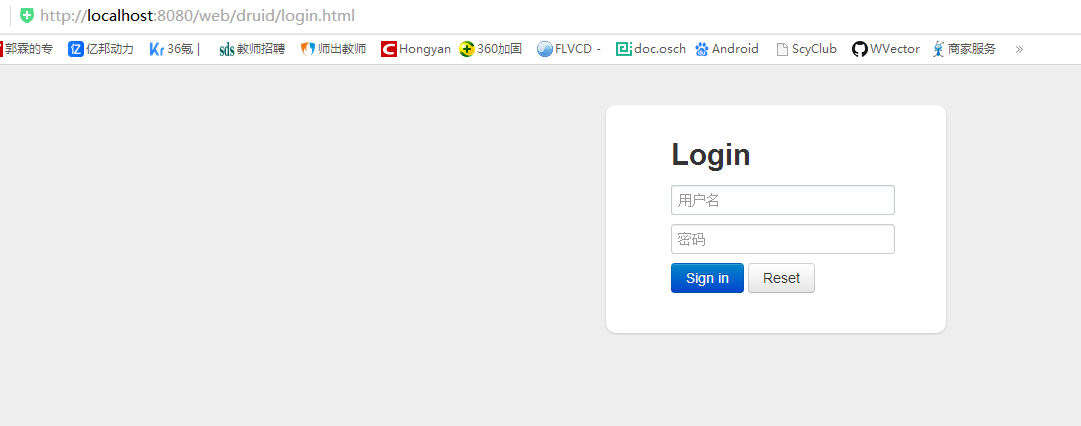
输入登录用户名和密码,可以查看Druid的监控信息:

4.实现增删改查功能:
创建测试表tb_student,并插入几条测试数据
CREATE TABLE `tb_student` (

  `id` int(10) unsigned NOT NULL AUTO_INCREMENT,

  `sno` varchar(10) DEFAULT NULL,

  `sname` varchar(100) DEFAULT NULL,

  `ssex` char(2) DEFAULT NULL,

  PRIMARY KEY (`id`)

) ENGINE=InnoDB AUTO_INCREMENT=4 DEFAULT CHARSET=utf8;
INSERT INTO `tb_student` VALUES ('', '', '张三', 'M');

INSERT INTO `tb_student` VALUES ('', '', '李四', 'M');

INSERT INTO `tb_student` VALUES ('', '', '王五', 'F');
创建对应实体:
package com.czhappy.bootlearn.SpringBootMyBatis.entity;

import java.io.Serializable;

public class Student implements Serializable {

    private static final long serialVersionUID = -339516038496531943L;

    private Integer id;

    private String sno;

    private String name;

    private String sex;

    public Integer getId() {

        return id;

    }

    public void setId(Integer id) {

        this.id = id;

    }

    public static long getSerialVersionUID() {

        return serialVersionUID;

    }

    public String getSno() {

        return sno;

    }

    public void setSno(String sno) {

        this.sno = sno;

    }

    public String getName() {

        return name;

    }

    public void setName(String name) {

        this.name = name;

    }

    public String getSex() {

        return sex;

    }

    public void setSex(String sex) {

        this.sex = sex;

    }

}
使用注解方式创建StudentMapper:
package com.czhappy.bootlearn.SpringBootMyBatis.mapper;

import com.czhappy.bootlearn.SpringBootMyBatis.entity.Student;

import org.apache.ibatis.annotations.*;

import org.springframework.stereotype.Component;

@Component

@Mapper

public interface StudentMapper {

    @Insert("insert into tb_student(sno,sname,ssex) values(#{sno},#{name},#{sex})")

    int add(Student student);

    @Update("update tb_student set sname=#{name},ssex=#{sex} where sno=#{sno}")

    int update(Student student);

    @Delete("delete from tb_student where sno=#{sno}")

    int deleteBysno(String sno);

    @Select("select * from tb_student where sno=#{sno}")

    @Results(id = "student",value= {

            @Result(property = "sno", column = "sno", javaType = String.class),

            @Result(property = "name", column = "sname", javaType = String.class),

            @Result(property = "sex", column = "ssex", javaType = String.class)

    })

    Student queryStudentBySno(String sno);

}
创建service:
package com.czhappy.bootlearn.SpringBootMyBatis.service;

import com.czhappy.bootlearn.SpringBootMyBatis.entity.Student;

public interface StudentService {

    int add(Student student);

    int update(Student student);

    int deleteBysno(String sno);

    Student queryStudentBySno(String sno);

}
package com.czhappy.bootlearn.SpringBootMyBatis.service.impl;

import com.czhappy.bootlearn.SpringBootMyBatis.entity.Student;

import com.czhappy.bootlearn.SpringBootMyBatis.mapper.StudentMapper;

import com.czhappy.bootlearn.SpringBootMyBatis.service.StudentService;

import org.springframework.beans.factory.annotation.Autowired;

import org.springframework.stereotype.Service;

@Servicepublic class StudentServiceImp implements StudentService {

    @Autowired

    private StudentMapper studentMapper;

    @Override

    public int add(Student student) {

        return this.studentMapper.add(student);

    }

    @Override

    public int update(Student student) {

        return this.studentMapper.update(student);

    }

    @Override

    public int deleteBysno(String sno) {

        return this.studentMapper.deleteBysno(sno);

    }

    @Override

    public Student queryStudentBySno(String sno) {

        return this.studentMapper.queryStudentBySno(sno);

    }

}
创建测试controller:
package com.czhappy.bootlearn.SpringBootMyBatis.controller;

import com.czhappy.bootlearn.SpringBootMyBatis.entity.Student;

import com.czhappy.bootlearn.SpringBootMyBatis.service.StudentService;

import org.springframework.beans.factory.annotation.Autowired;

import org.springframework.web.bind.annotation.RequestMapping;

import org.springframework.web.bind.annotation.RequestMethod;

import org.springframework.web.bind.annotation.RestController;

@RestController

public class TestController {

    @Autowired

    private StudentService studentService;

    @RequestMapping( value = "/querystudent", method = RequestMethod.GET)

    public Student queryStudentBySno(String sno) {

        return this.studentService.queryStudentBySno(sno);

    }

}
重启项目,测试查询接口:

SpringBoot2+Druid+MyBatis+MySql实现增删改查的更多相关文章
- SpringBoot2+Druid+JdbcTemplate+MySql实现增删改查
1.配置pom.xml文件 <?xml version="1.0" encoding="UTF-8"?> <project xmlns=&qu ...
- Mybatis入门之增删改查
Mybatis入门之增删改查 Mybatis如果操作成功,但是数据库没有更新那就是得添加事务了.(增删改都要添加)----- 浪费了我40多分钟怀疑人生后来去百度... 导入包: 引入配置文件: sq ...
- MyBatis -- 对表进行增删改查(基于注解的实现)
1.MyBatis对数据库表进行增/删/改/查 前一篇使用基于XML的方式实现对数据库的增/删/改/查 以下我们来看怎么使用注解的方式实现对数据库表的增/删/改/查 1.1 首先须要定义映射sql的 ...
- 使用MySQL练习增删改查时因为版本问题出现连接错误
使用MySQL练习增删改查时出现连接错误,错误提示如下: 2020-02-19 19:53:51.088 ERROR 16328 --- [reate-249798694] com.alibaba.d ...
- Mybatis实现简单增删改查
Mybatis的简单应用 学习内容: 需求 环境准备 代码 总结: 学习内容: 需求 使用Mybatis实现简单增删改查(以下是在IDEA中实现的,其他开发工具中,代码一样) jar 包下载:http ...
- MyBatis简单的增删改查以及简单的分页查询实现
MyBatis简单的增删改查以及简单的分页查询实现 <? xml version="1.0" encoding="UTF-8"? > <!DO ...
- Java连接MySQL数据库增删改查通用方法
版权声明:本文为博主原创文章,未经博主允许不得转载. Java连接MySQL数据库增删改查通用方法 运行环境:eclipse+MySQL 以前我们Java连接MySQL数据库都是一个数据库写一个类,类 ...
- MySQL数据库(增删改查语句)
MySQL数据库(增删改查语句)一.登录数据库:----> mysql -uroot -proot;(对应用户名和密码)二.SQL语句: 数据定义语言DDL 用来定义数据库.表.列,关 ...
- python操作mysql数据库增删改查的dbutils实例
python操作mysql数据库增删改查的dbutils实例 # 数据库配置文件 # cat gconf.py #encoding=utf-8 import json # json里面的字典不能用单引 ...
随机推荐
- test20190901 NOI2019 模拟赛
0+0+0=0.还是太菜,看不出题型. Masodik 你要从 (0,0) 点走到 (n,m),每次只能往 x 轴或者 y 轴正方向移动一个单位距离.从 (i,j) 移动到 (i,j+1) 的代价为 ...
- mybatis框架-SqlSession会话操作数据库的两种方式
1.通过SqlSession实力来直接执行已经映射的sql语句 例如,查询整个用户表中的信息 在UserMapper.xml中编写sql语句 编写测试方法: 注意:这里使用的selectList方法: ...
- Tensorflow细节-P309-高维向量可视化
import matplotlib.pyplot as plt import tensorflow as tf import numpy as np import os from tensorflow ...
- js 鼠标事件详细
常用的几个类型 onClick HTML: 2 | 3 | 3.2 | 4 Browser: IE3 | N2 | O3 鼠标点击事件,多用在某个对象控制的范围内的鼠标点击 onDblClick HT ...
- Kali Linux 2019.4 vmtool安装
1.如图点击 2.桌面上光盘把vmtool拿出来 然后解压加权限并执行 3.一路回车即可 如下图安装成功 然后reboot重启即可
- 将 iTunes 降级到支持安装 .ipa 文件的版本
将 iTunes 降级到支持安装 .ipa 文件的版本 新版的 iTunes 再也不支持安装 .ipa 文件了,但是 Apple 官网依旧保留了旧版 iTunes 的下载渠道.(点击进入) 安装完上面 ...
- 【后缀数组】【LuoguP2852】 [USACO06DEC]牛奶模式Milk Patterns
题目链接 题目描述 农夫John发现他的奶牛产奶的质量一直在变动.经过细致的调查,他发现:虽然他不能预见明天产奶的质量,但连续的若干天的质量有很多重叠.我们称之为一个"模式". J ...
- vue-cli使用笔记
安装nodejs 安装vue-clinpm install -g vue-cli 使用vue-cli初始化项目vue init webpack my-project 进到目录cd my-project ...
- js如何将汉字转化为拼音
github地址,上面有封装好的转换工具:https://github.com/sxei/pinyinjs 里面有几个库,根据功能,库的文件大小也不一样,可以根据需求去引入使用. 里面封装好了方法: ...
- [HAOI 2018]染色
传送门 Description 一个长度为\(N\)的序列, 每个位置都可以被染成 \(M\)种颜色中的某一种. 出现次数恰好为 \(S\)的颜色种数有\(i\)种, 会产生\(w_i\)的愉悦度. ...