P4factory ReadMe Quickstart 安装p4factory
操作系统:
Ubuntu 14.04
前言
在之前,我直接从P4.org给的GitHub网址上下载了p4factory,但是在根据ReadMe的内容进行QuickStart的时候,发生了shell脚本cd错误。
在得到了国际友人的帮助之下,我发现首先要把这个仓库fork过来,然后在自己的fork分支下进行修改。
询问及解答的地址:When I fellow the step in ReadMe: ./autogen.sh, I found a problem
PS:不知道怎么感谢人家,于是点了他的关注。
准备过程:Git操作
参考我的前一篇博文:Git 使用ssh密钥
在文章的最后,顺便把GitHub上的P4factory内容clone了下来。
实际操作过程(参考ReadMe)
Important: git submodules
We often update the submodules for this repo. This is why we recommend that you run the following command whenever pulling the latest version of master:
git submodule update --init --recursive
在之前的尝试中,我直接拷贝了原master的zip,但是并没有从git中下载下来submodules的内容,导致文件夹为空。
在cd进p4factory之后,执行该操作:

Quickstart
To install all the Ubuntu 14.04 dependencies, run
./install_deps.sh
Before running the simulator, you need to create veth interfaces that the simulator can connect to. To create them, you need to run:
sudo p4factory/tools/veth_setup.sh
We use autoconf tools to generate makefiles. Run the following commands to prepare your workspace.
cd p4factory

./autogen.sh

./configure
注意:上述各步结束之后,都会返回p4factory目录。
To validate your installation and test the simulator on a simple P4 target, do the following:
cd p4factory/targets/basic_routing/

make bm

sudo ./behavioral-model
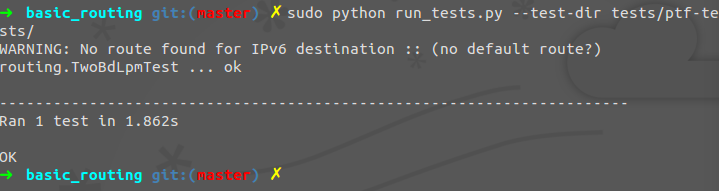
To run a simple test, run this in a different terminal:
cd p4factory/targets/basic_routing/

sudo python run_tests.py --test-dir tests/ptf-tests/
大概的意思是,在Ubuntu上安装依赖关系,然后安装配置工具balabala,最后跑了一个例子,按照顺序一步步下来即可。
注意,命令所提到的文件名称p4factory是和ReadMe一样的,如果你是直接从原仓库下下来的话,名称是p4factory-master。
2016/9/24
P4factory ReadMe Quickstart 安装p4factory的更多相关文章
- P4factory ReadMe 剩余部分
Building and Running a Target Each P4 program (called a 'target') is set up in a directory under tar ...
- p4factory 解决“g++: internal compiler error: Killed (program cc1plus)” make error问题
参考:解决: g++: internal compiler error: Killed (program cc1plus) 在安装p4factory的时候,执行: ./install_deps.sh ...
- P4行为模型BMV2依赖关系安装:thrift nanomsg nnpy安装
由于安装p4factory的步骤需要OF的支持,我需要下载p4的行为模型BMV2: thrift是支持BMV2的软件框架:nanomsg是一个实现了几种"可扩展协议"的高性能通信库 ...
- PTF 安装及简单测试 Packet Testing Framework
PTF PTF is a Python based dataplane test framework. It is based on unittest, which is included in th ...
- 安装配置dradis
github:https://github.com/dradis/dradis-ce/blob/master/README.md安装出现错误:== Copying sample files == == ...
- windows下安装KeystoneJS
安装参考: http://keystonejs.com/zh/getting-started/ http://jsnoder.com/kjs/quickstart 安装前提条件: 安装 Node.JS ...
- dubbo与zookeeper安装手册
原文 示例提供者安装 (+) (#) 安装: wget http://code.alibabatech.com/mvn/releases/com/alibaba/dubbo-demo-provider ...
- linux —— ubuntu 初次安装问题
本文收集了我自己安装ubuntu系统时的一些想法和遇到的一些问题,以及一些我自己感兴趣的软件的安装方法等 1. 50G ubuntu 分区方案 <plan> <key> / & ...
- CentOS 如何安装git server + Gitolite 【配置不成功需要再测试2015-8-20】
安装git 关于安装git 可以参考 http://gitolite.com/gitolite/install.html 里面有官方的介绍 1. Git 的工作需要调用 curl,zlib,open ...
随机推荐
- [黑金原创教程] FPGA那些事儿《设计篇 III》- 图像处理前夕·再续
简介 一本为入门图像处理的入门书,另外还教你徒手搭建平台(片上系统),内容请看目录. 注意 为了达到最好的实验的结果,请准备以下硬件. AX301开发板, OV7670摄像模块, VGA接口显示器, ...
- Xcode - 插件管理工具Alcatraz
Alcatraz 1.简介 Alcatraz是一个能帮你管理Xcode插件丶模版及颜色配置的工具.它可以直接集成在Xcode的图形界面中,让你感觉就像在使用Xcode自带的功能一样. 2.安装和删除 ...
- 网络费用流-最小k路径覆盖
多校联赛第一场(hdu4862) Jump Time Limit: 2000/1000 MS (Java/Others) Memory Limit: 32768/32768 K (Java/Ot ...
- Java的Object.hashCode()的返回值到底是不是对象内存地址?
关于这个问题,查阅了网上的资料,发现证明过程太繁琐,这里我用了反证法. java.lang.Object.hashCode()的返回值到底是不是对象内存地址? hashCode契约 说到这个问题,大家 ...
- Css--input输入框点击时去掉外框outline:medium;(chrome)
.search input[type='search']{ background:no-repeat 0 0 scroll #EEEEEE; border:none; outline:medium; ...
- 07.Curator计数器
这一篇文章我们将学习使用Curator来实现计数器.顾名思义,计数器是用来计数的,利用ZooKeeper可以实现一个集群共享的计数器.只要使用相同的path就可以得到最新的计数器值,这是由Zo ...
- 170524、java.lang.IllegalArgumentException: No converter found for return value of type异常解决
错误原因及解决步骤 1.原因:这是因为springmvc默认是没有对象转换成json的转换器的,需要手动添加jackson依赖. 2.解决步骤: 手动添加jackson依赖到pom.xml文件中 &l ...
- vue自定义过滤器的创建和使用
1.简单介绍 过滤器的作用:实现数据的筛选.过滤.格式化. 过滤器的本质是一个有参数,有返回值的方法. 过滤器可以用在两个地方:双花括号插值和v-bind表达式(后者从2.1.0+开始支持 ...
- 沈阳网络赛K-Supreme Number【规律】
26.89% 1000ms 131072K A prime number (or a prime) is a natural number greater than 11 that cannot be ...
- Python的Flask框架应用调用Redis队列数据的方法
转自:http://www.jb51.net/article/86021.htm 任务异步化 打开浏览器,输入地址,按下回车,打开了页面.于是一个HTTP请求(request)就由客户端发送到服务器, ...