Setting up Scatter for Web Applications
【Setting up Scatter for Web Applications】
If you are still using scatter-js please move over to scatterjs-core.
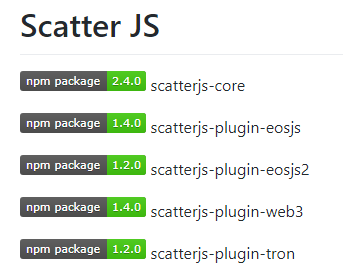
1、ScatterJS 分为以下5个部分:
2、浏览器中可以通过 <script> 标签引入。
<script src="https://cdn.scattercdn.com/file/scatter-cdn/js/latest/scatterjs-core.min.js"></script>

<script src="https://cdn.scattercdn.com/file/scatter-cdn/js/latest/scatterjs-plugin-eosjs.min.js"></script>

<script src="https://cdn.scattercdn.com/file/scatter-cdn/js/latest/scatterjs-plugin-eosjs2.min.js"></script>

<script src="https://cdn.scattercdn.com/file/scatter-cdn/js/latest/scatterjs-plugin-web3.min.js"></script>

<script src="https://cdn.scattercdn.com/file/scatter-cdn/js/latest/scatterjs-plugin-tron.min.js"></script>
3、React项目可心通过 npm 安装。
npm i -S scatterjs-core
React项目引入区块链相关库。scatter 支持3种不同的区块链。
1)EOS
npm i -S scatterjs-plugin-eosjs

// OR

npm i -S scatterjs-plugin-eosjs2
2)Ethereum
npm i -S scatterjs-plugin-web3
3)TRON
npm i -S scatterjs-plugin-tron
4、导入 ScatterJS,为EOS交互做准备。
import ScatterJS from 'scatterjs-core';

import ScatterEOS from 'scatterjs-plugin-eosjs'

ScatterJS.plugins( new ScatterEOS() );
5、用 DAPP 去连接,并且获取 identity。
// Optional!

const connectionOptions = {initTimeout:10000}

ScatterJS.scatter.connect("Put_Your_App_Name_Here", connectionOptions).then(connected => {

    if(!connected) {

        // User does not have Scatter installed/unlocked.

        return false;

    }

    // Use `scatter` normally now.

    ScatterJS.scatter.getIdentity(...);

});
6、创建 eosjs 的 proxy
// Using a proxy wrapper

const eos = ScatterJS.scatter.eos(network, Eos, eosjsOptions);
7、Interaction Flow

8、完整流程Demo。
1)scatterjs-core、scatterjs-plugin-eosjs。
import ScatterJS from 'scatterjs-core';

import ScatterEOS from 'scatterjs-plugin-eosjs';

import Eos from 'eosjs';

// Don't forget to tell ScatterJS which plugins you are using.

ScatterJS.plugins( new ScatterEOS() );
2)设置要连接的区块链。
// Networks are used to reference certain blockchains.

// They let you get accounts and help you build signature providers.

const network = {

    blockchain:'eos',

    protocol:'https',

    host:'nodes.get-scatter.com',

    port:443,

    chainId:'aca376f206b8fc25a6ed44dbdc66547c36c6c33e3a119ffbeaef943642f0e906'

}
3)设置 AppName 连接 本地Scatter。
// First we need to connect to the user's Scatter.

ScatterJS.scatter.connect('My-App').then(connected => {
    // If the user does not have Scatter or it is Locked or Closed this will return false;

    if(!connected) return false;
);
4)获取 identity,并获取其中一个eos账户(account)。
  const scatter = ScatterJS.scatter;

   // Now we need to get an identity from the user.

   // We're also going to require an account that is connected to the network we're using.

   const requiredFields = { accounts:[network] };

   scatter.getIdentity(requiredFields).then(() => {

       // Always use the accounts you got back from Scatter. Never hardcode them even if you are prompting

       // the user for their account name beforehand. They could still give you a different account.

       const account = scatter.identity.accounts.find(x => x.blockchain === 'eos');
}).catch(error => { // The user rejected this request, or doesn't have the appropriate requirements. console.error(error); }); });
5)获取 eos 代理
     // You can pass in any additional options you want into the eosjs reference.

        const eosOptions = { expireInSeconds:60 };

        // Get a proxy reference to eosjs which you can use to sign transactions with a user's Scatter.

        const eos = scatter.eos(network, Eos, eosOptions);

        // ----------------------------

        // Now that we have an identity,

        // an EOSIO account, and a reference

        // to an eosjs object
6)此时,可以进行交易了。
     // Never assume the account's permission/authority. Always take it from the returned account.

        const transactionOptions = { authorization:[`${account.name}@${account.authority}`] };

        eos.transfer(account.name, 'helloworld', '1.0000 EOS', 'memo', transactionOptions).then(trx => {

            // That's it!

            console.log(`Transaction ID: ${trx.transaction_id}`);

        }).catch(error => {

            console.error(error);

        });
参考:
1、https://get-scatter.com/docs/setting-up-for-web-apps
2、https://github.com/GetScatter/scatter-js
Setting up Scatter for Web Applications的更多相关文章
- Developing RIA Web Applications with Oracle ADF
Developing RIA Web Applications with Oracle ADF Purpose This tutorial shows you how to build a ric ...
- [Windows Azure] Developing Multi-Tenant Web Applications with Windows Azure AD
Developing Multi-Tenant Web Applications with Windows Azure AD 2 out of 3 rated this helpful - Rate ...
- Combining HTML5 Web Applications with OpenCV
The Web Dev Zone is brought to you by Stormpath—offering a pre-built Identity API for developers. Ea ...
- Create Advanced Web Applications With Object-Oriented Techniques
Create Advanced Web Applications With Object-Oriented Techniques Ray Djajadinata Recently I intervie ...
- Model-View-Controller(MVC) is an architectural pattern that frequently used in web applications. Which of the following statement(s) is(are) correct?
Model-View-Controller(MVC) is an architectural pattern that frequently used in web applications. Whi ...
- Progressive Web Applications
Progressive Web Applications take advantage of new technologies to bring the best of mobile sites an ...
- SpringBoot(五) Web Applications: MVC
统一异常处理 SpringBoot的默认映射 /error 码云: commit: 统一异常处理+返回JSON格式+favicon.ico 文档: 28.1.11 Error Handling 参考 ...
- 【bug】【yii】配置log时,报错 Setting read-only property: yii\web\Application::log
Setting read-only property: yii\web\Application::log 配置放在了 components 外面,应该放在里面
- a simple and universal interface between web servers and web applications or frameworks: the Python Web Server Gateway Interface (WSGI).
WSGI is the Web Server Gateway Interface. It is a specification that describes how a web server comm ...
随机推荐
- Linux跨服务器发送文件
在要发送的文件所在的目录下,输入下列命令 第一种: scp -r test.jar root@127.0.0.1:$(pwd)/test.jar 其中root为服务器账户名,127.0.0.1为要发送 ...
- 【python接口自动化-requests库】【一】requests库安装
1.概念 requests 是用Python语言编写,基于 urllib,采用 Apache2 Licensed 开源协议的 HTTP 库.它比 urllib 更加方便,可以节约我们大量的工作,完全满 ...
- 自定义pip 包开发简单说明
文档主要来自官方文档,主要是为了测试学习 创建pip 包项目 项目结构 ├── LICENSE ├── README.md ├── dalongrong_example_pkg │ └── __ini ...
- python调用mediainfo工具批量提取视频信息
写了2个脚本,分别是v1版本和v2版本 都是python调用mediainfo工具提取视频元数据信息 v1版本是使用pycharm中测试运行的,指定了视频路径 v2版本是最终交付给运营运行的,会把v2 ...
- 第二章 JavaScript总结(下)
js参考表 变量的引用 <script> var n=10; m = 10; //全局变量 function a () { var x = 10; //局部变量 b = 10;//全局变量 ...
- Mongo数据库基本操作
从这两个类的继承来看,connection是继承了MongoClient的,建议使用MongoClient而不是使用Connection.(也就是说,MongoClient可以使用方法Connecti ...
- unity的一些tips
主要是我知乎上回答的一个关于unity的tip,备忘. 说说我所看到unity相关的,不好的习惯: 1 尽量不要在Awake(), start()等函数内加入业务逻辑的初始化代码.首先无法简便的直接启 ...
- 查看docker容器的内存占用
使用docker stats命令可以查看容器的内存,但是有时候docker stats命令获得的数据可能准确,可以参考下面这种方式 先通过docker ps -a 找到容器的container id ...
- servlet cdi analysis
CDI中最令人兴奋的功能是允许每个人在Java EE平台中编写强大的扩展性功能,甚至于改变其核心本身.这些扩展性功能是可以完全移植到任何支持CDI的环境中. CDI的一些主要特性 1.类型安全:CDI ...
- 20165312 2017-2018-2《JAVA程序设计》第8周学习总结
20165312 2017-2018-2<JAVA程序设计>第8周学习总结 一.第十二章知识点总结 进程与线程 进程是程序的一次动态执行进程,它对应了从代码加载.执行至执行完毕的一个完整过 ...