ubuntu14.04下nodejs + npm + bower的安装、调试和部署
1. 简介
本文介绍ubuntu14.04下nodejs+npm+bower的安装、调试和部署
参考文档
https://docs.npmjs.com/getting-started
https://github.com/npm/npm/issues/
另外:
Windows nodejs版本https://nodejs.org/download/release/latest/node-v5.5.0-x64.msi
Windows下ide可选用WebStorm-10.0.2.exe
2. 安装
2.1. nodejs/npm安装
注意:
- 不要使用ubuntu自带的nodejs版本,实在是太低了!;最新版本(截止本文)为5.5.0
- Npm自带,不需要额外安装
1) 下载
ubuntu@ip-172-31-28-0:~$wget https://nodejs.org/download/release/latest/node-v5.5.0.tar.gz
2) 解压缩
ubuntu@ip-172-31-28-0:~$tar zxvf node-v5.5.0.tar.gz
3) 安装编译工具
ubuntu@ip-172-31-28-0:~$sudo apt-get install g++ make
4) 安装
ubuntu@ip-172-31-28-0:~$cd node-v5.5.0
ubuntu@ip-172-31-28-0:~$./configure
ubuntu@ip-172-31-28-0:~$Make
ubuntu@ip-172-31-28-0:~$Make install
5) nodejs版本查看
ubuntu@ip-172-31-28-0:~$ node -v
v5.5.0
6) npm版本查看
ubuntu@ip-172-31-28-0:~$ npm -v
3.3.12
2.2. npm安装package
1) 进入angularjs项目所在地
ubuntu@ip-172-31-28-0:~$ cd FundTray/frondent/
ubuntu@ip-172-31-28-0:~/FundTray/frondent$
2) 编辑package.json
{
"name": "mmm",
"private": true,
"devDependencies": {
"autoprefixer-core": "^5.2.1",
"grunt": "^0.4.5",
"grunt-angular-templates": "^0.5.7",
"grunt-concurrent": "^1.0.0",
"grunt-contrib-clean": "^0.6.0",
"grunt-contrib-concat": "^0.5.0",
"grunt-contrib-connect": "^0.9.0",
"grunt-contrib-copy": "^0.7.0",
"grunt-contrib-cssmin": "^0.12.0",
"grunt-contrib-htmlmin": "^0.4.0",
"grunt-contrib-imagemin": "^1.0.0",
"grunt-contrib-jshint": "^0.11.0",
"grunt-contrib-uglify": "^0.7.0",
"grunt-contrib-watch": "^0.6.1",
"grunt-filerev": "^2.1.2",
"grunt-google-cdn": "^0.4.3",
"grunt-jscs": "^1.8.0",
"grunt-newer": "^1.1.0",
"grunt-ng-annotate": "^0.9.2",
"grunt-postcss": "^0.5.5",
"grunt-svgmin": "^2.0.0",
"grunt-usemin": "^3.0.0",
"grunt-wiredep": "^2.0.0",
"jit-grunt": "^0.9.1",
"time-grunt": "^1.0.0",
"jshint-stylish": "^1.0.0"
},
"engines": {
"node": ">=0.10.0"
}
}
3) Npm安装
ubuntu@ip-172-31-28-0:~/FundTray/frondent$ npm install
安装完成以后,会显示各种依赖包关系,出错请google
4) 进入node_modules,查看安装后的package

2.3. bower安装Package
1) 进入angularjs项目所在地
ubuntu@ip-172-31-28-0:~$ cd FundTray/frondent/
ubuntu@ip-172-31-28-0:~/FundTray/frondent$
2) 编辑bower.json
{
"name": "mmm",
"version": "0.0.0",
"private":true,
"dependencies": {
"angular": "^1.4.0",
"bootstrap": "^3.2.0",
"angular-resource": "^1.4.0",
"angular-ui-router": "~0.2.15",
"angular-messages": "~1.4.8",
"font-awesome": "~4.5.0"
},
"devDependencies": {
"angular-mocks": "^1.4.0"
},
"appPath": "app",
"moduleName": "mmmApp",
"overrides": {
"bootstrap": {
"main": [
"dist/css/bootstrap.css"
]
},
"font-awesome": {
"main": [
"css/font-awesome.css",
"fonts/*"
]
}
}
}
3) 创建bower_components
ubuntu@ip-172-31-28-0:~/FundTray/frondent$ sudo mkdir bower_components
4) 安装bower
ubuntu@ip-172-31-28-0:~/FundTray/frondent$ sudo npm install -g bower
5) bower不能使用sudo,要保证当前用户拥有当前目录的权限
ubuntu@ip-172-31-28-0:~/FundTray/frondent$sudo chown -R ubuntu:ubuntu ../frondent/
6) bower 安装angular等依赖包
ubuntu@ip-172-31-28-0:~/FundTray/frondent$bower install
7) 进入bower_components查看包

各种包已经安装完成
3. 调试
1) 进入angularjs项目所在地
ubuntu@ip-172-31-28-0:~$ cd FundTray/frondent/
ubuntu@ip-172-31-28-0:~/FundTray/frondent$
2) 安装grunt客户端
ubuntu@ip-172-31-28-0:~/FundTray/frondent$npm install –g grunt-cli
3) 安装完成
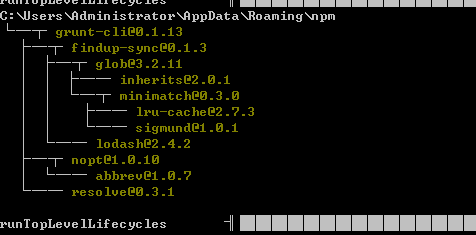
4) 查看grunt 客户端版本
ubuntu@ip-172-31-28-0:~/FundTray/frondent$ grunt -V
grunt-cli v0.1.13
grunt v0.4.5
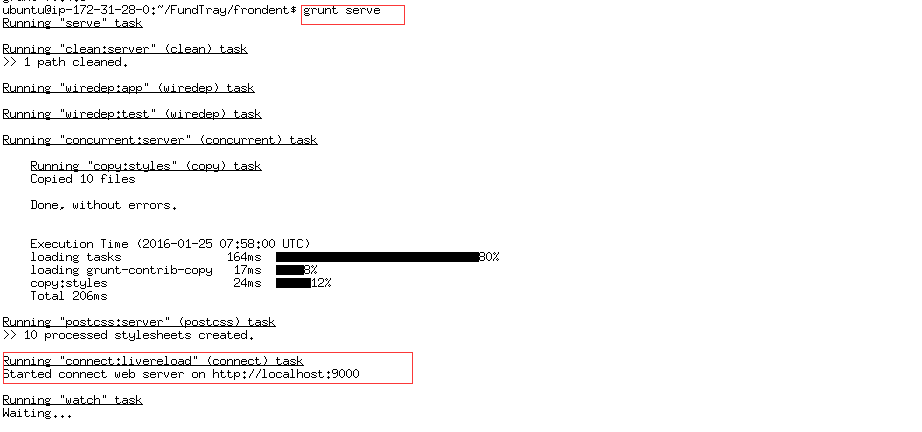
5) 进入系统所在目录,运行grunt server启动调试
注意:目前只可进行本机调试,无法对外访问
4. 部署
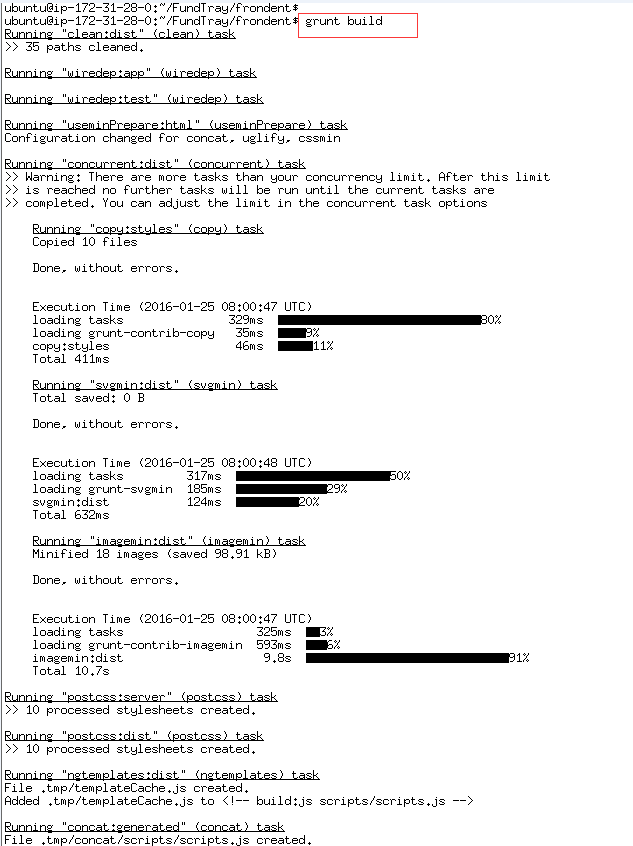
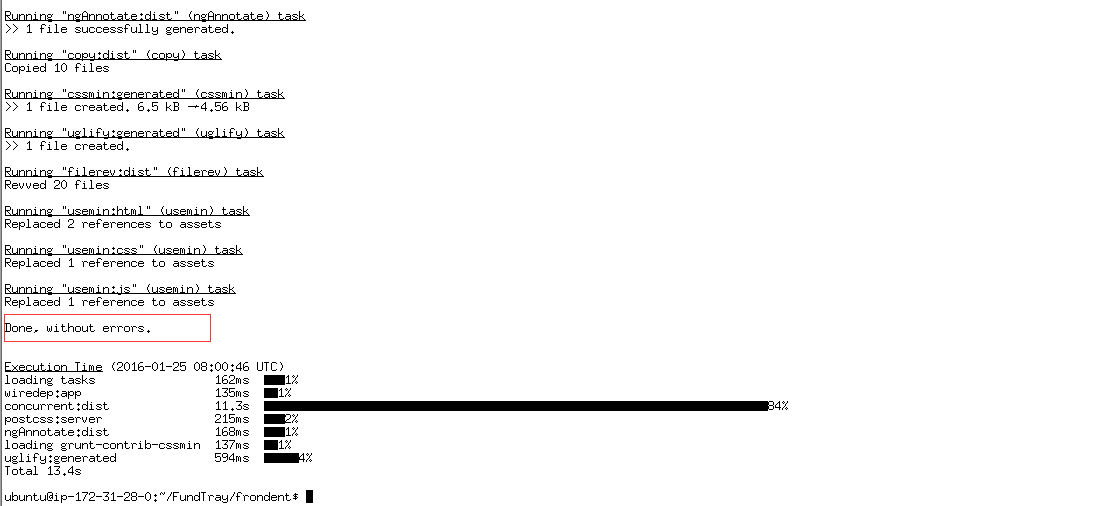
1) Grunt build
ubuntu@ip-172-31-28-0:~/FundTray/frondent$
grunt build
2) cdn自动替换
ubuntu@ip-172-31-28-0:~/FundTray/frondent$
grunt cdnify:dist

3) cdn手动替换
有部分cdn是无法自动替换的,此时只能手动替换了
替换
<link rel="stylesheet"
href="bower_components/bootstrap/dist/css/bootstrap.css" />
为
<link
href="//cdn.bootcss.com/bootstrap/3.3.6/css/bootstrap.min.css"
rel="stylesheet">
替换
<link
rel="stylesheet"
href="bower_components/font-awesome/css/font-awesome.css" />
为
<linkhref="//cdn.bootcss.com/font-awesome/4.5.0/css/font-awesome.css"
rel="stylesheet">
4) 查看dist
Dist目录就是发布目录,最终的网站

5) 拷贝dist到web服务器
搭建一个web服务器(比如nginx),将dist下的所有文件拷过去即可实现访问
ubuntu14.04下nodejs + npm + bower的安装、调试和部署的更多相关文章
- ubuntu14.04下svn版本管理系统的安装及常用命令的使用整理
ubuntu14.04下安装svn$sudo apt-get install subversion 执行这一步就安装完成了,在ubuntu先安装很方便 安装完成后,创建版本库目录,由于是本地环境,就在 ...
- Ubuntu14.04下Mongodb数据库可视化工具安装部署步骤(图文详解)(博主推荐)
不多说,直接上干货! 前期博客 Ubuntu14.04下Mongodb(离线安装方式|非apt-get)安装部署步骤(图文详解)(博主推荐) Ubuntu14.04下Mongodb官网安装部署步骤(图 ...
- windows下nodejs+npm+bower+git+bootstrap组件环境配置
1.进入nodejs官方网站下载软件(nodejs.org), 2.下载完成后,双击默认安装.安装程序会自动添加环境变量 3.检测nodejs是否安装成功.打开cmd命令行 输入 node - v 显 ...
- ubuntu14.04下 Kinect V2+Ros接口安装
1. 首先git下载代码,放到主文件夹下面 git clone https://github.com/OpenKinect/libfreenect2.git 2. 然后安装依赖项如下,最好事先编译安装 ...
- ubuntu14.04下配置Java环境以及安装最新版本的eclipse
首先是配置JDK 步骤一:下载最新版本的JDK,链接:http://www.oracle.com/technetwork/java/javase/downloads/index.html 步骤二:首先 ...
- ubuntu14.04下播放器SMplayer的安装
1. Mplayer 与 SMplayer的区别 虽然MPlayer播放器是人类史上最强大的播放器(参数超过千个),但是其默认编译没有界面,所以写参数时间甚至比看片时间还长.虽然编译时候可以选择--e ...
- ubuntu14.04下编译安装ambari-2.4.2.0
ubuntu14.04下编译安装ambari-2.4.2.0 编译前的准备工作 准备工作有: 系统参数 系统依赖(编译环境) 离线安装包 java环境 maven环境 Nodejs环境 git环境 a ...
- ubuntu14.04下安装cudnn5.1.3,opencv3.0,编译caffe及配置matlab和python接口过程记录
已有条件: ubuntu14.04+cuda7.5+anaconda2(即python2.7)+matlabR2014a 上述已经装好了,开始搭建caffe环境. 1. 装cudnn5.1.3,参照: ...
- Ubuntu14.04下安装Hadoop2.5.1 (单机模式)
本文地址:http://www.cnblogs.com/archimedes/p/hadoop-standalone-mode.html,转载请注明源地址. 欢迎关注我的个人博客:www.wuyudo ...
随机推荐
- Hadoop入门进阶课程6--MapReduce应用案例
本文版权归作者和博客园共有,欢迎转载,但未经作者同意必须保留此段声明,且在文章页面明显位置给出原文连接,博主为石山园,博客地址为 http://www.cnblogs.com/shishanyuan ...
- Storm集群部署
一. 说明 Storm是一个分布式实时计算系统,Storm对于实时计算的意义就相当于Hadoop对于批量计算的意义.对于实时性较高的系统Storm是不错的选择.Hadoop提供了map, reduce ...
- tips null和undefined的区别
tips null和undefined的区别 1.undefined类型 undefined类型只有一个值,即特殊的undefined.在使用var声明变量但未对其加以初始化时,这个变量的值就是und ...
- js-对象-2
对象: 对象是一组具有属性和方法的经过组织的数据. 默认对象: 日期对象:(日期基线:1970年1月1日00:00:00) 建立日期对象(实例): 格式:日期对象名称=new Date([日期参数]) ...
- MvvmLight框架使用入门(一)
MvvmLight是比较流行的MVVM框架,相对较为简单易用.可能正因为简单,对应的帮助文档不多,对初学者就不够友好了.这里会用几篇随笔,就个人对MvvmLight的使用经验,来做一个入门的介绍. 第 ...
- 点餐APP 冲刺三总结
一转眼所有的冲刺都完成了,而今次的冲刺主要是完善数据库,而我们 也成功地实现了,虽然过程很艰辛,但是我们每一个人都学习到了很多新 知识,这是最好的收获.因为今学期没有软件工程的课程,所以大家都是 利用 ...
- wpf 自定义消息框
相信很多人用过MessageBox.show(),是不是觉得这个消息框有点丑呢,反正我是觉得有点丑的,所以我自己重写了一个.先不说,上两幅图对比先: 当然,也不是很好看,不过比原有的好多了. 不多说了 ...
- Linux修改命令提示符(关于环境参量PS1)
关乎环境参量的四个文件/etc/profile /etc/bashrc ~/.bashrc ~/.bash_profile $$$:/etc/profile:此文件为系统的每个用户设置环境信息,当 ...
- [python学习笔记]Day1
初识python 第一个python程序: print('Hello,Python') >>>Hello,Python python2与python3的一些主要的区别: 1.在pyt ...
- 常用Keytool 命令
常用Keytool 命令Keytool 是一个JAVA环境下的安全钥匙与证书的管理工具.它管理一个存储了私有钥匙和验证相应公共钥匙的与它们相关联的X.509 证书链的keystore(相当一个数据库, ...