使用kubeadm 离线安装 单master k8s 1.13
Study From :https://www.kubernetes.org.cn/4948.html
https://www.kubernetes.org.cn/4948.html
感谢原作者提供的资源
1. 安装centos7_1811_7.6
2. 升级kernel 到 4.19
3. 关闭防火墙,关闭selinux
4. 修改sysctl 内容
# 设置网桥包经IPTables,core文件生成路径

echo """

vm.swappiness =

net.bridge.bridge-nf-call-ip6tables =

net.bridge.bridge-nf-call-iptables =

""" > /etc/sysctl.conf

sysctl -p
5. 安装ntpdate
yum install -y ntpdate

ntpdate -u ntp.api.bz
6. 暂时不学习集群 所以 不需要 ipvs了
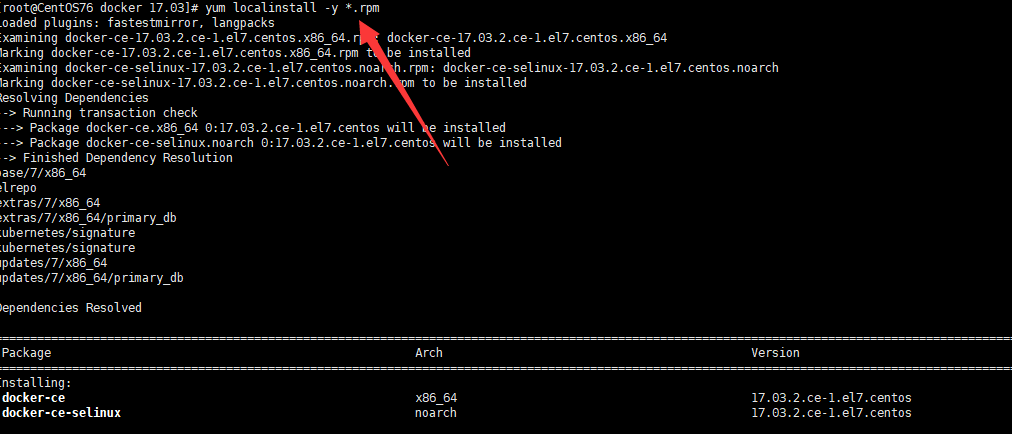
7. 安装docker 17.03
最笨的办法:
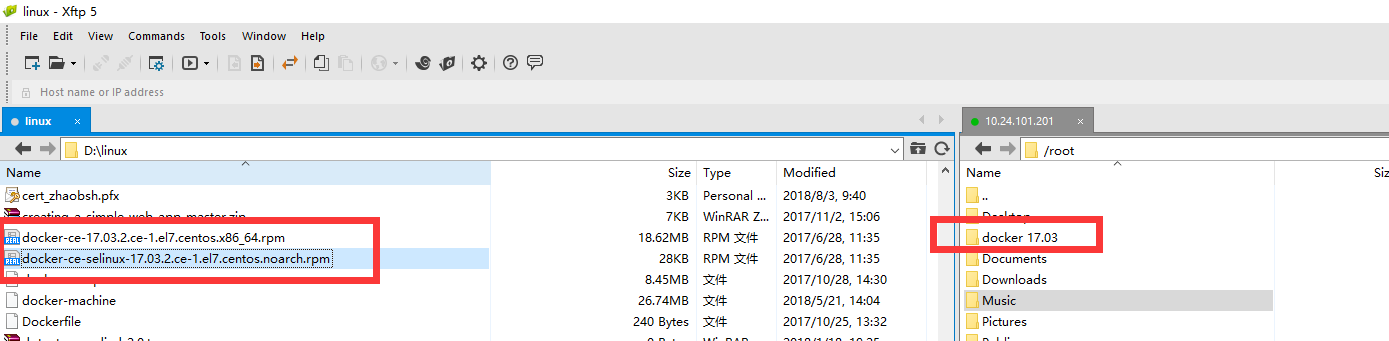
然后执行安装
8. 一个虚拟机进行处理 所以不需要harbor了.
9. 将docker设置为开机启动等
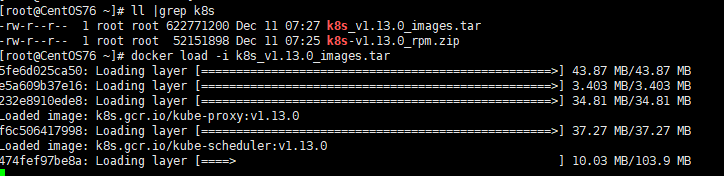
10. docker load 需要的 k8s images
[来源是 原作者blog 导入到 harbor 然后自己摘出来的]
11. 安装 rpm
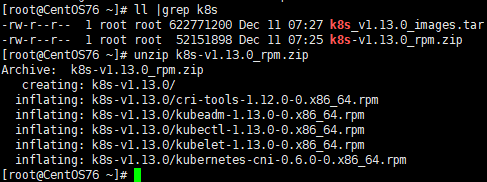
直接进行安装

12. 启动 kubelet

13. 关闭swap
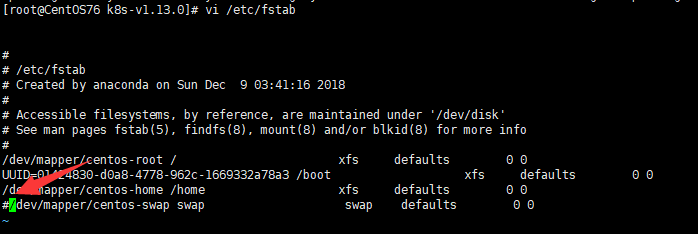
然后 reboot
顺便修改一下 hosts 加上本机
14. 使用kubeadm 进行启动 命令为:
kubeadm init --kubernetes-version=v1.13.0 --pod-network-cidr=10.244.0.0/ --ignore-preflight-errors=...
15. 命令界面为:
效果
kubeadm init --kubernetes-version=v1.13.0 --pod-network-cidr=10.244.0.0/ --ignore-preflight-errors=...

[init] Using Kubernetes version: v1.13.0

[preflight] Running pre-flight checks

[preflight] Pulling images required for setting up a Kubernetes cluster

[preflight] This might take a minute or two, depending on the speed of your internet connection

[preflight] You can also perform this action in beforehand using 'kubeadm config images pull'

[kubelet-start] Writing kubelet environment file with flags to file "/var/lib/kubelet/kubeadm-flags.env"

[kubelet-start] Writing kubelet configuration to file "/var/lib/kubelet/config.yaml"

[kubelet-start] Activating the kubelet service

[certs] Using certificateDir folder "/etc/kubernetes/pki"

[certs] Generating "front-proxy-ca" certificate and key

[certs] Generating "front-proxy-client" certificate and key

[certs] Generating "etcd/ca" certificate and key

[certs] Generating "etcd/peer" certificate and key

[certs] etcd/peer serving cert is signed for DNS names [centos76 localhost] and IPs [10.24.101.201 127.0.0.1 ::]

[certs] Generating "etcd/healthcheck-client" certificate and key

[certs] Generating "apiserver-etcd-client" certificate and key

[certs] Generating "etcd/server" certificate and key

[certs] etcd/server serving cert is signed for DNS names [centos76 localhost] and IPs [10.24.101.201 127.0.0.1 ::]

[certs] Generating "ca" certificate and key

[certs] Generating "apiserver" certificate and key

[certs] apiserver serving cert is signed for DNS names [centos76 kubernetes kubernetes.default kubernetes.default.svc kubernetes.default.svc.cluster.local] and IPs [10.96.0.1 10.24.101.201]

[certs] Generating "apiserver-kubelet-client" certificate and key

[certs] Generating "sa" key and public key

[kubeconfig] Using kubeconfig folder "/etc/kubernetes"

[kubeconfig] Writing "admin.conf" kubeconfig file

[kubeconfig] Writing "kubelet.conf" kubeconfig file

[kubeconfig] Writing "controller-manager.conf" kubeconfig file

[kubeconfig] Writing "scheduler.conf" kubeconfig file

[control-plane] Using manifest folder "/etc/kubernetes/manifests"

[control-plane] Creating static Pod manifest for "kube-apiserver"

[control-plane] Creating static Pod manifest for "kube-controller-manager"

[control-plane] Creating static Pod manifest for "kube-scheduler"

[etcd] Creating static Pod manifest for local etcd in "/etc/kubernetes/manifests"

[wait-control-plane] Waiting for the kubelet to boot up the control plane as static Pods from directory "/etc/kubernetes/manifests". This can take up to 4m0s

[apiclient] All control plane components are healthy after 25.003224 seconds

[uploadconfig] storing the configuration used in ConfigMap "kubeadm-config" in the "kube-system" Namespace

[kubelet] Creating a ConfigMap "kubelet-config-1.13" in namespace kube-system with the configuration for the kubelets in the cluster

[patchnode] Uploading the CRI Socket information "/var/run/dockershim.sock" to the Node API object "centos76" as an annotation

[mark-control-plane] Marking the node centos76 as control-plane by adding the label "node-role.kubernetes.io/master=''"

[mark-control-plane] Marking the node centos76 as control-plane by adding the taints [node-role.kubernetes.io/master:NoSchedule]

[bootstrap-token] Using token: 9jhx3x.c1a35jp4hq12pk7w

[bootstrap-token] Configuring bootstrap tokens, cluster-info ConfigMap, RBAC Roles

[bootstraptoken] configured RBAC rules to allow Node Bootstrap tokens to post CSRs in order for nodes to get long term certificate credentials

[bootstraptoken] configured RBAC rules to allow the csrapprover controller automatically approve CSRs from a Node Bootstrap Token

[bootstraptoken] configured RBAC rules to allow certificate rotation for all node client certificates in the cluster

[bootstraptoken] creating the "cluster-info" ConfigMap in the "kube-public" namespace

[addons] Applied essential addon: CoreDNS

[addons] Applied essential addon: kube-proxy

Your Kubernetes master has initialized successfully!

To start using your cluster, you need to run the following as a regular user:

  mkdir -p $HOME/.kube

  sudo cp -i /etc/kubernetes/admin.conf $HOME/.kube/config

  sudo chown $(id -u):$(id -g) $HOME/.kube/config

You should now deploy a pod network to the cluster.

Run "kubectl apply -f [podnetwork].yaml" with one of the options listed at:

  https://kubernetes.io/docs/concepts/cluster-administration/addons/

You can now join any number of machines by running the following on each node

as root:

  kubeadm join 10.24.101.201: --token 9jhx3x.c1a35jp4hq12pk7w --discovery-token-ca-cert-hash sha256:5f02ab9b825cf6c21f46a5701c4391e6e1c8c584219a458b3e91f1163bf3a402
效果:

需要安装 flannel 或者是calico 才可以.
这里先不写了....
感谢原作者
kubeadm 跟之前的版本 基本上一致的 简单测试了下.
使用kubeadm 离线安装 单master k8s 1.13的更多相关文章
- 企业运维实践-还不会部署高可用的kubernetes集群?使用kubeadm方式安装高可用k8s集群v1.23.7
关注「WeiyiGeek」公众号 设为「特别关注」每天带你玩转网络安全运维.应用开发.物联网IOT学习! 希望各位看友[关注.点赞.评论.收藏.投币],助力每一个梦想. 文章目录: 0x00 前言简述 ...
- kubernetes实战(二十五):kubeadm 安装 高可用 k8s v1.13.x
1.系统环境 使用kubeadm安装高可用k8s v.13.x较为简单,相比以往的版本省去了很多步骤. kubeadm安装高可用k8s v.11 和 v1.12 点我 主机信息 主机名 IP地址 说明 ...
- ubunut下使用kubeadm离线安装k8s1.9
模仿转载的那个博客,简单记录下过程. 需要的文件. 原贴里面的:http://www.bladewan.com/2018/01/02/kubernetes_install/ 镜像文件,以及单独下载一些 ...
- kubeadm安装K8S单master双节点集群
宿主机:master:172.16.40.97node1:172.16.40.98node2:172.16.40.99 # 一.k8s初始化环境:(三台宿主机) 关闭防火墙和selinux syste ...
- 使用Kubeadm安装Kubernetes【单Master节点】
参考:Kubernetes官方文档 Kubernetes安装方案选择 Centos 7 配置科学上网 安装Calico网络插件 kubernetes-dashboard部署 Kubernetes ...
- 【K8S】基于单Master节点安装K8S集群
写在前面 最近在研究K8S,今天就输出部分研究成果吧,后续也会持续更新. 集群规划 IP 主机名 节点 操作系统版本 192.168.175.101 binghe101 Master CentOS 8 ...
- centos7.3 kubernetes/k8s 1.10 离线安装 --已验证
本文介绍在centos7.3使用kubeadm快速离线安装kubernetes 1.10. 采用单master,单node(可以多node),占用资源较少,方便在笔记本或学习环境快速部署,不适用于生产 ...
- k8s 组件介绍__单Master集群部署
参考链接:https://github.com/opsnull/follow-me-install-kubernetes-cluster kubernetes 概述 1.kubernetes 是什么 ...
- 从零到一,利用kubeadm在ubuntu server 16.04 64位系统离线安装kubernetes v1.10.0
说明 初步接触kubernets,记录学习过程 本教程目的利用kubeadm在ubuntu server 16.04 64位系统离线安装kubernets v1.10.0 环境信息 节点IP地址 角色 ...
随机推荐
- Python2.7-pickle, cpickle
pickle, cpickle模块,用于序列化和反序列化 python 对象数据,可以被序列化的有:布尔值,数值,字符串,包含以上三类的容器,定义在模块顶层的函数.内置函数和类,实例对象的 __dic ...
- ansible 远程以普通用户执行命令
1. ansible 10.0.0.1 -m raw -a "date" -u www 2.在ansible的主机配置文件中指定ssh_uservi/etc/ansible/hos ...
- ceph 部署步骤和原理理解
1.ceph的官方源在国外,网速比较慢,此处添加ceph源为阿里源(每个节点上均执行) vim /etc/yum.repos.d/ceph.repo [Ceph] name=Ceph packages ...
- linux系统下php通过php_oci8扩展连接oracle数据库 Nginx
相关版本信息: PHP Version 5.6.30 nginx version: nginx/1.10.3 Linux version 2.6.32-358.el6.x86_64 (mockbuil ...
- maven使用出现的错误
修改mvn archetype:create 改成mvn archetype:generate 刚开始学习用Maven, 装好了以后生成一个新的project mvnarchetype:genera ...
- SharePoint2016配置工作流开发环境
1,下载Web PlatForm5.0 地址:https://www.microsoft.com/web/downloads/platform.aspx 2,保证开发环境能连网,安装Web Plat ...
- kettle学习笔记(九)——子转换、集群与变量
一.概述 kettle中3个重要的步骤: 子转换/映射 在转换里调用一个子转换,便于封装和重用. 集群 集群模式 变量和参数 变量和参数的用法 二.子转换 1.定义子转换 主要由映射输入与映射输出定义 ...
- Exp3
利用不同免杀方式生成文件 1.msfvenom 使用msfvenom命令查看功能介绍 其中有: -p 选择一个载荷(或者叫模块) -l 载荷列表 -f 生成的文件格式 -e 编码方式 -l 编码次数 ...
- laraver框架学习------工厂模型填充测试数据
在laravel中填充数据有几种方式.一种是Seeder,另一种是工厂模式进行的填充. 工厂模式可以实现大批量的填充数据,数据的量可以自定义.这也为后续的软件测试提供方便. 在laravel框架有da ...
- Scala基础(1)
Scala基础语法 声明与定义: val,常量声明 val x:T(把x声明成一个类型为T的常量) x是变量的名字,T是变量的类型 v ...