Java进阶知识26 SSH整合(Struts2、Spring、Hibernate)
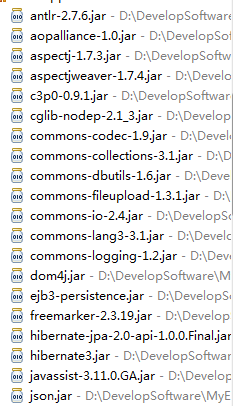
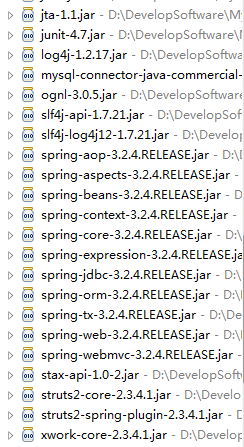
1、我用到的jar包
2、整合实例
2.1、MySQL数据库建表语句
 create database school; -- 创建数据库

 use school; -- 使用school数据库

 4 create table user( -- 创建user表

   id int(4) primary key auto_increment,

   name varchar(20) not null,

   age int(4) not null

 );
 inert into user(name,age) values("张三",);
2.2、配置web.xml文件
 <?xml version="1.0" encoding="UTF-8"?>

 <web-app xmlns:xsi="http://www.w3.org/2001/XMLSchema-instance" xmlns="http://java.sun.com/xml/ns/javaee" xmlns:web="http://java.sun.com/xml/ns/javaee/web-app_2_5.xsd" xsi:schemaLocation="http://java.sun.com/xml/ns/javaee http://java.sun.com/xml/ns/javaee/web-app_3_0.xsd" version="3.0">

   <display-name></display-name>

   <welcome-file-list>

     <welcome-file>index.jsp</welcome-file>

   </welcome-file-list>

   <!-- Spring监听器 -->

   <context-param>

         <param-name>contextConfigLocation</param-name>

         <param-value>/WEB-INF/classes/beans_*.xml</param-value>

     </context-param>

     <listener>

         <listener-class>org.springframework.web.context.ContextLoaderListener</listener-class>

     </listener>

     <!-- Struts2过滤器 -->

     <filter>

         <filter-name>struts2</filter-name>

         <filter-class>org.apache.struts2.dispatcher.ng.filter.StrutsPrepareAndExecuteFilter</filter-class>

     </filter>

     <filter-mapping>

         <filter-name>struts2</filter-name>

         <url-pattern>/*</url-pattern>

     </filter-mapping>

 </web-app>
2.3、创建实体类(User)
 package com.shore.entity;

 /**

  * @author DSHORE/2019-11-12

  *

  */

 public class User {

     private Integer id;

     private String name;

     private Integer age;

     public Integer getId() {

         return id;

     }

     public void setId(Integer id) {

         this.id = id;

     }

     public String getName() {

         return name;

     }

     public void setName(String name) {

         this.name = name;

     }

     public Integer getAge() {

         return age;

     }

     public void setAge(Integer age) {

         this.age = age;

     }

 }
2.4、配置实体类User的hibernate文件(User.hbm.xml)
 <?xml version="1.0" encoding="utf-8"?>

 <!DOCTYPE hibernate-mapping PUBLIC

         "-//Hibernate/Hibernate Mapping DTD 3.0//EN"

         "http://www.hibernate.org/dtd/hibernate-mapping-3.0.dtd">

 <hibernate-mapping package="com.shore.entity">

     <class name="User">

         <id name="id">

             <generator class="native"/>

         </id>

         <property name="name" type="java.lang.String"/>

         <property name="age" type="java.lang.Integer"/>

     </class>

 </hibernate-mapping>
2.5、创建dao层IUserDao接口类以及UserDao接口实现类
 //接口类

 public interface IUserDao {

     public User getByName(String name);//根据用户名查询

 }

 //对应的接口实现类

 public class UserDao implements IUserDao {

     //从IoC容器注入SessionFactory

     private SessionFactory sessionFactory;

     public void setSessionFactory(SessionFactory sessionFactory) {

         this.sessionFactory = sessionFactory;

     }

     @Override  //根据用户名查询

     public User getByName(String name) {

         Query query = sessionFactory.getCurrentSession().createQuery("from User where name=:name");  //:name是命名参数

         query.setParameter("name", name);

         @SuppressWarnings("unchecked")

         List<User> users = query.list();

         if (users != null && users.size() > 0) {

             return users.get(0);

         }

         return null;

     }

 }
2.6、创建service层IUserService接口类以及UserService接口实现类
 //接口类

 public interface IUserService {

     public User getByName(String name);

 }

 //对应的接口实现类

 public class UserService implements IUserService {

     private IUserDao userDao;

     public void setUserDao(IUserDao userDao) {

         this.userDao = userDao;

     }

     @Override

     public User getByName(String name) {

         return userDao.getByName(name);

     }

 }
2.7、创建UserAction
 package com.shore.action;

 import com.opensymphony.xwork2.ActionSupport;

 import com.shore.service.IUserService;

 /**

  * @author DSHORE/2019-11-16

  *

  */

 public class UserAction extends ActionSupport{

     private static final long serialVersionUID = -3099218232367860074L;

     private IUserService userService;

     public String login() {

         System.out.println(userService.getByName("张三"));

         return SUCCESS;

     }

     public void setUserService(IUserService userService) {

         this.userService = userService;

     }

 }
2.8、配置Spring文件(beans_common.xml)
 <?xml version="1.0" encoding="UTF-8"?>

 <beans xmlns="http://www.springframework.org/schema/beans"

     xmlns:xsi="http://www.w3.org/2001/XMLSchema-instance"

     xmlns:aop="http://www.springframework.org/schema/aop"

     xmlns:tx="http://www.springframework.org/schema/tx"

     xsi:schemaLocation="

        http://www.springframework.org/schema/beans

        http://www.springframework.org/schema/beans/spring-beans.xsd

        http://www.springframework.org/schema/tx

        http://www.springframework.org/schema/tx/spring-tx.xsd

        http://www.springframework.org/schema/aop

        http://www.springframework.org/schema/aop/spring-aop.xsd">

     <!-- c3p0数据库连接池配置 -->

     <bean id="dataSource" class="com.mchange.v2.c3p0.ComboPooledDataSource">

         <property name="driverClass" value="com.mysql.jdbc.Driver"></property>

         <property name="jdbcUrl" value="jdbc:mysql://localhost:3306/school"></property>

         <property name="user" value="root"></property>

         <property name="password" value="root"></property>

         <property name="initialPoolSize" value="3"></property>

         <property name="maxPoolSize" value="100"></property>

         <property name="maxStatements" value="200"></property>

         <!--当连接池中的连接耗尽的时候c3p0一次同时获取的连接数。Default: 3 -->

         <property name="acquireIncrement" value="2"></property>

     </bean>

     <!-- Hibernate核心配置文件(hibernate.cfg.xml)全交给Spring去管理 -->

     <bean id="sessionFactory" class="org.springframework.orm.hibernate3.LocalSessionFactoryBean">

         <!-- c3p0的数据库连接池 -->

         <property name="dataSource" ref="dataSource"></property>

         <!-- Hibernate基础参数配置 -->

         <property name="hibernateProperties">

             <props>  <!-- 注意:这个是Spring配置文件,故下面的key要写全名,即:前面加上hibernate.xxxxxx -->

                 <prop key="hibernate.dialect">org.hibernate.dialect.MySQLDialect</prop>

                 <prop key="hibernate.cache.provider_class">org.hibernate.cache.NoCacheProvider</prop>

                 <prop key="hibernate.show_sql">true</prop>

                 <prop key="hibernate.format_sql">true</prop>

                 <prop key="hibernate.hbm2ddl.auto">update</prop>

             </props>

         </property>

         <!-- Hibernate 映射文件的配置 -->

         <property name="mappingLocations">

             <list>

                 <value>classpath:com/shore/entity/*.hbm.xml</value>

             </list>

         </property>

     </bean>

     <!-- dao层 -->

     <bean id="userDao" class="com.shore.dao.impl.UserDao">

         <property name="sessionFactory" ref="sessionFactory"></property>

     </bean>

     <!-- service层 -->

     <bean id="userService" class="com.shore.service.impl.UserService">

         <property name="userDao" ref="userDao"></property>

     </bean>

     <!-- action层 -->

     <bean id="userAction" class="com.shore.action.UserAction" scope="prototype">

         <property name="userService" ref="userService"></property>

     </bean>

     <!-- ############Spring声明式事务管理配置########### -->

     <!-- 配置事务管理器 -->

     <bean id="transactionManager" class="org.springframework.orm.hibernate3.HibernateTransactionManager">

         <property name="sessionFactory" ref="sessionFactory"></property>

     </bean>

     <!-- 配置事务增强(针对DAO层) -->

     <tx:advice transaction-manager="transactionManager" id="transactionAdvice">

         <tx:attributes>  <!-- *代表DAO层的所有方法 -->

             <tx:method name="*" read-only="false"/>

         </tx:attributes>

     </tx:advice>

     <!-- AOP配置:配置切入点表达式 -->

     <aop:config>    <!-- 第一个*表示返回值类型;第二个*表示service层下的所有接口实现类;第三个*表示每个接口实现类下的所有方法 -->

         <aop:pointcut expression="execution(* com.shore.service.impl.*.*(..))" id="pt"/>

         <aop:advisor advice-ref="transactionAdvice" pointcut-ref="pt"/>

     </aop:config>

 </beans>
2.9、配置Struts2 文件(struts.xml)
 <?xml version="1.0" encoding="UTF-8" ?>

 <!DOCTYPE struts PUBLIC

     "-//Apache Software Foundation//DTD Struts Configuration 2.3//EN"

     "http://struts.apache.org/dtds/struts-2.3.dtd">

 <struts>

     <!-- true支持动态方法调用 -->

     <constant name="struts.enable.DynamicMethodInvocation" value="true" />

     <constant name="struts.devMode" value="true" /> <!-- true -->

     <package name="user" namespace="/user" extends="struts-default">

         <action name="userAction" class="com.shore.action.UserAction">

             <result name="success">/success.jsp</result>

         </action>

     </package>

 </struts>
测试结果图:


总结:
1、与传统方式相比,SSH框架 代码层(dao层、service层 等)耦合度较低,方便后期维护。
2、entity、dao、service、action层、以及db层(连接数据库)都交给spring IOC容器来管理,大大降低各层之间的耦合度,极大方便该项目后期的维护。
3、Hibernate或Spring IOC容器管理project与DB之间的连接;Spring IOC容器管理dao层(及BaseDao)、service层、action层;Struts2管理action层与前端页面的数据交互。
|
原创作者:DSHORE 作者主页:http://www.cnblogs.com/dshore123/ 原文出自:https://www.cnblogs.com/dshore123/p/11874947.html 版权声明:欢迎转载,转载务必说明出处。(如果本文对您有帮助,可以点击一下右下角的 推荐,或评论,谢谢!) |
Java进阶知识26 SSH整合(Struts2、Spring、Hibernate)的更多相关文章
- 整合struts2+spring+hibernate
一.准备struts2+spring+hibernate所须要的jar包: 新建web项目并将jar包引入到project项目中. 二.搭建struts2环境 a.在 ...
- Eclipse搭建SSH(Struts2+Spring+Hibernate)框架教程
| 版权声明:本文为博主原创文章,未经博主允许不得转载. 前言 确实,刚创博客,对于这个陌生的东西还是有些许淡然.这是我的第一篇博文,希望能给你们有帮助,这就是我最大的乐趣! 好了下面进入正题: SS ...
- SSH之IDEA2017整合Struts2+Spring+Hibernate
转自:https://blog.csdn.net/sysushui/article/details/68937005
- Eclipse搭建SSH框架(Struts2+Spring+Hibernate)
见识少的我经过一天多的研究才知道,在MyEclipse中搭好的框架的配置文件和jar包是通用的.接下来——亮剑! 工具:Eclipse+Tomcat+Mysql 一.先在Eclipse中配置好Tomc ...
- 用MyEclipse搭建SSH框架(Struts2 Spring Hibernate)
1.new一个web project. 2.右键项目,为项目添加Struts支持. 点击Finish.src目录下多了struts.xml配置文件. 3.使用MyEclipse DataBase Ex ...
- Spring、Struts2+Spring+Hibernate整合步骤
所使用的Jar包: Hibernate: Spring(使用MyEclipse自动导入框架功能) Struts2: 注解包和MySql驱动包: 1.配置Hibernate和Spring: <be ...
- SSH---整合Struts2&Spring&Hibernate(实例)
一.SSH回顾 Struts2:核心为过滤器+拦截器.过程:Filter--->FilterDispatcher-->ActionMapper-->ActionProxy--> ...
- Maven搭建struts2+spring+hibernate环境
Maven搭建struts2+spring+hibernate环境(一) 本文简单的使用STS的自带的maven插件工具搭建ssh(struts2+spring+hibernate)开发环境,图文并茂 ...
- SSH三大框架的搭建整合(struts2+spring+hibernate)(转)
原文地址:http://blog.csdn.net/kyle0349/article/details/51751913 尊重原创,请访问原文地址 SSH说的上是javaweb经典框架,不能说100% ...
随机推荐
- SAS学习笔记13 SAS数据清洗和加工(续)
查找缺失值 cha[*]和num[*]是建立数组cha和num,但不指定数组中的元素数 自动变量_character_表示数据集中的所有字符型变量 自动变量_numeric_表示数据集中的所有数值型变 ...
- kettle工具的介绍和使用
kettle详解(数据抽取.转换.装载) 原文地址链接:https://blog.csdn.net/qq_35731570/article/details/71123413 一:下载路径 当你要学 ...
- harbor环境搭建及web使用
概述 Habor是由VMWare公司开源的容器镜像仓库.事实上,Habor是在Docker Registry上进行了相应的企业级扩展,从而获得了更加广泛的应用,这些新的企业级特性包括:管理用户界面,基 ...
- ckplayer获取播放时长一
<div id="a1"></div> <div id="nowTime"></div> <script ...
- codefroce 854 A.Fraction
题解:贪心,每次从能够出发的飞机中取一个最大的就好啦,用一个队列维护一下~ ac代码: #include <cstdio> #include <iostream> #inclu ...
- (一)CXF之发布第一个WebService服务
一.CXF入门 1.1 前提 Apache CXF 是一个开源的 Services 框架,CXF 帮助您利用 Frontend 编程 API 来构建和开发 Services ,像 JAX-WS .这些 ...
- (四)Maven中的仓库
一.分类 maven的仓库只有两大类: 1.本地仓库 2.远程仓库,在远程仓库中又分成了3种: 2.1 中央仓库 2.2 私服 2.3 其它公共库 二.本地仓库 本地仓库,顾名思义,就是Maven在本 ...
- 关于__new__和__init__
关于__new__和__init__ 例如一个类 class Foo(object): def __init__(self): print(1) def __new__(self): print(2) ...
- 针对IE6 7 8当独写样式
IE8的格式: .foot{padding:12px 10px\9;} //在后面加\9 IE7的格式: .foot{*padding:12px 10px\9;} //在前面加* IE6的格式: .f ...
- stm32F1 DMA
DMA,全称是Direct Memory Access,中文意思为直接存储器访问 DMA可用于实现外设与存储器之间或者存储器与存储器之间数据传输的高效性 DMA请求映像 各通道的DMA1请求: 各通道 ...