02 Vue介绍与安装,指令系统 v-*、音乐播放器
VUE文档 https://cn.vuejs.org/v2/guide/
1、vue的介绍
尤雨溪
1、vue的优点

2、vue的介绍


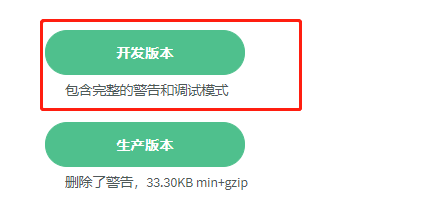
3、vue的安装


4、声明式渲染
<body>
<div id="app1">
<!-- 插值语法 react {} angular {{}} {%%} <% = %>
你可以任意插
-->
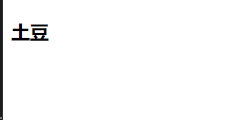
<h3>{{title}}</h3>
</div>
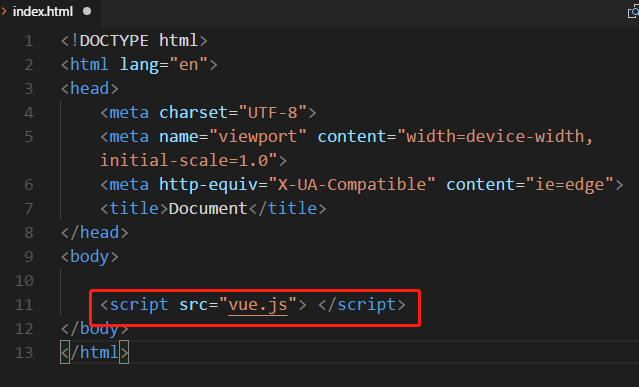
<script src="vue.js"> </script>
<script>
// vue实例化对象
var app = new Vue({
el: "#app1",
// 所有的数据都放在数据属性中
data:{
title:"土豆"
}
})
// 不推荐
console.log(app)
console.log(app.$el)
console.log(app.$data)
console.log(app.$data.title)
</script>
</body>
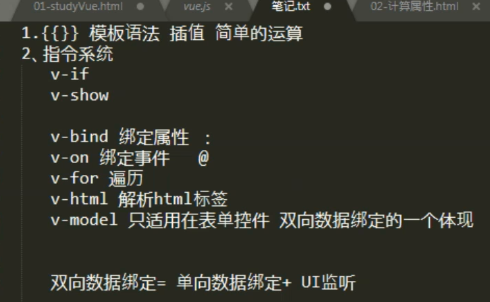
2、指令系统介绍
1、v-if v-for v-on v-show
<body>
<div id="app">
<!-- v-if -->
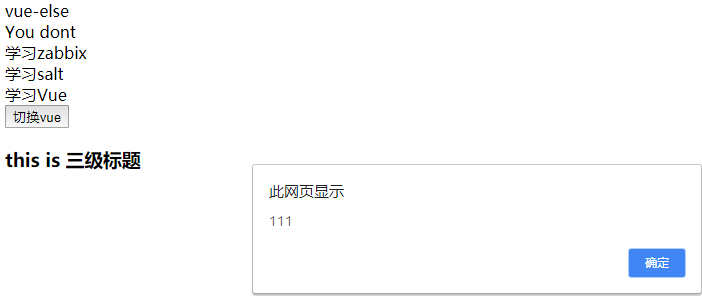
<div v-if='show'>vue-if</div>
<div v-else>vue-else</div> <div v-if='Math.random() > 0.5'>Now you see </div>
<div v-else>You dont</div> <!-- v-for -->
<div v-for="todo in todolist">{{todo.text}}</div> <!-- v-show -->
<h3 v-show='isShow'>this is 三级标题</h3> <!-- v-on -->
<button v-on:click="clickHandler">切换vue</button> </div> <script src="vue.js"></script>
<script>
// vue的实例对象 // 指令系统 v-*
var app = new Vue({
el: "#app",
data:{
show: false,
todolist:[
{text:"学习zabbix"},
{text:"学习salt"},
{text:"学习Vue"},
],
isShow:true
},
methods:{
clickHandler:function(){
alert(111)
console.log(this) //整个网页就一个实例化对象
this.show = !this.show
this.isShow = !this.isShow
}
}
}) // MVVM Model View ViewModel
// MTV Model Template View </script>
</body>


2、v-bind
<body>

    <div id="app">

        <!-- v-bind -->

        <div title="嘿嘿">这是一个三级标题</div>

        <div v-show='isShow' v-bind:title='data'>这是一个三级标题</div>

        <img src="" alt="">

        <img v-bind:src='imgSrc' v-bind:alt="imgAlt">

        <!-- 简便写法

            v-bin:src  :src

            v-on:click @click

        -->

        <img :src='imgSrc' :alt="imgAlt">

    </div>

    <script src="vue.js"></script>

    <script>

        // vue的实例对象

        // 指令系统 v-*

        var app = new Vue({

            el: "#app",

            data:{

                isShow:true,

                data:"hahah",

                imgSrc:'./images/shiyun.jp',

                imgAlt: `页面加载与${new Date().toLocaleString()}`

            },

        })

    </script>

</body>

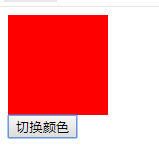
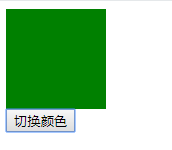
3、v-bind: class与style绑定
传个 v-bind:class 一个对象,以动态地切换class
<!DOCTYPE html>

<html lang="en">

<head>

    <meta charset="UTF-8">

    <meta name="viewport" content="width=device-width, initial-scale=1.0">

    <meta http-equiv="X-UA-Compatible" content="ie=edge">

    <title>Document</title>

    <style type="text/css">

        .box{

           width:100px;

           height: 100px;

           background: red;

        }

        .box2{

           width:100px;

           height: 100px;

           background: green;

        }

    </style>

</head>

<body>

    <div id="app">

       <div class="box" v-bind:class={box2:isGreen} ></div>

       <button @click='changeColor'>切换颜色</button>

    </div>

    <script src="vue.js"></script>

    <script>

        // vue的实例对象

        // 指令系统 v-*

        var app = new Vue({

            el: "#app",

            data:{

                isGreen:false

            },

            methods:{

                changeColor:function(){

                    this.isGreen = !this.isGreen

                },

            }

        })

    </script>

</body>

</html>
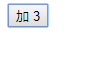
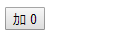
4、vue核心思想:数据驱动视图,双向数据绑定
<body>

    <div id="app">

       <!-- 核心思想概念:数据驱动视图 -->

       <!-- 双向数据绑定 -->

       <button v-on:click = 'count+=1'> 加 {{count}}</button>

    </div>

    <script src="vue.js"></script>

    <script>

        // vue的实例对象

        // 指令系统 v-*

        var app = new Vue({

            el: "#app",

            data:{

                count:0

            },

            methods:{

            }

        })

    </script>

</body>
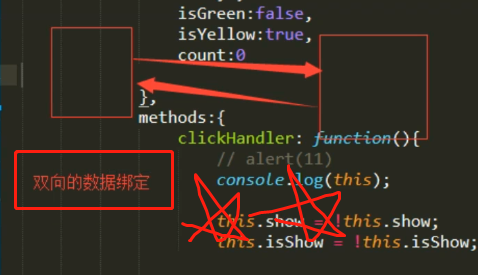
声明式的指令 :之前写的html,都是
命令式的:Vue
5、监听事件

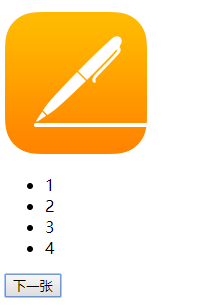
6、应用:轮播图
版本1
<body>

    <div id="app">

        <!-- 列表渲染 :轮播图 -->

        <!-- 传统写法 -->

        <div>

            <img src="./images/vue.png" alt="">

            <ul>

                <li></li>

                <li></li>

                <li></li>

                <li></li>

            </ul>

        </div>

        <!-- Vue -->

        <div>

            <img :src="imgSrc" >

            <ul>

                <li v-for = "(item,i) in imgArr" @click='ChangeImgSrc(item)'>{{ i+ }}</li>

            </ul>

        </div>

        <button @click='nextImg'>下一张</button>

    </div>

    <script src="vue.js"></script>

    <script>

        // vue的实例对象

        // 指令系统 v-*

        var app = new Vue({

            el: "#app",

            data:{

                imgSrc:'./images/1.png',

                imgArr:[

                    {id:, src:'./images/1.png'},

                    {id:, src:'./images/2.png'},

                    {id:, src:'./images/3.png'},

                    {id:, src:'./images/4.png'}

                ],

                currentIndex:

            },

            methods:{

                ChangeImgSrc(item){

                    this.imgSrc = item.src

                },

                nextImg(){

                    if (this.currentIndex==this.imgArr.length-){

                        this.currentIndex=-

                    }

                    this.currentIndex ++

                    this.imgSrc = this.imgArr[this.currentIndex].src

                }

            }

        })

    </script>

</body>

版本2:添加定时器
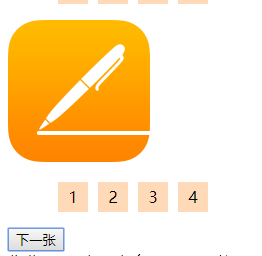
<!DOCTYPE html>

<html lang="en">

<head>

    <meta charset="UTF-8">

    <meta name="viewport" content="width=device-width, initial-scale=1.0">

    <meta http-equiv="X-UA-Compatible" content="ie=edge">

    <title>Document</title>

    <style type="text/css">

        ul{

            width:180px;

            overflow: hidden;

            list-style: none;

        }

        ul li{

            float: left;

            width: 30px;

            height: 30px;

            background: peachpuff;

            margin-left: 10px;

            line-height: 30px;

            text-align: center;

            color: black

        }

    </style>

</head>

<body>

    <div id="app">

        <!-- 列表渲染 :轮播图 -->

        <!-- 传统写法 -->

        <div>

            <img src="./images/vue.png" alt="">

            <ul>

                <li>1</li>

                <li>2</li>

                <li>3</li>

                <li>4</li>

            </ul>

        </div>

        <!-- Vue -->

        <div>

            <img :src="imgSrc" @mouseenter="closeTimer" @mouseleave="openTimer">

            <ul>

                <li v-for = "(item,i) in imgArr" @click='ChangeImgSrc(item)'>{{ i+1 }}</li>

            </ul>

        </div>

        <button @click='nextImg'>下一张</button>

    </div>

    <script src="vue.js"></script>

    <script>

        // vue的实例对象

        // 指令系统 v-*

        var app = new Vue({

            el: "#app",

            data:{

                imgSrc:'./images/1.png',

                imgArr:[

                    {id:1, src:'./images/1.png'},

                    {id:2, src:'./images/2.png'},

                    {id:3, src:'./images/3.png'},

                    {id:4, src:'./images/4.png'}

                ],

                currentIndex:0,

                timer:null  // 3.0 鼠标移到停止

            },

            created(){

                // 生命周期方法

                // 开启定时器

                // 提前获取cookie和session

                this.timer = setInterval(this.nextImg,2000)

                console.log(1111)

            },

            methods:{

                ChangeImgSrc(item){

                    this.imgSrc = item.src

                },

                nextImg(){

                    if (this.currentIndex==this.imgArr.length-1){

                        this.currentIndex=-1

                    }

                    this.currentIndex ++

                    this.imgSrc = this.imgArr[this.currentIndex].src

                },

                closeTimer(){

                    clearInterval(this.timer) // 鼠标enter,停止定时器

                },

                openTimer(){

                    this.timer = setInterval(this.nextImg,2000)  // 重新开启定时器

                }

            }

        })

    </script>

</body>

</html>

作业:

    1、标号颜色

    2、下一张
7、v-html:解析标签

<body>

    <div id="app">

        <!-- 为什么需要v-html,解析标签 -->

        <div>{{str}}</div>

        <div v-html="str"></div>

    </div>

    <script src="vue.js"></script>

    <script>

        // vue的实例对象

        // 指令系统 v-*

        var app = new Vue({

            el: "#app",

            data:{

                str:"<p>为什么需要v-html,解析标签</p>"

            },

            methods:{

            }

        })

    </script>

</body>
8、计算属性 :getter setter
(1)getter
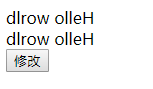
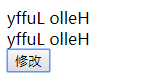
<body>

    <!-- 计算属性 -->

    <div id="computed">

        <!-- 1.0 版本1 -->

        <div>

            {{ msg.split('').reverse().join('') }}

        </div>

        <!-- 2.0 版本 -->

        <div>

            {{ recverseStr }}

        </div>

        <!-- 3.0 修改字符串 -->

        <button @click="clickHandler">修改</button>

    </div>

    <script type="text/javascript" src="vue.js"></script>

    <script>

        // vue的实例对象

        var com = new Vue({

            el: "#computed",

            data:{

                msg:"Hello world"

            },

            computed:{

                // 计算属性 watch 监听

                // 默认只有getter方法

                recverseStr(){

                    return this.msg.split('').reverse().join('')

                }

            },

            methods:{

                clickHandler(){

                    this.msg = "Hello Luffy"

                }

            }

        })

    </script>

</body>
(2) setter
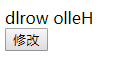

<body>

    <!-- 计算属性 -->

    <div id="computed">

        <!-- setter -->

        <div>

            {{ recverseStr }}

        </div>

        <button @click="clickHandler">修改</button>

    </div>

    <script type="text/javascript" src="vue.js"></script>

    <script>

        // vue的实例对象

        var com = new Vue({

            el: "#computed",

            data:{

                msg:"Hello world"

            },

            computed:{

                // 计算属性 watch 监听

                // 默认只有getter方法

                // 如何添加set方法

                recverseStr:{

                    set:function(newValue){

                        this.msg = newValue

                    },

                    get:function(){

                        return this.msg.split('').reverse().join('');

                    }

                }

            },

            methods:{

                clickHandler(){

                    // this.msg = "Hello Luffy"

                    console.log(this.recverseStr) // GET

                    this.recverseStr = "Talk is cheap"  //SET

                }

            }

        })

    </script>

</body>
9、v-model :双向绑定
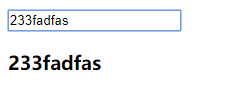
(1) v-model 只适用于表单控件 form
<body>

    <form id="computed">

        <!-- v-model -->

        <!-- 数据的双向绑定 = 单向数据绑定+UI事件监听 -->

        <input type="text" v-model="msg">

        <h3>{{ msg }}</h3>

    </form>

    <script type="text/javascript" src="vue.js"></script>

    <script>

        // vue的实例对象

        var com = new Vue({

            el: "#computed",

            data:{

                msg:"123",

                getValue:"233"

            },

        })

    </script>

</body>
(2)数据的双向绑定 = 单向数据绑定+UI事件监听
<body>

    <form id="computed">

        <!-- v-model -->

        <!-- 数据的双向绑定 = 单向数据绑定+UI事件监听 -->

        <!-- 等价于 -->

        <input type="text" v-bind:value="getValue" @input="msgChange">

        <h3>{{ getValue }}</h3>

    </form>

    <script type="text/javascript" src="vue.js"></script>

    <script>

        // vue的实例对象

        var com = new Vue({

            el: "#computed",

            data:{

                getValue:"233"

            },

            methods:{

                msgChange(e){

                    console.log(e)

                    this.getValue = e.target.value

                }

            },

            computed:{

                getValue:{

                    set:function(newValue){

                        this.getValue = newValue

                    },

                    get:function(){

                        return this.getValue

                    }

                }

            }

        })

    </script>

</body>

(3)计算属性应用
10、vue表单
https://cn.vuejs.org/v2/guide/forms.html

<body>
<form id="computed">
<!-- v-model -->
<!-- 数据的双向绑定 = 单向数据绑定+UI事件监听 -->
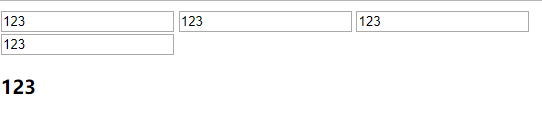
<input type="text" v-model="msg">
<!-- 使用 change 事件进行同步 -->
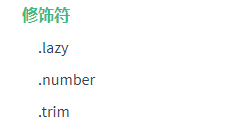
<input type="text" v-model.lazy="msg">
<!-- 输入值转为数值类型 -->
<input type="text" v-model.number="msg">
<!-- 首尾空白字符 -->
<input type="text" v-model.trim="msg">
<h3>{{ msg }}</h3>
</form>
<script type="text/javascript" src="vue.js"></script>
<script>
// vue的实例对象
var com = new Vue({
el: "#computed",
data:{
msg:"123",
getValue:"233"
},
})
</script>
</body>
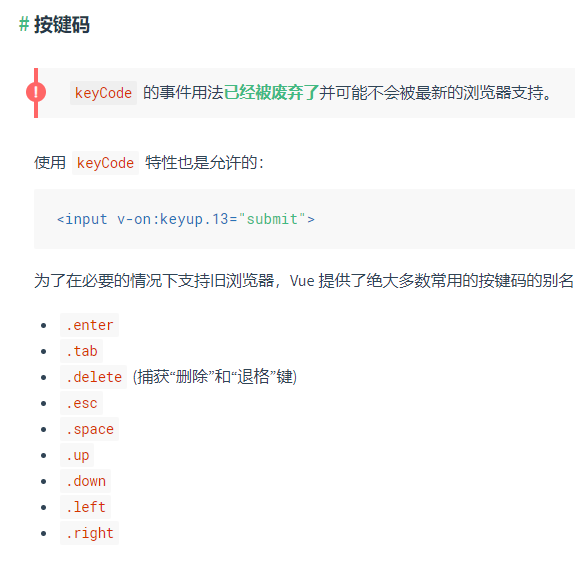
11、事件处理
https://cn.vuejs.org/v2/guide/events.html#事件修饰符
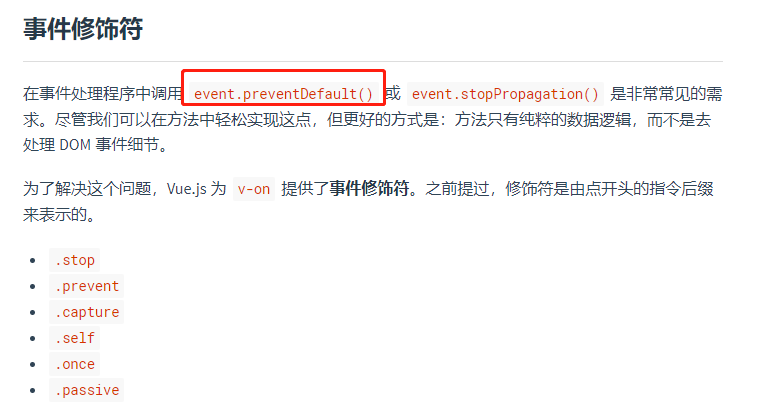

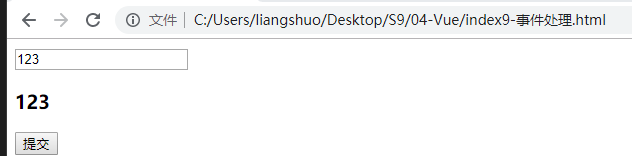
<body>

    <!-- 阻止表单提交 -->

    <!-- <form id="computed" > -->

    <form id="computed" @submit.prevent>

        <input type="text" v-model="msg">

        <h3>{{ msg }}</h3>

        <input type="submit" name="" value="提交">

    </form>

    <script type="text/javascript" src="vue.js"></script>

    <script>

        // vue的实例对象

        var com = new Vue({

            el: "#computed",

            data:{

                msg:"123",

                getValue:"233"

            },

            methods:{

                // ajax技术

                // jquery  ---> $ajax()  封装了(xmlhttpRequest)

                // vue --> axios

            }

        })

    </script>

</body>
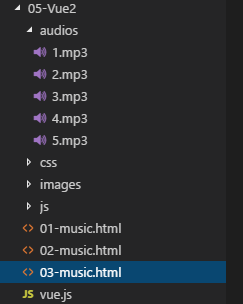
3、音乐播放器
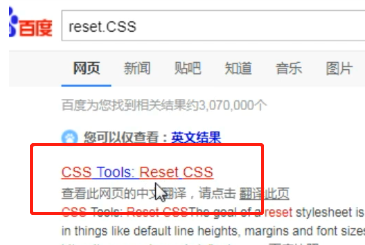
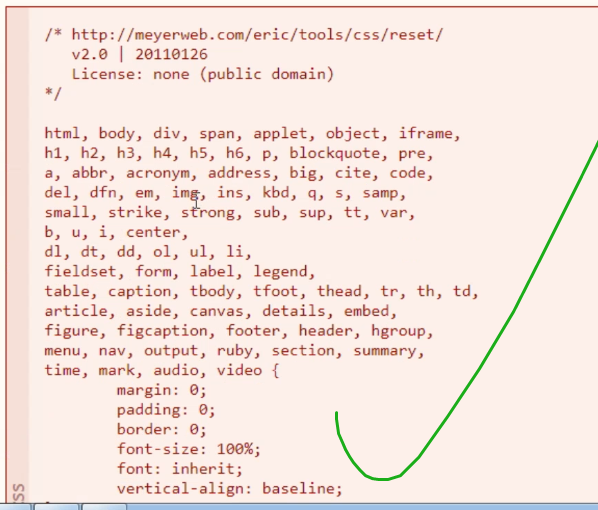
1、目录结构,rest css
reset css
https://meyerweb.com/eric/tools/css/reset/
2、v-for,@click:点击切换歌曲
<!DOCTYPE html>
<html lang="en">
<head>
<meta charset="UTF-8">
<meta name="viewport" content="width=device-width, initial-scale=1.0">
<meta http-equiv="X-UA-Compatible" content="ie=edge">
<title>Document</title> <style type="text/css">
*{
padding:0
}
ul{
list-style: none;
}
li{
border-bottom: 1px solid gray;
}
</style>
</head>
<body>
<!-- 1.0 死写法 -->
<audio src="./audios/1.mp3" autoplay="" controls=""></audio> <!-- 2.0 循环指令 -->
<div id="music"> <audio :src="currentSong" autoplay="" controls="" ></audio> <ul>
<li v-for="(item,index) in songs" @click='clickHandler(index)'>
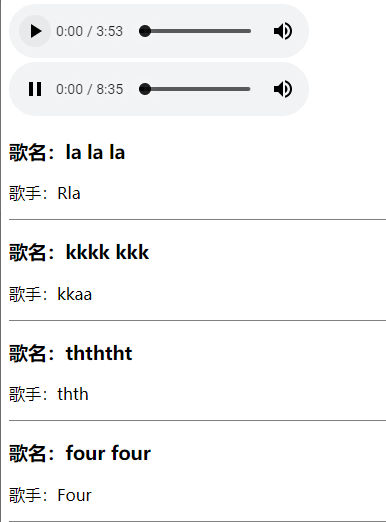
<h3>歌名:{{ item.name }}</h3>
<p>歌手:{{ item.author }}</p>
</li>
</ul>
</div> <script type="text/javascript" src="vue.js"> </script> <script> var songs = [
{id:1, src:"./audios/1.mp3", name:"la la la", author:"Rla"},
{id:2, src:"./audios/2.mp3", name:"kkkk kkk", author:"kkaa"},
{id:3, src:"./audios/3.mp3", name:"thththt", author:"thth"},
{id:4, src:"./audios/4.mp3", name:"four four", author:"Four"}
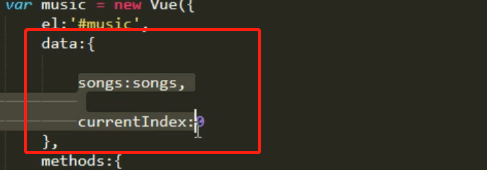
] var musci = new Vue({
el: "#music",
data:{
songs:songs,
currentSong:"./audios/1.mp3",
currentIndex:0
},
methods:{
// 点击,切换下一首歌曲
clickHandler(index){
this.currentSong = this.songs[index].src;
}, },
computed:{ },
created(){
// 通常都用来做页面的初始化
}
})
</script> </body>
</html>
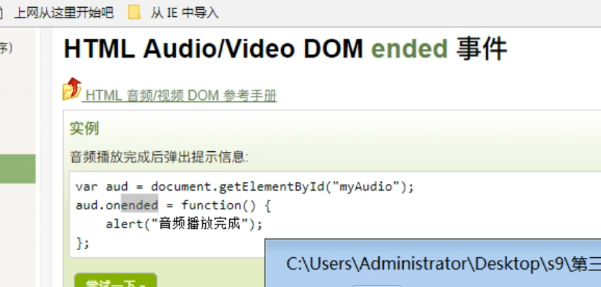
3、@ended :播放结束,切换下一首
<body>

    <!-- 2.0 循环指令 -->

    <div id="music">

        <audio :src="currentSong" autoplay="" controls="" @ended='nextSong'></audio>

        <ul>

            <li v-for="(item,index) in songs" @click='clickHandler(index)'>

                <h3>歌名:{{ item.name }}</h3>

                <p>歌手:{{ item.author }}</p>

            </li>

        </ul>

    </div>

    <script type="text/javascript" src="vue.js"> </script>

    <script>

        var songs = [

            {id:1, src:"./audios/1.mp3", name:"la la la", author:"Rla"},

            {id:2, src:"./audios/2.mp3", name:"kkkk kkk", author:"kkaa"},

            {id:3, src:"./audios/3.mp3", name:"thththt", author:"thth"},

            {id:4, src:"./audios/4.mp3", name:"four four", author:"Four"}

        ]

        var musci = new Vue({

            el: "#music",

            data:{

                songs:songs,

                currentSong:"./audios/1.mp3",

                currentIndex:0

            },

            methods:{

                // 点击,切换下一首歌曲

                clickHandler(index){

                    this.currentSong = this.songs[index].src;

                },

                // 音频播放完成,切换下一首  方法1

                nextSong(){

                    alert(111)

                    this.currentIndex++;

                    this.currentSong = this.songs[this.currentIndex].src

                }

            },

            computed:{

            },

            created(){

                // 通常都用来做页面的初始化

            }

        })

    </script>

</body>
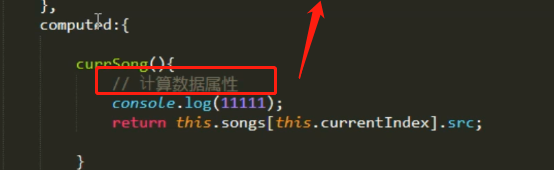
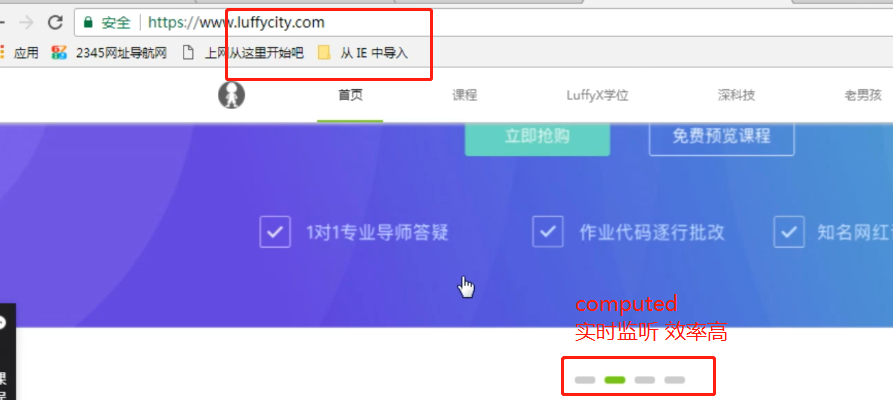
4、computed:实时监控,计算数据属性***
<body>

    <!-- 1.0 死写法 -->

    <audio src="./audios/1.mp3" autoplay="" controls=""></audio>

    <!-- 2.0 循环指令 -->

    <div id="music">

        <!-- 方法2 -->

        <audio :src="currSong" autoplay="" controls="" @ended='nextSong'></audio>

        <ul>

            <li v-for="(item,index) in songs" @click='clickHandler(index)'>

                <h3>歌名:{{ item.name }}</h3>

                <p>歌手:{{ item.author }}</p>

            </li>

        </ul>

        <button @click="addOneSong">添加1首歌</button>

    </div>

    <script type="text/javascript" src="vue.js"> </script>

    <script>

        var songs = [

            {id:1, src:"./audios/1.mp3", name:"la la la", author:"Rla"},

            {id:2, src:"./audios/2.mp3", name:"kkkk kkk", author:"kkaa"},

            {id:3, src:"./audios/3.mp3", name:"thththt", author:"thth"},

            {id:4, src:"./audios/4.mp3", name:"four four", author:"Four"}

        ]

        var musci = new Vue({

            el: "#music",

            data:{

                songs:songs,

                currentIndex:0

            },

            methods:{

                // 点击,切换下一首歌曲

                clickHandler(index){

                    this.currentIndex = index;

                },

                // 音频播放完成,切换下一首

                nextSong(){

                    this.currentIndex++;

                },

                // 添加1首歌

                addOneSong(){

                    this.songs.push({id:5, src:"./audios/5.mp3", name:"qqq", author:"qqq"})

                }

            },

            computed:{

                // 方法2 currsong 实时监听,数组 index

                // 计算属性:计算数据属性,data中的数据

                // 数据驱动视图

                currSong(){

                    return this.songs[this.currentIndex].src

                }

            },

            created(){

                // 通常都用来做页面的初始化

            }

        })

    </script>

</body>
计算属性:data中的数据
网页中的实时监控
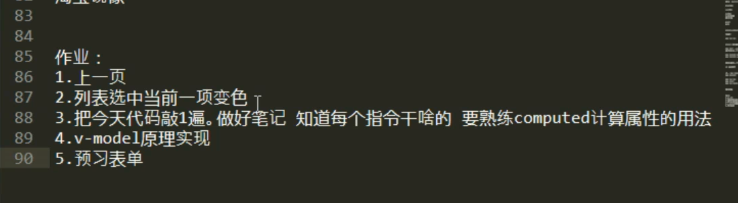
4、作业与总结
1、作业

2、总结

02 Vue介绍与安装,指令系统 v-*、音乐播放器的更多相关文章
- Ubuntu系统的安装与使用 深度音乐播放器
1.添加深度音乐播放器的ppa源并更新源缓存 sudo add-apt-repository ppa:noobslab/deepin-sc sudo apt-get update 2. 安装需要的依 ...
- 躁!DJ 风格 Java 桌面音乐播放器
本文适合有 Java 基础知识的人群,跟着本文可学习和运行 Java 版桌面 DJ 音乐播放器. 本文作者:HelloGitHub-秦人 HelloGitHub 推出的<讲解开源项目>系列 ...
- Simple2D-14(音乐播放器)简介
接下来文章中,会介绍一个简单的程序——音乐播放器.通过编写一个音乐播放器在 Simple2D 中加入两个库:音频库 bass 和界面库 ImGui. 下面是音乐播放器的预览图: 播放器的功能比较简单, ...
- vue——一个页面实现音乐播放器
请忽略下面这段文字年关将至,时间好歹又多出了些许.却不敢过度消遣.岁月未曾饶过我,我亦不想饶过岁月.且将它塞得膨胀,让这一年看似加更充实.不曾料想我一个爱些风花雪月.研墨行歌之人,却做起了碼农这一行当 ...
- 【Linux_Fedora_应用系列】_1_如何安装音乐播放器和mp3解码
因为安装环境的不同,Fedora在安装后会安装不同的软件包.通常在安装的时候有多种选择: 1.桌面环境: 适合个人日常使用,安装包含办公软件(Fedora 默认安装Open Office).娱乐影音软 ...
- 如何用vue打造一个移动端音乐播放器
写在前面 没错,这就是慕课网上的那个vue音乐播放器,后台是某音乐播放器的线上接口扒取,虽然这类项目写的人很多,但不得不说这还是个少有的适合vue提升的好项目,做这个项目除了想写一个比较大并且功能复杂 ...
- ubuntu12.04安装深度音乐播放器和深度影音
昨天折腾了一天,想要安装深度播放器和深度影音都未成功,老是出现依赖关系不满足这个错误.网上解决办法有非常多,可是都没能有效的解决这个问题.今天突然想起来之前换过软件源,是不是这个原因而导致了依赖关系不 ...
- 一个基于H5audio标签的vue音乐播放器
<!DOCTYPE html> <html lang="en"> <head> <meta charset="UTF-8&quo ...
- Ubuntu 14.04 用户如何安装深度音乐播放器和百度音乐插件
播放本地音乐或者收听国外的音乐电台,Ubuntu 14.04 自带的音乐播放器 Rhythmbox 完全能够满足,但是如果你想有像酷狗那样的国内播放器就需要折腾一下,还好有深度音乐播放器,这是一款完全 ...
随机推荐
- dev控件学习笔记之----CxGrid2
一.cxgrid 表格自适应列宽和增加注脚注和 for i := 0 to ado_lxr_cx.FieldCount - 1 do begin //如果是数字,则注脚求合 ...
- 【LOJ】#3092. 「BJOI2019」排兵布阵
LOJ#3092. 「BJOI2019」排兵布阵 这题就是个背包啊,感觉是\(nms\)的但是不到0.2s,发生了什么.. 就是设\(f[i]\)为选了\(i\)个人最大的代价,然后有用的人数只有\( ...
- AMD平台如何使用Android Studio官方的高性能模拟器
当我第一次接触Android Studio的时候,脑子里第一个想法是:tm不就是IDEA么??以为自己会用的贼六,结果其他小朋友的模拟器都打开了,才发现自己运行不了模拟器.一度以为是我哪里操作错了.于 ...
- Centos删除多余的Linux内核
删除开机多余kernel(centos) yum update 命令会大范围升级,有时候linux内核也会升级,升级后开机画面就会出现多个内核供你选择,所有强迫症的我需要删除旧的 ⒈查看正在使用的内核 ...
- Mathematically Hard LightOJ-1007(欧拉定理+前缀和)
Description Mathematically some problems look hard. But with the help of the computer, some problems ...
- linux 百度ping不通解决
很长时间没有使用Liunx了,上来发现linux上面没有办法ping百度了.(这样的问题>>..ping:www.baidu.com:Temporaryfailureinnameresol ...
- Codeforces 1189D2. Add on a Tree: Revolution
传送门 首先可以证明一颗树合法的充分必要条件是不存在某个节点的度数为 $2$ 首先它是必要的,考虑任意一条边连接的两点如果存在某一点 $x$ 度数为 $2$ ,那么说明 $x$ 还有连一条边出去,那么 ...
- Array Product CodeForces - 1042C (细节)
#include <iostream> #include <sstream> #include <algorithm> #include <cstdio> ...
- linux常用的bash指令
文本处理 awk sed grep sort uniq cat cut echo fmt tr nl egrep fgrep wc 进程监视 ps top htop atop lsof 网络 nmap ...
- CentOS 中利用docker安装MySQL
1.前提条件 centos7 且内核版本高于3.10, 可通过命令: uname -r 查看内核版本 2.利用yum 安装docker 安装一些必要的系统工具: sudo yum install -y ...