
WebGPU学习(九):学习“fractalCube”示例
大家好,本文学习Chrome->webgpu-samplers->fractalCube示例。
上一篇博文:
WebGPU学习(八):学习“texturedCube”示例
下一篇博文:
WebGPU学习(十):介绍“GPU实现粒子效果”
学习fractalCube.ts
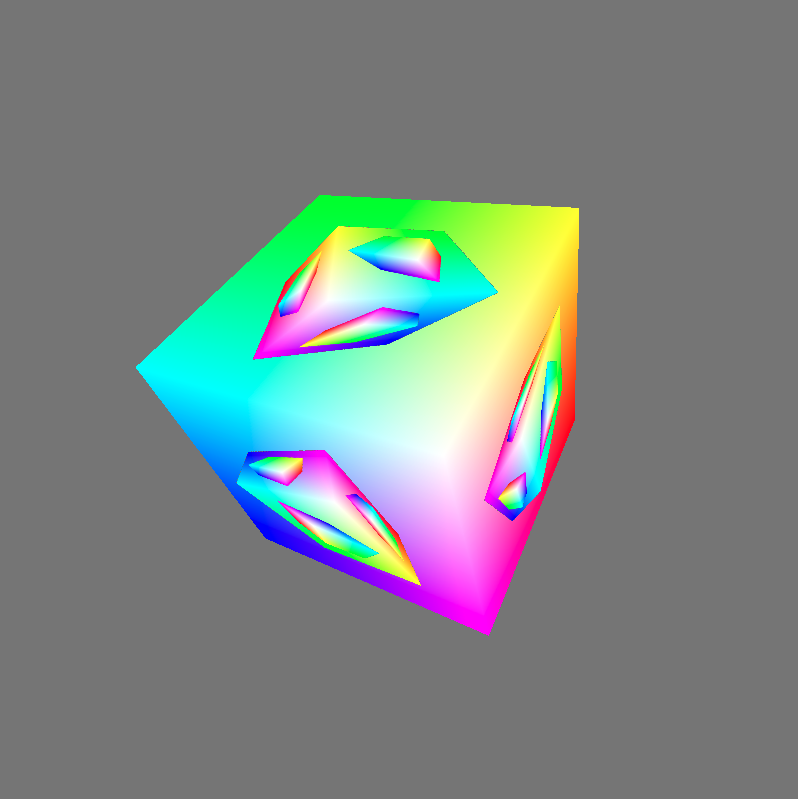
最终渲染结果:
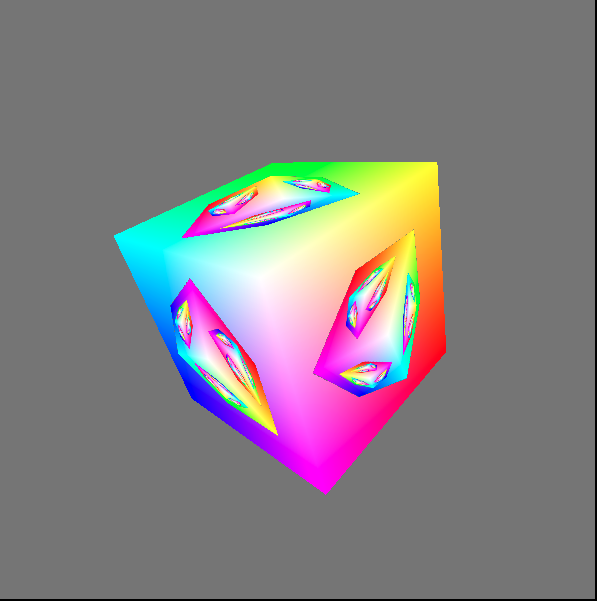
该示例展示了如何用上一帧渲染的结果作为下一帧的纹理。
与“texturedCube”示例相比,该示例的纹理并不是来自图片,而是来自上一帧渲染的结果
下面,我们打开fractalCube.ts文件,分析相关代码:
传输顶点的color
它与“texturedCube”示例->“传递顶点的uv数据”类似,这里不再分析
上一帧渲染的结果作为下一帧的纹理
- 配置swapChain
因为swapChain保存了上一帧渲染的结果,所以将其作为下一帧纹理的source。因此它的usage需要增加GPUTextureUsage.COPY_SRC:
  const swapChain = context.configureSwapChain({

    device,

    format: "bgra8unorm",

    usage: GPUTextureUsage.OUTPUT_ATTACHMENT | GPUTextureUsage.COPY_SRC,

  });
- 创建空纹理(cubeTexture)和sampler,设置到uniform bind group中
相关代码如下:
  const fragmentShaderGLSL = `#version 450

  ...

  layout(set = 0, binding = 2) uniform texture2D myTexture;

  ...

  void main() {

    vec4 texColor = texture(sampler2D(myTexture, mySampler), fragUV * 0.8 + 0.1);

    ...

    outColor = mix(texColor, fragColor, f);

  }`;

  ...

  const cubeTexture = device.createTexture({

    size: { width: canvas.width, height: canvas.height, depth: 1 },

    format: "bgra8unorm",

    usage: GPUTextureUsage.COPY_DST | GPUTextureUsage.SAMPLED,

  });

  const sampler = device.createSampler({

    magFilter: "linear",

    minFilter: "linear",

  });

  const uniformBindGroup = device.createBindGroup({

    layout: bindGroupLayout,

    bindings: [

    ...

    {

      binding: 1,

      resource: sampler,

    }, {

      binding: 2,

      //传递cubeTexture到fragment shader中

      resource: cubeTexture.createView(),

    }],

  });
- 绘制和拷贝
在每一帧中:
绘制带纹理的立方体;
将渲染结果(swapChainTexture)拷贝到cubeTexture中。
相关代码如下:
  return function frame() {

    const swapChainTexture = swapChain.getCurrentTexture();

    renderPassDescriptor.colorAttachments[0].attachment = swapChainTexture.createView();

    const commandEncoder = device.createCommandEncoder({});

    const passEncoder = commandEncoder.beginRenderPass(renderPassDescriptor);

    ...

    passEncoder.setBindGroup(0, uniformBindGroup);

    ...

    passEncoder.draw(36, 1, 0, 0);

    passEncoder.endPass();

    commandEncoder.copyTextureToTexture({

      texture: swapChainTexture,

    }, {

      texture: cubeTexture,

    }, {

      width: canvas.width,

      height: canvas.height,

      depth: 1,

    });

    device.defaultQueue.submit([commandEncoder.finish()]);

    ...

  }
分析shader代码
本示例的vertex shader与“texturedCube”示例的vertex shader相比,增加了color attribute:
  const vertexShaderGLSL = `#version 450

  ...

  layout(location = 1) in vec4 color;

  ...

  layout(location = 0) out vec4 fragColor;

  ...

  void main() {

    ...

    fragColor = color;

    ...

  }`;
fragment shader的代码如下:
  const fragmentShaderGLSL = `#version 450

  layout(set = 0, binding = 1) uniform sampler mySampler;

  layout(set = 0, binding = 2) uniform texture2D myTexture;

  layout(location = 0) in vec4 fragColor;

  layout(location = 1) in vec2 fragUV;

  layout(location = 0) out vec4 outColor;

  void main() {

    vec4 texColor = texture(sampler2D(myTexture, mySampler), fragUV * 0.8 + 0.1);

    // 1.0 if we're sampling the background

    float f = float(length(texColor.rgb - vec3(0.5, 0.5, 0.5)) < 0.01);

    outColor = mix(texColor, fragColor, f);

  }`;
第10行对fragUV进行了处理,我们会在分析渲染时间线中分析它。
第13行和第15行相当于做了if判断:
if(纹理颜色 === 背景色){

    outColor = fragColor

}

else{

    outColor = 纹理颜色

}
这里之所以不用if判断而使用计算的方式,是为了减少条件判断,提高gpu的并行性
分析渲染时间线
下面分析下渲染的时间线:
第一帧
因为纹理为空纹理,它的颜色为背景色,所以fragment shader的outColor始终为fragColor,因此立方体的所有片段的颜色均为fragColor。
第一帧的渲染结果如下:
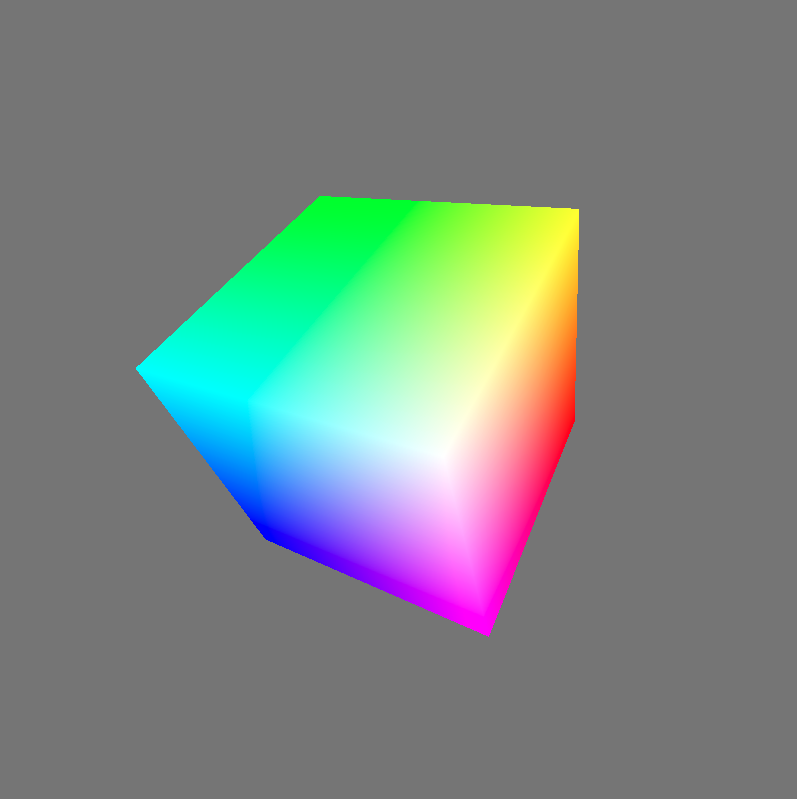
第一帧绘制结束后,渲染结果会被拷贝到cubeTexture中。
第二帧
分析执行的fragment shader代码:
  const fragmentShaderGLSL = `#version 450

  layout(set = 0, binding = 1) uniform sampler mySampler;

  layout(set = 0, binding = 2) uniform texture2D myTexture;

  layout(location = 0) in vec4 fragColor;

  layout(location = 1) in vec2 fragUV;

  layout(location = 0) out vec4 outColor;

  void main() {

    vec4 texColor = texture(sampler2D(myTexture, mySampler), fragUV * 0.8 + 0.1);

    // 1.0 if we're sampling the background

    float f = float(length(texColor.rgb - vec3(0.5, 0.5, 0.5)) < 0.01);

    outColor = mix(texColor, fragColor, f);

  }`;
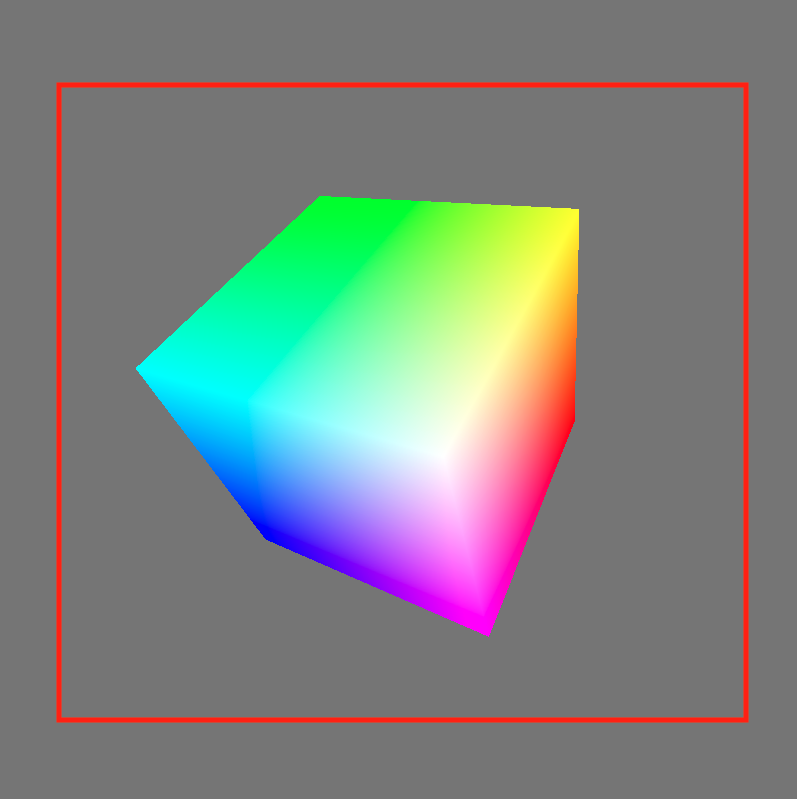
- 第10行的“fragUV * 0.8 + 0.1”是为了取纹理坐标u、v方向的[0.1-0.9]部分,从而使纹理中立方体所占比例更大。
得到的纹理区域如下图的红色区域所示:
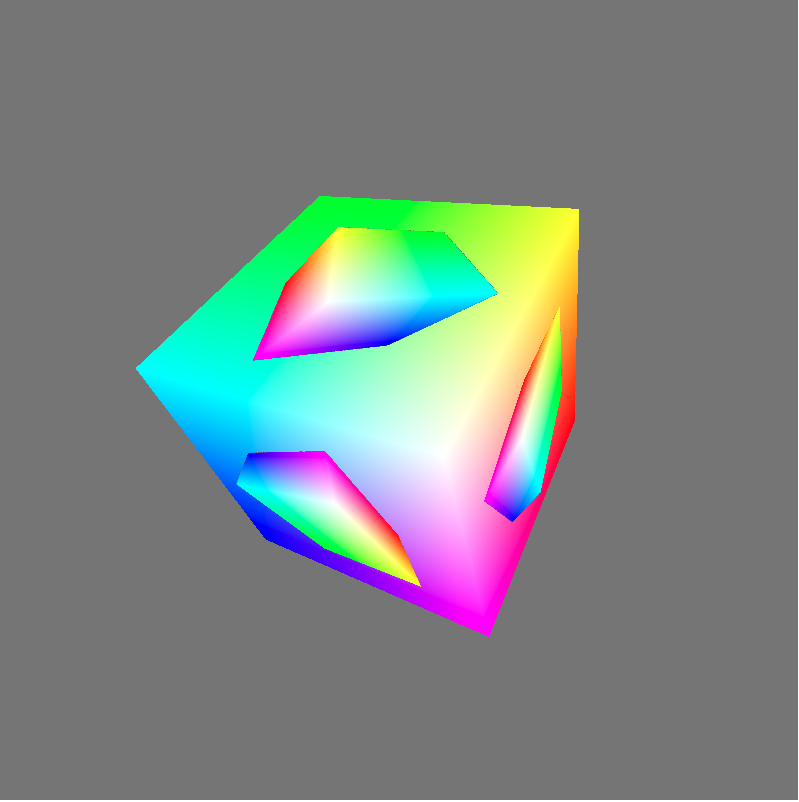
- 第13行和第15行代码,将纹理中的背景色替换为了fragColor
第二帧的渲染结果如下:
- 第三帧
依次类推,第三帧的渲染结果如下:
参考资料
WebGPU规范
webgpu-samplers Github Repo
WebGPU-7
WebGPU学习(九):学习“fractalCube”示例的更多相关文章
- WebGPU学习(七):学习“twoCubes”和“instancedCube”示例
大家好,本文学习Chrome->webgpu-samplers->twoCubes和instancedCube示例. 这两个示例都与"rotatingCube"示例差不 ...
- Angular 快速学习笔记(1) -- 官方示例要点
创建组件 ng generate component heroes {{ hero.name }} {{}}语法绑定数据 管道pipe 格式化数据 <h2>{{ hero.name | u ...
- SQL 数据库 学习 007 通过一个示例简单介绍什么是字段、属性、列、元组、记录、表、主键、外键 (上)
SQL 数据库 学习 007 通过一个示例简单介绍什么是字段.属性.列.元组.记录.表.主键.外键 (上) 我们来介绍一下:数据库是如何存储数据的. 数据库是如何存储数据的 来看一个小例子 scott ...
- Deep Learning(深度学习)学习笔记整理系列之(五)
Deep Learning(深度学习)学习笔记整理系列 zouxy09@qq.com http://blog.csdn.net/zouxy09 作者:Zouxy version 1.0 2013-04 ...
- Deep Learning(深度学习)学习笔记整理系列之(八)
Deep Learning(深度学习)学习笔记整理系列 zouxy09@qq.com http://blog.csdn.net/zouxy09 作者:Zouxy version 1.0 2013-04 ...
- Deep Learning(深度学习)学习笔记整理系列之(七)
Deep Learning(深度学习)学习笔记整理系列 zouxy09@qq.com http://blog.csdn.net/zouxy09 作者:Zouxy version 1.0 2013-04 ...
- Deep Learning(深度学习)学习笔记整理系列之(六)
Deep Learning(深度学习)学习笔记整理系列 zouxy09@qq.com http://blog.csdn.net/zouxy09 作者:Zouxy version 1.0 2013-04 ...
- Deep Learning(深度学习)学习笔记整理系列之(四)
Deep Learning(深度学习)学习笔记整理系列 zouxy09@qq.com http://blog.csdn.net/zouxy09 作者:Zouxy version 1.0 2013-04 ...
- Deep Learning(深度学习)学习笔记整理系列之(三)
Deep Learning(深度学习)学习笔记整理系列 zouxy09@qq.com http://blog.csdn.net/zouxy09 作者:Zouxy version 1.0 2013-04 ...
- Deep Learning(深度学习)学习笔记整理系列之(二)
Deep Learning(深度学习)学习笔记整理系列 zouxy09@qq.com http://blog.csdn.net/zouxy09 作者:Zouxy version 1.0 2013-04 ...
随机推荐
- mysql捕捉所有SQL语句
MySQL可以通过开通general_log参数(可动态修改)来扑捉所有在数据库执行的SQL语句.显示参数:mysql> show variables like 'general%log%';+ ...
- spring data jpa 使用方法命名规则查询
按照Spring Data JPA 定义的规则,查询方法以findBy开头,涉及条件查询时,条件的属性用条件关键字连接,要注意的是:条件属性首字母需大写.框架在进行方法名解析时,会先把方法名多余的前缀 ...
- Learning OSG programing---osgClip
OSG Clip例程剖析 首先是创建剪切节点的函数代码: osg::ref_ptr<osg::Node> decorate_with_clip_node(const osg::ref_pt ...
- 转 cpu高 问题分析定位
文章来源: http://www.blogjava.net/hankchen/archive/2012/08/09/377735.html 一个应用占用CPU很高,除了确实是计算密集型应用之外,通常原 ...
- jquery 查找元素,id,class
查找元素下的class 带有.pageactive的a标签 $('a.pageactive') 标签a和..pageactive不要有空格,有空格找不到 ======================= ...
- json模块 pickle 模块 collections 模块 openpyxl 模块
json模块 json 模块是一个系列化模块 一个第三方的特殊数据格式 可以将python数据类型----> json 数据格式 ----> 字符串 ----> 文件 其他语言想要使 ...
- springboot中xml配置之@ImportResource
springboot中进行相关的配置往往有java配置和xml配置两种方式. 使用java的方式配置只需要使用@configuration注解即可,而使用xml的方式配置的话需要使用@ImportRe ...
- 利用Swiperefreshlayout实现下拉刷新功能的技术探讨
在常见的APP中通常有着下拉页面从而达到刷新页面的功能,这种看似简单的功能有着花样繁多的实现方式.而利用Swiperefreshlayout实现下拉刷新功能则是其中比较简明扼要的一种. 一般来说,在竖 ...
- 一、bootstrap-fontawesome-iconpicker组件
一.bootstrap-fontawesome-iconpicker组件 <!DOCTYPE html> <html lang="en"> <head ...
- 某个应用的CPU使用率居然达到100%,我该怎么做?(三)
某个应用的CPU使用率居然达到100%,我该怎么做?(三) 1. 引 你们好,可爱的小伙伴们^_^! 咱们最常用什么指标来描述系统的CPU性能呢?我想你的答案,可能不是平均负载,也不是CPU上下文切换 ...