Keepalived+Nginx+tomcat实现主备+负载
 部署系统:
部署系统:
Red Hat Enterprise Linux Server release 7.0
软件版本:apache-tomcat-7.0.92.tar.gz
keepalived-2.0.11.tar.gz
nginx-1.15.7.tar.gz (openssl-1.1.1.tar.gz pcre-8.40.tar.gz zlib-1.2.11.tar.gz )
架构图
vip:192.168.56.80-----> A:192.168.56.129 nginx(8001) tomcat (8080)
B:192.168.56.130 nginx(8001) tomcat (8080)
开始部署
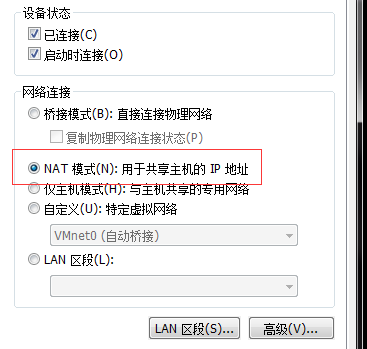
1、准备两台虚拟机,网络我选择的是nat,如下图. 这种网络有点麻烦后面需要做一下映射。
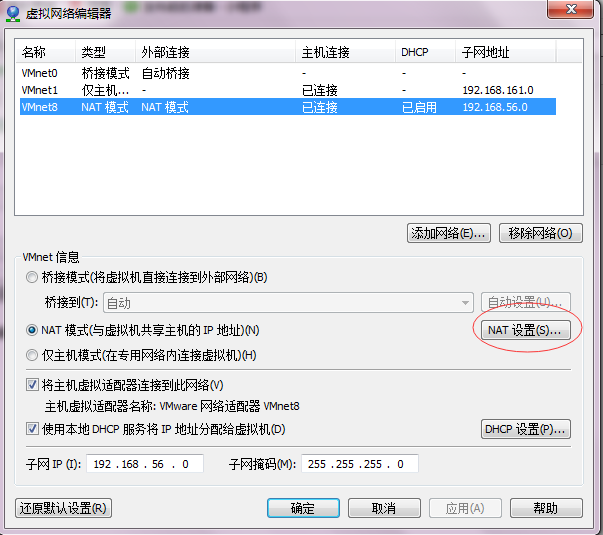
在vmware 编辑下虚拟网络编辑器,选择NAT设置
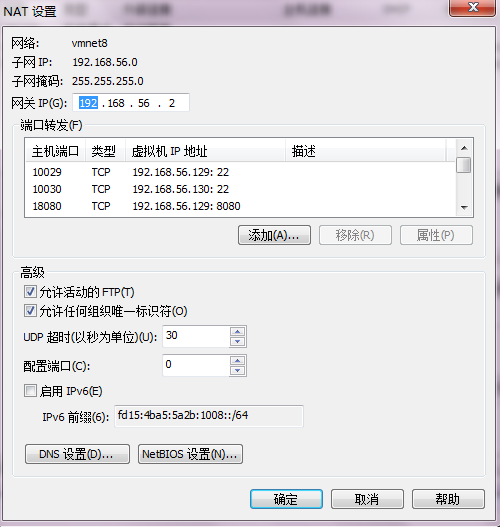

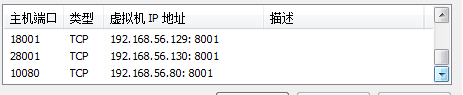
这样通过本机IP访问这此端口了.
服务器上网络准备如下:
[root@mrice_02 sbin]# cat /etc/sysconfig/network-scripts/ifcfg-eno16777736
TYPE=Ethernet
BOOTPROTO=static
DEFROUTE=yes
NAME=eno16777736
ONBOOT=yes
IPADDR0=192.168.56.130
PREFIX0=32
GATEWAY0=192.168.56.2
HWADDR=00:0c:29:b9:46:b5
PEERDNS=yes
2、服务器准备完毕后,开始安装软件.
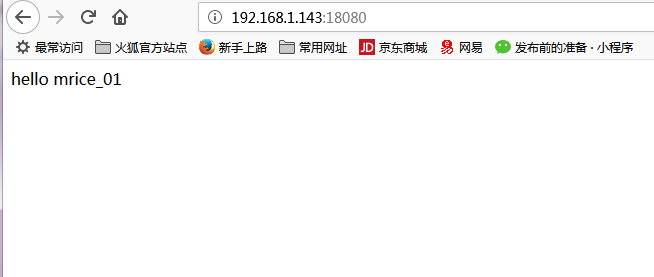
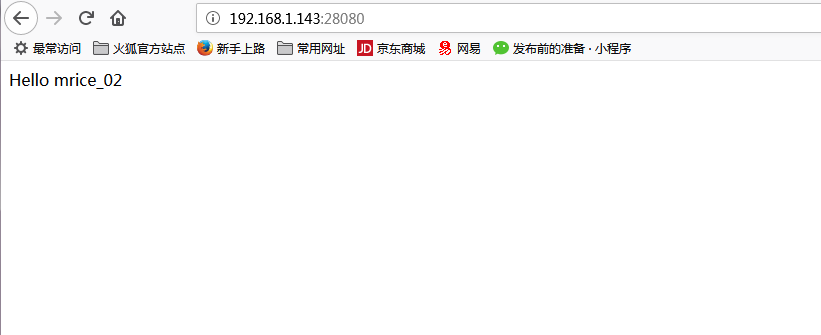
tomcat 不用说了,解压后,编写一个默认页面.
nginx 安装 请参考https://www.cnblogs.com/mrice/p/9882781.html
nginx.conf 配置文件如下 ,nginx配置可简单也可复杂,可根据生产中进行配置.
#user  nobody;

worker_processes  ;

#error_log  logs/error.log;

#error_log  logs/error.log  notice;

#error_log  logs/error.log  info;

#pid        logs/nginx.pid;

events {

    worker_connections  ;

}

http {

    include       mime.types;

    default_type  application/octet-stream;

    #log_format  main  '$remote_addr - $remote_user [$time_local] "$request" '

    #                  '$status $body_bytes_sent "$http_referer" '

    #                  '"$http_user_agent" "$http_x_forwarded_for"';

    #access_log  logs/access.log  main;

    sendfile        on;

    #tcp_nopush     on;

    #keepalive_timeout  ;

    keepalive_timeout  ;

    #gzip  on;

    upstream mrice{

    server 192.168.56.129: weight=;

    server 192.168.56.130: weight=;

    }

    server {

        listen       ;

        server_name  localhost;

        #charset koi8-r;

        #access_log  logs/host.access.log  main;

        location / {

            root   html;

            index  index.html index.htm;

        }

    location /mrice {

    proxy_pass http://mrice/;

    }

        #error_page                /.html;

        # redirect server error pages to the static page /50x.html

        #

        error_page        /50x.html;

        location = /50x.html {

            root   html;

        }

        # proxy the PHP scripts to Apache listening on 127.0.0.1:

        #

        #location ~ \.php$ {

        #    proxy_pass   http://127.0.0.1;

        #}

        # pass the PHP scripts to FastCGI server listening on 127.0.0.1:

        #

        #location ~ \.php$ {

        #    root           html;

        #    fastcgi_pass   127.0.0.1:;

        #    fastcgi_index  index.php;

        #    fastcgi_param  SCRIPT_FILENAME  /scripts$fastcgi_script_name;

        #    include        fastcgi_params;

        #}

        # deny access to .htaccess files, if Apache's document root

        # concurs with nginx's one

        #

        #location ~ /\.ht {

        #    deny  all;

        #}

    }

    # another virtual host using mix of IP-, name-, and port-based configuration

    #

    #server {

    #    listen       ;

    #    listen       somename:;

    #    server_name  somename  alias  another.alias;

    #    location / {

    #        root   html;

    #        index  index.html index.htm;

    #    }

    #}

    # HTTPS server

    #

    #server {

    #    listen        ssl;

    #    server_name  localhost;

    #    ssl_certificate      cert.pem;

    #    ssl_certificate_key  cert.key;

    #    ssl_session_cache    shared:SSL:1m;

    #    ssl_session_timeout  5m;

    #    ssl_ciphers  HIGH:!aNULL:!MD5;

    #    ssl_prefer_server_ciphers  on;

    #    location / {

    #        root   html;

    #        index  index.html index.htm;

    #    }

    #}

}
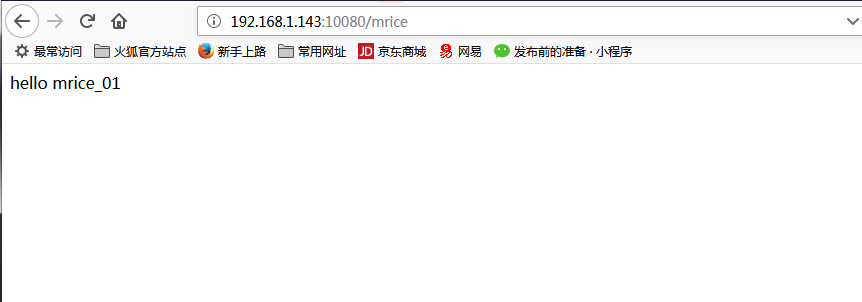
验证负载是否正常
keepalived 安装
本次使用的是源码安装
tar -xzvf keepalived-2.0.11.tar.gz
cd keepalived-2.0.11
./configure --prefix=/usr/local/keepalived 安装目录根据需要修改
make && make install
cp keepalived-2.0.11/keepalived/etc/init.d/keepalived /etc/init.d/
cp /usr/local/keepalived/etc/keepalived/keepalived.conf /etc/keepalived/
cp keepalived-2.0.11/keepalived/etc/sysconfig/keepalived
cp /usr/local/keepalived/sbin/keepalived /usr/sbin/
配置keepalived.conf
! Configuration File for keepalived

global_defs {

   notification_email {

    mrice_02@mrice.com

   }

   notification_email_from mrice@mrice.com

   smtp_server 192.168.56.8

   smtp_connect_timeout

   router_id mrice_backup

}

vrrp_script chk_http_port {

    script "/opt/nginx/check_nginx.sh"

    interval

    weight

}

vrrp_instance VI_1 {

    state BACKUP

    interface eno16777736

    virtual_router_id

    priority

    advert_int

    authentication {

        auth_type PASS

        auth_pass

    }

    virtual_ipaddress {

        192.168.56.80

    }

}
其中配置文件中/opt/nginx/check_nginx.sh检查nginx进程
#!/bin/bash

A=`ps -C nginx --no-header |wc -l`

if [ $A -eq  ];then

    /usr/nginx/sbin/nginx                #重启nginx

    if [ `ps -C nginx --no-header |wc -l` -eq  ];then    #nginx重启失败

        exit

    else

        exit

    fi

else

    exit

fi
通过VIP访问是否正常。
可查看VIP地址在哪台服务器上
[root@mrice_02 sbin]# ip addr show
1: lo: <LOOPBACK,UP,LOWER_UP> mtu 65536 qdisc noqueue state UNKNOWN
link/loopback 00:00:00:00:00:00 brd 00:00:00:00:00:00
inet 127.0.0.1/8 scope host lo
valid_lft forever preferred_lft forever
inet6 ::1/128 scope host
valid_lft forever preferred_lft forever
2: eno16777736: <BROADCAST,MULTICAST,UP,LOWER_UP> mtu 1500 qdisc pfifo_fast state UP qlen 1000
link/ether 00:0c:29:b9:46:b5 brd ff:ff:ff:ff:ff:ff
inet 192.168.56.130/32 brd 192.168.56.130 scope global eno16777736
valid_lft forever preferred_lft forever
inet 192.168.56.80/32 scope global eno16777736
valid_lft forever preferred_lft forever
inet6 fe80::20c:29ff:feb9:46b5/64 scope link
valid_lft forever preferred_lft forever
截止目前主备+负载配置完成,过程很简单,很多细节需要动手操作才会发现.
Keepalived+Nginx+tomcat实现主备+负载的更多相关文章
- 搭建 Keepalived + Nginx + Tomcat 的高可用负载均衡架构
1 概述 初期的互联网企业由于业务量较小,所以一般单机部署,实现单点访问即可满足业务的需求,这也是最简单的部署方式,但是随着业务的不断扩大,系统的访问量逐渐的上升,单机部署的模式已无法承载现有的业务量 ...
- Keepalived + Nginx + Tomcat 的高可用负载均衡架构搭建
Keepalived + Nginx + Tomcat 的高可用负载均衡架构搭建 Nginx 是一个高性能的 HTTP反向代理服务器 Keepalived 是一个基于VRRP协议来实现的LVS服务高可 ...
- 搭建Keepalived + Nginx + Tomcat的高可用负载均衡架构
1 概述 初期的互联网企业由于业务量较小,所以一般单机部署,实现单点访问即可满足业务的需求,这也是最简单的部署方式,但是随着业务的不断扩大,系统的访问量逐渐的上升,单机部署的模式已无法承载现有的业务量 ...
- Keepalived+Nginx+Tomcat配置高可用负载均衡系统示例
前言 此示例为keepalived+nginx+tomcat的基础配置示例,某些特定配置此例中不会出现,在示例中会用到三个虚拟机:两个纯命令行用于模拟服务端配置,一个带桌面环境的用于模拟客户端访问,这 ...
- [转]搭建Keepalived+Nginx+Tomcat高可用负载均衡架构
[原文]https://www.toutiao.com/i6591714650205716996/ 一.概述 初期的互联网企业由于业务量较小,所以一般单机部署,实现单点访问即可满足业务的需求,这也是最 ...
- Keepalived + Nginx + Tomcat 高可用负载均衡架构
环境: 1.centos7.3 2.虚拟ip:192.168.217.200 3.192.168.217.11.192.168.217.12上分别部署Nginx Keepalived Tomcat并进 ...
- Ubuntu下配置 keepalived+nginx+tomcat 负载均衡
本文力图阐述在 Ubuntu Server 环境下使用 Keepalived + Nginx + Tomcat 搭建高可用负载均衡环境的操作步骤和简约配置,这里不涉及性能调优.先说一下他们各自扮演的角 ...
- keepalived+nginx+tomcat+redis实现负载均衡和session共享(原创)
keepalived+nginx+tomcat+redis实现负载均衡和session共享 直接上链接,码了一天,就不再重写了,希望能帮到大家,有问题欢迎留言交流.
- Keepalived+Nginx+Tomcat 实现高可用Web集群
https://www.jianshu.com/p/bc34f9101c5e Keepalived+Nginx+Tomcat 实现高可用Web集群 0.3912018.01.08 20:28:59字数 ...
随机推荐
- linux下挂载磁盘
1.使用fdisk 查看硬盘信息 [root@localhost ~]# fdisk -l Disk /dev/sdb: 107.4 GB, 107374182400 bytes 255 heads, ...
- 屏蔽ffmpeg命令的所有提示
有时候需要隐蔽的执行ffmpeg不希望输出任何日志,提示.这个时候只需要多添加这个参数即可 -loglevel quiet
- python 调用c++类方法(1)
myTest.cpp: #include<iostream> #include<vector> class MyTest { public: MyTest(); ~MyTest ...
- oracle备份和还原
用exp命令即可完成,但要看具体的备份方式. 1. 导出一个完整数据库 exp system/manager file=bible_db log=dible_db full=y 2. 导出数据库定义而 ...
- 微博获取原图时重定向到图片的url
微博获取原图时重定向到图片的url,所以获取的是乱码 jsoup默认是执行重定向的. //根据Url获取页面对应的Document public static Document getDoc1(Str ...
- Visual Studio Code - 插件
Intellisense(代码提示.智能感应) Path Intellisense:路径别名(alias)代码提示 例如:在模块打包配置中配置@代替了src,可以使用下面的配置让@智能感应 " ...
- IntelliJ IDEA 2019.1.1 maven框架web.xml中web-app版本过低导致不能正常使用EL表达式的解决方案
1.软件版本 IDEA版本:IntelliJ IDEA 2019.1.1 maven版本:apache-maven-3.6.1 Tomcat版本:tomcat-8.5 2.问题描述 IDEA使用如下 ...
- Chapter02 第三节 其他语句
2.3 其他语句 // getinfo.cpp #include <bits/stdc++.h> using namespace std; int main() { int carrots ...
- 【Linux开发】Linux及Arm-Linux程序开发笔记(零基础入门篇)
Linux及Arm-Linux程序开发笔记(零基础入门篇) 作者:一点一滴的Beer http://beer.cnblogs.com/ 本文地址:http://www.cnblogs.com/beer ...
- Scrapy输出文件格式问题汇总
Q:Scrapy抓取的内容(包含中文)输出到JSON Lines文件时如何确保输出的是字符本身而不是其unicode编码? A:默认的JsonLinesItemExporter其ensure_asci ...