[原创]java WEB学习笔记103:Spring学习---Spring Bean配置:基于注解的方式(基于注解配置bean,基于注解来装配bean的属性)
本博客的目的:①总结自己的学习过程,相当于学习笔记 ②将自己的经验分享给大家,相互学习,互相交流,不可商用
内容难免出现问题,欢迎指正,交流,探讨,可以留言,也可以通过以下方式联系。
本人互联网技术爱好者,互联网技术发烧友
微博:伊直都在0221
QQ:951226918
-----------------------------------------------------------------------------------------------------------------------------------------------------------------------------------------------------------------------------------------------------------
1.在 classpath 中扫描组件
1)组件扫描(component scanning): Spring 能够从 classpath 下自动扫描, 侦测和实例化具有特定注解的组件.
2)对于扫描到的组件, Spring 有默认的命名策略: 使用非限定类名, 第一个字母小写. 也可以在注解中通过 value 属性值标识组件的名称
例如:UserOperator --> userOperator
3)特定组件包括:
① @Component: 基本注解, 标识了一个受 Spring 管理的组件
② @Respository: 标识持久层组件
③ @Service: 标识服务层(业务层)组件
④ @Controller: 标识表现层组件
4)当在组件类上使用了特定的注解之后, 还需要在 Spring 的配置文件中声明 <context:component-scan> :
① base-package 属性指定一个需要扫描的基类包,Spring 容器将会扫描这个基类包里及其子包中的所有类.
② 当需要扫描多个包时, 可以使用逗号分隔.
③ 如果仅希望扫描特定的类而非基包下的所有类,可使用 resource-pattern 属性过滤特定的类,示例:

④ <context:include-filter> 子节点表示要包含的目标类
⑤ <context:exclude-filter> 子节点表示要排除在外的目标类
⑥ <context:component-scan> 下可以拥有若干个 <context:include-filter> 和 <context:exclude-filter> 子节点

2.注解配置bean的关联关系:<context:component-scan> 元素还会自动注册 AutowiredAnnotationBeanPostProcessor 实例, 该实例可以自动装配具有 @Autowired 和 @Resource 、@Inject注解的属性.
1)使用 @Autowired 自动装配 Bean
① @Autowired 注解自动装配具有兼容类型的单个 Bean属性
② 构造器, 普通字段(即使是非 public), 一切具有参数的方法都可以应用@Authwired 注解
特殊情况
③ 默认情况下, 所有使用 @Authwired 注解的属性都需要被设置. 当 Spring 找不到匹配的 Bean 装配属性时, 会抛出异常, 若某一属性允许不被设置, 可以设置 @Authwired 注解的 required 属性为 false
④ 默认情况下, 当 IOC 容器里存在多个类型兼容的 Bean 时, 通过类型的自动装配将无法工作. 此时可以在 @Qualifier 注解里提供 Bean 的名称. Spring 允许对方法的入参标注 @Qualifiter 已指定注入 Bean 的名称
⑤ @Authwired 注解也可以应用在数组类型的属性上, 此时 Spring 将会把所有匹配的 Bean 进行自动装配.
⑥ @Authwired 注解也可以应用在集合属性上, 此时 Spring 读取该集合的类型信息, 然后自动装配所有与之兼容的 Bean.
⑦ @Authwired 注解用在 java.util.Map 上时, 若该 Map 的键值为 String, 那么 Spring 将自动装配与之 Map 值类型兼容的 Bean, 此时 Bean 的名称作为键值
2)使用 @Resource 或 @Inject 自动装配 Bean
① Spring 还支持 @Resource 和 @Inject 注解,这两个注解和 @Autowired 注解的功用类似
② @Resource 注解要求提供一个 Bean 名称的属性,若该属性为空,则自动采用标注处的变量或方法名作为 Bean 的名称
③ @Inject 和 @Autowired 注解一样也是按类型匹配注入的 Bean, 但没有 reqired 属性
④ 建议使用 @Autowired 注解
3.代码结构
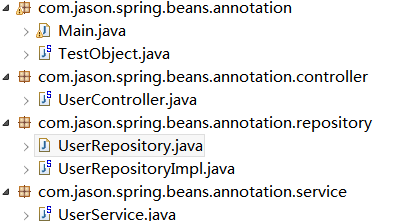
TestObject.java
 package com.jason.spring.beans.annotation;

 import org.springframework.stereotype.Component;

 @Component

 public class TestObject {

 }
UserService.java
 package com.jason.spring.beans.annotation.service;

 import org.springframework.beans.factory.annotation.Autowired;

 import org.springframework.stereotype.Service;

 import com.jason.spring.beans.annotation.repository.UserRepository;

 @Service

 public class UserService {

     @Autowired

     private UserRepository userRepository;

     public void add() {

         System.out.println("UserService add ...");

         userRepository.save();

     }

 }
UserController.java
 package com.jason.spring.beans.annotation.controller;

 import org.springframework.beans.factory.annotation.Autowired;

 import org.springframework.stereotype.Controller;

 import com.jason.spring.beans.annotation.service.UserService;

 @Controller

 public class UserController {

     @Autowired

     private UserService userService;

     public void execute() {

         System.out.println("UserController execute ...");

         userService.add();

     }

 }
UserRepositoty.java
 package com.jason.spring.beans.annotation.repository;

 public interface UserRepository {

     void save();

 }
UserRepositoryImpl.java
 package com.jason.spring.beans.annotation.repository;

 import org.springframework.stereotype.Repository;

 @Repository("userRepositoryImpl")

 public class UserRepositoryImpl implements UserRepository{

     @Override

     public void save() {

         System.out.println("added ! ! !");

     }

 }
Main.java
 package com.jason.spring.beans.annotation;

 import org.springframework.context.ApplicationContext;

 import org.springframework.context.support.ClassPathXmlApplicationContext;

 import com.jason.spring.beans.annotation.controller.UserController;

 import com.jason.spring.beans.annotation.repository.UserRepositoryImpl;

 import com.jason.spring.beans.annotation.service.UserService;

 public class Main {

     public static void main(String[] args) {

         ApplicationContext ctx = new ClassPathXmlApplicationContext("beans-annotation.xml");

         UserRepositoryImpl uri = (UserRepositoryImpl) ctx.getBean("userRepositoryImpl");

         System.out.println(uri);

         TestObject to = (TestObject) ctx.getBean("testObject");

         System.out.println(to);

         UserService  us  = (UserService) ctx.getBean("userService");

         System.out.println(us);

         UserController uc = (UserController) ctx.getBean("userController");

         System.out.println(uc);

         uc.execute();

     }

 }
beans-anntation.xml
 <?xml version="1.0" encoding="UTF-8"?>

 <beans xmlns="http://www.springframework.org/schema/beans"

     xmlns:xsi="http://www.w3.org/2001/XMLSchema-instance"

     xmlns:context="http://www.springframework.org/schema/context"

     xsi:schemaLocation="http://www.springframework.org/schema/beans http://www.springframework.org/schema/beans/spring-beans.xsd

         http://www.springframework.org/schema/context http://www.springframework.org/schema/context/spring-context-4.0.xsd">

     <!-- 指定Spring IOC 容器扫描的包 -->

     <!-- 可以通过resource-pattern 指定扫描的资源

         <context:component-scan

             base-package="com.jason.spring.beans.annotation"

             resource-pattern="repository/*.class">

         </context:component-scan>

     -->

      <!--

          <context:exclude-filter> 排除那些指定表达式的组件

          <context:include-filter> 指定包含哪些表达式的组件,该子节点需要 设置use-default-filters="false"

      <context:component-scan base-package="com.jason.spring.beans.annotation" >

          <context:exclude-filter type="annotation" expression="org.springframework.stereotype.Repository"/>

          <context:include-filter type="annotation" expression="org.springframework.stereotype.Repository"/>

          <context:exclude-filter type="assignable" expression="com.jason.spring.beans.annotation.repository.UserRepositoryImpl"/>

      </context:component-scan>

      -->

      <context:component-scan base-package="com.jason.spring.beans.annotation"></context:component-scan>

 </beans>
[原创]java WEB学习笔记103:Spring学习---Spring Bean配置:基于注解的方式(基于注解配置bean,基于注解来装配bean的属性)的更多相关文章
- [原创]java WEB学习笔记95:Hibernate 目录
本博客的目的:①总结自己的学习过程,相当于学习笔记 ②将自己的经验分享给大家,相互学习,互相交流,不可商用 内容难免出现问题,欢迎指正,交流,探讨,可以留言,也可以通过以下方式联系. 本人互联网技术爱 ...
- [原创]java WEB学习笔记75:Struts2 学习之路-- 总结 和 目录
本博客的目的:①总结自己的学习过程,相当于学习笔记 ②将自己的经验分享给大家,相互学习,互相交流,不可商用 内容难免出现问题,欢迎指正,交流,探讨,可以留言,也可以通过以下方式联系. 本人互联网技术爱 ...
- [原创]java WEB学习笔记66:Struts2 学习之路--Struts的CRUD操作( 查看 / 删除/ 添加) 使用 paramsPrepareParamsStack 重构代码 ,PrepareInterceptor拦截器,paramsPrepareParamsStack 拦截器栈
本博客的目的:①总结自己的学习过程,相当于学习笔记 ②将自己的经验分享给大家,相互学习,互相交流,不可商用 内容难免出现问题,欢迎指正,交流,探讨,可以留言,也可以通过以下方式联系. 本人互联网技术爱 ...
- Spring框架学习笔记(5)——Spring Boot创建与使用
Spring Boot可以更为方便地搭建一个Web系统,之后服务器上部署也较为方便 创建Spring boot项目 1. 使用IDEA创建项目 2. 修改groupid和artifact 3. 一路n ...
- Spring实战第四章学习笔记————面向切面的Spring
Spring实战第四章学习笔记----面向切面的Spring 什么是面向切面的编程 我们把影响应用多处的功能描述为横切关注点.比如安全就是一个横切关注点,应用中许多方法都会涉及安全规则.而切面可以帮我 ...
- Spring框架学习笔记(8)——spring boot+mybatis plus+mysql项目环境搭建
之前写的那篇Spring框架学习笔记(5)--Spring Boot创建与使用,发现有多小细节没有提及,,正好现在又学习了mybatis plus这款框架,打算重新整理一遍,并将细节说清楚 1.通过I ...
- Mybatis学习笔记(八) —— Mybatis整合spring
一.整合思路 1.SqlSessionFactory对象应该放到spring容器中作为单例存在. 2.传统dao的开发方式中,应该从spring容器中获得sqlsession对象. 3.Mapper代 ...
- 学习笔记:CentOS7学习之十九:Linux网络管理技术
目录 学习笔记:CentOS7学习之十九:Linux网络管理技术 本文用于记录学习体会.心得,兼做笔记使用,方便以后复习总结.内容基本完全参考学神教育教材,图片大多取材自学神教育资料,在此非常感谢MK ...
- 五大 JAVA Web 框架的优缺点对比,Spring MVC 领先
毫无疑问,Java 是当今世界上最重要的编程语言之一.js 框架给程序员提供了 一个可以构建程序的坚实基础.它包括定义的类和功能,用于硬件设备管理,与系统软件交互并处理输入,让开发人员变得更轻松.Ja ...
- 学习笔记:CentOS7学习之二十:shell脚本的基础
目录 学习笔记:CentOS7学习之二十:shell脚本的基础 20.1 shell 基本语法 20.1.1 什么是shell? 20.1.2 编程语言分类 20.1.3 什么是shell脚本 20. ...
随机推荐
- iOS 消息推送(APNs) 傻瓜式教程
也可以去我的简书页面查看这篇文章 首先: 1.做iOS消息推送需要真机测试 2.做iOS消息推送需要有付费的开发者账号 是否继续看帖? 先学习一下相关的知识吧! 因为中途可能会遇到一些问题,这篇文章或 ...
- activity 、window与view的关系(下)
在activity的attacth方法中,通过policymanager 的makenewwindow来创建window 而window的具体实现是phonewindow 接下来通过setconten ...
- python 安装模块
python安装模块的方法很多,在此仅介绍一种,不需要安装其他附带的pip等,python安装完之后,配置环境变量,我由于中英文分号原因,环境变量始终没能配置成功汗. 1:下载模块的压缩文件解压到任意 ...
- Useful links
Better JavaScript with ES6 Pt.IPopular Features pt.II A Deep Dive into Classes pt.III Cool Collectio ...
- dedecms中调用制定栏目
{dede:type typeid='5'} <li> <a href="[field:typelink/]" target="_blank" ...
- iOS宏和__attribute__
本文目录 iOS宏的经典用法 Apple的习惯 __attribute__ iOS宏的经典用法 1.常量宏.表达式宏 #define kTabBarH (49.0f) #define kScreenH ...
- Ecilpse快捷键
编辑快捷键 [ALT+/] 显示代码提示,以及代码自动补全功能. [Ctrl+/] 添加注释 [Ctrl+D] 删除当前行 窗口快捷键 [Ctrl+M] 窗口最大化和还原 查看和定位快捷键 ...
- IE8浏览器不能识别CSS伪类的解决办法。
1. 方法一:开头加上这两句 <!DOCTYPE html PUBLIC "-//W3C//DTD XHTML 1.0 Transitional//EN" "htt ...
- asp.net identity 3.0.0 在MVC下的基本使用 序言
本人也尚在学习使用之中,错误之处请大家指正. 开发环境:vs2015 UP1 项目环境:asp.net 4.6.1 模板为:asp.net 5 模板 identity版本为:asp.n ...
- 准备上线,切换到master分支,报错
切换到master分支,准备上线,把上次上线sourceTree保存的修改拉出来: 运行,报错了: stackOverflow一搜说要删除旧的: 我show in finder 把他删了,然后双击安装 ...