
使用VS Code开发AngularJS 2 第一个应用程序
使用VS Code开发AngularJS 2 第一个应用程序
目录
运行环境
运行环境:
Windows 10
Node 6.7.0

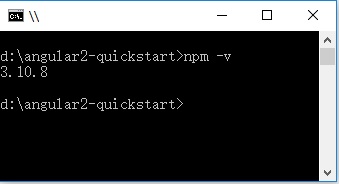
npm 3.10.8
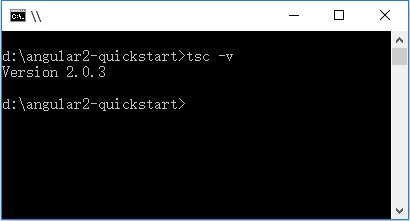
TypeScript 2.0.3
创建项目
- 1、创建文件夹:angular2-quickstart,启动VS Code,打开刚创建的文件夹:angular2-quickstart。
- 2、在根文件夹(angular2-quickstart)下,创建package.json文件:
{

    "name": "angular-quickstart",

    "version": "1.0.0",

    "scripts": {

        "start": "tsc && concurrently \"tsc -w\" \"lite-server\" ",

        "lite": "lite-server",

        "postinstall": "typings install",

        "tsc": "tsc",

        "tsc:w": "tsc -w",

        "typings": "typings"

    },

    "license": "ISC",

    "dependencies": {

        "@angular/common": "~2.0.2",

        "@angular/compiler": "~2.0.2",

        "@angular/core": "~2.0.2",

        "@angular/forms": "~2.0.2",

        "@angular/http": "~2.0.2",

        "@angular/platform-browser": "~2.0.2",

        "@angular/platform-browser-dynamic": "~2.0.2",

        "@angular/router": "~3.0.2",

        "@angular/upgrade": "~2.0.2",

        "angular-in-memory-web-api": "~0.1.5",

        "bootstrap": "^3.3.7",

        "core-js": "^2.4.1",

        "reflect-metadata": "^0.1.8",

        "rxjs": "5.0.0-beta.12",

        "systemjs": "0.19.39",

        "zone.js": "^0.6.25"

    },

    "devDependencies": {

        "concurrently": "^3.1.0",

        "lite-server": "^2.2.2",

        "typescript": "^2.0.3",

        "typings": "^1.4.0"

    }

}
- 3、在根文件夹(angular2-quickstart)下,创建tsconfig.json文件:
{

    "compilerOptions": {

        "target": "es5",

        "module": "commonjs",

        "moduleResolution": "node",

        "sourceMap": true,

        "emitDecoratorMetadata": true,

        "experimentalDecorators": true,

        "removeComments": false,

        "noImplicitAny": false

    }

}
- 4、在根文件夹(angular2-quickstart)下,创建typings.json文件:
{

    "globalDependencies": {

        "core-js": "registry:dt/core-js#0.0.0+20160725163759",

        "jasmine": "registry:dt/jasmine#2.2.0+20160621224255",

        "node": "registry:dt/node#6.0.0+20160909174046"

    }

}
- 5、在根文件夹(angular2-quickstart)下,创建systemjs.config.js(JavaScript脚本)文件:
/**

 * System configuration for Angular samples

 * Adjust as necessary for your application needs.

 */

(function(global) {

    System.config({

        paths: {

            // paths serve as alias

            'npm:': 'node_modules/'

        },

        // map tells the System loader where to look for things

        map: {

            // our app is within the app folder

            app: 'app',

            // angular bundles

            '@angular/core': 'npm:@angular/core/bundles/core.umd.js',

            '@angular/common': 'npm:@angular/common/bundles/common.umd.js',

            '@angular/compiler': 'npm:@angular/compiler/bundles/compiler.umd.js',

            '@angular/platform-browser': 'npm:@angular/platform-browser/bundles/platform-browser.umd.js',

            '@angular/platform-browser-dynamic': 'npm:@angular/platform-browser-dynamic/bundles/platform-browser-dynamic.umd.js',

            '@angular/http': 'npm:@angular/http/bundles/http.umd.js',

            '@angular/router': 'npm:@angular/router/bundles/router.umd.js',

            '@angular/forms': 'npm:@angular/forms/bundles/forms.umd.js',

            // other libraries

            'rxjs': 'npm:rxjs',

            'angular-in-memory-web-api': 'npm:angular-in-memory-web-api',

        },

        // packages tells the System loader how to load when no filename and/or no extension

        packages: {

            app: {

                main: './main.js',

                defaultExtension: 'js'

            },

            rxjs: {

                defaultExtension: 'js'

            },

            'angular-in-memory-web-api': {

                main: './index.js',

                defaultExtension: 'js'

            }

        }

    });

})(this);
文件结构:
|_ angular2-quickstart

|_ app

| |_ app.component.ts

| |_ main.ts

|_ node_modules ...

|_ typings ...

|_ index.html

|_ package.json

|_ tsconfig.json

|_ typings.json
安装依赖包(最关键一步)
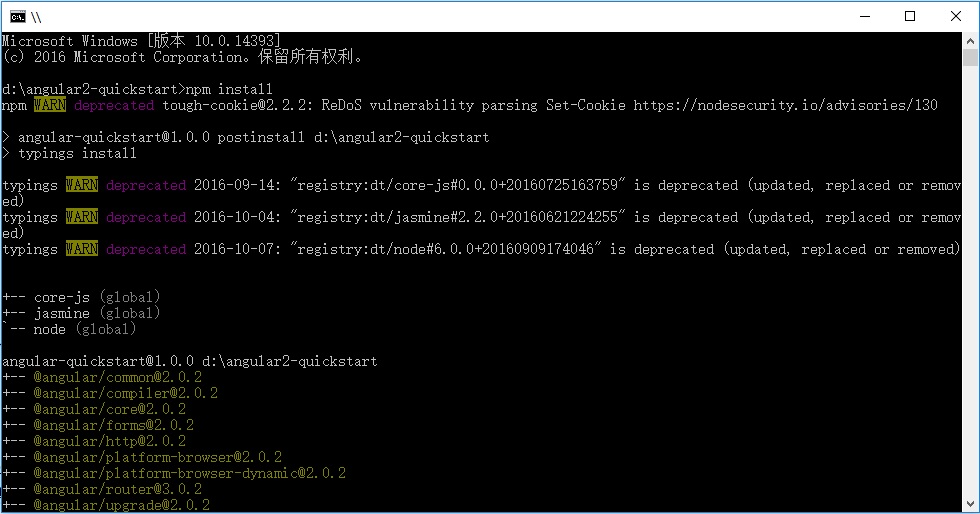
- 使用 npm 命令来安装 package.json 中列出的依赖包。在命令行 cmd 窗口,输入:cd angular2-quickstart,进入angular2-quickstar文件夹下,输入下列命令:
npm install
创建TypeScript应用程序
- 1、在VS Code中,在根文件夹(angular2-quickstart)下,创建app子文件夹。
- 2、在子app文件夹下,创建TypeScript文件app.module.ts:
import { NgModule }      from '@angular/core';

import { BrowserModule } from '@angular/platform-browser';

import { AppComponent }   from './app.component';

@NgModule({

  imports:      [ BrowserModule ],

  declarations: [ AppComponent ],

  bootstrap:    [ AppComponent ]

})

export class AppModule { }
- 3、在子app文件夹下,创建TypeScript文件app.component.ts:
import { Component } from '@angular/core';

@Component({

  selector: 'my-app',

  template: '<h1>我的第一个 AngularJS 2 应用程序</h1>'

})

export class AppComponent { }
- 4、在子app文件夹下,创建TypeScript文件main.ts:
import { platformBrowserDynamic } from '@angular/platform-browser-dynamic';

import { AppModule } from './app.module';

const platform = platformBrowserDynamic();

platform.bootstrapModule(AppModule);
- 5、在根文件夹(angular2-quickstart)下,创建html文件index.html:
<html>

<head>

    <title>Angular QuickStart</title>

    <meta charset="UTF-8">

    <meta name="viewport" content="width=device-width, initial-scale=1">

    <link rel="stylesheet" href="styles.css">

    <!-- 1. Load libraries -->

    <!-- Polyfill(s) for older browsers -->

    <script src="node_modules/core-js/client/shim.min.js"></script>

    <script src="node_modules/zone.js/dist/zone.js"></script>

    <script src="node_modules/reflect-metadata/Reflect.js"></script>

    <script src="node_modules/systemjs/dist/system.src.js"></script>

    <!-- 2. Configure SystemJS -->

    <script src="systemjs.config.js"></script>

    <script>

        System.import('app').catch(function(err) {

            console.error(err);

        });

    </script>

</head>

<!-- 3. Display the application -->

<body>

    <my-app>Loading...</my-app>

</body>

</html>
- 6、在根文件夹(angular2-quickstart)下,创建css文件styles.css:
/* Master Styles */

h1 {

    color: #369;

    font-family: Arial, Helvetica, sans-serif;

    font-size: 250%;

}

h2,

h3 {

    color: #444;

    font-family: Arial, Helvetica, sans-serif;

    font-weight: lighter;

}

body {

    margin: 2em;

}
配置应用程序
- 1、在VS Code中,在根文件夹(angular2-quickstart)下,创建.vscode子文件夹。
- 2、在.vscode子文件夹下,创建settings.json文件:
// 将设置放入此文件中以覆盖默认值和用户设置。

{

    "typescript.tsdk": "node_modules/typescript/lib",

    // ts 项目, 隐藏 .js 和 .js.map 文件

    "files.exclude": {

        "node_modules": true,

        "**/*.js": { "when": "$(basename).ts" },

        "**/*.js.map": true

    }

}
- 3、在.vscode子文件夹下,创建tasks.json文件:
{

    // See https://go.microsoft.com/fwlink/?LinkId=733558

    // for the documentation about the tasks.json format

    "version": "0.1.0",

    "command": "cmd",

    "isShellCommand": true,

    "showOutput": "always",

    "args": ["/C npm start"]

}
运行应用程序
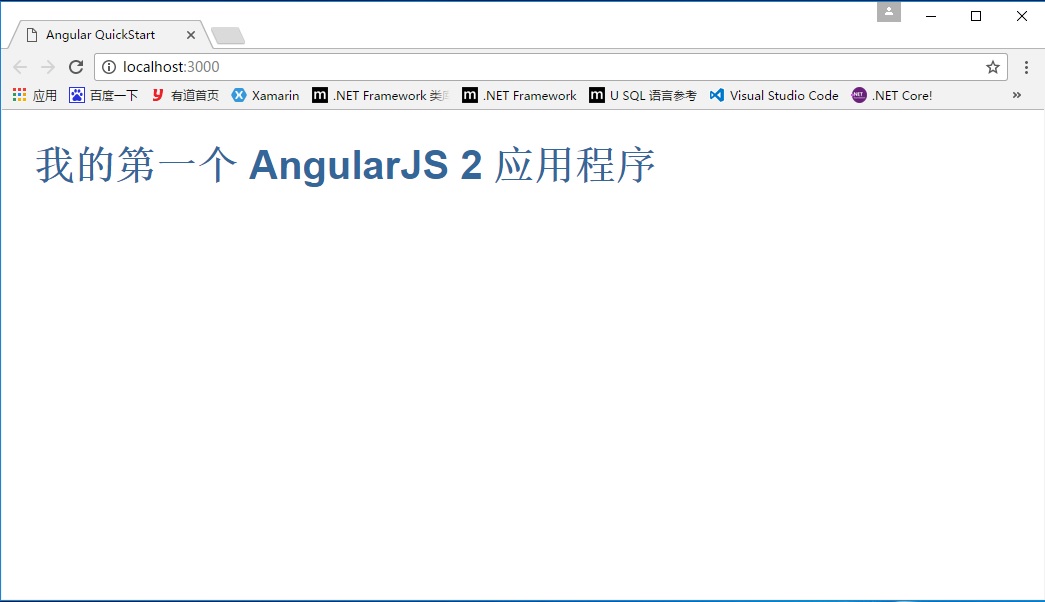
- 至此,配置完毕,按 Ctrl + Shift + B 编译,程序将会将Typescript编译成 Javascript ,同时启动一个 lite-server, 加载我们编写的index.html。 显示:我的第一个 Angular 2 应用程序

参考资料
使用VS Code开发AngularJS 2 第一个应用程序的更多相关文章
- 【免费视频】使用VS Code开发ASP.NET Core WebAPI应用程序
1.使用VS Code开发ASP.NET Core WebAPI应用程序 1.使用Visual Studio Code开发Asp.Net Core基础入门实战 毕竟从.net过度过来的我们已经习惯了使 ...
- 使用Visual Studio Code开发AngularJS应用
(此文章同时发表在本人微信公众号"dotNET每日精华文章",欢迎右边二维码来关注.) 题记:VSC发布之后,尤其最近刚刚更新到0.3之后,社区出现了很多介绍VSC使用的好文章.比 ...
- 菜鸟学Windows Phone 8开发(1)——创建第一个应用程序
本系列文章来源MSDN的 面向完全新手的 Windows Phone 8 开发 主要是想通过翻译本系列文章来巩固下基础知识顺带学习下英语和练习下自己的毅力(因为打算每天翻译一篇,但是发现翻译这篇花费了 ...
- 使用VS Code开发Angular 2应用程序所需配置文件的解析
目录 package.json typings.json tsconfig.json launch.json settings.json tasks.json package.json: 这是项目的基 ...
- 使用VS Code开发 调试.NET Core 应用程序
使用VS Code开发 调试.NET Core RC2应用程序,由于.NET Core 目前还处于预览版. 本文使用微软提供的示例进行开发及调试. https://github.com/aspnet/ ...
- 使用VS Code开发调试ASP.NET Core 1.0
使用VS Code开发调试ASP.NET Core 1.0,微软在今天凌晨发布了.NET Core 1.0,ASP.NET Core 1.0 与 Entity Framewok 1.0. 之前跟大家讲 ...
- VS Code开发调试ASP.NET Core 1.0
VS Code开发调试ASP.NET Core 1.0 使用VS Code开发调试ASP.NET Core 1.0,微软在今天凌晨发布了.NET Core 1.0,ASP.NET Core 1.0 与 ...
- VS Code开发调试.NET Core
使用VS Code开发 调试.NET Core 应用程序 使用VS Code开发 调试.NET Core RC2应用程序,由于.NET Core 目前还处于预览版. 本文使用微软提供的示例进行开发 ...
- 使用ASP.NET 5开发AngularJS应用
今天推荐的是一个系列文章,讲述了如何使用ASP.NET 5来开发AngularJS应用,一共7篇文章. 在Visual Studio 2015中由于优化了项目结构,优化了前端JS框架的引用方式,所以开 ...
随机推荐
- 武汉科技大学ACM :1004: A+B for Input-Output Practice (IV)
Problem Description Your task is to Calculate the sum of some integers. Input Input contains multipl ...
- 使用shiro标签遇到的部分问题的解决思路
最近几天,在shiro进行系统权限控制.在处理JSP页面的时候,遇到几个问题,纠结好几天,终于成功解决这些问题. 1.使用<shiro:principal>的时候,如何得到整个类的信息? ...
- 高放的c++学习笔记之模板与泛型编程
函数模板 作用 有很多时候参数的类型以及返回值的类型是可变的,我们通过定义模板来让函数能更灵活的运用. 我们设计一个比较函数,如果能比较的两个参数是int型的,两个参数也可能都是string型的,单独 ...
- protocol buffer介绍(protobuf)
一.理论概述0.参考资料入门资料:https://developers.google.com/protocol-buffers/docs/javatutorial更详细的资料:For more det ...
- 信息安全实验二:return-to-libc
title: return-to-libc date: 2016-01-11 17:40:30 categories: information-security tags: return-to-lib ...
- python 3.5 用户登录验证和输入三次密码锁定用户
#!/usr/bin/env python #encoding: utf-8 #登录程序,输入用户和密码输出欢迎信息,输入错误三次锁定用户,不让登录 import sys print (''' 欢迎登 ...
- android百度定位
package com.aihunqin.test; import android.app.Activity; import android.os.Bundle; import android.wid ...
- WebAPI 用户认证防篡改实现HMAC(二)签名验证 AbsBaseAuthenticationAttribute--转
public class ActionFilter : ActionFilterAttribute { public override void OnActionExecu ...
- YII增加全局函数
法1: 在使用Yii开发中我们经常会遇到一个问题,每次使用Yii的组件.扩展等,我们会像下面一样去写: <?php Yii::app()->user; Yii::app()->get ...
- Linux下的QQ折腾记
用Linux最重要是要把QQ装好了,webqq很不好用.qq for linux是古董,Linux还是悲惨,很多软件有windows版本,有mac版本,就是不出linux版本.只好用wine来 ...