Appium+Maven+TestNG(ReportNG)环境搭建(详细过程)
最近群里经常有人会问到关于maven构建Appium测试项目以及使用testNG生成测试报告的问题,试着搭建了一下,下面是过程:
jdk安装过程我这里就不说了
一、下载eclipse,推荐下载Eclipse Luna java EE版本,自带maven插件,比较稳定。Eclipse Luna java EE版64位下载地址:http://ftp.yz.yamagata-u.ac.jp/pub/eclipse//technology/epp/downloads/release/luna/SR2/eclipse-jee-luna-SR2-win32-x86_64.zip
二、下载Maven并配置环境变量
从maven官网下载maven程序包:http://apache.opencas.org/maven/maven-3/3.3.9/binaries/apache-maven-3.3.9-bin.zip,下载后解压,例如我的目录结构是:
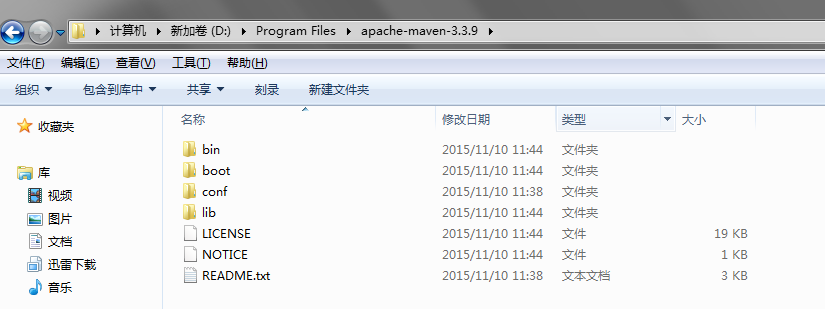
配置环境变量MAVEN_HOME,变量值为maven的根目录:D:\Program Files\apache-maven-3.3.9,在PATH中添加bin的路径:D:\Program Files\apache-maven-3.3.9\bin,
三、配置settings.xml文件,打开maven conf目录下的settings.xml文件,配置maven本地仓库地址,我配置的是F:\repository

我还配置了镜像的地址,因为从默认的中央仓库下载依赖包太慢了,在settings.xml中加入下面的代码:
 <mirrors>

     <!-- mirror | Specifies a repository mirror site to use instead of a given

         repository. The repository that | this mirror serves has an ID that matches

         the mirrorOf element of this mirror. IDs are used | for inheritance and direct

         lookup purposes, and must be unique across the set of mirrors. | -->

     <mirror>

         <id>nexus-osc</id>

         <mirrorOf>central</mirrorOf>

         <name>Nexus osc</name>

         <url>http://maven.oschina.net/content/groups/public/</url>

     </mirror>

     <mirror>

         <id>nexus-osc-thirdparty</id>

         <mirrorOf>thirdparty</mirrorOf>

         <name>Nexus osc thirdparty</name>

         <url>http://maven.oschina.net/content/repositories/thirdparty/</url>

     </mirror>

 </mirrors>
mirrors
推荐几个国内的镜像地址:
http://maven.oschina.net/content/groups/public/
http://maven.oschina.net/content/repositories/thirdparty/
http://repo2.maven.org/maven2/
如果在下载的时候还是觉得慢的话,请自行百度其他地址。
打开Eclipse,在菜单选择:windows->Preference->Maven->User Settings,在右侧User Settings选择刚才的settings.xml文件:
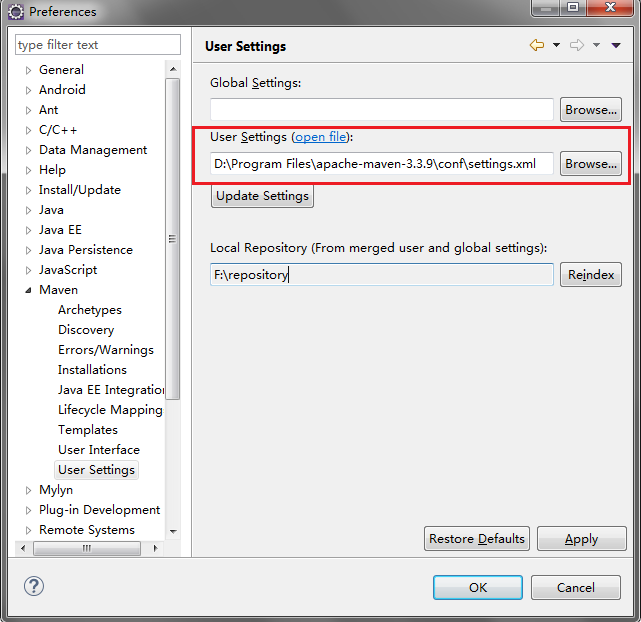
配置后,下面步骤在pom.xml配置的依赖包就会从远程仓库下载到本地配置的仓库:F:\repository
四、安装Eclipse testNG插件,在菜单栏选择help->Eclipse Maketplace,搜索testng,安装,重启Eclipse

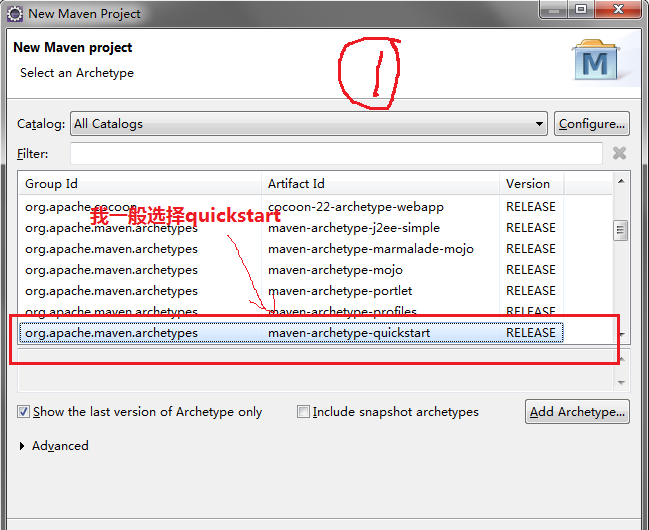
五、开始创建Maven工程,选择Archetype,输入Group Id、Artifact Id,finish创建完成,如下图:

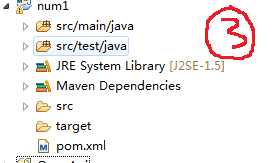
创建完成后是这样的:
六、配置依赖包,Appium需要三个包:appium client、selenium client、selenium server,如果我们不用maven构建工程,那么我们需要去下载这三个包,然后添加到我们的工程中,而maven不需要了,只需要配置依赖关系就可以了,我们可以在maven仓库中搜索我们需要的包,把他们的依赖关系写到pom.xml文件中:
maven仓库地址:http://mvnrepository.com/,例如搜索appium,就可以搜索到appium java client的包,选择最新的包,把依赖关系粘贴打pom.xml中,selenium client和selenium server只需要配置一个selenium依赖就行了,配置后的pom.xml文件如下:
 <project xmlns="http://maven.apache.org/POM/4.0.0" xmlns:xsi="http://www.w3.org/2001/XMLSchema-instance"

   xsi:schemaLocation="http://maven.apache.org/POM/4.0.0 http://maven.apache.org/xsd/maven-4.0.0.xsd">

   <modelVersion>4.0.0</modelVersion>

   <groupId>com.zdx.appium</groupId>

   <artifactId>num1</artifactId>

   <version>0.0.1-SNAPSHOT</version>

   <packaging>jar</packaging>

   <name>num1</name>

   <url>http://maven.apache.org</url>

   <properties>

     <project.build.sourceEncoding>UTF-8</project.build.sourceEncoding>

   </properties>

   <dependencies>

     <dependency>

       <groupId>junit</groupId>

       <artifactId>junit</artifactId>

       <version>3.8.1</version>

       <scope>test</scope>

     </dependency>

     <dependency>

     <groupId>io.appium</groupId>

     <artifactId>java-client</artifactId>

     <version>3.4.0</version>

 </dependency>

 <dependency>

     <groupId>org.testng</groupId>

     <artifactId>testng</artifactId>

     <version>6.9.10</version>

 </dependency>

   </dependencies>

 </project>
pom.xml
配置后保存,会自动更新依赖包,如果没有更新也可以在右键选中工程,选择Maven-Update Project,进行更新。更新完成后,你就发现你的Maven Dependencies多了很多jar包
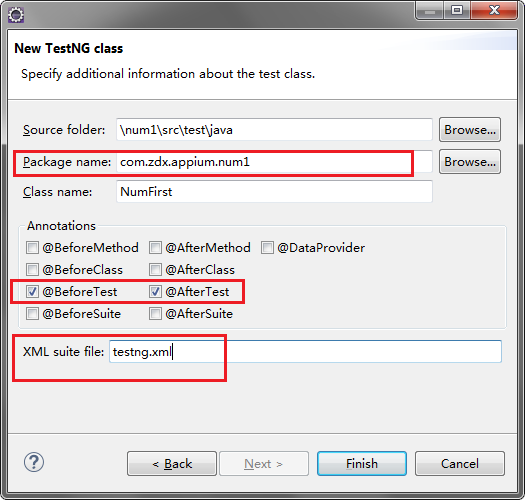
七、创建TestNG测试类,因为是Appium项目,所以我把源代码放在了src/test/java目录下,选中目录,右键选择New->Other->TestNG->TestNG Class
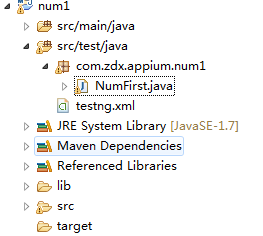
创建完成后的目录结构:
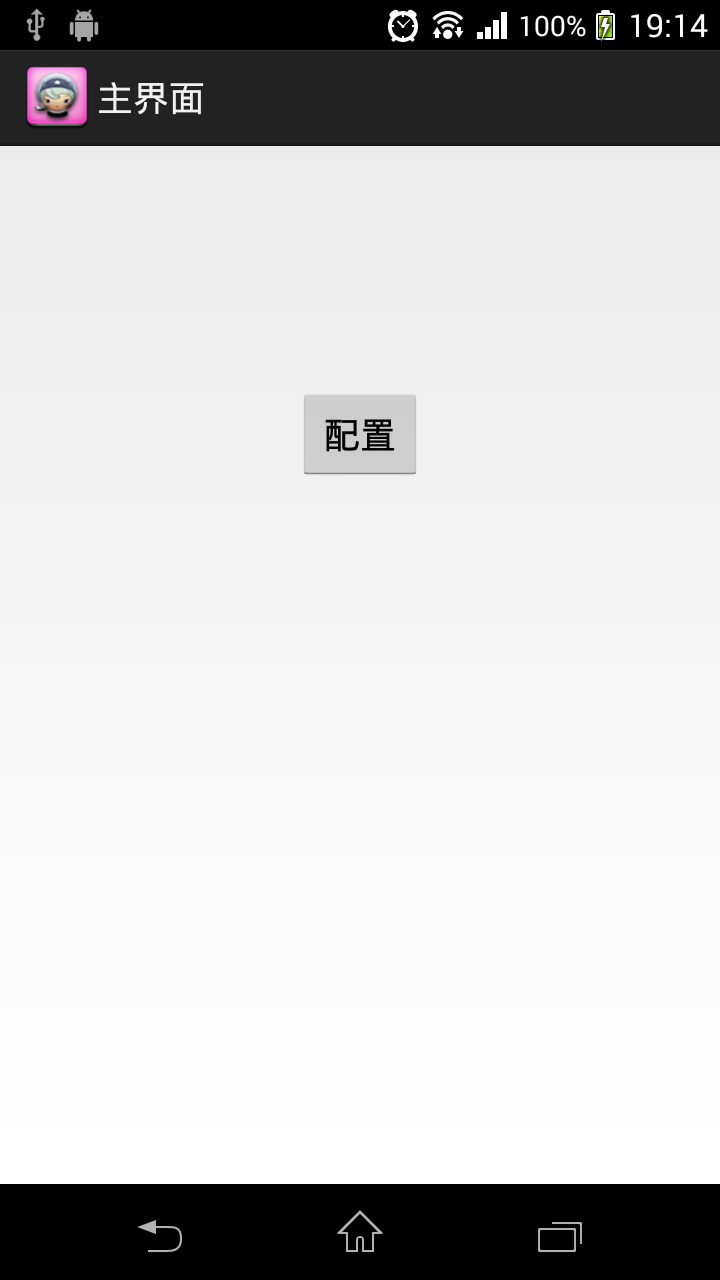
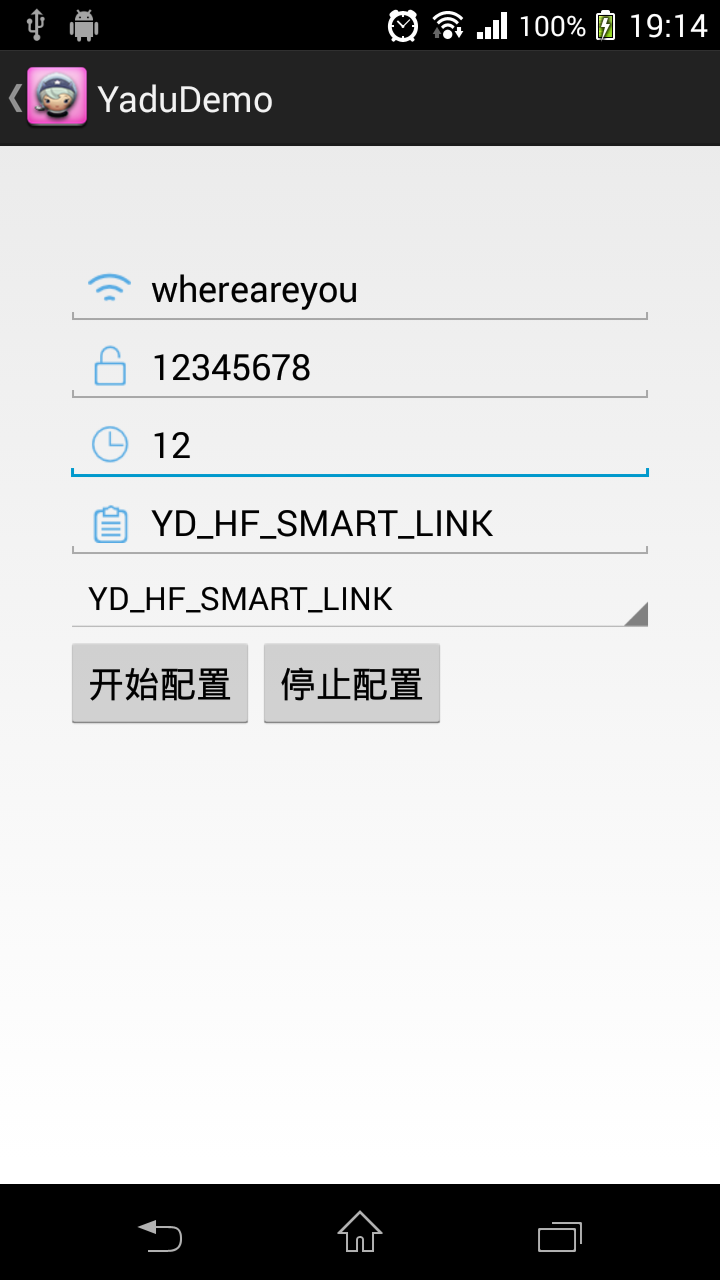
八、下面就开始写Appium代码吧,下面是我写的一个demo,app是我自己写的一个测试demo
APP截图:
测试代码:
 package com.zdx.appium.num1;

 import org.testng.Assert;

 import org.testng.annotations.Test;

 import org.testng.annotations.BeforeTest;

 import org.testng.annotations.AfterTest;

 import io.appium.java_client.AppiumDriver;

 import io.appium.java_client.android.AndroidDriver;

 import io.appium.java_client.android.AndroidElement;

 import java.io.File;

 import java.io.UnsupportedEncodingException;

 import java.net.URL;

 import java.sql.Driver;

 import java.sql.Time;

 import java.util.List;

 import java.util.Random;

 import mx4j.log.Log;

 import org.apache.bcel.generic.RETURN;

 import org.junit.After;

 import org.junit.Before;

 import org.openqa.selenium.By;

 import org.openqa.selenium.WebElement;

 import org.openqa.selenium.logging.LogEntry;

 import org.openqa.selenium.logging.LoggingHandler;

 import org.openqa.selenium.logging.LoggingPreferences;

 import org.openqa.selenium.logging.Logs;

 import org.openqa.selenium.remote.DesiredCapabilities;

 import org.openqa.selenium.remote.RemoteWebDriver;

 import org.openqa.selenium.remote.server.log.LoggingManager;

 import org.openqa.selenium.remote.server.log.LoggingOptions;

 import org.testng.asserts.LoggingAssert;

 public class NumFirst {

     private AndroidDriver<AndroidElement> driver;

   @BeforeTest

   public void setUp() throws Exception{

       /* File classpathRoot = new File(System.getProperty("user.dir"));

       System.out.println(classpathRoot);

       File appDir = new File(classpathRoot, "/apps");

       File app = new File(appDir, "");*/

       DesiredCapabilities capabilities = new DesiredCapabilities();

       capabilities.setCapability("deviceName","udid");

       capabilities.setCapability("platformVersion", "4.4");

       capabilities.setCapability("udid","YT91050HXZ");

       //capabilities.setCapability("app", app.getAbsolutePath());

       capabilities.setCapability("appPackage", "com.example.yadudemo");

       capabilities.setCapability("appActivity", ".MainActivity");

       //capabilities.setCapability("appActivity", ".ui.activity.UPlusMainActivity");

   driver = new AndroidDriver<>(new URL("http://127.0.0.1:4726/wd/hub"), capabilities);

   }

   @Test

   public void test() throws UnsupportedEncodingException {

       //验证APP启动成功,并且MainActivity打开

       if(activityVerify(8000, driver, ".MainActivity")==true)

       {

           System.out.println(driver.currentActivity().toString());

           Assert.assertEquals(driver.currentActivity().toString(), ".MainActivity");

           AndroidElement bt_config = driver.findElementByName("配置");

           bt_config.click();

           //验证ConfigActivity打开

           if(activityVerify(3000, driver, ".ConfigActivity")==true)

           {

               Assert.assertEquals(driver.currentActivity().toString(), ".ConfigActivity");

               List<AndroidElement> et_List = driver.findElementsByClassName("android.widget.EditText");

               //输入密码

               et_List.get(1).clear();

               et_List.get(1).sendKeys("12345678");

               //验证输入密码正确

               Assert.assertEquals(et_List.get(1).getText(), "12345678");

               //输入超时时间

               et_List.get(2).clear();

               et_List.get(2).sendKeys("12");

               //验证超时时间输入正确

               Assert.assertEquals(et_List.get(2).getText(), "12");

               //如果button被键盘遮挡,关闭键盘

               if(driver.findElementsByName("开始配置").isEmpty())

               {

                   driver.pressKeyCode(4);

               }

               //点击开始配置

               AndroidElement bt_start_config = driver.findElementByName("开始配置");

               bt_start_config.click();

           }

       }

       //关闭APP

       closeApp();

       //验证APP已经关闭

       Assert.assertNotEquals(driver.currentActivity().toString(), ".ConfigActivity");

       Assert.assertNotEquals(driver.currentActivity().toString(), ".MainActivity");

   }

   @AfterTest

   public void tearDown() {

       driver.quit();

   }

   //线程等待方法

   public void appWait(long time)

   {

       try {

           Thread.sleep(time);

       } catch (InterruptedException e) {

           // TODO Auto-generated catch block

           e.printStackTrace();

       }

   }

   //关闭APP方法

   public void closeApp()

   {

       for(int h=0;h<6;h++)

       {

           driver.pressKeyCode(4);

       }

   }

   //验证activity方法

  public Boolean activityVerify(long time,AndroidDriver<AndroidElement> tdriver,String activity)

  {

          for(int i=1;i<time/1000;i++){

              appWait(1000);

              if(tdriver.currentActivity().equals(activity))

              {

                  return true;

              }

          }

          System.out.println("can not find "+activity);

          return false;

  }

 }
NumFirst.java
启动Appium Server,连接手机(我手机已经安装了测试demo APP),右键选中num1工程,选择Run As->TestNG Test,运行后,会在工程目录下创建一个test-output的文件夹,打开文件夹下的index.html可以查看测试结果,也可以在Eclipse的Console中查看结果,如下图:
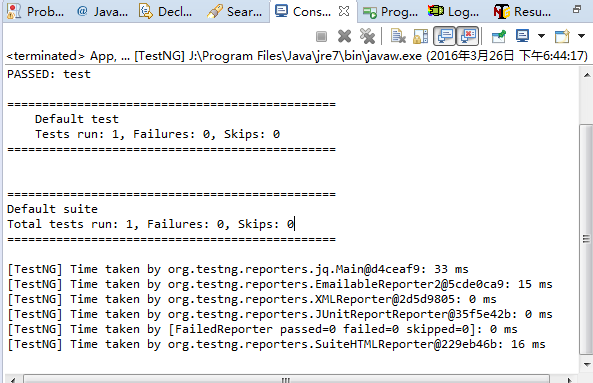

这个报告很简陋,下面开始用ReportNG替换TestNG的报告
九、使用ReportNG生成报告
1、添加依赖,在pom.xml文件中添加下列依赖关系:
         <dependency>

             <groupId>org.uncommons</groupId>

             <artifactId>reportng</artifactId>

             <version>1.1.4</version>

             <scope>test</scope>

             <exclusions>

                 <exclusion>

                     <groupId>org.testng</groupId>

                     <artifactId>testng</artifactId>

                 </exclusion>

             </exclusions>

         </dependency>

         <dependency>

             <groupId>com.google.inject</groupId>

             <artifactId>guice</artifactId>

             <version>4.0</version>

             <scope>test</scope>

         </dependency>
reportNG依赖
2、配置maven-surefire-plugin并加入reportNG listenser
     <build>

         <plugins>

         <plugin>

                 <groupId>org.apache.maven.plugins</groupId>

                 <artifactId>maven-surefire-plugin</artifactId>

                 <version>2.17</version>

                 <configuration>

                     <suiteXmlFiles>

                         <suiteXmlFile>xmlfile/testng.xml</suiteXmlFile>

                     </suiteXmlFiles>

                 </configuration>

             </plugin>

             <plugin>

                 <groupId>org.apache.maven.plugins</groupId>

                 <artifactId>maven-surefire-plugin</artifactId>

                 <version>2.19.1</version>

                 <configuration>

                     <properties>

                         <property>

                             <name>usedefaultlisteners</name>

                             <value>false</value>

                         </property>

                         <property>

                             <name>listener</name>

                             <value>org.uncommons.reportng.HTMLReporter, org.uncommons.reportng.JUnitXMLReporter</value>

                         </property>

                     </properties>

                     <workingDirectory>target/</workingDirectory>

                 </configuration>

             </plugin>

         </plugins>

     </build>
配置build
注意这句:<suiteXmlFile>xmlfile/testng.xml</suiteXmlFile>,我在工程目录下新建了一个文件夹,把testng的xml文件都放在这个目录下,如果有多个testng.xml文件的话,这样更直观,如果只有一个的话,不建文件夹也可以。
如果看不懂的话,请百度maven-surefire-plugin参数说明
3、更新一下Maven Project,然后右键选中Maven工程,选择Run As->Maven Test,运行成功后,在target目录下创建了一个surefire-reports目录,打开它下面的html文件夹,打开indel.xml,就可以看到相对美观的报告形式了:
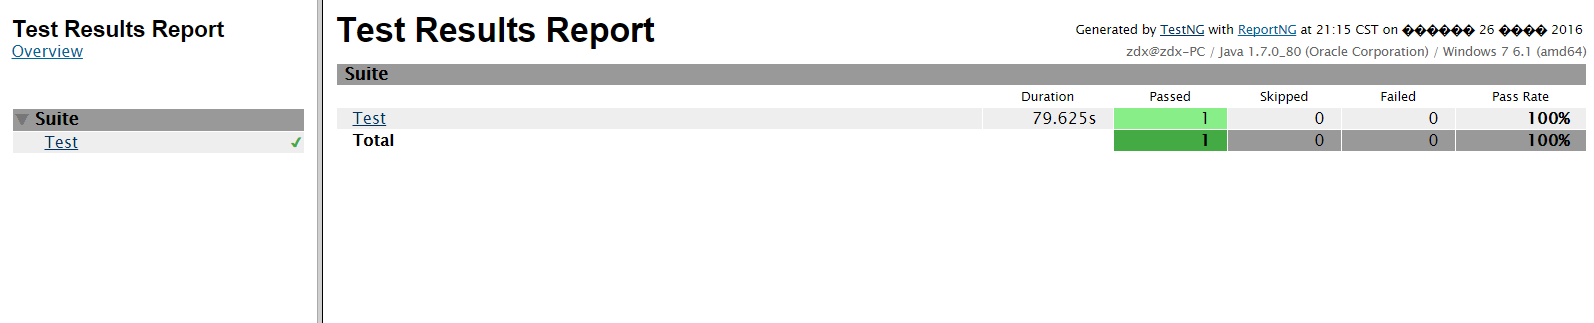
reportNG报告样式是可以自定义的,我的报告中还有乱码,以后会慢慢研究。
Appium+Maven+TestNG(ReportNG)环境搭建(详细过程)的更多相关文章
- 搭建appium+maven手机自动化测试环境搭建
搭建安卓自动化测试框架记录: 需要的软件: jdk版本:jdk1.8 appium版本:v1.4.16 下载AppiumForWindows.zip (下载appium1.7不需要配置环境变量) no ...
- Learning Discriminative and Transformation Covariant Local Feature Detectors实验环境搭建详细过程
依赖项: Python 3.4.3 tensorflow>1.0.0, tqdm, cv2, exifread, skimage, glob 1.安装tensorflow:https://www ...
- windows 2008r2+php5.6.28环境搭建详细过程
安装IIS7 安装php 网站验证 安装IIS7 1.打开服务器管理器(开始-计算机-右键-管理-也可以打开),添加角色 直接下一步 勾选Web服务器(IIS),下一步,有个注意事项继续下一步(这里我 ...
- Spark+ECLIPSE+JAVA+MAVEN windows开发环境搭建及入门实例【附详细代码】
http://blog.csdn.net/xiefu5hh/article/details/51707529 Spark+ECLIPSE+JAVA+MAVEN windows开发环境搭建及入门实例[附 ...
- Win10 Anaconda下TensorFlow-GPU环境搭建详细教程(包含CUDA+cuDNN安装过程)(转载)
win7(win10也适用)系统安装GPU/CPU版tensorflow Win10 Anaconda下TensorFlow-GPU环境搭建详细教程(包含CUDA+cuDNN安装过程) 目录 2.配置 ...
- appium+Java+testng自动化框架搭建-第一季
app自动化越来越火,随着移动app的不断发展,手机端测试日益火爆,想成为一个高级软件测试工程师必须要掌握,那么我们今天就来搭建appium+Java+testng自动化测试框架. Appium环境搭 ...
- Eclipse+maven+scala+spark环境搭建
准备条件 我用的Eclipse版本 Eclipse Java EE IDE for Web Developers. Version: Luna Release (4.4.0) 我用的是Eclipse ...
- zookeeper集群环境搭建详细图文教程
zookeeper集群环境搭建详细图文教程 zhoubang @ 2018-01-02 [文档大纲] 友情介绍 软件环境 注意点 环境安装 1. 新建用于存储安装包以及软件安装的目录 2. 下载安装z ...
- SUSE Storage6 环境搭建详细步骤 - Win10 + VMware WorkStation
学习 SUSE Storage 系列文章 (1)SUSE Storage6 实验环境搭建详细步骤 - Win10 + VMware WorkStation (2)SUSE Linux Enterpri ...
随机推荐
- VT100字体
自从接触LINUX之后,VT100是我最喜欢的终端字体,当然它也是SecureCRT的默认字体.真实文件全名,VT100.FON 总共才44KB大小. 字体安装:直接放入C:\Windows\Fon ...
- golang rbac框架
在 https://github.com/mikespook/gorbac/tree/v1.0 github上新的版本是开发板,得用这里的老版 demo package main import ( & ...
- [git]Git与Repo入门
转自:http://www.cnblogs.com/angeldevil/archive/2013/11/26/3238470.html 注:非常推荐的一篇关于git的博文 目录: 版本控制 一.原始 ...
- Env:Cscope安装与配置
1. 介绍 Cscope是类似于ctags一样的工具,但可认为他是ctags的增强版. 2. 安装 sudo apt-get install cscope 通过源码安装,参照http://blog.c ...
- linux 鼠标中键粘帖功能?!!
转载自:http://yjhexy.iteye.com/blog/785564 ubuntu鼠标中键问题,其实也不是什么问题,ubuntu的鼠标中键是用来快速粘贴的,只是windows用惯了,时不时手 ...
- 创建immutable类
不可变对象(immutable objects) 那么什么是immutable objects?什么又是mutable Objects呢? immutable Objects就是那些一旦被创建,它们的 ...
- Python分布式爬虫原理
转载 permike 原文 Python分布式爬虫原理 首先,我们先来看看,如果是人正常的行为,是如何获取网页内容的. (1)打开浏览器,输入URL,打开源网页 (2)选取我们想要的内容,包括标题,作 ...
- git(5) windows下 pycharm + git(github) ,在本地方便管理
本篇博客讲解一下,windows下如何在pycharm下使用git(使用github设置和git一样),在本地进行commit,push,pull等操作 优点:简单,方便 pycharm版本:5.0. ...
- webView--总结
Anaroid WebView API详解--http://blog.csdn.net/zhangcanyan/article/details/51344090;Android5.1系统WebView ...
- redis info命令详解
以一种易于解释(parse)且易于阅读的格式,返回关于 Redis 服务器的各种信息和统计数值. 通过给定可选的参数 section ,可以让命令只返回某一部分的信息: server : 一般 Red ...