使用C#构建一个同时问多个LLM并总结的小工具
前言
在AI编程时代,如果自己能够知道一些可行的解决方案,那么描述清楚交给AI,可以有很大的帮助。
但是我们往往不知道真正可行的解决方案是什么?
我自己有过这样的经历,遇到一个需求,我不知道有哪些解决方案,就去问AI,然后AI输出一大堆东西,我一个个去试,然后再换个AI问,又提出了不同的解决方案。
在换AI问与一个个试的过程中好像浪费了很多时间。
突然出现了一个想法,不是可以一下子把问题丢给多个AI,然后再总结一下出现最多的三个方案。那么这三个方案可行的概率会大一点。然后再丢给Cursor或者Cline等AI编程工具帮我们实现一下。
这样做的缺点是比起直接在网页上问,调用API需要耗费Token,但是硅基流动给我赠送了很多额度还没用完,随便玩一下。
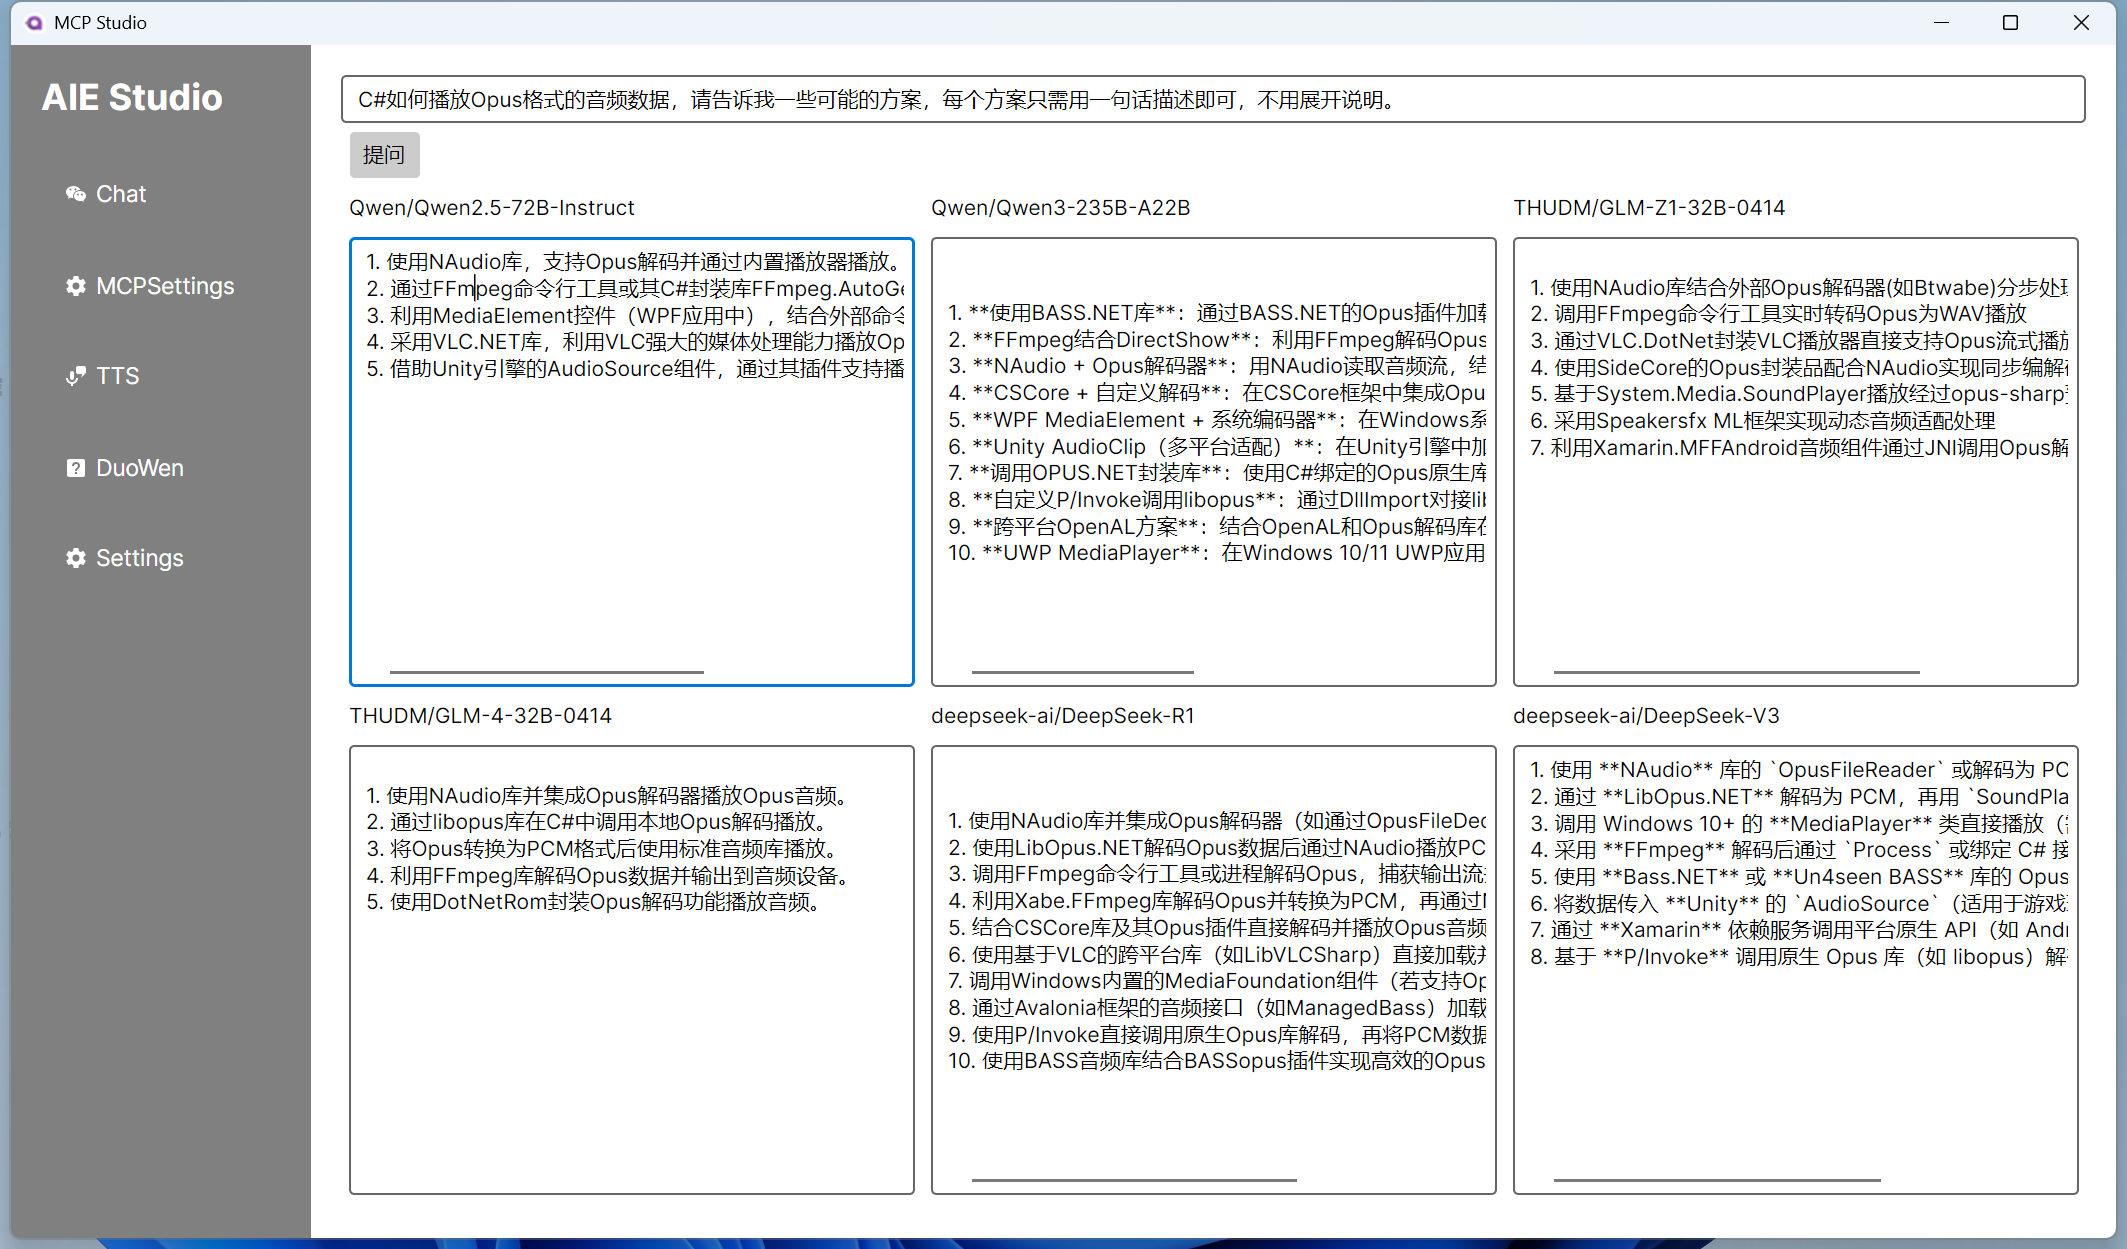
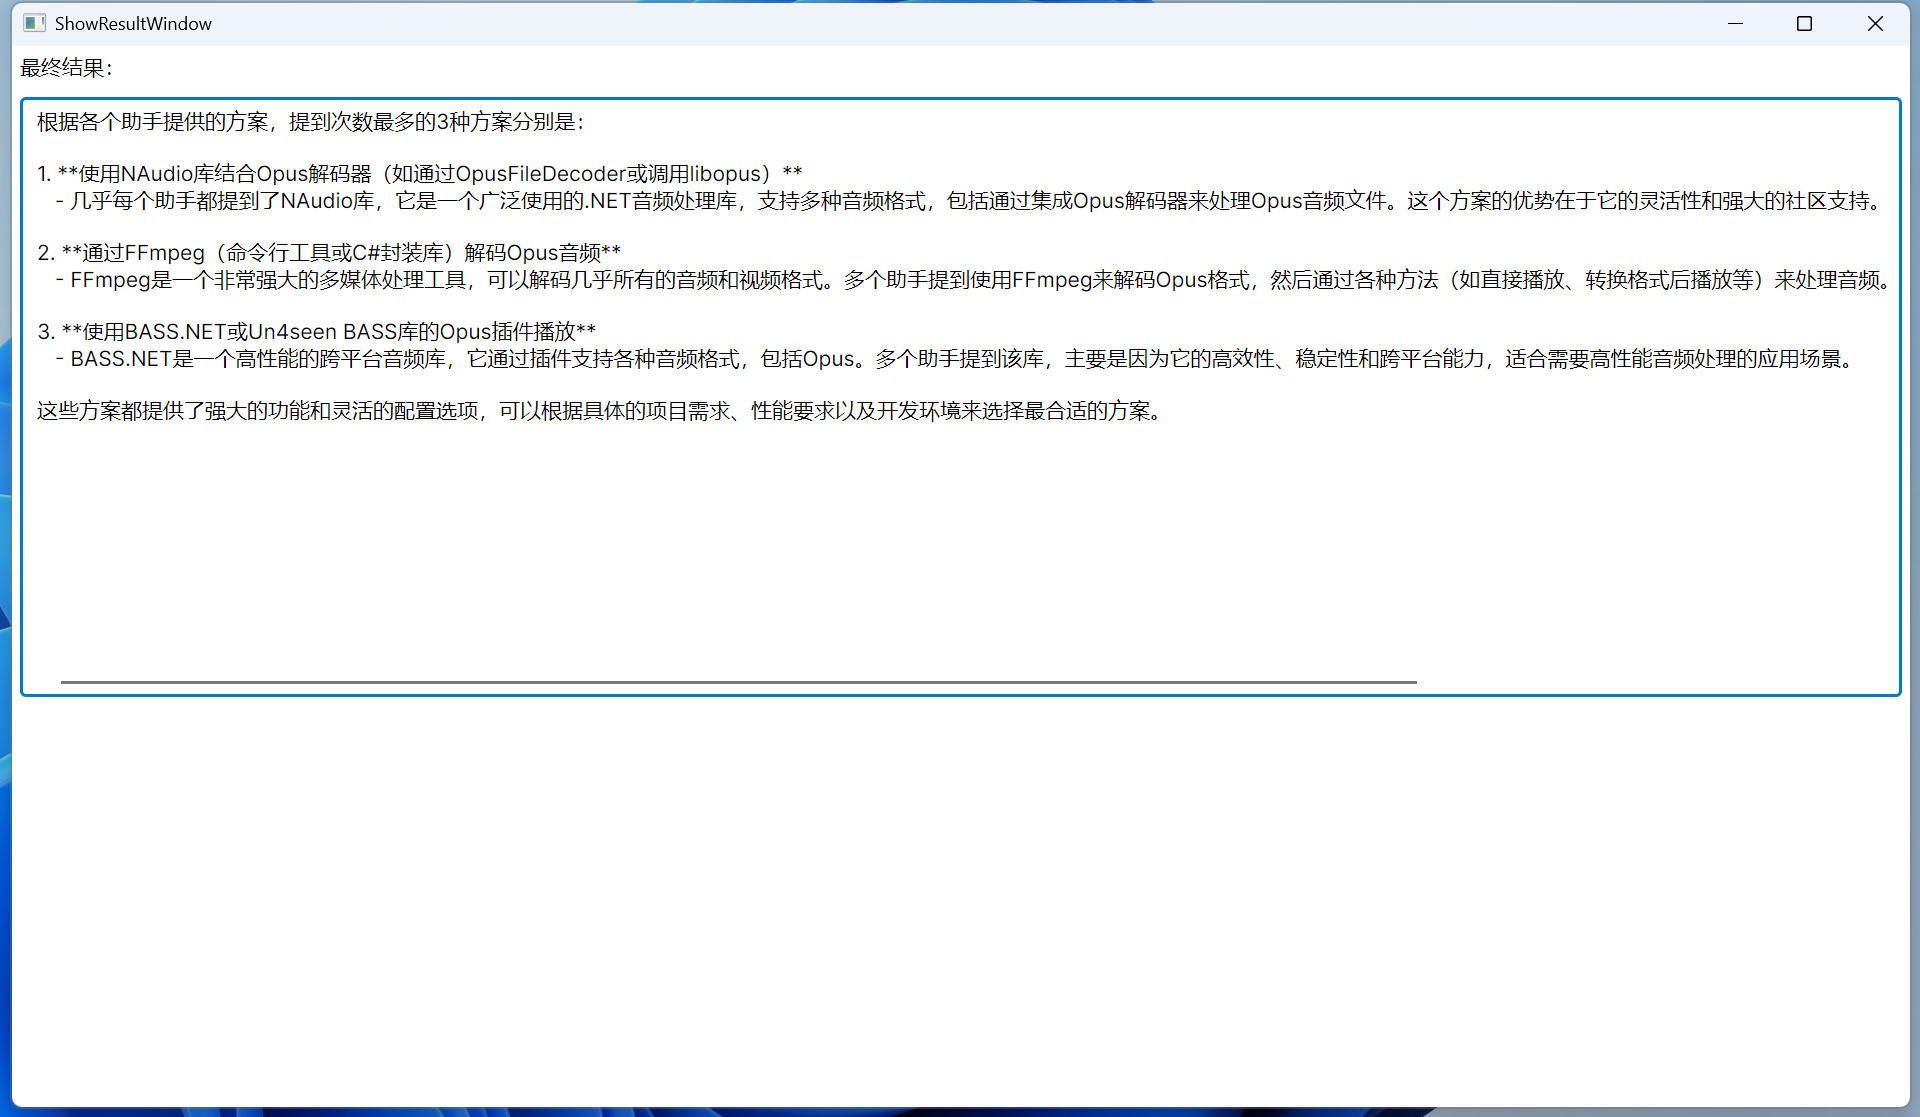
实现效果:
实现方案
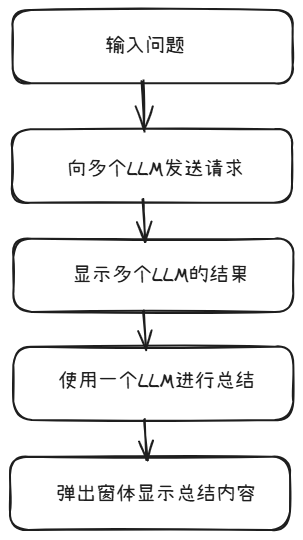
实现方案也很简单,如下图所示:
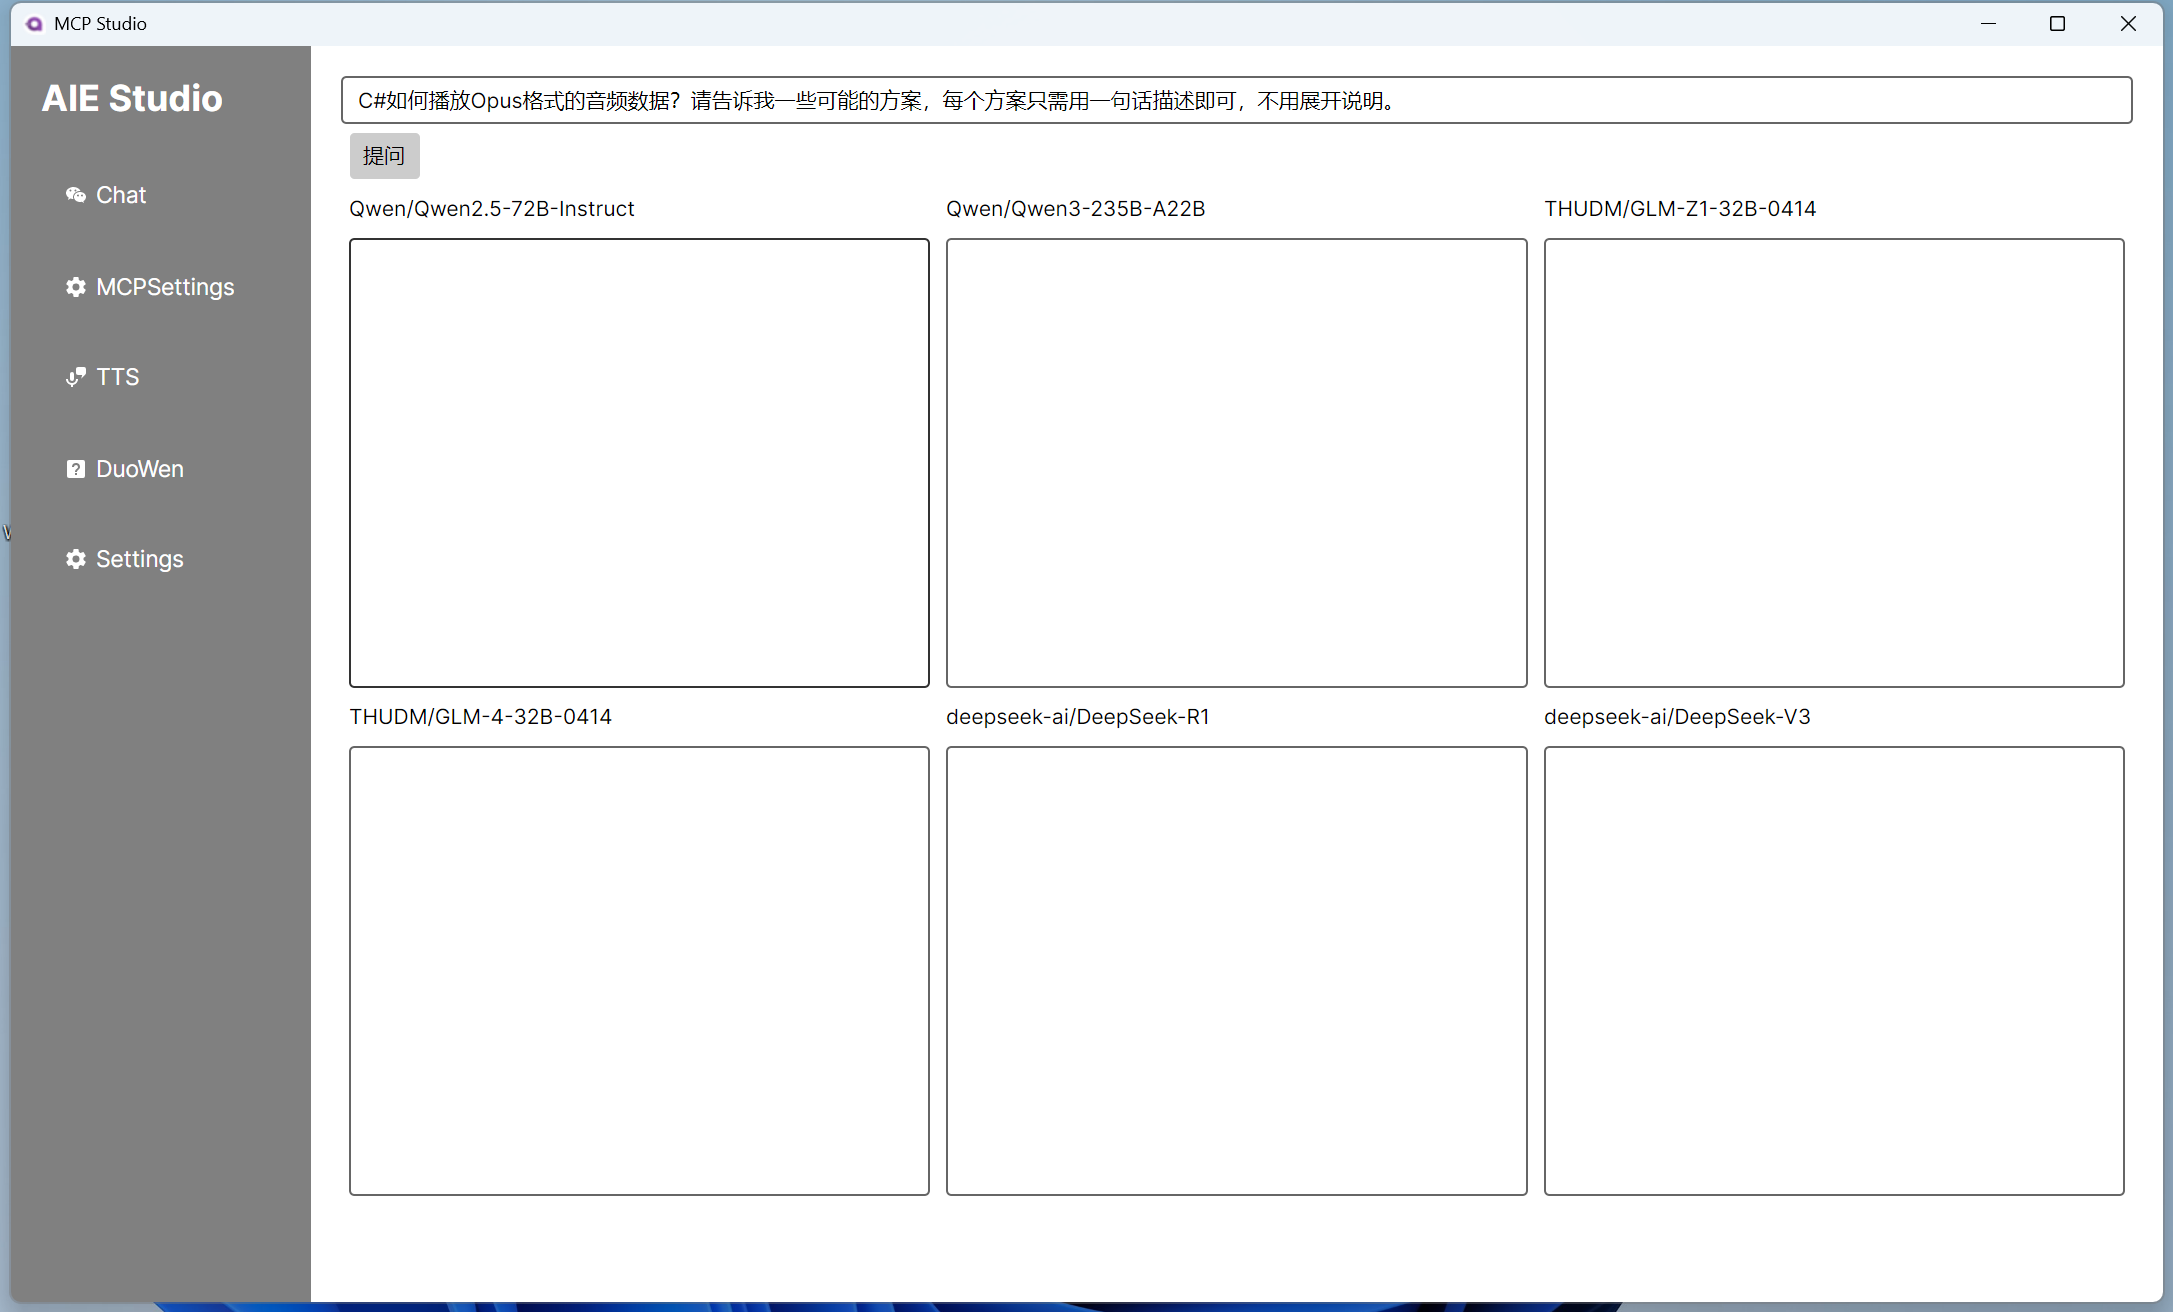
先设计一下布局:
<UserControl xmlns="https://github.com/avaloniaui"

             xmlns:x="http://schemas.microsoft.com/winfx/2006/xaml"

             xmlns:d="http://schemas.microsoft.com/expression/blend/2008"

             xmlns:mc="http://schemas.openxmlformats.org/markup-compatibility/2006"

             mc:Ignorable="d" d:DesignWidth="800" d:DesignHeight="450"

			 xmlns:vm="using:AIE_Studio.ViewModels"

			 x:DataType="vm:DuoWenViewModel"

             x:Class="AIE_Studio.Views.DuoWenView">

	<StackPanel>

		<TextBox Text="{Binding Question}"></TextBox>

		<Button Content="提问" Command="{Binding DuoWenStreamingParallelCommand}" Margin="5"/>

		<ScrollViewer VerticalScrollBarVisibility="Auto">

		<Grid>

			<Grid.RowDefinitions>

				<RowDefinition Height="*"/>

				<RowDefinition Height="*"/>

			</Grid.RowDefinitions>

			<Grid.ColumnDefinitions>

				<ColumnDefinition Width="*"/>

				<ColumnDefinition Width="*"/>

				<ColumnDefinition Width="*"/>

			</Grid.ColumnDefinitions>

			<!-- Row 1, Column 1 -->

			<StackPanel Grid.Row="0" Grid.Column="0">

				<TextBlock Text="{Binding Title1}" Margin="5"/>

				<ScrollViewer VerticalScrollBarVisibility="Auto">

					<TextBox Text="{Binding Result1}" AcceptsReturn="True" Margin="5" Height="300"/>

				</ScrollViewer>

			</StackPanel>

			<!-- Row 1, Column 2 -->

			<StackPanel Grid.Row="0" Grid.Column="1">

				<TextBlock Text="{Binding Title2}" Margin="5"/>

				<ScrollViewer VerticalScrollBarVisibility="Auto">

					<TextBox Text="{Binding Result2}" AcceptsReturn="True" Margin="5" Height="300"/>

				</ScrollViewer>

			</StackPanel>

			<!-- Row 1, Column 3 -->

			<StackPanel Grid.Row="0" Grid.Column="2">

				<TextBlock Text="{Binding Title3}" Margin="5"/>

				<ScrollViewer VerticalScrollBarVisibility="Auto">

					<TextBox Text="{Binding Result3}" AcceptsReturn="True" Margin="5" Height="300"/>

				</ScrollViewer>

			</StackPanel>

			<!-- Row 2, Column 1 -->

			<StackPanel Grid.Row="1" Grid.Column="0">

				<TextBlock Text="{Binding Title4}" Margin="5"/>

				<ScrollViewer VerticalScrollBarVisibility="Auto">

					<TextBox Text="{Binding Result4}" AcceptsReturn="True" Margin="5" Height="300"/>

				</ScrollViewer>

			</StackPanel>

			<!-- Row 2, Column 2 -->

			<StackPanel Grid.Row="1" Grid.Column="1">

				<TextBlock Text="{Binding Title5}" Margin="5"/>

				<ScrollViewer VerticalScrollBarVisibility="Auto">

					<TextBox Text="{Binding Result5}" AcceptsReturn="True" Margin="5" Height="300"/>

				</ScrollViewer>

			</StackPanel>

			<!-- Row 2, Column 3 -->

			<StackPanel Grid.Row="1" Grid.Column="2">

				<TextBlock Text="{Binding Title6}" Margin="5"/>

				<ScrollViewer VerticalScrollBarVisibility="Auto">

					<TextBox Text="{Binding Result6}" AcceptsReturn="True" Margin="5" Height="300"/>

				</ScrollViewer>

			</StackPanel>

		</Grid>

		</ScrollViewer>

	</StackPanel>

</UserControl>
在ViewModel中先来看一下最原始的显示结果的方式:
 [RelayCommand]

 private async Task DuoWen()

 {

     ApiKeyCredential apiKeyCredential = new ApiKeyCredential("your api key");

     OpenAIClientOptions openAIClientOptions = new OpenAIClientOptions();

     openAIClientOptions.Endpoint = new Uri("https://api.siliconflow.cn/v1");

     IChatClient client1 =

     new OpenAI.Chat.ChatClient("Qwen/Qwen2.5-72B-Instruct", apiKeyCredential, openAIClientOptions).AsChatClient();

     var result1 = await client1.GetResponseAsync(Question);

     Result1 = result1.ToString();

     IChatClient client2 =

     new OpenAI.Chat.ChatClient("Qwen/Qwen3-235B-A22B", apiKeyCredential, openAIClientOptions).AsChatClient();

     var result2 = await client2.GetResponseAsync(Question);

     Result2 = result2.ToString();

     IChatClient client3 =

     new OpenAI.Chat.ChatClient("THUDM/GLM-Z1-32B-0414", apiKeyCredential, openAIClientOptions).AsChatClient();

     var result3 = await client3.GetResponseAsync(Question);

     Result3 = result3.ToString();

     IChatClient client4 =

     new OpenAI.Chat.ChatClient("THUDM/GLM-4-32B-0414", apiKeyCredential, openAIClientOptions).AsChatClient();

     var result4 = await client4.GetResponseAsync(Question);

     Result4 = result4.ToString();

     IChatClient client5 =

    new OpenAI.Chat.ChatClient("deepseek-ai/DeepSeek-R1", apiKeyCredential, openAIClientOptions).AsChatClient();

     var result5 = await client5.GetResponseAsync(Question);

     Result5 = result5.ToString();

     IChatClient client6 =

     new OpenAI.Chat.ChatClient("deepseek-ai/DeepSeek-V3", apiKeyCredential, openAIClientOptions).AsChatClient();

     var result6 = await client6.GetResponseAsync(Question);

     Result6 = result6.ToString();
这种最简单的方式是非流式的并且也不是并行的,你会发现一个结束了才会继续向下一个提问。
但至少已经成功显示结果了,现在想要实现的是有一个窗体进行总结。
窗体设计:
<Window xmlns="https://github.com/avaloniaui"

        xmlns:x="http://schemas.microsoft.com/winfx/2006/xaml"

        xmlns:d="http://schemas.microsoft.com/expression/blend/2008"

        xmlns:mc="http://schemas.openxmlformats.org/markup-compatibility/2006"

        mc:Ignorable="d" d:DesignWidth="600" d:DesignHeight="450"

		xmlns:vm="using:AIE_Studio.ViewModels"

        x:Class="AIE_Studio.Views.ShowResultWindow"

		x:DataType="vm:ShowResultWindowViewModel"

        Title="ShowResultWindow">

	<StackPanel>

		<TextBlock Text="最终结果:" Margin="5" />

		<ScrollViewer VerticalScrollBarVisibility="Auto">

			<TextBox Text="{Binding ReceivedValue}" AcceptsReturn="True" Margin="5" Height="400"/>

		</ScrollViewer>

	</StackPanel>

</Window>
窗体的ViewModel:
public partial class ShowResultWindowViewModel : ViewModelBase

{

    [ObservableProperty]

    private string? receivedValue;

}
然后只要在全部都有结果之后,再进行一下总结即可。
IChatClient client7 =

new OpenAI.Chat.ChatClient("Qwen/Qwen2.5-72B-Instruct", apiKeyCredential, openAIClientOptions).AsChatClient();

List<Microsoft.Extensions.AI.ChatMessage> messages = new List<Microsoft.Extensions.AI.ChatMessage>();

string prompt = $"""

      请分析以下各个助手给出的方案,选择其中提到最多的3种方案。

      助手1:{result1}

      助手2:{result2}

      助手3:{result3}

      助手4:{result4}

      助手5:{result5}

      助手6:{result6}

      """;

messages.Add(new Microsoft.Extensions.AI.ChatMessage(ChatRole.User, prompt));

var result7 = await client7.GetResponseAsync(messages);

var showWindow = _serviceProvider.GetRequiredService<ShowResultWindow>();

var showWindowViewModel = _serviceProvider.GetRequiredService<ShowResultWindowViewModel>();

showWindowViewModel.ReceivedValue = result7.ToString();

showWindow.DataContext = showWindowViewModel;

showWindow.Show();
以上就成功实现了。
但是还是有可以改进的地方,首先是并行,一个一个问不如同时问。
 [RelayCommand]

 private async Task DuoWenParallel()

 {

     ApiKeyCredential apiKeyCredential = new ApiKeyCredential("your api key");

     OpenAIClientOptions openAIClientOptions = new OpenAIClientOptions();

     openAIClientOptions.Endpoint = new Uri("https://api.siliconflow.cn/v1");

     // 创建一个列表来存储所有的任务

     var tasks = new List<Task<string>>();

     // 向每个助手发送请求并将任务添加到列表中

     tasks.Add(GetResponseFromClient("Qwen/Qwen2.5-72B-Instruct", apiKeyCredential, openAIClientOptions));

     tasks.Add(GetResponseFromClient("Qwen/Qwen3-235B-A22B", apiKeyCredential, openAIClientOptions));

     tasks.Add(GetResponseFromClient("THUDM/GLM-Z1-32B-0414", apiKeyCredential, openAIClientOptions));

     tasks.Add(GetResponseFromClient("THUDM/GLM-4-32B-0414", apiKeyCredential, openAIClientOptions));

     tasks.Add(GetResponseFromClient("deepseek-ai/DeepSeek-R1", apiKeyCredential, openAIClientOptions));

     tasks.Add(GetResponseFromClient("deepseek-ai/DeepSeek-V3", apiKeyCredential, openAIClientOptions));

     // 等待所有任务完成

     var results = await Task.WhenAll(tasks);

     // 将结果分配给相应的属性

     Result1 = results[0];

     Result2 = results[1];

     Result3 = results[2];

     Result4 = results[3];

     Result5 = results[4];

     Result6 = results[5];

 }

  private async Task<string> GetResponseFromClient(string model, ApiKeyCredential apiKeyCredential, OpenAIClientOptions options)

  {

      IChatClient client = new OpenAI.Chat.ChatClient(model, apiKeyCredential, options).AsChatClient();

      var result = await client.GetResponseAsync(Question);

      return result.ToString();

  }
现在虽然是并行了,但是只有等到所有助手都回答了之后,才会统一显示,用户体验也不好。
改成流式:
[RelayCommand]

private async Task DuoWenStreaming()

{

    ApiKeyCredential apiKeyCredential = new ApiKeyCredential("your api key");

    OpenAIClientOptions openAIClientOptions = new OpenAIClientOptions();

    openAIClientOptions.Endpoint = new Uri("https://api.siliconflow.cn/v1");

    //string question = "C#如何获取鼠标滑动选中的值?请告诉我一些可能的方案,每个方案只需用一句话描述即可,不用展开说明。";

    IChatClient client1 =

    new OpenAI.Chat.ChatClient("Qwen/Qwen2.5-72B-Instruct", apiKeyCredential, openAIClientOptions).AsChatClient();

    await foreach (var item in client1.GetStreamingResponseAsync(Question))

    {

       Result1 += item.ToString();

    }

}
现在查看效果:
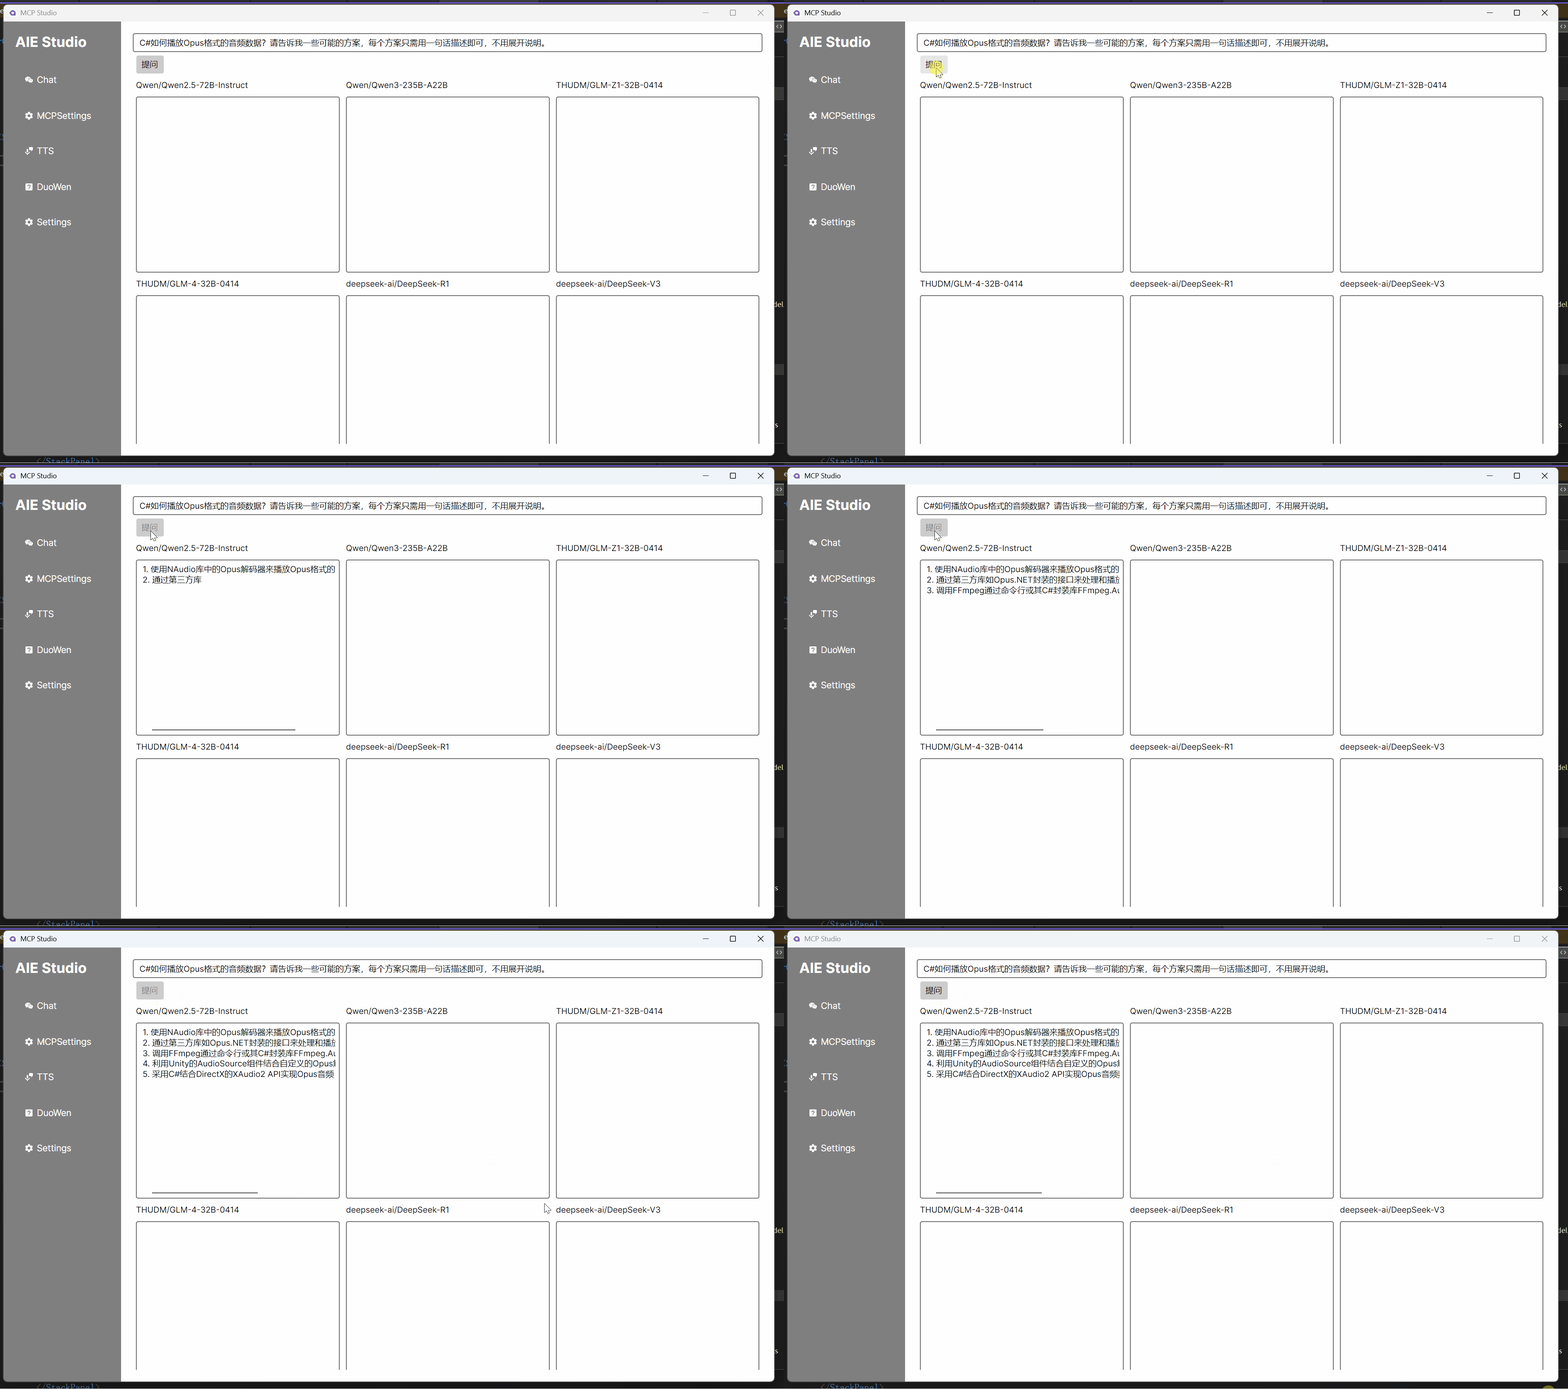
最后再改造成流式+并行就好了。
 [RelayCommand]

 private async Task DuoWenStreamingParallel()

 {

     ApiKeyCredential apiKeyCredential = new ApiKeyCredential("your api key");

     OpenAIClientOptions openAIClientOptions = new OpenAIClientOptions();

     openAIClientOptions.Endpoint = new Uri("https://api.siliconflow.cn/v1");

     // Clear previous results

     Result1 = Result2 = Result3 = Result4 = Result5 = Result6 = string.Empty;

     // Create a list of tasks for parallel processing

     var tasks = new List<Task>

     {

         ProcessStreamingResponse("Qwen/Qwen2.5-72B-Instruct", apiKeyCredential, openAIClientOptions, (text) => Result1 += text),

         ProcessStreamingResponse("Qwen/Qwen3-235B-A22B", apiKeyCredential, openAIClientOptions, (text) => Result2 += text),

         ProcessStreamingResponse("THUDM/GLM-Z1-32B-0414", apiKeyCredential, openAIClientOptions, (text) => Result3 += text),

         ProcessStreamingResponse("THUDM/GLM-4-32B-0414", apiKeyCredential, openAIClientOptions, (text) => Result4 += text),

         ProcessStreamingResponse("deepseek-ai/DeepSeek-R1", apiKeyCredential, openAIClientOptions, (text) => Result5 += text),

         ProcessStreamingResponse("deepseek-ai/DeepSeek-V3", apiKeyCredential, openAIClientOptions, (text) => Result6 += text)

     };

     // Wait for all streaming responses to complete

     await Task.WhenAll(tasks);

     IChatClient client7 =

     new OpenAI.Chat.ChatClient("Qwen/Qwen2.5-72B-Instruct", apiKeyCredential, openAIClientOptions).AsChatClient();

     List<Microsoft.Extensions.AI.ChatMessage> messages = new List<Microsoft.Extensions.AI.ChatMessage>();

     string prompt = $"""

           请分析以下各个助手给出的方案,选择其中提到最多的3种方案。

           助手1:{Result1}

           助手2:{Result2}

           助手3:{Result3}

           助手4:{Result4}

           助手5:{Result5}

           助手6:{Result6}

           """;

     messages.Add(new Microsoft.Extensions.AI.ChatMessage(ChatRole.User, prompt));

     var result7 = await client7.GetResponseAsync(messages);

     var showWindow = _serviceProvider.GetRequiredService<ShowResultWindow>();

     var showWindowViewModel = _serviceProvider.GetRequiredService<ShowResultWindowViewModel>();

     showWindowViewModel.ReceivedValue = result7.ToString();

     showWindow.DataContext = showWindowViewModel;

     showWindow.Show();

 }

private async Task ProcessStreamingResponse(string model, ApiKeyCredential apiKeyCredential, OpenAIClientOptions options, Action<string> updateResult)

{

    IChatClient client = new OpenAI.Chat.ChatClient(model, apiKeyCredential, options).AsChatClient();

    await foreach (var item in client.GetStreamingResponseAsync(Question))

    {

        updateResult(item.ToString());

    }

}
这里使用了一个带有一个参数的委托来更新每个助手回复的结果。
现在再查看效果:
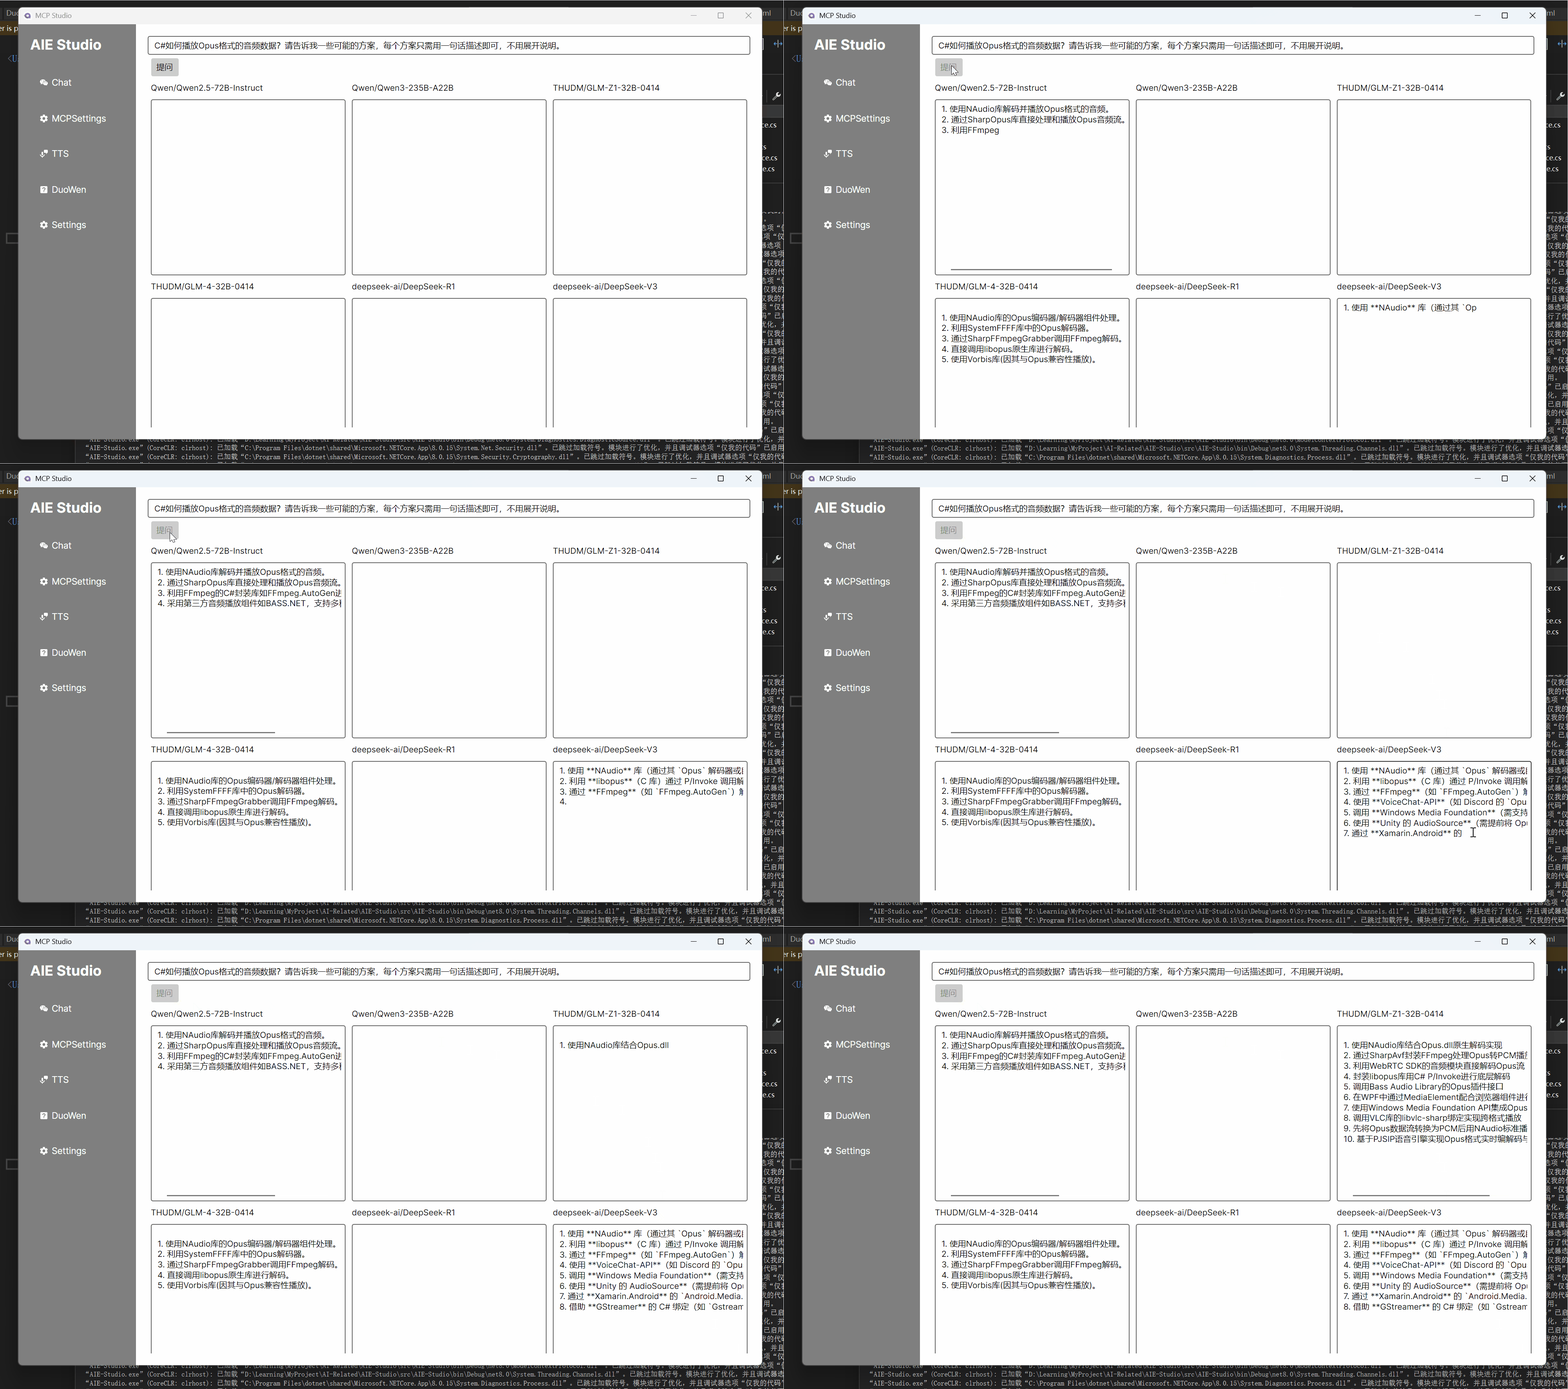
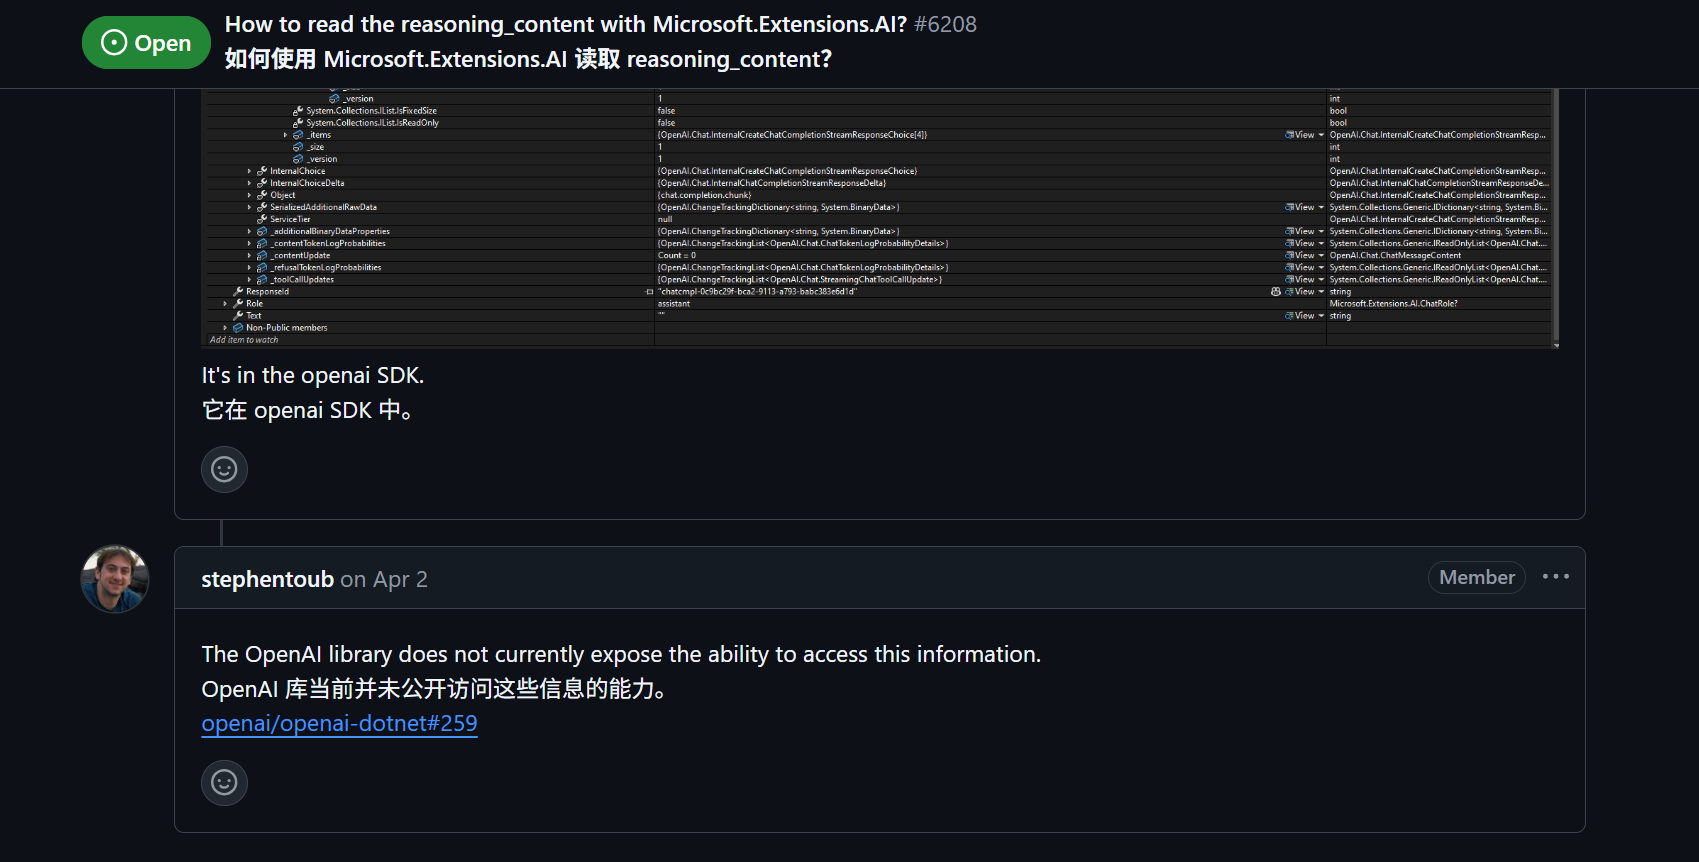
Qwen/Qwen3-235B-A22B、THUDM/GLM-Z1-32B-0414、deepseek-ai/DeepSeek-R1有思考过程,返回结果比较慢。
目前Microsoft.Extensions.AI.OpenAI好像还无法获取思考内容。
等待久一会之后,可以看到结果都出来了:
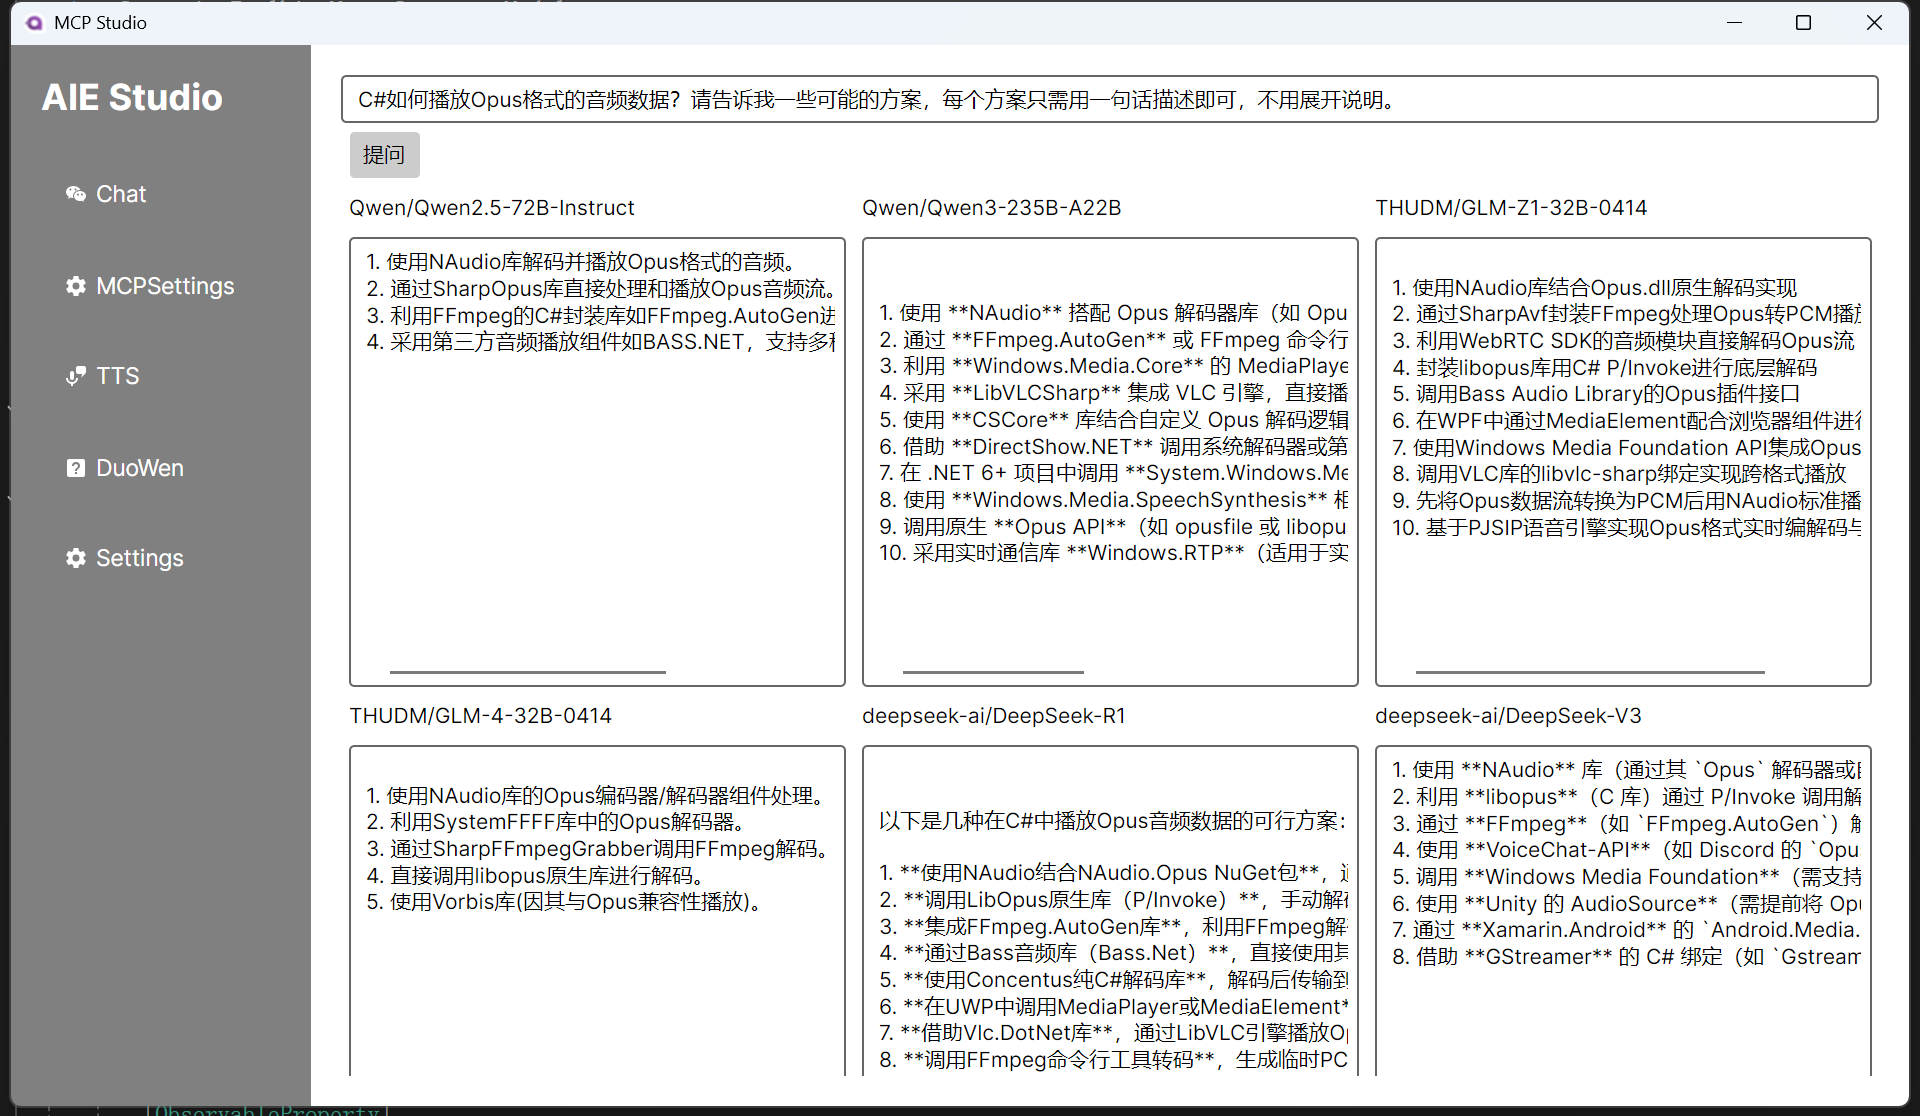
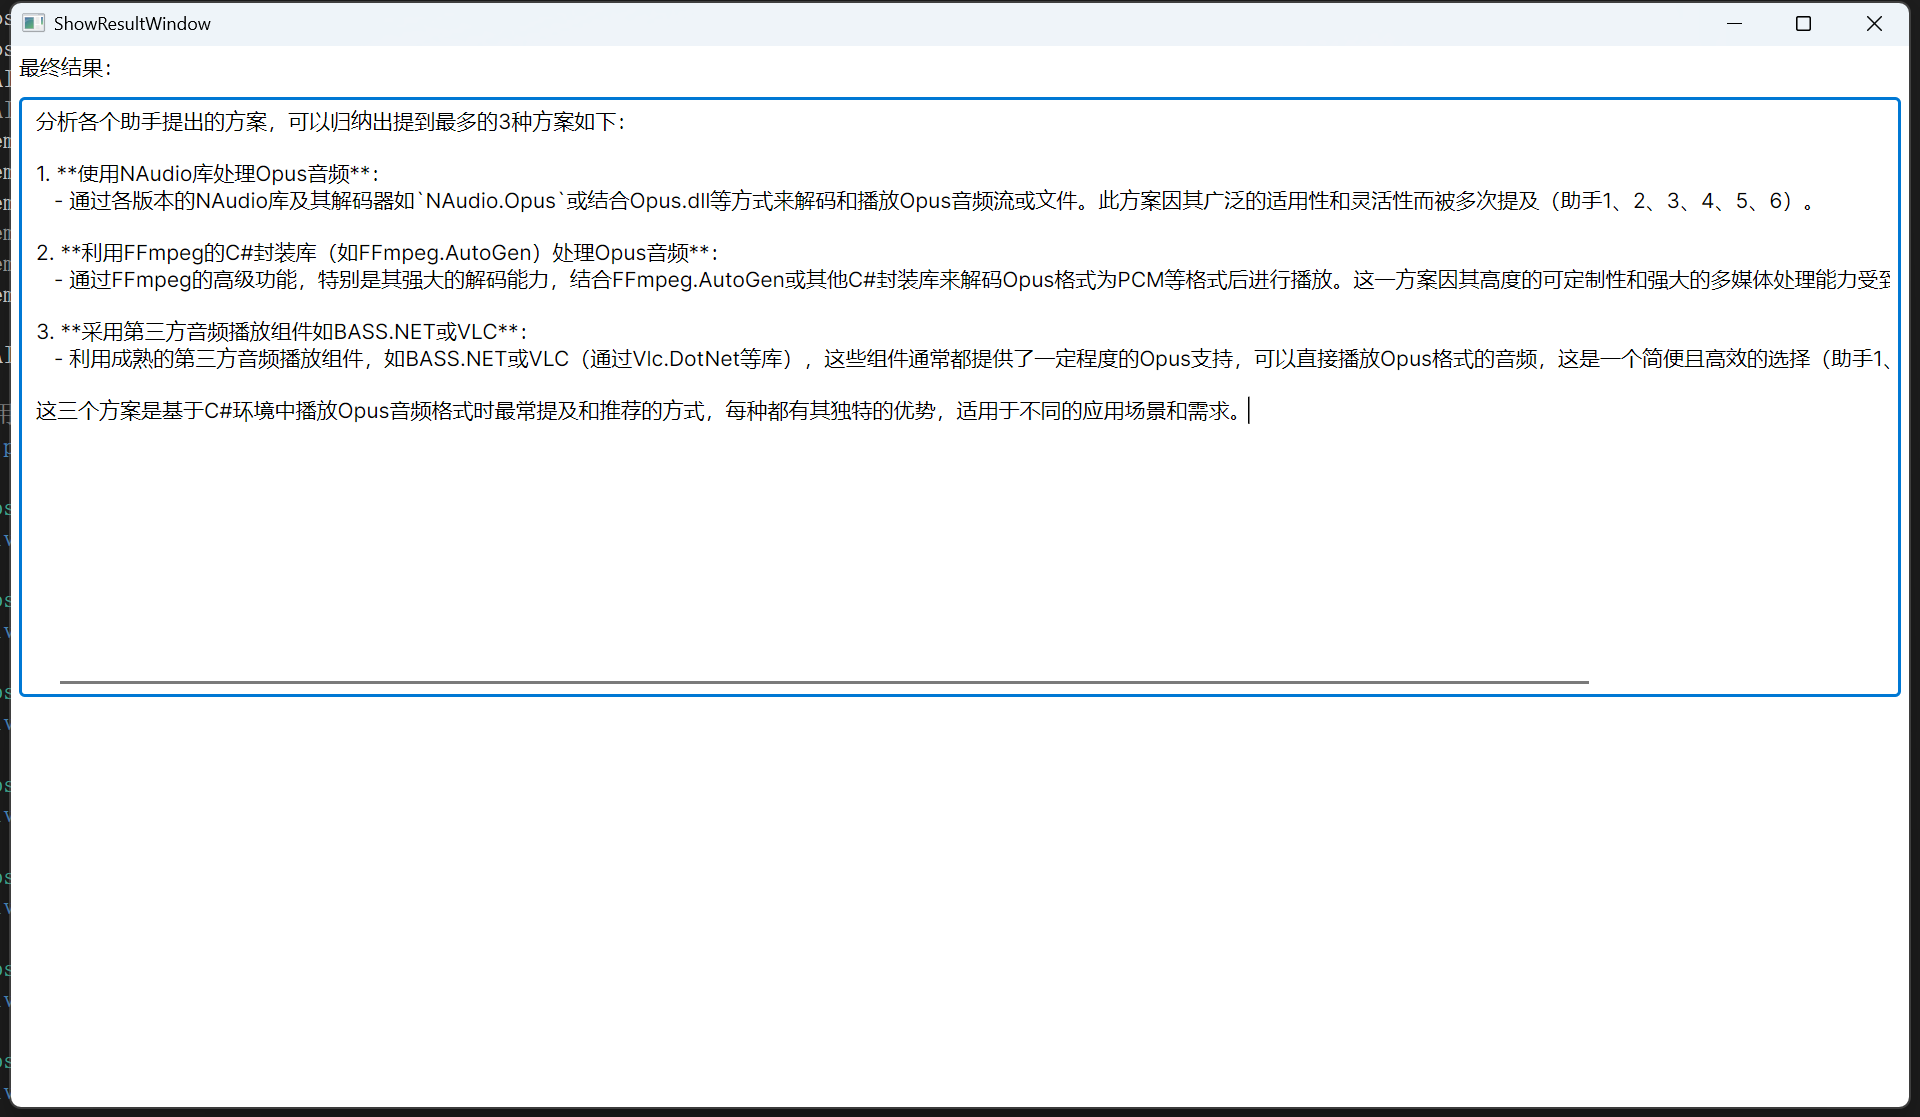
然后总结窗口会显示最终的总结内容:
确定方案之后可以让Cursor或者Cline帮我们写一下试试。
使用C#构建一个同时问多个LLM并总结的小工具的更多相关文章
- 一个支持DbFirst、ModelFirst和CodeFirst的数据库小工具DbTool
DbTool 一个支持DbFirst.ModelFirst和CodeFirst的数据库工具. 简介 这是一个针对 SqlServer 数据库和 C# 开发语言的小工具,可以利用这个小工具生成数据库表对 ...
- 手把手教你写一个windows服务 【基于.net】 附实用小工具{注册服务/开启服务/停止服务/删除服务}
1,本文适用范围 语言:.net 服务类型:windows服务,隔一段时间执行 2,服务搭建: 1,在vs中创建 console程序 2,在console项目所在类库右键 添加-新建项-选择Windo ...
- [wxpusher]分享一个服务器推送消息到微信上的小工具,可以用于微信推送提醒和告警。
背景 作为一个程序员,业余搞点自己的东西很正常,一般程序员都会有一两台自己的服务器,谁叫今天xx云搞活动,明天yy云搞活动呢. 自家的服务器用来跑爬虫,跑博客,或者跑一些个人业务,但当服务有新状态,抢 ...
- 分享一个很早之前写的小工具DtSpyPlus
几年前写的一个获取windows窗体基本信息和屏幕取色的小工具 ,一直在用. 下载地址 http://files.cnblogs.com/dint/SpyPlus.zip
- 从零构建一个简单的 Python Web框架
为什么你想要自己构建一个 web 框架呢?我想,原因有以下几点: 你有一个新奇的想法,觉得将会取代其他的框架 你想要获得一些名气 你遇到的问题很独特,以至于现有的框架不太合适 你对 web 框架是如何 ...
- 利用socket.io构建一个聊天室
利用socket.io来构建一个聊天室,输入自己的id和消息,所有的访问用户都可以看到,类似于群聊. socket.io 这里只用来做一个简单的聊天室,官网也有例子,很容易就做出来了.其实主要用的东西 ...
- 构建一个简单的 Google Dialogflow 聊天机器人【上】
概述 本教程将向您展示如何构建一个简单的Dialogflow聊天机器人,引导您完成Dialogflow的最重要功能.您将学习如何: 创建Dialogflow帐户和第一个Dialogflow聊天机器人, ...
- 开源低代码平台开发实践二:从 0 构建一个基于 ER 图的低代码后端
前后端分离了! 第一次知道这个事情的时候,内心是困惑的. 前端都出去搞 SPA,SEO 们同意吗? 后来,SSR 来了. 他说:"SEO 们同意了!" 任何人的反对,都没用了,时代 ...
- 构建一个基本的前端自动化开发环境 —— 基于 Gulp 的前端集成解决方案(四)
通过前面几节的准备工作,对于 npm / node / gulp 应该已经有了基本的认识,本节主要介绍如何构建一个基本的前端自动化开发环境. 下面将逐步构建一个可以自动编译 sass 文件.压缩 ja ...
- .Net中的AOP系列之构建一个汽车租赁应用
返回<.Net中的AOP>系列学习总目录 本篇目录 开始一个新项目 没有AOP的生活 变更的代价 使用AOP重构 本系列的源码本人已托管于Coding上:点击查看. 本系列的实验环境:VS ...
随机推荐
- kickstart和PXE安装
Kickstart安装Kickstart是一种无人值守的安装方式如果在安装过程中出现要填写参数的情况,安装程序首先会去查找Kickstart生成的文件,如果找到合适的参数,就采用所找到的参数:如果没有 ...
- CTFHub技能树-密码口令wp
引言 仅开放如下关卡 弱口令 通常认为容易被别人(他们有可能对你很了解)猜测到或被破解工具破解的口令均为弱口令. 打开环境,是如下界面,尝试一些弱口令密码无果 利用burpsuite抓包,然后爆破,发 ...
- 【Unity】光照解决方案笔记
[Unity]光照解决方案笔记 https://docs.unity.cn/cn/2022.3/Manual/BestPracticeLightingPipelines.html 确定对象显示效果的三 ...
- docker - [16] Swarm集群搭建
以下是购买的阿里云服务器ECS的四个实例,确保四台服务器互相可以ping通. 一.环境准备(安装docker) (1)安装gcc相关环境(在四台服务器上) yum -y install gcc yum ...
- AngleSharp :在 C# 中轻松解析和操作 HTML/XML 文档
AngleSharp 是一个 C# 库,主要用于解析和操作 HTML 和 XML 文档,类似于浏览器的 DOM 操作.允许你在 C# 中使用类似浏览器的方式处理网页数据,进行网页抓取.数据提取和处理等 ...
- C#中固定编译时不确定数量的变量(相关话题fixed固定多个数组)
以交错数组byte[][]为例. fixed无法固定byte[][],只能在编译时固定确定数量的变量. 交错数组byte[][]中的每一个byte[]可以采用GCHandle进行固定. int n = ...
- 读论文-电子商务产品推荐的序列推荐系统综述与分类(A Survey and Taxonomy of Sequential Recommender Systems for E-commerce Product Recommendation)
前言 今天读的这篇文章是于2023年发表在"SN Computer Science"上的一篇论文,这篇文章主要对序列推荐系统进行了全面的调查和分类,特别是在电子商务领域的应用.文章 ...
- FastAPI路由:微服务架构下的路由艺术与工程实践 🌐
title: FastAPI路由专家课:微服务架构下的路由艺术与工程实践 date: 2025/3/4 updated: 2025/3/4 author: cmdragon excerpt: 用API ...
- 寒武纪平台上传 Docker 镜像
前言 学校的算力平台更换为了寒武纪平台,相较于以前简单的通过 Linux 用户隔离,使用门槛有所提升.但从整体来看,这样拥有更好的隔离性,在 docker 中即便搞崩了也可以重新来过,可以避免因他人的 ...
- 10年+ .NET Coder 心语 ── 封装的思维:从隐藏、稳定开始理解其本质意义
引言 ❝ 小编是一名10年+的.NET Coder,期间也写过Java.Python,从中深刻的认识到了软件开发与语言的无关性.现在小编已经脱离了一线开发岗位,在带领团队的过程中,发现了很多的问题,究 ...
